
P0135 on 2006-2012 Mitsubishi Eclipse: O2 Sensor Heater Circuit Causes and Fixes
This code indicates a failure in the heater circuit of the upstream oxygen sensor (Bank 1, Sensor 1). The most common fix is to replace the sensor itself. Before replacing, check the fuse for the O2 sensor heater. Expect to pay $60-$120 for a quality aftermarket sensor (like Denso or NGK) and $150-$250 for an OEM part. It's a DIY-friendly repair, especially on the 2.4L engine.
- P0135 almost always points to a failed heater inside the Bank 1, Sensor 1 oxygen sensor.
- Before buying parts, always check the O2 sensor heater fuse first. It's often fuse #23 (15A) in the engine bay.
- For the 3.8L V6, Bank 1 is the rear bank (near the firewall). For the 2.4L I4, there is only one bank.
- Use a quality OEM-style replacement sensor from a brand like Denso or NGK for the best results. Specific part numbers are Denso 234-4738 (V6) and 234-4317 (I4).
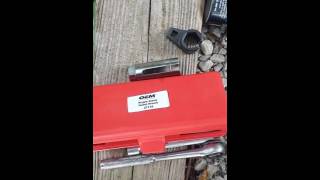
- An O2 sensor can be very difficult to remove; use plenty of penetrating oil and the correct socket.
What's Unique About the 2006-2012 Mitsubishi Eclipse
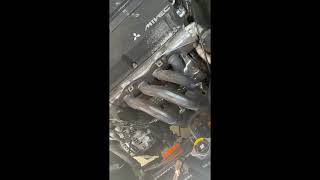
For the 2006-2012 fourth-generation Eclipse, this code is a very common and straightforward issue. There are no widespread design flaws causing this, but the oxygen sensors, like on any car, are wear-and-tear items. The key difference is locating the correct sensor: on the 2.4L 4G69 engine, it's the only upstream sensor, located on the exhaust manifold. On the 3.8L 6G75 V6, 'Bank 1' is the rear cylinder bank, closer to the firewall, and 'Sensor 1' is the upstream sensor on that bank. Accessing the V6 sensor is more challenging and may require working from underneath the car.
Symptoms You May Notice
- Check Engine Light is illuminated.
- Reduced fuel economy.
- Failure to pass an emissions test.
- Possible rough idle or hesitation during cold starts, before the engine fully warms up.
- Black smoke from the tailpipe (less common).
- Replacing the wrong oxygen sensor (e.g., the downstream Sensor 2, or the sensor on Bank 2 for the V6 engine).
- Replacing the oxygen sensor without first checking the fuse and wiring, leading to the new sensor not fixing the problem.
- Assuming the new part is good without testing. A new sensor can be faulty out of the box.
Most Likely Causes
- Failed Bank 1, Sensor 1 Oxygen Sensor 🔴 High Probability → Shop Oxygen Sensor The internal heater element is a common failure point due to age and countless heat cycles. This is a standard wear-and-tear part.
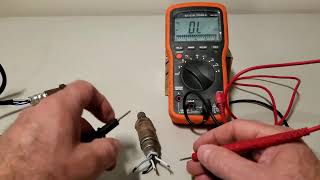
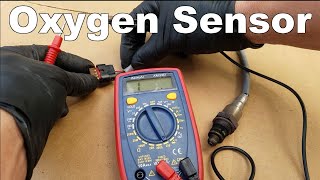
How to confirm: Disconnect the sensor and use a multimeter to measure the resistance between the two heater circuit pins (usually the two same-colored wires, often black). A reading of 'OL' (Open Loop) or infinite resistance indicates a broken heater element. A normal reading for a Mitsubishi sensor is typically between 4.5 and 8.0 ohms when cold (at 68°F/20°C). Some sources cite a broader range of 5 to 15 ohms as acceptable for Denso-style sensors.
Typical fix: Replace the Bank 1, Sensor 1 oxygen sensor.
Est. part cost: $60 - $250 - Damaged Wiring or Connector 🟡 Medium Probability The sensor wiring is located near hot exhaust components and can become brittle, melted, or frayed over time. The connector can also suffer from corrosion or loose pins.
How to confirm: Visually inspect the wiring harness from the sensor to the main engine loom for any signs of melting, chafing, or breaks. Check the connector for corrosion, moisture, or bent pins. A visual inspection is the first step before testing with a multimeter.
Typical fix: Repair the damaged section of wiring or clean/replace the connector.
Est. part cost: $5 - $50 - Blown Fuse for O2 Heater Circuit ⚪ Low Probability
How to confirm: Consult the owner's manual or the fuse box diagram to locate the fuse for the O2 sensor heater. On some Mitsubishi models, this may be a 15A or 20A fuse in the engine bay fuse box, sometimes labeled 'Engine management system' or similar. For the 4G Eclipse, check fuse #23 (15A) in the engine compartment fuse box.
Typical fix: Replace the blown fuse. If the fuse blows again immediately, it indicates a short circuit in the wiring or the sensor itself that must be diagnosed.
Est. part cost: $1 - $5
Rare But Worth Checking
- Failed Powertrain Control Module (PCM): → Shop Engine Control Module (ECM) This is extremely rare. The PCM's internal driver for the heater circuit can fail, but all other possibilities should be exhausted before considering PCM replacement. This should only be considered after confirming the sensor, wiring, and fuse are all in good condition.
Diagnosis Steps
- Check the Fuse: Locate and inspect the fuse for the oxygen sensor heater circuit. For the 4G Eclipse, this is often fuse #23 (15 Amp) in the engine compartment fuse box. Replace if blown.
- Visual Inspection: Carefully inspect the wiring and electrical connector for the Bank 1, Sensor 1 O2 sensor. Look for any signs of melting, burning, chafing against the engine/frame, or corrosion in the connector pins.
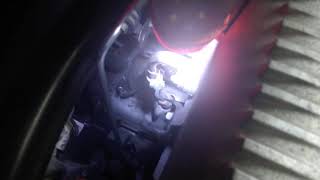
- Identify Bank 1, Sensor 1: For the 2.4L I4 engine, this is the upstream sensor in the exhaust manifold. For the 3.8L V6, this is the upstream sensor in the rear exhaust manifold (closer to the firewall).
- Test the Sensor's Heater Resistance: Disconnect the sensor. Set a multimeter to the low ohms scale (e.g., 200 Ω). Measure the resistance between the two heater pins on the sensor side of the connector (typically the two wires of the same color, e.g., two black wires). A good Mitsubishi sensor should read between 4.5 and 8.0 ohms at room temperature. An infinite resistance ('OL') means the heater is burned out and the sensor must be replaced.
- Test for Voltage at the Harness: If the sensor resistance is good, check the vehicle-side connector. Set the multimeter to DC Volts. With the ignition key in the 'ON' position (engine off), one pin should have 12V (battery voltage) from the MFI relay. If 12V is missing, the problem is upstream in the wiring or fuse box. If 12V is present but the code persists, the issue may be in the ground or control side of the circuit, which is controlled by the ECM.
- Replace the Sensor: If the sensor's heater element is confirmed to be open (Step 4), replace the Bank 1, Sensor 1 oxygen sensor. 🎬 Watch: 2006 Eclipse oxygen sensor replacement It is highly recommended to use an O2 sensor socket and apply penetrating oil to the old sensor before removal, as they can be seized in the exhaust.
- Clear Code and Test Drive: After repair, use an OBD-II scanner to clear the trouble code and test drive the vehicle to ensure the Check Engine Light does not return.
Parts You'll Likely Need
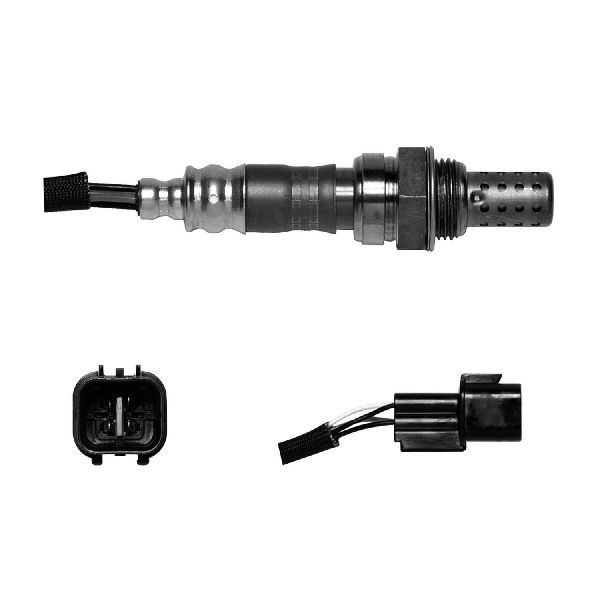
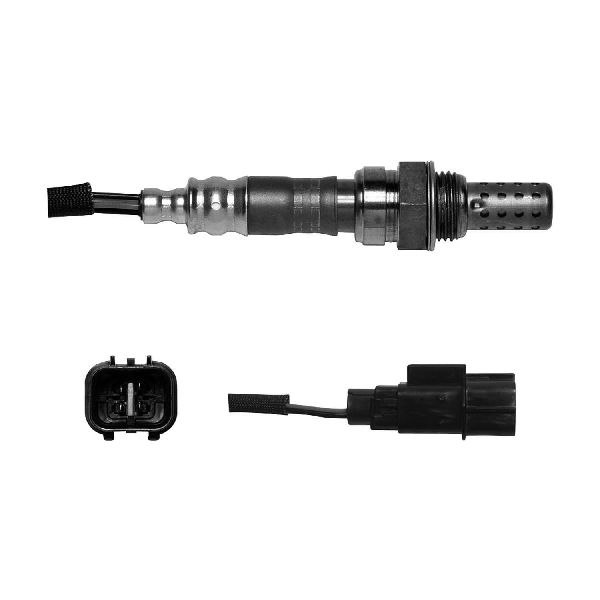
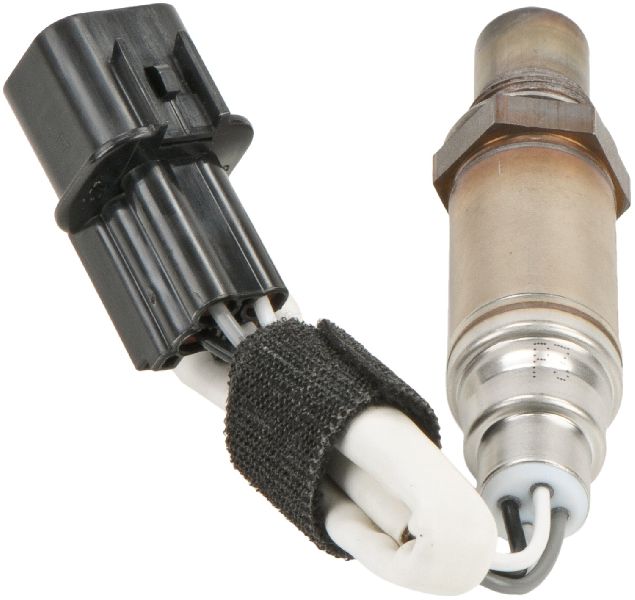
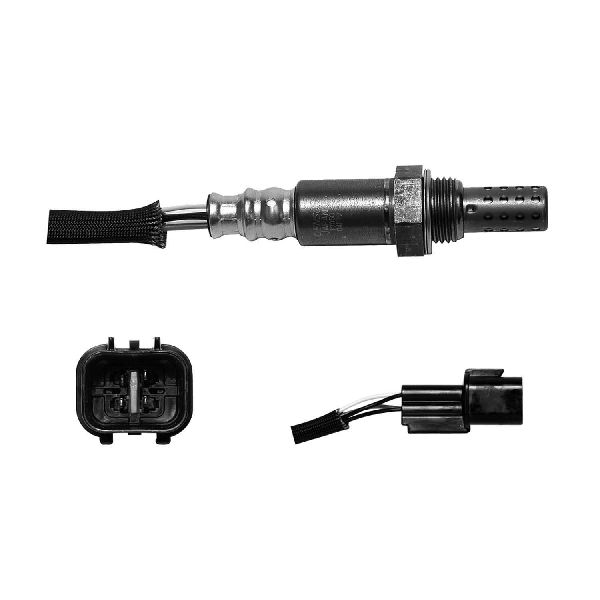
- Bank 1 Sensor 1 Oxygen Sensor (Upstream)
(OEM #MN158671 (for 2.4L 4G69), 1588A047 (for 3.8L 6G75 - Bank 1))— The internal heater element fails from age and heat cycles, which is the direct cause of the P0135 code.
Trusted brands: Denso (OEM Manufacturer), NGK/NTK
OEM price range: $150-$250
Aftermarket price range: $60-$120
Platform-Specific Known Issues
- Stuck/Seized O2 Sensor: → Shop Oxygen Sensor Owners on forums for platform-mate vehicles like the Mitsubishi Endeavor report that the oxygen sensors can become extremely difficult to remove due to rust and heat cycling. Shops have sometimes resorted to removing the exhaust manifold to work on it on a bench. Liberal use of penetrating oil (like PB Blaster) and allowing it to soak is highly recommended before attempting removal.
Mechanic-Grade Diagnostic Values
- O2 Sensor Heater Element Resistance — expected: 4.5 to 8.0 Ohms at 68°F (20°C). Failure: Infinite resistance (OL on multimeter), indicating an open circuit.
- Voltage at Harness Connector (Heater Power Pin) — expected: Battery Voltage (approx. 12V) with Key On, Engine Off.. Failure: 0V, indicating a problem with the fuse, MFI relay, or wiring from the relay.
- Heater Circuit Current Draw (Monitored by PCM) — expected: Between 0.17A and 2.0A (varies by specific ECU logic). Failure: Current below the minimum threshold (e.g., <0.17A) or above the maximum triggers the code.
Scan Tool Commands That Help
- Mitsubishi MUT-III: Actuator Test for O2 Sensor Heater — The dealer-level MUT-III scan tool can command the O2 sensor heater circuit ON and OFF manually. This allows a technician to check for voltage and ground at the sensor connector while the circuit is actively being controlled by the scan tool, confirming the integrity of the wiring and the PCM's driver circuit without having to wait for the engine to warm up.
Wiring & Ground Locations
- MFI Relay — Located in the engine compartment relay box, on the driver's side of the engine bay.. The Multi-Function Injection (MFI) relay supplies the 12V power to the oxygen sensor's heater element. A faulty relay will prevent the heater from receiving power, directly causing a P0135 code.
- Connector B-17 (2.4L 4G69) — This is the 4-pin connector for the front heated oxygen sensor.. This is the primary diagnostic point. The heater circuit wires are typically the two same-colored wires (often black on the sensor side). All voltage and resistance tests are performed here to isolate the fault between the sensor and the vehicle's wiring harness.
- Connector C-215 (3.8L 6G75) — This is the 4-pin connector for the Bank 1 (rear) heated oxygen sensor.. This is the diagnostic point for the V6 engine's Bank 1 sensor. The heater circuit wires are typically the two same-colored wires. Power comes from the MFI relay, and the ground is controlled by the ECM.
- Ground G10 — Located on the rear of the engine.. This is a primary engine ground point. While the O2 heater is typically grounded through the PCM, a poor main engine ground can cause a variety of electrical issues and voltage drops that could indirectly affect sensor performance or trigger faults.
Real Owner Repair Stories
- YouTube video comment/description (2007 Mitsubishi Eclipse) — Check Engine Light with P0135.
❌ Tried (didn't work) The owner purchased a new universal Bosch oxygen sensor which had different wire colors than the factory sensor.
✅ What actually fixed it The issue was resolved by correctly splicing the universal sensor's wires to the factory harness connector. For this specific Bosch sensor, the two white wires (heater) were connected to the two black wires on the car's harness. The grey sensor wire (signal) was connected to the white harness wire, and the black sensor wire (ground) was connected to the blue harness wire. This highlights the risk of using universal sensors if the wiring is not matched correctly.
Model Year Variations Within This Range
- 2009: For the 2009 model year, the Eclipse received a minor facelift which included revised front and rear fascias. While this did not change the engine or the core components related to P0135, there can be slight differences in harness routing around the bumper and radiator support areas. This is unlikely to affect diagnosis but is a known production change.
- 2011-2012: On GT (V6) models from 2011-2012, the manual transmission was discontinued. This has no impact on the P0135 code but is a significant powertrain variation within the generation.
Diagnostic Flowchart
Other Known Issues on This Vehicle
Issues unrelated to this code that are worth knowing about as an owner of this generation:
- Cracked or Peeling Dashboard 🟠 Medium — Very common, especially in warmer climates. The dash material can become brittle, sticky, or peel away from the defroster vents. Onset can happen at any time but is widespread on vehicles over 10 years old.
- Clear Coat / Paint Failure 🟡 Low — Common, particularly on the roof, hood, and bumpers of cars frequently exposed to sun. The clear coat begins to peel or fade, leading to a chalky appearance. Certain colors like orange and blue seem more affected.
- Oil Consumption (6G75 V6) 🟠 Medium — Many owners of the 3.8L V6 report noticeable oil consumption, often attributed to hardened valve stem seals. This can begin around 100,000 miles and manifest as blue smoke on startup or after long idles.
- Automatic Transmission Issues 🟠 Medium — Some owners report issues like hard shifts, slipping, or hesitation, particularly if transmission fluid changes have been neglected.
- Worn Suspension Components 🟡 Low — As a wear-and-tear item, struts and control arm bushings often need replacement after 80,000-100,000 miles, leading to clunking noises or poor ride quality.
Used vs. New Parts: Buying Guide for This Vehicle
When a used part is the smart pick: For this repair, using a used part is almost never a good idea. The primary failure is the internal heater element, which is a wear-and-tear component with a finite lifespan. A used sensor from a junkyard has unknown hours of use and could fail shortly after installation, wasting time and money.
Donor-vehicle mileage cap: roughly under 20000 miles for the part to have meaningful remaining life.
What to inspect on the donor part:
- If forced to use a used sensor for temporary diagnosis, source it from a very low-mileage vehicle.
- Inspect the connector for any signs of corrosion, melted plastic, or broken locking tabs.
- Avoid sensors that are physically damaged, heavily rusted, or covered in oil.
OEM-only on this vehicle (don't cheap out):
- While not strictly 'OEM-only', using a direct-fit sensor from an OEM manufacturer like Denso or NTK is highly recommended over universal 'splice-in' types to avoid wiring errors and ensure correct performance.
Aftermarket brands forum-validated for this vehicle:
- Denso (often the original equipment manufacturer)
- NGK / NTK
Brands owners have reported issues with on this vehicle:
- Generic, unbranded 'universal' sensors can be problematic due to incorrect wire color-coding and potentially lower quality heater elements.
- Some forum users have reported mixed results with Bosch sensors on Japanese vehicles, with some experiencing premature failure, though others report no issues. Sticking with Denso or NTK is the safer bet for this platform.
Real Owner Stories
Aggregated from forums and TSBs cited above. Mileages and costs reflect what owners reported in those sources.
2004 Mitsubishi Endeavor 6G75 3.8L V6
Symptoms: Check engine light with code P0135; the sensor was found to be completely frozen in the manifold.
What fixed it: The shop suggested the sensor was so seized it would require removing the exhaust manifold to extract it on a bench.
Source hint: MitsubishiForum.com - Thread '2004 Endeavor - check engine light'
2006-2012 Mitsubishi Eclipse 6G75 3.8L V6 — ~100000 miles
Symptoms: Blue smoke on startup or after long idles, potentially leading to O2 sensor contamination.
What fixed it: Addressing hardened valve stem seals to stop oil consumption.
Source hint: BobIsTheOilGuy.com - Thread '6G74 - Valve seals leaking'
Related OBD-II Codes
Frequently Asked Questions
Where is the Bank 1, Sensor 1 oxygen sensor located on my 3.8L V6 Eclipse?
Which fuse should I check for a P0135 code on my 4G Eclipse?
What resistance reading should I see when testing the O2 sensor on my Mitsubishi?
I'm worried about the sensor being stuck. Is this common on the Eclipse platform?
Could my V6's oil consumption issue be related to the P0135 code?
Can I use a used O2 sensor to fix this code?
Helpful Videos

We Have This Part in Stock


The information in this article is provided for general reference and educational purposes only. Vehicle specifications, procedures, and part compatibility can vary by production date, trim level, and region. Always consult your vehicle's factory service manual and verify part numbers before purchasing or performing repairs. Safety-critical components such as airbags, seat belts, and braking systems should be installed by a qualified professional.
- Mitsubishi Eclipse:
- 🧭 Diagnostic Flowchart
- 🎬 Helpful Videos
- 🛍️ Shop This Part
- What's Unique About the 2006-2012 Mitsubishi Eclipse
- Symptoms You May Notice
- Most Likely Causes
- Rare But Worth Checking
- Diagnosis Steps
- Parts You'll Likely Need
- Platform-Specific Known Issues
- Mechanic-Grade Diagnostic Values
- Scan Tool Commands That Help
- Wiring & Ground Locations
- Real Owner Repair Stories
- Model Year Variations Within This Range
- Other Known Issues on This Vehicle
- Used vs. New Parts: Buying Guide for This Vehicle
- Real Owner Stories
- 2004 Mitsubishi Endeavor 6G75 3.8L V6
- 2006-2012 Mitsubishi Eclipse 6G75 3.8L V6 — ~100000 miles
- Related OBD-II Codes
- Frequently Asked Questions
- 🎟️ Get 5% Off