
P0135 on 2004-2012 Mitsubishi Galant: O2 Sensor Heater Circuit Causes and Fixes
This code almost always means the upstream oxygen sensor (Bank 1, Sensor 1) has failed and needs to be replaced. It's a common DIY repair costing between $40-$100 for an aftermarket sensor from a brand like Denso or Bosch. Before replacing, quickly check fuse #9 (20A) in the engine bay.
- P0135 points directly to a failure in the heater circuit of the upstream O2 sensor on Bank 1.
- The most probable fix is replacing the Bank 1, Sensor 1 oxygen sensor.
- Before replacing the sensor, always check the 20A 'Engine management system' fuse (#9) in the engine bay fuse box.
- On the 3.8L V6 engine, Bank 1 is the rear bank near the firewall, which is more difficult to access than the sensor on the 2.4L I4 engine.
- Using a quality direct-fit aftermarket sensor from a brand like Denso or NGK/NTK is a cost-effective and reliable repair.
What's Unique About the 2004-2012 Mitsubishi Galant
For the 2004-2012 Galant, this code is straightforward and rarely points to complex platform-specific issues. The key difference is locating 'Bank 1'. On the 4G69 2.4L I4 engine, there is only one bank, so Bank 1 Sensor 1 is the easily accessible O2 sensor on the front exhaust manifold. On the 6G75 3.8L V6, Bank 1 is the rear cylinder bank, closer to the firewall. Accessing its upstream sensor is significantly more challenging and may require a specialized 22mm crow's foot O2 sensor socket and extensions to reach from underneath the vehicle.
Symptoms You May Notice
- Check Engine Light is on
- Reduced fuel economy
- Rough idle, especially when the engine is cold
- Potential to fail an emissions test
- Slight hesitation on acceleration
- Replacing the wrong oxygen sensor (e.g., the downstream sensor or the sensor for Bank 2 on V6 models). Always confirm the location of Bank 1, Sensor 1 for your specific engine before purchasing parts.
- Assuming the sensor is bad without checking the fuse first. A blown fuse can cause the same code and is a much cheaper and easier fix.
Most Likely Causes
- Failed Oxygen Sensor 🔴 High Probability → Shop Oxygen Sensor The internal heater element is a common failure point in oxygen sensors due to constant heat cycles and exposure to exhaust gases. This is not unique to the Galant but is the most frequent cause for P0135.
How to confirm: Disconnect the sensor and measure the resistance across the two heater circuit wires (usually the two wires of the same color, e.g., black) with a multimeter. A good heater should have a low resistance, typically between 5 and 15 Ohms. An open circuit (infinite resistance) or a reading far outside this range indicates a failed heater.
Typical fix: Replace the Bank 1, Sensor 1 oxygen sensor. It is highly recommended to use a direct-fit sensor from a reputable brand like Denso or NTK rather than a universal sensor that requires splicing wires.
Est. part cost: $40 - $120 - Blown Fuse 🟡 Medium Probability
How to confirm: Check the fuse for the 'Engine management system' or O2 heater. In the engine compartment fuse box located next to the battery, this is typically fuse #9, a 20A fuse. A visual inspection or continuity test will confirm if it's blown.
Typical fix: Replace the blown fuse. If the new fuse blows immediately, it indicates a short circuit in the wiring that must be traced.
Est. part cost: $1 - $5 - Damaged Wiring or Connector ⚪ Low Probability Wiring can become brittle from heat or damaged by road debris. On the V6 model, the rear sensor's proximity to the firewall can make its wiring susceptible to chafing or melting if not routed correctly.
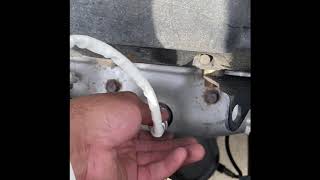
How to confirm: Visually inspect the wiring harness leading to the O2 sensor for any signs of melting, fraying, or breaks. Check the connector for corrosion, moisture, or pushed-out pins.
Typical fix: Repair the damaged section of wire or replace the connector pigtail.
Est. part cost: $10 - $30
Rare But Worth Checking
- Faulty Powertrain Control Module (PCM): → Shop Engine Control Module (ECM) This is extremely rare. The PCM's internal driver for the heater circuit can fail, but all other possibilities should be exhausted before considering PCM replacement.
Diagnosis Steps
- Scan for any other stored trouble codes. Address other codes first if they are present.
- Locate the engine compartment fuse box next to the battery. Inspect fuse #9 (20A), labeled for the engine management system. Replace it if it is blown.
- If the fuse is good, locate the Bank 1, Sensor 1 oxygen sensor. For the 2.4L I4, it's on the front of the exhaust manifold. For the 3.8L V6, it's on the rear exhaust manifold near the firewall.
- Inspect the sensor's wiring harness and connector for any visible damage, melting, or corrosion. Ensure the connector is securely plugged in.
- Disconnect the sensor. With the ignition key in the 'On' position (engine off), use a multimeter to verify that there is 12V power being supplied to one of the heater circuit pins on the harness side of the connector.
- With the sensor still disconnected, measure the resistance between the two heater circuit pins on the sensor itself. A reading of infinite resistance (open loop) or a very high resistance confirms the internal heater has failed. A good sensor will typically read between 5-15 Ohms.
- If the wiring has power and the sensor's heater circuit shows good resistance, there may be an intermittent wiring issue or a rare PCM fault. Check for intermittent shorts or opens in the harness.
Parts You'll Likely Need
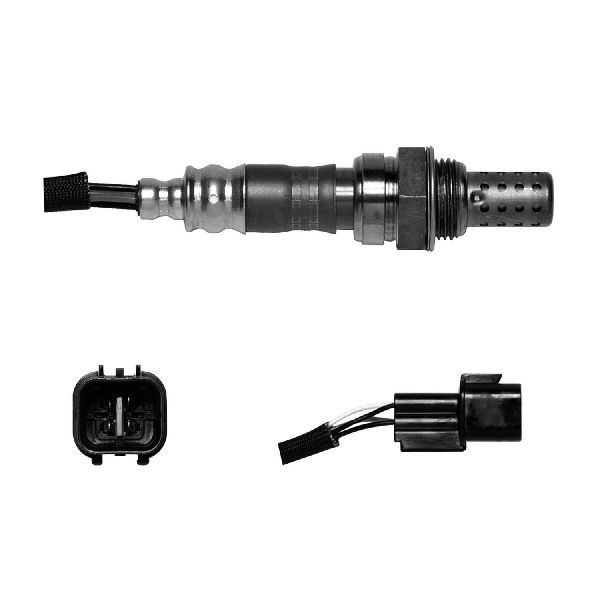
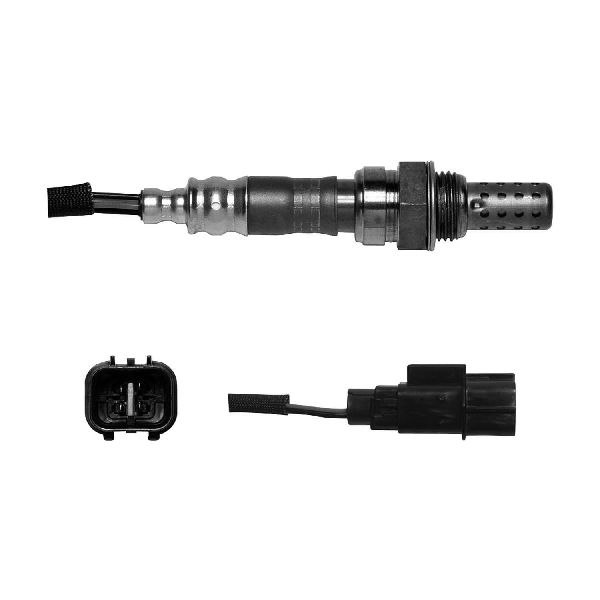
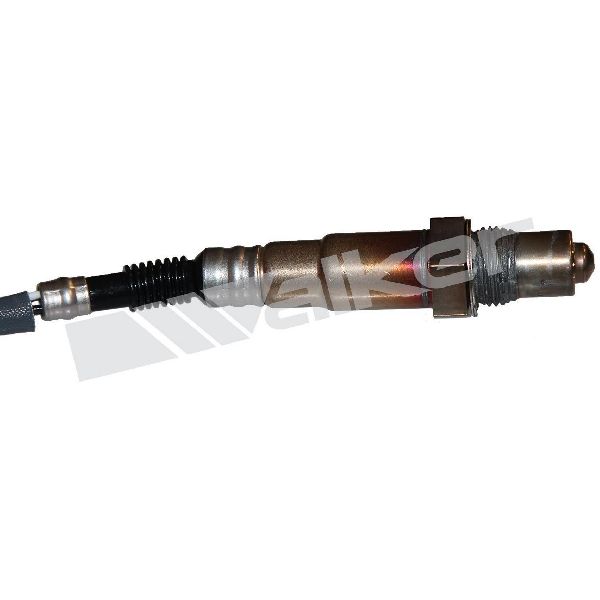
- Upstream Oxygen Sensor (Bank 1, Sensor 1)
(OEM #1588A206, MN163400, MN183468)— This is the sensor whose internal heater circuit is reported as faulty by code P0135. The heater element failing inside the sensor is the most common cause.
Trusted brands: Denso (e.g., 234-4276 - Direct Fit), NGK/NTK, Bosch
OEM price range: $100-$160
Aftermarket price range: $40-$120
Mechanic-Grade Diagnostic Values
- O2 Sensor Heater Current (Live Data) — expected: Between 0.16 A and 7.5 A while the heater is commanded on.. Failure: A current reading of less than 0.16 A (open circuit) or more than 7.5 A (short circuit) for 4 seconds will trigger the code.
- O2 Sensor Heater Element Resistance — expected: Approximately 11 to 16 Ohms at room temperature. Some sources state a broader range of 5-20 Ohms is acceptable.. Failure: Infinite resistance (Open Loop/OL) or a reading significantly outside the expected range.
- Voltage at Heater Power Supply Wire (Harness Side) — expected: Battery voltage (approx. 12.6V with key on, engine off; ~14V with engine running) should be present at the power supply pin coming from the MFI relay.. Failure: No voltage or significantly low voltage indicates a problem with the fuse, MFI relay, or the wiring from the relay.
Scan Tool Commands That Help
- Mitsubishi MUT-II / MUT-III: Actuation Test for O2 Sensor Heater — The dealer-level scan tool can command the O2 sensor heater circuit on and off manually. This is used to verify if the PCM driver is functional and to observe the current draw on live data without waiting for the normal warm-up cycle. It helps isolate a faulty PCM driver from a wiring or sensor issue.
Wiring & Ground Locations
- MFI Relay — Located in the engine compartment relay box, typically next to the battery.. Power is supplied from the MFI relay (terminal No. 4) to the front heated oxygen sensor's heater circuit. A failure of this relay can cut power to the heater.
- PCM/ECM Connector (Heater Control Pin) — On the main engine computer.. The PCM/ECM controls the ground side of the heater circuit to regulate its operation. For automatic transmission models, this is Pin 3 on the PCM. For manual transmission models, it is Pin 60 on the ECM. A break in the wire to this pin will cause an open circuit fault.
- Engine Ground G11 / G12 — G11 is located on the left front of the engine compartment. G12 is on the left side of the engine compartment.. While not directly for the heater circuit (which is grounded through the PCM), a poor main engine or chassis ground can cause floating voltages and incorrect readings across various sensors, potentially leading to misdiagnosis. Ensuring these grounds are clean and tight is a best practice.
Real Owner Repair Stories
- Reddit user in r/AskAMechanic (2004 Honda Civic (Similar 4-wire O2 sensor system)) — Persistent P0135 code after replacing the Bank 1 Sensor 1 sensor.
❌ Tried (didn't work) Replacing the upstream A/F sensor (Denso 234-9005)., Checking the in-car fuse (#2).
✅ What actually fixed it The user discovered exposed copper wires in the engine wiring harness where it connects to the sensor. The previous owner had poorly wrapped it in electrical tape. The fix was to properly repair the damaged section of the wiring harness, which resolved the code.
OEM Part Supersession History
MN163400, MN183468→1588A206— Part number consolidation and potential minor revisions by the manufacturer.
Heads up: All three part numbers are listed as interchangeable for the 2004-2012 Galant 2.4L, indicating they are compatible replacements for each other.
Diagnostic Flowchart
Other Known Issues on This Vehicle
Issues unrelated to this code that are worth knowing about as an owner of this generation:
- 2-3 Shift Flair From Automatic Transmission 🟠 Medium — A widely reported issue where the transmission hesitates or flares between the 2nd and 3rd gear shift. It may not always store a trouble code. Can sometimes be mitigated with fluid changes or software updates, but may indicate eventual transmission failure.
- Engine Stalling Due to Faulty Crankshaft Sensor 🔴 High — A common problem where a failing crankshaft position sensor can cause the engine to stall unexpectedly or fail to start. This is a critical sensor for engine operation.
- Power Window Failure 🟡 Low — Failure of the window regulators or motors is a common annoyance reported by owners, causing one or more power windows to stop working.
- Corrosion of Automatic Transmission Cooler Pipes 🔴 High — Affects specific 2010 models. Insufficient plating on the cooler pipes can lead to corrosion and transmission fluid leaks, potentially causing transmission damage. (Ref: NHTSA ID: 10V212000)
- Balance Shaft Belt Failure (4G69 I4) 🔴 High — The 4G69 is an interference engine. The balance shaft belt has been known to fail, and if pieces get caught in the main timing belt, it can cause the timing belt to break or jump time, leading to catastrophic engine damage (bent valves).
Used vs. New Parts: Buying Guide for This Vehicle
When a used part is the smart pick: For this repair, obtaining a used part is almost never a smart choice. The primary failure is the internal heater element, which has a finite lifespan determined by heat cycles. A used oxygen sensor from a junkyard has an unknown number of heat cycles and could fail shortly after installation, wasting time and money.
Donor-vehicle mileage cap: roughly under 15000 miles for the part to have meaningful remaining life.
What to inspect on the donor part:
- If forced to consider a used sensor, only select one from a very low-mileage vehicle that was wrecked due to collision, not engine failure.
- Inspect the connector for any signs of corrosion, melting, or broken locking tabs.
- The sensor tip should be free of heavy black soot (rich condition) or white deposits (coolant/oil contamination).
Aftermarket brands forum-validated for this vehicle:
- Denso (often the OEM supplier)
- NGK / NTK
- Bosch
Brands owners have reported issues with on this vehicle:
- Generic, unbranded 'white-box' sensors from online marketplaces. These often have incorrect heater resistance values or use lower-quality materials, leading to premature failure or persistent codes.
Real Owner Stories
Aggregated from forums and TSBs cited above. Mileages and costs reflect what owners reported in those sources.
2007 Mitsubishi Galant
Symptoms: The owner experienced an intermittent P0135 code that appeared for two days and then disappeared on its own.
What fixed it: The discussion noted that once the engine is warm, exhaust heat can sometimes mask a heater circuit fault, though the internal heater element is typically the failed component.
Source hint: "P0135 o2 sensor heater malfnction" - A 2007 thread on Team-BHP.com
Related OBD-II Codes
Frequently Asked Questions
Where is the Bank 1, Sensor 1 oxygen sensor located on my 2.4L I4 Galant?
I have a 3.8L V6 Galant; is the sensor in a different spot?
Which fuse should I check for a P0135 code on my 2004-2012 Galant?
Are there any specific brands I should use when replacing the O2 sensor?
Is there a recall for transmission issues that might be related to my engine management light?
Can I use a used oxygen sensor from a junkyard to save money?
Helpful Videos


We Have This Part in Stock


The information in this article is provided for general reference and educational purposes only. Vehicle specifications, procedures, and part compatibility can vary by production date, trim level, and region. Always consult your vehicle's factory service manual and verify part numbers before purchasing or performing repairs. Safety-critical components such as airbags, seat belts, and braking systems should be installed by a qualified professional.
- Mitsubishi Galant:
- 🧭 Diagnostic Flowchart
- 🎬 Helpful Videos
- 🛍️ Shop This Part
- What's Unique About the 2004-2012 Mitsubishi Galant
- Symptoms You May Notice
- Most Likely Causes
- Rare But Worth Checking
- Diagnosis Steps
- Parts You'll Likely Need
- Mechanic-Grade Diagnostic Values
- Scan Tool Commands That Help
- Wiring & Ground Locations
- Real Owner Repair Stories
- OEM Part Supersession History
- Other Known Issues on This Vehicle
- Used vs. New Parts: Buying Guide for This Vehicle
- Real Owner Stories
- 2007 Mitsubishi Galant
- Related OBD-II Codes
- Frequently Asked Questions
- 🎟️ Get 5% Off