
P0135 on 2008-2015 Mitsubishi Lancer Evolution: Front O2 Sensor Heater Fixes
For a 2008-2015 Mitsubishi Lancer Evolution (Evo X), code P0135 almost always means the heater element inside the front (upstream) oxygen sensor has failed. This is a common wear item. Replacing the sensor with an OEM or Denso equivalent is the typical fix, with DIY difficulty rated at 3/5 due to tight access and the need for a special 22mm O2 sensor socket.
- P0135 on an Evo X almost always points to a failed front oxygen sensor heater element, a common wear item.
- The job is DIY-friendly for those with basic tools, but requires a special 22mm (or 7/8") O2 sensor socket and access can be tight.
- Always check the fuse and inspect the wiring for heat damage before replacing the sensor.
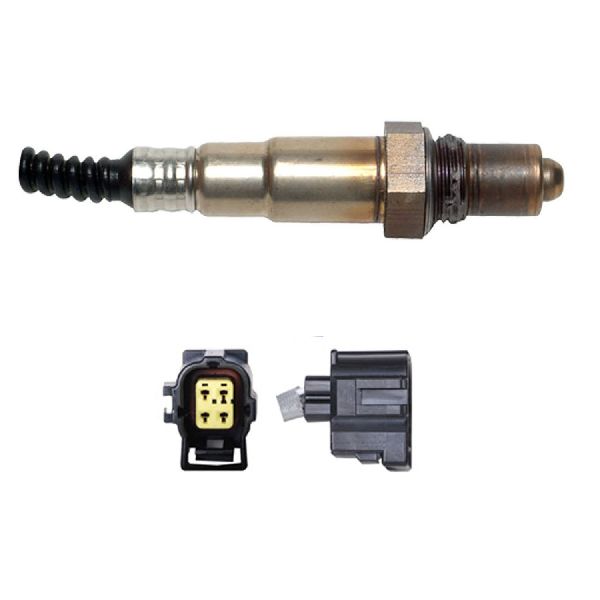
- A direct-fit Denso sensor (part number 234-5052) is a cost-effective and reliable OEM-equivalent replacement.
What's Unique About the 2008-2015 Mitsubishi Lancer Evolution
The Lancer Evolution X and its platform-mate, the Lancer Ralliart, are high-performance turbocharged vehicles. The front O2 sensor is subjected to extreme exhaust temperatures. This environment contributes to a finite lifespan for the sensor's internal heater element, making P0135 a relatively common and expected maintenance item as the car ages. While the code itself is standard, the frequency of failure and the specific location of the sensor right after the turbo are key characteristics for this platform.
Symptoms You May Notice
- Check Engine Light is illuminated.
- Slightly decreased fuel economy.
- Failure to pass an emissions/smog test.
- In rare cases, a slightly rough idle during the initial warm-up period.
- Engine remains in 'open-loop' fuel mode for an extended time after startup.
- Replacing the rear (downstream) O2 sensor instead of the front (upstream) one.
- Replacing the sensor without first checking the fuse and wiring, potentially leading to the new sensor not fixing the issue or a new fuse blowing immediately.
Most Likely Causes
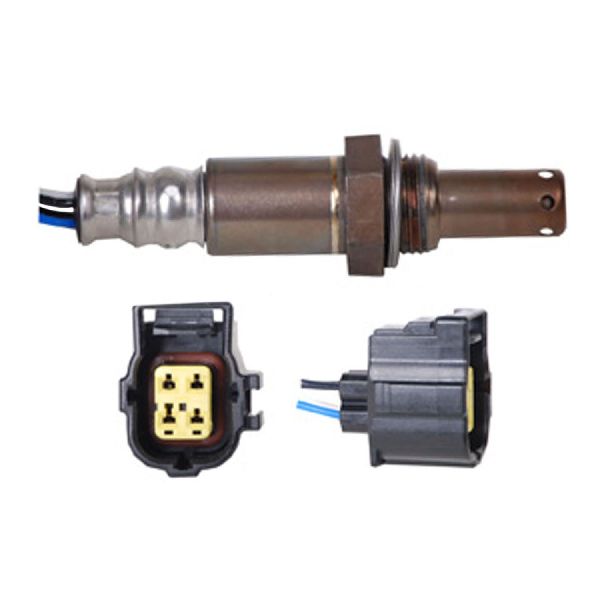
- Failed Front Oxygen Sensor 🔴 High Probability → Shop Oxygen Sensor The internal heater element within the O2 sensor burns out over time due to constant, extreme heat cycles from the turbocharged engine's exhaust. It is a common wear-and-tear component.
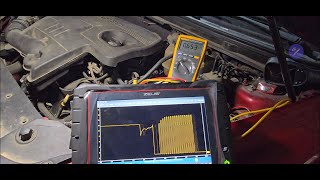
How to confirm: Disconnect the sensor and use a multimeter to measure the resistance between the two heater circuit wires (typically the two wires of the same color). A good sensor should have a resistance between 4.5 and 8.0 ohms at 20°C (68°F). An infinite resistance reading (OL) indicates an open circuit and a failed heater. 🎬 Watch: How to test oxygen sensor heater circuits with a multimeter
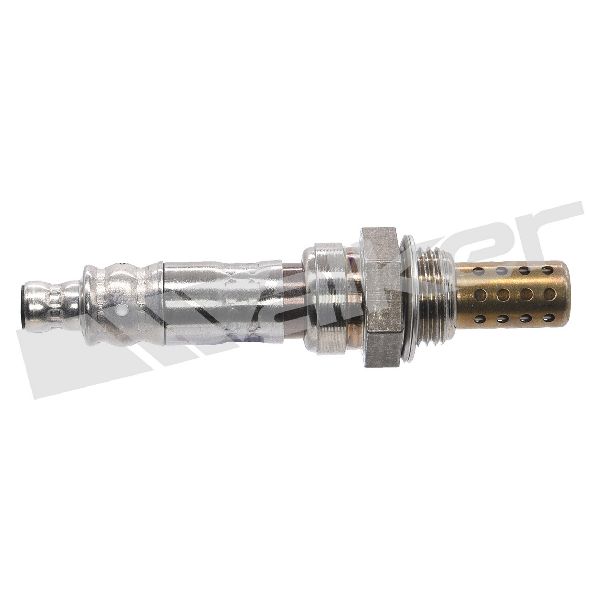
Typical fix: Replace the front (upstream) oxygen sensor. The Denso 234-5052 is a widely used, direct-fit aftermarket replacement. 🎬 See this walkthrough for replacing the upstream oxygen sensor
Est. part cost: $60-$250 - Damaged Wiring or Connector 🟡 Medium Probability The wiring harness is routed close to the hot exhaust manifold and turbocharger, which can cause the protective loom to become brittle and the wires to melt or break over time.
How to confirm: Visually inspect the entire length of the O2 sensor harness from the sensor to the firewall for any signs of melting, chafing, or breaks. Check the connector pins for corrosion or damage. Some sources suggest wiring issues can account for a significant percentage of P0135 faults.
Typical fix: Repair the damaged section of wiring or replace the connector pigtail. Use heat-resistant sheathing for protection.
Est. part cost: $10-$50 - Blown Fuse ⚪ Low Probability
How to confirm: Consult the owner's manual or service manual to locate the fuse for the O2 sensor heater circuit in the vehicle's fuse box. Visually inspect the fuse or test it with a multimeter to see if it is blown.
Typical fix: Replace the blown fuse. If the new fuse blows immediately, it indicates a short circuit in the wiring or the sensor itself that must be diagnosed and repaired.
Est. part cost: $1-$5
Rare But Worth Checking
- Failed Engine Control Module (ECM): → Shop Engine Control Module (ECM) This is extremely rare. The driver circuit inside the ECM that controls the O2 sensor heater can fail. This should only be considered after all other possibilities (sensor, wiring, fuses) have been definitively ruled out.
Diagnosis Steps
- Confirm the presence of code P0135 using an OBD-II scanner.
- Perform a visual inspection of the front O2 sensor's wiring harness and connector. Look for any signs of melting, fraying, or physical damage from proximity to the turbo and exhaust manifold.
- Locate and inspect the fuse for the O2 sensor heater circuit. Replace if blown.
- If the fuse and wiring are good, disconnect the O2 sensor connector. The connector is located inside the cabin, in the passenger-side footwell area, requiring glove box removal for access.
- Using a multimeter set to measure resistance (Ohms), test the heater element of the sensor itself. Probe the two same-colored wires on the sensor side of the connector. A good sensor will have a low resistance between 4.5 and 8.0 ohms. A failed sensor will show infinite resistance (open circuit).
- If the sensor's resistance is good, test for 12V power at the harness-side connector with the ignition on. If power is present, check the ground control wire from the harness back to the ECM for continuity. A break in the power or ground wire will cause the code.
Parts You'll Likely Need
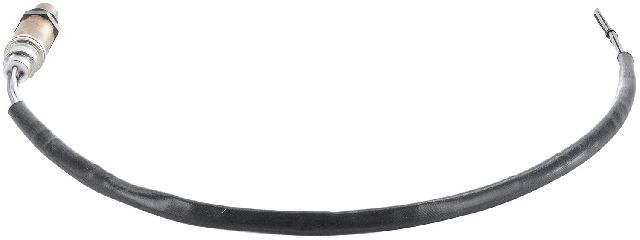
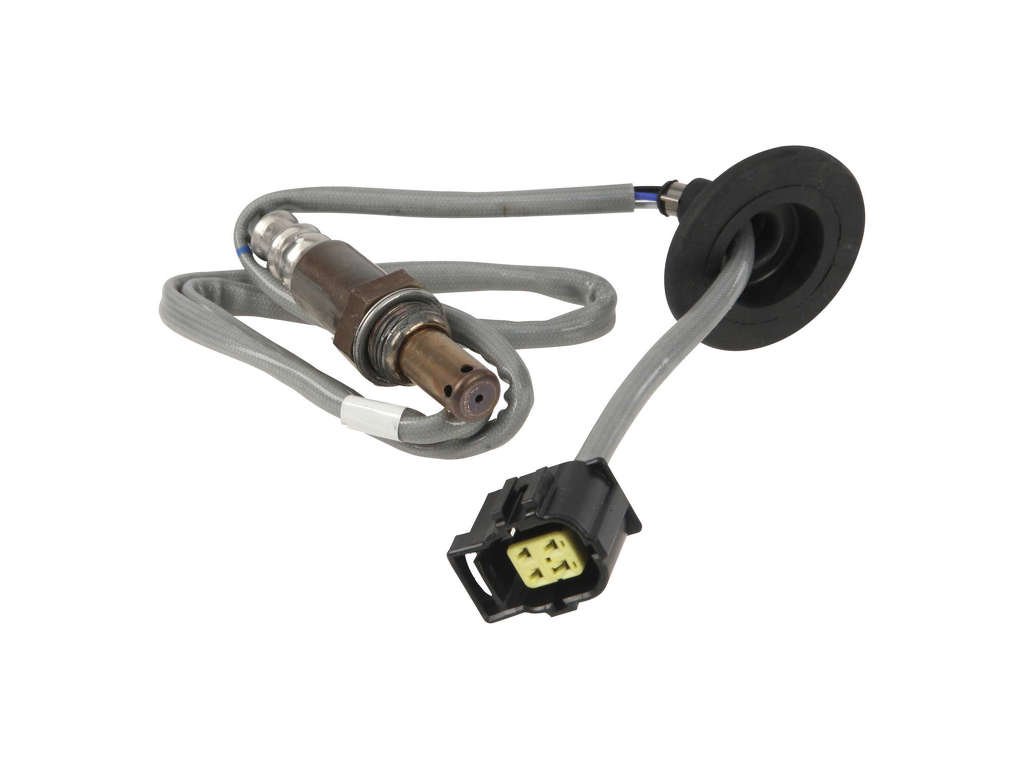
- Front Oxygen Sensor (Air/Fuel Ratio Sensor)
(OEM #1588A141)— This is the most common failure point for code P0135, as the internal heater element burns out over time.
Trusted brands: Mitsubishi (OEM), Denso (P/N: 234-5052), NTK
OEM price range: $200-$250
Aftermarket price range: $60-$150
Related Codes That Often Appear With This One
- P0134 —
- P0171 —
- P0030 —
Platform-Specific Known Issues
- Access to the sensor can be tight. Some owners find it easier to remove the upper radiator support brackets and gently pull the radiator/fans forward to create more room to work.
- The sensor connector is located inside the cabin, in the passenger footwell area. The glove box must be removed to access the grommet and connector. 🎬 Watch: Evo X front O2 sensor replacement with side skirts
- A special 22mm (or 7/8") slotted oxygen sensor socket is required to remove and install the sensor without damaging the wires.
Mechanic-Grade Diagnostic Values
- Front O2 Sensor Heater Resistance — expected: 4.5 - 8.0 Ω (at 20°C / 68°F). Failure: Infinite resistance (OL) indicates an open circuit (failed heater). A reading outside the specified range also indicates a fault.
- Front O2 Sensor Heater Circuit Current Draw — expected: ~1.8 A (at 14.4V with 8.0 Ω resistance). Failure: Significantly lower or zero current indicates an open circuit or high resistance. Significantly higher current indicates a short circuit.
- Front O2 Sensor Heater Power Consumption — expected: ~26 Watts (at 14.4V with 8.0 Ω resistance). Failure: This value is useful for selecting appropriately rated resistors if attempting to bypass the heater circuit for off-road use.
- Voltage at Harness Connector (Heater Power Wire) — expected: Battery Voltage (~12.6V with key on, engine off; ~14.4V with engine running). Failure: 0V indicates a blown fuse or a break in the power supply wire.
Scan Tool Commands That Help
- Mitsubishi MUT-III: Live Data Monitoring / ECU Diagnostics — The MUT-III is the dealer-level diagnostic tool. While specific bidirectional commands for the heater circuit are not documented in public sources, this tool would be used to monitor ECU commands to the heater, check for internal ECU faults, and perform any necessary ECU reprogramming after a complex repair.
Wiring & Ground Locations
- ECU Connector B-108 (Front O2 Sensor Pins) — The main 64-pin engine control unit (ECU) connector.. Pins 38 and 39 are for the front O2 sensor. Pin 38 is the signal wire (Red wire in a twisted pair) and Pin 39 is the ECU internal ground. These pins are used for continuity and voltage checks directly at the ECU to rule out wiring breaks between the sensor connector and the ECU.
- Front O2 Sensor Connector — Inside the cabin, in the passenger-side footwell. The glove box must be removed to access the connector and the grommet through the firewall.. This is the primary disconnection point for testing the sensor's resistance and checking for power/ground from the main harness.
Real Owner Repair Stories
- EvolutionM.net forum user (2008-2015 Lancer Evolution X) — Check Engine Light with code P0135. No other noticeable running issues.
✅ What actually fixed it Replacing the front (upstream) O2 sensor with a Denso 'First Time Fit' sensor resolved the code. The user noted the Denso part is nearly identical to the Mitsubishi OEM part but significantly cheaper. - MAPerformance customer review by 'Cole' (2008-2015 Lancer Evolution X) — Unspecified issue that triggered the need to replace the front O2 sensor, likely P0135.
❌ Tried (didn't work) Replacing the front O2 sensor with a new OEM part.
✅ What actually fixed it The story is a counter-example; the user replaced the sensor, but it did not solve their underlying issue. This highlights that while the sensor is the most common cause, further diagnosis of wiring or the ECU may be needed if a new sensor doesn't fix the code.
When the Usual Fixes Don't Work
- While replacing the front O2 sensor is the fix for P0135 in over 90% of cases, there are documented instances where this does not resolve the code. If a new, quality sensor (OEM or Denso) is installed and the code returns, the fault lies elsewhere. The next steps must be a meticulous inspection of the wiring harness for intermittent shorts or opens, verification of a stable 12V supply from the fuse/relay, and checking the integrity of the control wire back to the ECU. In very rare cases, the ECU's internal driver circuit for the heater can fail, which would require ECU repair or replacement.
OEM Part Supersession History
1588A141→1588A141— No supersession found. This part number appears to be consistent for the entire 2008-2015 model run.
Diagnostic Flowchart
Other Known Issues on This Vehicle
Issues unrelated to this code that are worth knowing about as an owner of this generation:
- ACD/AYC Pump Failure 🔴 High — Very common, especially in regions with road salt. The pump is mounted externally and is prone to corrosion, leading to failure. (Ref: TSB-14-22-005 / Warranty Extension to 10 years/100,000 miles in the US for corrosion-related failure.)
- Timing Chain Stretch 🔴 High — Common, particularly on 2008-2011 models before a revised chain was introduced. Can occur as early as 35k-50k miles and can lead to catastrophic engine failure if it jumps timing.
- Clutch Master Cylinder (CMC) Failure 🟠 Medium — Common across all years. The OEM plastic CMC is known to fail and leak, causing difficulty shifting or a pedal that sticks to the floor. (Ref: NHTSA Recall #13V446000 for 2008-2013 models.)
- Fuel Pump Relay Failure 🔴 High — A well-known issue where the original grey-colored relays fail, potentially cutting fuel and causing a dangerous lean condition. Owners proactively replace them with updated black or green relays.
- Cracked OEM Exhaust Manifold 🟠 Medium — The factory exhaust manifold is known to be poorly cast and can develop hairline cracks, most often on the runner for cylinder 3, creating an exhaust leak.
Used vs. New Parts: Buying Guide for This Vehicle
When a used part is the smart pick: For this repair, a used part is almost never a good choice for the oxygen sensor itself. For related components, a used wiring harness pigtail from a junkyard can be a viable option if the original connector is damaged and a new pigtail is not available.
Donor-vehicle mileage cap: roughly under 50000 miles for the part to have meaningful remaining life.
What to inspect on the donor part:
- For a wiring harness/pigtail, inspect for any signs of melting, brittleness, or cracking in the loom and wires.
- Ensure the connector pins are clean, straight, and free of corrosion.
- Avoid parts from vehicles with signs of fire or major front-end damage near the exhaust manifold.
OEM-only on this vehicle (don't cheap out):
- Engine Control Module (ECM) - If the ECM is the confirmed point of failure, a new or professionally remanufactured unit programmed to the vehicle is required. A used ECM from another vehicle will have incorrect VIN and immobilizer data.
Aftermarket brands forum-validated for this vehicle:
- Denso (specifically P/N 234-5052, often cited as the OEM manufacturer)
- NTK / NGK
- Bosch (direct-fit models)
Brands owners have reported issues with on this vehicle:
- Generic, unbranded sensors from online marketplaces (e.g., eBay, Amazon). These often have high rates of out-of-box failure and may not be manufactured to the correct specifications, causing persistent codes or poor performance.
Real Owner Stories
Aggregated from forums and TSBs cited above. Mileages and costs reflect what owners reported in those sources.
2010 Evo X GSR
Symptoms: Check engine light came on with code P0135 (heater circuit malfunction).
What fixed it: Replaced the upstream O2 sensor (Bank 1 Sensor 1) using a 22mm thin-wall socket and an extension with a universal joint from underneath the car.
Source hint: AliExpress Blog/Review: 'Where Is the Evo X O2 Sensor Located? A Real-World Guide to Finding, Replacing, and Choosing the Right One'
2008 Evo X (Stock) — 50000 miles
Symptoms: Fully extended tensioner and loose chain (shared as a separate common reliability concern).
What fixed it: This report highlights the prevalence of timing chain stretch, though the P0135 code specifically requires O2 sensor heater circuit repair.
Source hint: EvolutionM.net: 'Chain Stretch Pics'
Related OBD-II Codes
Frequently Asked Questions
Where is the front O2 sensor connector located on the Evo X? I can't find it in the engine bay.
Is there a specific aftermarket sensor recommended for the 4B11T to fix P0135?
What should the resistance reading be for a healthy heater circuit on this Mitsubishi sensor?
I'm having trouble reaching the sensor due to the turbo setup. Any tips for easier access?
Could my P0135 code be related to the timing chain stretch issues common on 2008-2011 models?
Is there a recall for the O2 sensor on the 2008-2015 Lancer Evolution?
Helpful Videos


We Have This Part in Stock


The information in this article is provided for general reference and educational purposes only. Vehicle specifications, procedures, and part compatibility can vary by production date, trim level, and region. Always consult your vehicle's factory service manual and verify part numbers before purchasing or performing repairs. Safety-critical components such as airbags, seat belts, and braking systems should be installed by a qualified professional.
- Mitsubishi Lancer Evolution:
- 🧭 Diagnostic Flowchart
- 🎬 Helpful Videos
- 🛍️ Shop This Part
- What's Unique About the 2008-2015 Mitsubishi Lancer Evolution
- Symptoms You May Notice
- Most Likely Causes
- Rare But Worth Checking
- Diagnosis Steps
- Parts You'll Likely Need
- Related Codes That Often Appear With This One
- Platform-Specific Known Issues
- Mechanic-Grade Diagnostic Values
- Scan Tool Commands That Help
- Wiring & Ground Locations
- Real Owner Repair Stories
- When the Usual Fixes Don't Work
- OEM Part Supersession History
- Other Known Issues on This Vehicle
- Used vs. New Parts: Buying Guide for This Vehicle
- Real Owner Stories
- 2010 Evo X GSR
- 2008 Evo X (Stock) — 50000 miles
- Related OBD-II Codes
- Frequently Asked Questions
- 🎟️ Get 5% Off