
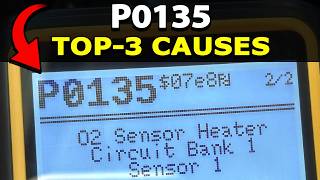
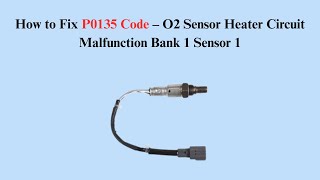
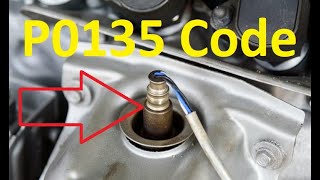
P0135 on 2005-2010 Scion tC: Air/Fuel Sensor Heater Causes and Fixes
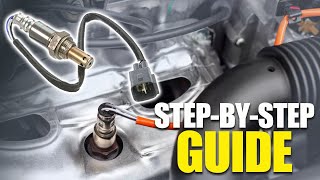
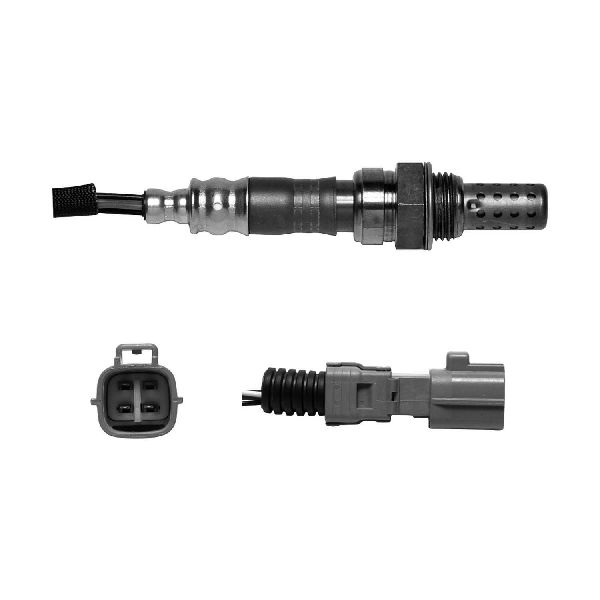
For a 2005-2010 Scion tC, code P0135 almost always means the heater inside the upstream oxygen sensor (Bank 1, Sensor 1) has failed. Replacing the sensor, which is located on the exhaust manifold, is the typical fix. Use a direct-fit Denso sensor (part #234-9041) for best results. The sensor is often seized in the manifold, so be prepared with penetrating oil and a proper O2 sensor socket. Expect to pay $70-$120 for a quality aftermarket part or around $200 for an OEM part.
- P0135 on a Scion tC points directly to the heater circuit in the upstream A/F sensor on the exhaust manifold.
- The most common fix, by far, is to replace the Bank 1, Sensor 1 Air/Fuel Ratio sensor with a quality Denso part (234-9041).
- Before buying a new sensor, it's wise to spend two minutes checking the 'A/F HTR' fuse in the engine bay fuse box.
- The job is DIY-friendly, but the sensor is very often seized in the exhaust manifold. Be prepared with penetrating oil, a proper 22mm O2 sensor socket, and potentially heat to get it out.
- Using a quality replacement part from Denso (the OEM supplier) is highly recommended, as these engines can be sensitive to off-brand sensors.
What's Unique About the 2005-2010 Scion tC
The P0135 code on the Scion tC with the 2AZ-FE engine is a very straightforward and common issue. This engine was widely used across many Toyota models (like the Camry and RAV4), making parts and repair information widely available. A failing A/F sensor heater is a frequent maintenance item as the vehicle ages. There are no unique platform-specific quirks; the diagnosis and repair are standard and well-documented by both professional mechanics and DIY enthusiasts, with the main challenge often being the physical removal of the old, seized sensor.
Symptoms You May Notice
- Check Engine Light is on
- Reduced fuel economy
- Vehicle may fail an emissions test
- Potentially rough idle on cold starts
- In some cases with a severely failed sensor, engine misfires can occur due to an overly rich fuel mixture
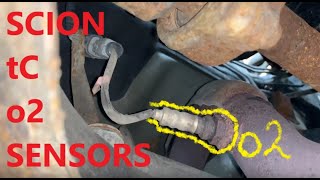
- Replacing the downstream (Bank 1, Sensor 2) oxygen sensor. P0135 specifically refers to Sensor 1, which is the upstream sensor on the exhaust manifold. 🎬 Watch: Locate the Bank 1 Sensor 1 on your Scion.
- Using a cheap, universal-fit oxygen sensor. These require splicing wires, which can introduce resistance issues and fail to resolve the code. The 2AZ-FE engine is known to be sensitive to the brand of sensor used.
Most Likely Causes
- Failed Air/Fuel Ratio Sensor (Bank 1, Sensor 1) 🔴 High Probability → Shop Oxygen Sensor The internal heating element within the sensor is a common failure point due to age and countless heat cycles. This is a well-documented failure item on the 2AZ-FE engine family.
How to confirm: Disconnect the sensor and use a multimeter to test the resistance between the two heater circuit pins (typically the two wires of the same color, often black). A reading of 'OL' (open loop/infinite resistance) confirms the heater has burned out. A good heater should have a low resistance; service manuals for similar Toyota engines specify a range of 1.8 to 3.4 Ω at room temperature (68°F/20°C).
Typical fix: Replace the upstream Air/Fuel Ratio sensor.
Est. part cost: $70-$200 - Blown Fuse for Heater Circuit 🟡 Medium Probability An electrical short in the sensor or its wiring can cause the protective fuse to blow.
How to confirm: Locate the fuse box in the engine compartment and check the fuse labeled for the A/F heater (often marked 'A/F HTR' or 'EFI MAIN'). Visually inspect the fuse or use a multimeter to test for continuity. A blown fuse is a simple fix but may indicate a deeper problem like a shorted sensor.
Typical fix: Replace the blown fuse. If the new fuse blows immediately, there is a short circuit in the wiring or sensor that must be found and repaired.
Est. part cost: $1-$5 - Damaged Wiring or Connector ⚪ Low Probability Wiring is exposed to high heat in the engine bay and can become brittle or damaged over time. The connector can also accumulate dirt, moisture, or corrosion, leading to a poor connection.
How to confirm: Visually inspect the entire length of the sensor's wiring harness from the sensor itself to the main engine harness. Look for any signs of melting, chafing, breaks, or corrosion inside the connector pins. The connector clip can be brittle and hard to release.
Typical fix: Repair the damaged section of wire or clean/replace the connector.
Est. part cost: $5-$50
Rare But Worth Checking
- Faulty Engine Control Module (ECM): → Shop Engine Control Module (ECM) This is extremely rare. The ECM's driver circuit for the heater could fail, but this should only be considered after all other possibilities (sensor, fuse, wiring) have been definitively ruled out.
Diagnosis Steps
- Confirm the code P0135 is present using an OBD-II scanner.
- Visually inspect the upstream A/F sensor on the exhaust manifold. Check its wiring harness and connector for any obvious damage, melting, or corrosion.
- In the engine compartment fuse box, locate the 'A/F HTR' or 'EFI MAIN' fuse (typically 20A or 25A) and verify it is not blown.
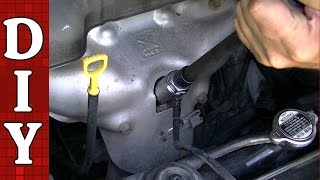
- If the fuse is good, allow the engine to cool completely. Disconnect the sensor's electrical connector. This can be difficult to reach and release without first removing the air intake snorkel. Be gentle with the plastic locking tab.
- Use a multimeter set to Ohms (Ω) to measure the resistance across the two heater pins on the sensor side of the connector (usually the two same-colored wires). An open circuit ('OL') indicates a failed heater element, and the sensor must be replaced. A good sensor will read a low resistance, typically between 1.8 and 3.4 Ohms at 68°F (20°C).
- If the sensor resistance is within spec, turn the ignition key to the 'ON' position (engine off) and carefully test for 12V power at the heater circuit pins on the vehicle harness side of the connector. Lack of voltage points to a problem with the fuse, A/F relay, or wiring from the ECM.
- If voltage and sensor resistance are good, the problem is intermittent or may lie with the ECM, which is very unlikely. The most probable cause remains a faulty sensor that fails under load or when hot.
Parts You'll Likely Need
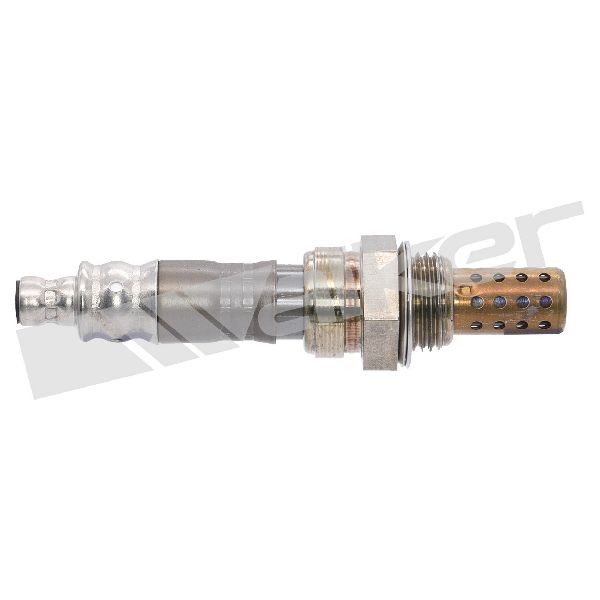
- Upstream Air/Fuel Ratio Sensor (Bank 1, Sensor 1)
(OEM #89467-21020)— This is the part that contains the heater circuit reported by code P0135. The internal heater element failing is the most common cause of this code.
Trusted brands: Denso (OEM Manufacturer), NGK / NTK, Bosch
OEM price range: $190-$220
Aftermarket price range: $70-$150
Technical Service Bulletins (TSBs) & Recalls
- While no specific TSB for the 2005-2010 Scion tC is widely cited for P0135, Toyota did issue TSBs for earlier model years (early 2000s) on different vehicles for codes P0135 and P0155, acknowledging issues with the originally equipped O2 sensors and providing updated parts. This indicates a history of heater circuit failure in Toyota's A/F sensors.
Platform-Specific Known Issues
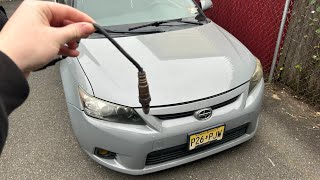
- Sensor Seized in Exhaust Manifold: Due to constant exposure to extreme heat cycles, the original A/F sensor frequently seizes in the threads of the cast iron exhaust manifold, making it very difficult to remove. Attempting to remove it with a standard wrench can easily round off the hex head of the sensor. 🎬 Watch: Professional tips for removing a seized upstream sensor.
Mechanic-Grade Diagnostic Values
- A/F Sensor Heater Resistance — expected: 1.8 to 3.4 Ω at 20°C (68°F). Failure: Open circuit (OL) or resistance outside the specified range.
- A/F Sensor Heater Current (via scan tool) — expected: Between 0.3 A and 8.0 A when active.. Failure: Current is less than 0.3 A (open circuit) or more than 8.0 A (short circuit).
- Voltage at A/F Sensor Connector (Harness Side) — expected: Battery voltage (approx. 12V) with ignition ON, engine OFF.. Failure: 0V or significantly low voltage, indicating a problem with the EFI relay, fuse, or wiring.
Scan Tool Commands That Help
- Toyota Techstream: Active Test -> 'Control the A/F Sensor Heater' — This command allows a technician to manually activate the A/F sensor heater circuit. It's used to verify that the ECM driver, relay, and wiring are capable of delivering power to the sensor on command, helping to isolate the fault to the sensor itself if the circuit tests good but the code persists.
- Toyota Techstream / Advanced OBD-II Scanner: Live Data -> 'A/F Heater Current (B1S1)' — Monitoring this PID (Parameter ID) provides the actual current draw of the heater circuit in real-time. This is the most direct way to see if the circuit is open (near 0A), shorted (high amps), or has high resistance (low amps), confirming the ECM's diagnosis.
Wiring & Ground Locations
- A/F Sensor Connector (B7) — On the engine harness, connected to the upstream A/F sensor pigtail. It is located near the back of the cylinder head, below the intake manifold.. This is the primary connection point for testing. The heater circuit pins are typically the two same-colored wires (often black) on the sensor side. On the harness side, one pin should have 12V+ from the EFI/A-F relay, and the other is the duty-cycle controlled ground from the ECM (AFHT pin).
- EFI MAIN Relay & A/F HTR Fuse — Located in the under-hood fuse/relay box (Engine Room R/B No. 2).. This relay and fuse supply the 12V+ power to the A/F sensor's heater circuit. A failure in either will cut power and cause P0135.
- Engine Ground Point — The main engine ground for the ECU and its sensors is typically located on the left side of the cylinder head (driver's side).. While the heater circuit is controlled by the ECM, a poor main engine ground can cause floating voltages and erratic behavior in the entire engine management system, potentially leading to false codes. Some owners have reported that improving the engine-to-chassis ground resolved persistent, hard-to-diagnose electrical issues.
Real Owner Repair Stories
- Reddit user in r/SciontC (Scion tC (generation not specified, but symptoms are relevant)) — No-start condition, which can be an extreme escalation of electrical issues that might otherwise present as sensor codes.
❌ Tried (didn't work) Replacing multiple components with no success.
✅ What actually fixed it The user discovered the vehicle had a very poor factory grounding system. The final fix was to add a heavy-gauge (4-gauge) ground wire directly from the battery's negative terminal to a solid point on the engine block (like a starter bolt). This resolved months of electrical gremlins.
OEM Part Supersession History
89467-21020→89467-0R050— Part consolidation and updates across multiple Toyota/Scion models.
Heads up: While the parts may be physically interchangeable, it is always best to use the part number specified for the exact vehicle year or a trusted cross-reference like the Denso 234-9041 to avoid compatibility issues. The original 89467-21020 is still widely available from OEM sources.
Diagnostic Flowchart
Real Owner Stories
Aggregated from forums and TSBs cited above. Mileages and costs reflect what owners reported in those sources.
Scion tC 2.4L 2AZ-FE — 112000 miles
Symptoms: Check engine light came on with code P0135, accompanied by sluggish acceleration when climbing hills and poor fuel economy.
What fixed it: Replaced the A/F sensor themselves after a dealership incorrectly suggested replacing the MAF sensor. Fuel economy improved by nearly 12% and the idle smoothed out.
Source hint: Vertex-AI Search
2010 Scion tC
Symptoms: The P0135 code returned shortly after replacing the faulty sensor with an aftermarket Bosch unit.
What fixed it: Swapping the Bosch sensor for the recommended Denso 234-9049 part, as the car's computer is highly sensitive to sensor brands.
Source hint: Reddit r/SciontC: 'How do I fix this code on my 2010 scion tc'
1st Gen Scion tC
Symptoms: Struggled to remove a severely seized O2 sensor from the exhaust manifold, with the hex head starting to round off during the attempt.
What fixed it: Soaking the threads in PB Blaster, tapping the sensor, and switching to a proper 22mm wrench instead of a standard O2 sensor socket to get a better grip.
Source hint: ScionLife.com: 'o2 sensor removal help asap!!'
Scion tC
Symptoms: Check engine light illuminated with a code pointing directly to the oxygen sensor.
What fixed it: Replacing the oxygen sensor promptly after community members warned that ignoring the code could cause long-term damage to the catalytic converter.
Source hint: Reddit r/SciontC: 'This code popped up is the the Oxygen sensor??'
Related OBD-II Codes
Frequently Asked Questions
Is there a specific TSB for the P0135 code on my 2005-2010 Scion tC?
What brand of Air/Fuel sensor should I use to fix P0135 on my 2AZ-FE engine?
Why is the upstream A/F sensor so hard to remove on my tC?
How can I safely remove a seized A/F sensor from the exhaust manifold?
Which fuse should I check for the A/F sensor heater circuit?
What should the resistance be on a good A/F sensor for the 2.4L engine?
Can I ignore the P0135 code on my Scion tC?
Helpful Videos


We Have This Part in Stock


The information in this article is provided for general reference and educational purposes only. Vehicle specifications, procedures, and part compatibility can vary by production date, trim level, and region. Always consult your vehicle's factory service manual and verify part numbers before purchasing or performing repairs. Safety-critical components such as airbags, seat belts, and braking systems should be installed by a qualified professional.
- Scion tC:
- 🧭 Diagnostic Flowchart
- 🎬 Helpful Videos
- 🛍️ Shop This Part
- What's Unique About the 2005-2010 Scion tC
- Symptoms You May Notice
- Most Likely Causes
- Rare But Worth Checking
- Diagnosis Steps
- Parts You'll Likely Need
- Technical Service Bulletins (TSBs) & Recalls
- Platform-Specific Known Issues
- Mechanic-Grade Diagnostic Values
- Scan Tool Commands That Help
- Wiring & Ground Locations
- Real Owner Repair Stories
- OEM Part Supersession History
- Real Owner Stories
- Scion tC 2.4L 2AZ-FE — 112000 miles
- 2010 Scion tC
- 1st Gen Scion tC
- Scion tC
- Related OBD-II Codes
- Frequently Asked Questions
- 🎟️ Get 5% Off