
P0136 on 1999-2007 Chevrolet Silverado 1500: Downstream O2 Sensor Causes and Fixes
This code points to a malfunction in the downstream oxygen sensor on the driver's side (Bank 1, Sensor 2). The most common fix is replacing the sensor itself, which is a straightforward DIY job if the sensor isn't seized. Expect to pay $25-$75 for an aftermarket sensor or $60-$100 for an OEM ACDelco part. Before replacing, always check the wiring harness for melting or physical damage, as its location under the truck makes it vulnerable.
- P0136 on your Silverado almost always points to the downstream O2 sensor on the driver's side or its wiring.
- Before buying a new sensor, always perform a quick visual inspection of the wiring harness for any melting or physical damage, as this is a common point of failure.
- Use a direct-fit sensor from a reputable brand like ACDelco or Denso to avoid compatibility issues.
- This is a very common, simple, and inexpensive DIY repair for most owners.
What's Unique About the 1999-2007 Chevrolet Silverado 1500
On the GMT800 platform Silverado (1999-2007 Classic), the P0136 code is a very common and straightforward issue. The LM7 5.3L V8 and its exhaust system are robust, but the O2 sensors are consumable items that fail with age. Due to the truck's design, the sensor and its wiring are exposed underneath the vehicle, making them susceptible to damage from road debris, moisture, and heat cycling. There are no widespread, unique platform-wide defects that cause this code; it's typically just a worn-out sensor or damaged wiring. The issue is so common that many owners can diagnose and fix it in their driveway with basic tools.
Generation note: The 1999-2007 year range covers the entire GMT800 generation (1999-2006) and the first year of the GMT900 generation (2007). Chevrolet sold both generations in 2007, with the GMT800 models being labeled as "Classic". While the P0136 code has the same meaning for both, be sure to verify the correct part number for your specific model year, especially if you have a 2007 model, as wiring connectors can differ.
Symptoms You May Notice
- Check Engine Light is on.
- Failure to pass a state emissions inspection.
- Slightly reduced fuel economy in some cases.
- In rare instances, a rough or unstable idle.
- A sulfur or "rotten egg" smell from the exhaust if the catalytic converter is being affected.
- Replacing the catalytic converter. While a failing converter can cause other codes like P0420, it is not a direct cause of a P0136 circuit malfunction code. The P0136 code must be resolved before diagnosing a P0420.
- Replacing the wrong oxygen sensor. P0136 is specifically for Bank 1 (driver's side) and Sensor 2 (post-catalytic converter). Many people mistakenly replace the upstream sensor (Sensor 1) which is used for fuel trim.
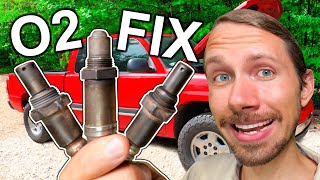
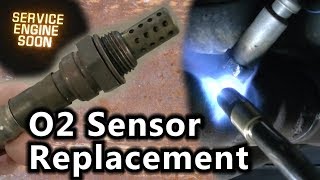
- Using a cheap, universal oxygen sensor that requires splicing wires. These often have incorrect resistance values or are prone to failure, causing the code to return. A direct-fit sensor is highly recommended. 🎬 See: Expert tips for diagnosing and replacing Vortec O2 sensors
Most Likely Causes
- Failed Downstream Oxygen Sensor (Bank 1, Sensor 2) 🔴 High Probability → Shop Oxygen Sensor Oxygen sensors are wear items with a finite lifespan. Heat cycles, moisture, and constant exposure to exhaust gases cause them to degrade and fail over time, typically after 80,000-100,000 miles.
How to confirm: Use a scan tool to monitor the live data for the B1S2 voltage. A healthy sensor should show a relatively stable voltage between 0.5V and 0.8V on a warm engine. If the voltage is stuck near 0V or 1V, is switching rapidly like an upstream sensor, or shows no reading, the sensor has likely failed.
Typical fix: Replace the Bank 1, Sensor 2 oxygen sensor. This is the downstream sensor on the driver's side. An oxygen sensor socket is highly recommended for removal. Penetrating oil may be needed if the sensor is seized in the exhaust pipe.
Est. part cost: $25-$75 - Damaged Wiring or Connector 🟡 Medium Probability The sensor wiring runs under the truck and is exposed to road debris, water, and extreme heat from the exhaust. The harness is often clipped to the frame or transmission crossmember and can get snagged, melted on the exhaust pipe, or corroded at the connector pins.
How to confirm: Visually inspect the entire wiring harness from the O2 sensor to where it enters the main loom. Look for signs of melting, chafing, or breaks. Disconnect the sensor and check the connector for corrosion or pushed-out pins. Perform a continuity test on the signal and heater circuit wires between the sensor connector and the PCM if no visible damage is found. 🎬 Watch: How to test an O2 sensor with a multimeter
Typical fix: Repair the damaged section of the wiring harness using solder and heat shrink or replace the connector pigtail. If the harness is melted, re-route it to prevent future damage.
Est. part cost: $10-$30 - Exhaust Leak ⚪ Low Probability Rust can cause leaks at the exhaust manifold gaskets or flange connections, especially on trucks in regions where road salt is used. The factory exhaust manifold bolts are also known to break, causing a leak at the cylinder head.
How to confirm: Listen for ticking or hissing noises from the exhaust system, especially when the engine is cold. Visually inspect the exhaust pipes and manifolds for black soot trails, which indicate a leak. A smoke test is the most definitive way to find small leaks.
Typical fix: Replace the leaking gasket or repair the cracked exhaust component. If a manifold bolt is broken, it will need to be extracted and replaced.
Est. part cost: $20-$200
Rare But Worth Checking
- Faulty Powertrain Control Module (PCM): This is extremely rare. The PCM should only be considered after all other possibilities, including the sensor, wiring, and exhaust leaks, have been definitively ruled out. A faulty PCM driver for the O2 sensor circuit is possible but unlikely.
- Blown Fuse for Heater Circuit: The oxygen sensor has an internal heater that helps it reach operating temperature quickly. This heater circuit is often protected by a fuse. If the fuse blows, the sensor may not operate correctly, triggering a circuit code. Check the fuse box for a fuse labeled 'O2 HTR' or similar.
Diagnosis Steps
- Connect an OBD-II scanner to confirm the P0136 code and check for any other related codes.
- Perform a thorough visual inspection of the Bank 1, Sensor 2 oxygen sensor (driver's side, after the catalytic converter). Look for any obvious damage to the sensor or its wiring harness. Pay close attention to where the harness might contact the exhaust pipe or driveshaft.
- Inspect the exhaust system for any leaks between the exhaust manifold and the downstream O2 sensor. Look for black soot marks.
- Use the live data function on your scan tool to observe the voltage from the Bank 1, Sensor 2. A healthy downstream sensor on a warm, running engine should show a relatively steady voltage, typically between 0.5V and 0.8V.
- If the voltage is stuck near 0V or 1V, or if it is not reading at all, the sensor is likely bad.
- If the wiring appears damaged, repair it. If the wiring looks good but the sensor signal is faulty, the most likely cause is the sensor itself.
- Before replacing the sensor, it's wise to test the wiring harness. Check for 12V at the heater circuit wire and a good ground. Then, check the signal and signal ground wires for continuity back to the PCM.
- Check the fuse for the O2 sensor heater circuit in the under-hood fuse block.
- If the sensor and wiring are confirmed to be good, the issue may be a rare PCM fault.
Parts You'll Likely Need
- Downstream Oxygen Sensor (Bank 1, Sensor 2)
(OEM #ACDelco 213-3867 (superseded by 213-4768 in many cases))— This is the component that the code directly identifies as having a circuit malfunction. Due to age and operating conditions, it is the most common failure point.
Trusted brands: ACDelco, Denso (e.g., 234-4668), Bosch, NGK/NTK
OEM price range: $60-$100
Aftermarket price range: $25-$75 - Oxygen Sensor Socket Set — A specialized socket with a cutout for the wire makes removing and installing the sensor much easier without damaging the wiring. It is considered an essential tool for this job.
Trusted brands: Lisle, OEMTools, GearWrench
Aftermarket price range: $10-$30
Related Codes That Often Appear With This One
- P0137 — This code means 'O2 Sensor Circuit Low Voltage (Bank 1, Sensor 2)'. It is a more specific version of P0136 and often points to a short to ground in the wiring or a completely dead sensor.
- P0138 — This code means 'O2 Sensor Circuit High Voltage (Bank 1, Sensor 2)'. It's another specific version of P0136, often caused by a short to power in the sensor's signal wire.
- P0140 — This code means 'O2 Sensor Circuit No Activity Detected (Bank 1, Sensor 2)'. This indicates the PCM is receiving no signal at all, often due to a broken wire, unplugged sensor, or a completely failed sensor heater circuit.
Mechanic-Grade Diagnostic Values
- O2 Sensor Heater Circuit Resistance — expected: 4 to 20 Ohms (when cold). Failure: A reading of 'OL' (Open Loop/infinite resistance) or 0 ohms (short circuit) indicates a failed heater element inside the sensor.
- O2 Sensor Heater Circuit Power (KOEO) — expected: Battery Voltage (~12V). Failure: 0V indicates a blown fuse (e.g., 'O2B' fuse) or a break in the power wire (typically pink) from the fuse block.
Hidden / Shadow Codes Worth Checking
- Mode $06: This is not a specific code, but a diagnostic mode that reveals results from the PCM's non-continuous self-tests. For P0136, a technician would examine the results for the Oxygen Sensor Monitor. A failing value for the test ID (TID) corresponding to the Bank 1 Sensor 2 circuit can confirm a problem, sometimes before the PCM sets a hard code. (see via Requires a professional scan tool capable of displaying Mode $06 data.)
Scan Tool Commands That Help
- Tech2 / GDS2 (or equivalent professional scanner): O2 Sensor Heater Control — This bidirectional command allows a technician to manually turn the B1S2 heater circuit on and off. It's used to verify the integrity of the heater circuit. The technician can command the heater 'ON' and then check for voltage at the connector or monitor the amperage draw to confirm the circuit and heater element are working, isolating the problem between the PCM, wiring, and the sensor itself.
Wiring & Ground Locations
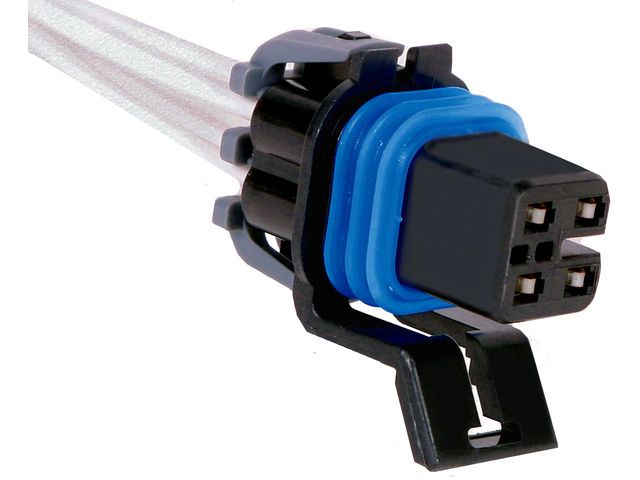
- B1S2 PCM Wires — At the 4-pin O2 sensor connector and the PCM connector.. The four wires typically have standard GM colors: Pink (Heater Power +12V), Black (Heater Ground), Tan (Low Signal / Signal Ground), and Purple (High Signal). Testing for power, ground, and continuity on these specific wires is essential for diagnosing a circuit fault.
- G103 / G104 — These are primary engine-to-chassis grounds. G103 is often located on the front of the left (driver's) side engine block. G104 is often on the rear of the right (passenger's) side cylinder head. Locations can vary slightly by year and 2WD/4WD configuration.. The PCM relies on these grounds for a stable reference. A corroded or loose G103 or G104 can cause erratic voltage readings from multiple sensors, including the O2 sensors, leading to a P0136 code even if the sensor and its direct wiring are good.
- O2 Sensor Connector — On the vehicle-side harness, above the transmission crossmember on the driver's side.. The connector itself is a common failure point due to moisture and heat. For 1999-2002 models, the connector could be a flat black or square white design depending on the sensor type. Later models (approx. 2003+) typically use a square or triangular connector. Mismatched connectors are a common issue when ordering replacement parts.
Real Owner Repair Stories
- GM-Trucks.com Forum User (2013 Suburban 5.3L (Similar GMT900 platform, issue is applicable)) — Check Engine Light with O2 sensor codes (P015B - delayed response) that kept returning after sensor replacement.
❌ Tried (didn't work) Replacing the Bank 1 Sensor 1 O2 sensor (code returned)., Resetting the code.
✅ What actually fixed it The root cause was a previously cross-threaded sensor bung that a prior owner had tac-welded. The threads were partially ruined, creating a small exhaust leak right at the sensor. The owner had to remove the Y-pipe, re-tap the bung with a thread chaser, and then reinstall the new sensor to get a proper seal, which finally resolved the code.
OEM Part Supersession History
ACDelco 213-3867→N/A - Often confused with 213-4768— These parts are for different applications, not direct supersessions.
Heads up: Part 213-3867 typically uses a square 4-pin connector. Part 213-4768 uses a triangular connector. They are not interchangeable. Verify the connector shape on your truck's harness visually before ordering, as part catalogs can be incorrect for these transition years.
Model Year Variations Within This Range
- 1999-2002: Trucks from this period could have either 'Case Grounded' or 'Isolated Ground' oxygen sensors depending on the assembly plant. This affects the sensor's internal wiring and the required part number. The connectors may be flat black or square white.
- 2003-2007: These years transitioned to primarily 'Isolated Ground' sensors. Connector shapes also evolved, with square and triangular connectors both being common. Visual inspection of the connector before ordering a replacement part is critical to avoid incompatibility.
Diagnostic Flowchart
Other Known Issues on This Vehicle
Issues unrelated to this code that are worth knowing about as an owner of this generation:
- Cracked 'Castech' Cylinder Heads 🔴 High — Affects a specific batch of heads marked with a 'Castech' logo, common enough to warrant a TSB. Often presents as mysterious coolant loss between 75k-150k miles. (Ref: TSB #06-06-01-019B)
- Intermediate Steering Shaft Clunk 🟡 Low — Extremely common across the entire GMT800 platform. A clunking or popping sound/feel in the steering wheel, especially at low speeds. Can occur at any mileage. (Ref: TSB #00-02-35-003L)
- Instrument Cluster (Stepper Motor) Failure 🟠 Medium — Very common, affecting millions of GM vehicles from this era. Gauges (speedometer, tachometer, etc.) become stuck, erratic, or read incorrectly. Typically occurs after 5-10 years. (Ref: GM Special Coverage Adjustment #07187C (expired))
- Rusted Brake Lines 🔴 High — Prevalent in 'salt belt' states. The factory steel brake lines are prone to severe corrosion, which can lead to a sudden loss of braking fluid and pressure. NHTSA investigated but did not issue a recall. (Ref: NHTSA Investigation PE10-011 (Closed, no recall))
- Intake Manifold Gasket Leaks 🟠 Medium — Common after 100,000 miles. The original orange gaskets degrade, causing vacuum leaks that lead to a rough idle and lean codes (P0171, P0174).
- Fuel Pressure Regulator Failure 🟠 Medium — A common failure on early (1999-2003) return-style fuel systems. A leaking diaphragm can cause hard starting, rough idle, and rich running conditions.
Used vs. New Parts: Buying Guide for This Vehicle
When a used part is the smart pick: A used part is NEVER recommended for the oxygen sensor itself, as it is a wear-and-tear component with a finite lifespan. However, if the wiring connector is damaged, sourcing a used connector pigtail from a junkyard is an excellent and cost-effective repair method.
Donor-vehicle mileage cap: roughly under 150000 miles for the part to have meaningful remaining life.
What to inspect on the donor part:
- For a connector pigtail, ensure the plastic is not brittle or cracked.
- Check that the locking tab is intact and functional.
- Inspect the metal pins inside the connector for any signs of green or white corrosion.
- Ensure at least 6 inches of wire is attached to the pigtail for easier splicing.
OEM-only on this vehicle (don't cheap out):
- While not strictly 'OEM-only', using an ACDelco (OEM) or a known OEM supplier like Denso or NTK is very strongly recommended for oxygen sensors on this platform.
Aftermarket brands forum-validated for this vehicle:
- ACDelco (GM Original Equipment)
- Denso
- NGK / NTK
Brands owners have reported issues with on this vehicle:
- Bosch (has mixed reviews for this specific generation of Silverado; some owners report persistent codes that are only resolved by switching to ACDelco or Denso).
- Generic, unbranded 'universal' sensors that require splicing are a frequent cause of repeat failures.
Real Owner Stories
Aggregated from forums and TSBs cited above. Mileages and costs reflect what owners reported in those sources.
2004 Chevrolet Silverado 1500 5.3L V8 — ~110000 miles
Symptoms: Check Engine Light on, failed state emissions inspection, and a slight reduction in fuel economy.
What fixed it: Replacement of the Bank 1, Sensor 2 oxygen sensor using an oxygen sensor socket and penetrating oil to remove the seized sensor.
Source hint: Common causes and symptoms section for LM7 5.3L V8
2002 Chevrolet Silverado 1500 5.3L V8 — ~125000 miles
Symptoms: Ticking noise from the engine bay especially when cold; black soot marks found near the exhaust manifold.
What fixed it: Extraction and replacement of a broken exhaust manifold bolt and a new gasket.
Source hint: Exhaust Leak cause section and diagnosis steps
Related OBD-II Codes
Frequently Asked Questions
Where is the Bank 1, Sensor 2 oxygen sensor located on my 5.3L Silverado?
Could the common 'Castech' cylinder head issue on my LM7 engine be related to P0136?
My Silverado has a ticking noise and P0136; are they related?
Is there a specific fuse I should check for the O2 sensor on my truck?
Why does my Silverado's wiring keep failing for this sensor?
Will a vacuum leak from my intake manifold gaskets cause P0136?
Helpful Videos

We Have This Part in Stock


The information in this article is provided for general reference and educational purposes only. Vehicle specifications, procedures, and part compatibility can vary by production date, trim level, and region. Always consult your vehicle's factory service manual and verify part numbers before purchasing or performing repairs. Safety-critical components such as airbags, seat belts, and braking systems should be installed by a qualified professional.
- Chevrolet Silverado 1500:
- 🧭 Diagnostic Flowchart
- 🎬 Helpful Videos
- 🛍️ Shop This Part
- What's Unique About the 1999-2007 Chevrolet Silverado 1500
- Symptoms You May Notice
- Most Likely Causes
- Rare But Worth Checking
- Diagnosis Steps
- Parts You'll Likely Need
- Related Codes That Often Appear With This One
- Mechanic-Grade Diagnostic Values
- Hidden / Shadow Codes Worth Checking
- Scan Tool Commands That Help
- Wiring & Ground Locations
- Real Owner Repair Stories
- OEM Part Supersession History
- Model Year Variations Within This Range
- Other Known Issues on This Vehicle
- Used vs. New Parts: Buying Guide for This Vehicle
- Real Owner Stories
- 2004 Chevrolet Silverado 1500 5.3L V8 — ~110000 miles
- 2002 Chevrolet Silverado 1500 5.3L V8 — ~125000 miles
- Related OBD-II Codes
- Frequently Asked Questions
- 🎟️ Get 5% Off