
P0136 on 2017-2020 Hyundai Elantra: O2 Sensor Circuit Malfunction Causes and Fixes
This code points to a problem with the downstream oxygen sensor (Bank 1, Sensor 2). The most likely fix is replacing the sensor itself, which is located on the exhaust after the catalytic converter. Expect to pay $50-$120 for an aftermarket sensor or around $170 for an OEM part. It's a DIY-friendly job with the right tools, primarily an O2 sensor socket.
- P0136 on a 2017-2020 Elantra almost always means the downstream oxygen sensor (after the catalytic converter) has failed.
- Before buying a new sensor, always perform a quick visual inspection of the wiring and connector for obvious damage like melting or corrosion.
- Replacing the sensor is a manageable DIY job with a 22mm (or 7/8") oxygen sensor socket.
What's Unique About the 2017-2020 Hyundai Elantra
For the 2017-2020 (AD generation) Elantra, particularly with the common 2.0L Nu MPI engine, the P0136 code is a straightforward and common issue. There are no widespread, unique design flaws that cause this code. The problem is almost always related to the standard wear-and-tear of the sensor itself or damage to its exposed wiring under the car. The repair is a common task for both DIYers and professional mechanics on this platform, with numerous video guides available.
Symptoms You May Notice
- Check Engine Light is on
- Failure to pass an emissions test
- Potential for slightly reduced fuel economy
- Possible rough idle or engine hesitation in some cases
- In rare cases, a sulfur or "rotten egg" smell from the exhaust
- Replacing the upstream (Bank 1, Sensor 1) oxygen sensor instead of the downstream (Bank 1, Sensor 2).
- Replacing the catalytic converter. While a P0420 code often points to a bad converter, a P0136 code specifically indicates a fault in the sensor's circuit, which should be diagnosed first.
Most Likely Causes
- Failed Downstream Oxygen Sensor (Bank 1, Sensor 2) 🔴 High Probability → Shop Oxygen Sensor Oxygen sensors are wear-and-tear items with a finite lifespan, typically failing due to contamination from exhaust gases and constant exposure to extreme heat cycles.
How to confirm: Using a scan tool, observe the live data for the B1S2 voltage. A healthy sensor should show a relatively steady voltage (typically 0.5V-0.8V) once the engine is warm. If the voltage is stuck low (near 0.1V), stuck high (near 0.9V), or fluctuating rapidly like the upstream sensor, it has likely failed.
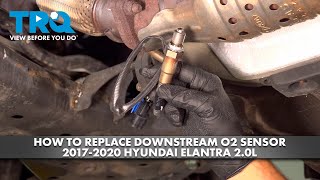
Typical fix: Replace the downstream oxygen sensor. The new sensor should come with anti-seize compound on the threads. A special 22mm (or 7/8") oxygen sensor socket is highly recommended for removal and installation. 🎬 See this step-by-step downstream sensor replacement walkthrough
Est. part cost: $50-$120 - Damaged Wiring or Connector 🟡 Medium Probability The sensor's wiring is routed under the vehicle and can be damaged by road debris, speed bumps, or become brittle from heat cycles. The wire can also melt if it comes into contact with the hot exhaust pipe, causing a short.
How to confirm: Visually inspect the entire length of the wiring harness from the O2 sensor to its connection point, which is often on a bracket on the firewall. Look for any signs of chafing, melting, cracking, or corrosion on the connector pins.
Typical fix: Repair the damaged section of wire or replace the connector pigtail. Ensure the harness is properly secured in its retaining clips away from the exhaust.
Est. part cost: $15-$40 - Exhaust Leak ⚪ Low Probability Rust can cause leaks to form in the exhaust system, particularly at gaskets or weld seams. A leak before the sensor allows outside air to enter the exhaust stream.
How to confirm: Listen for a ticking or hissing sound from the exhaust when the engine is running. You can also have a helper temporarily block the tailpipe with a rag while you feel for leaks along the exhaust pipes and flanges before the sensor. A leak will allow unmetered oxygen in, skewing the sensor's readings and causing a fault.
Typical fix: Repair the leak by replacing the faulty gasket or welding the cracked section of pipe.
Est. part cost: $20-$150
Rare But Worth Checking
- Blown Fuse: The oxygen sensor's internal heater is powered by a fuse. While not common, a short in the heater circuit can blow the fuse, causing a circuit code. On many Hyundais, this fuse is in the engine bay fuse box and may be labeled 'SENSOR 1' or 'SNSR 3' (15A).
- Faulty Powertrain Control Module (PCM): This is extremely rare. The PCM itself can fail, but this should only be considered after all other possibilities (sensor, wiring, leaks, fuses) have been exhaustively ruled out. In some cases, a PCM software update may be available to address overly sensitive fault logic, though no specific TSB for P0136 on this platform is widely documented.
Diagnosis Steps
- Connect an OBD-II scanner to confirm P0136 is the active code and check for any other related codes.
- With the scanner, access the live data stream. Warm up the engine and observe the voltage for 'O2S B1S2' (Bank 1, Sensor 2). It should be relatively stable between 0.5V and 0.8V. If it's stuck near 0V, near 1.0V, or fluctuating rapidly like the upstream sensor, the sensor is the primary suspect.
- Perform a thorough visual inspection. Safely raise the vehicle and locate the downstream O2 sensor on the exhaust pipe, situated after the primary catalytic converter.
- Inspect the sensor's wiring harness for any signs of melting, chafing, or physical damage. Follow the wire up to the firewall and check that the connector is secure and free of corrosion.
- Check for exhaust leaks between the engine and the downstream sensor. Listen for unusual noises and feel for escaping air.
- Check the fuse for the O2 sensor heater circuit, often labeled 'SENSOR 1' or 'SNSR 3' in the engine compartment fuse box.
- If the wiring and fuse are good, the next step is typically to replace the oxygen sensor, as it is the most common point of failure.
Parts You'll Likely Need
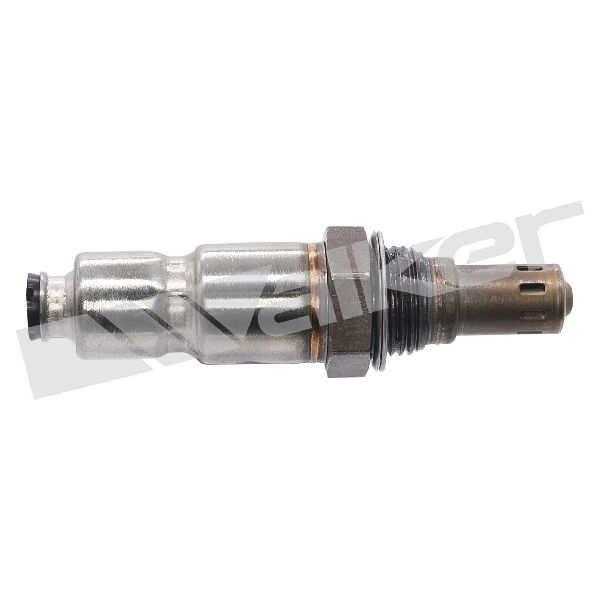
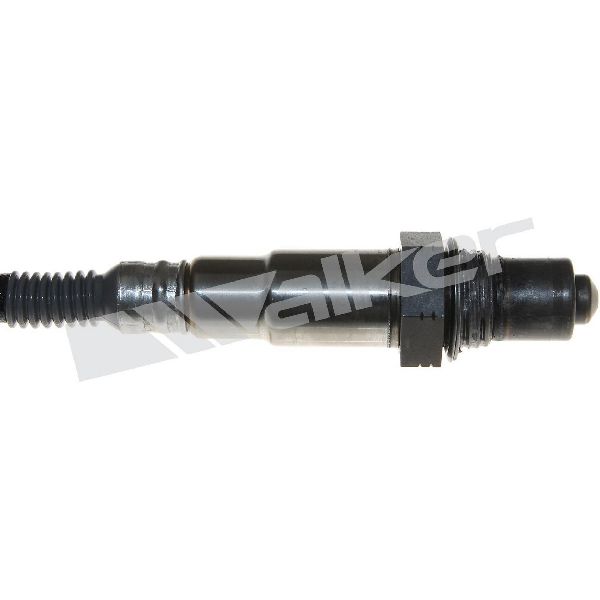
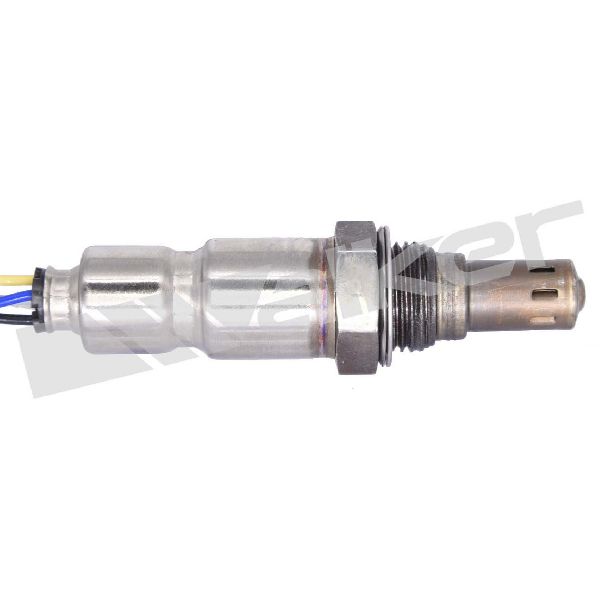
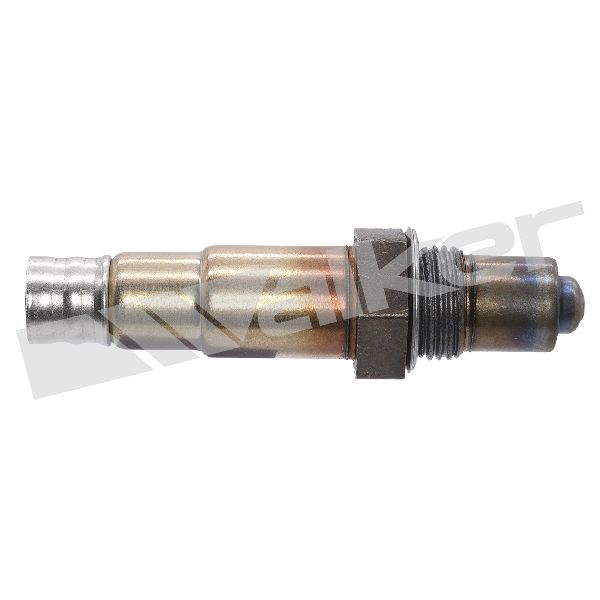
- Downstream Oxygen Sensor (Bank 1, Sensor 2)
(OEM #39210-2E410)— This is the most common failure point for a P0136 code. It is a standard maintenance part that wears out over time. The OEM part number for the 2.0L Nu engine is often 39210-2E410, but always verify with the vehicle's VIN. The part number 39210-03AA5 cited in pass 2 is for the 1.4L engine.
Trusted brands: Hyundai (Genuine OEM), NGK/NTK, Denso, Bosch, Walker
OEM price range: $150-$200
Aftermarket price range: $50-$120
Related Codes That Often Appear With This One
- P0137 — This code indicates 'O2 Sensor Circuit Low Voltage'. It can appear with P0136 if the sensor signal wire is shorted to ground or the sensor fails internally with a low voltage output.
- P0138 — This code indicates 'O2 Sensor Circuit High Voltage'. It can appear with P0136 if the sensor signal wire is shorted to a power source.
- P0141 — This code indicates a malfunction in the heater circuit of the same sensor (B1S2). A failed heater element is a very common reason for the entire sensor to be replaced and can trigger the P0136 circuit code simultaneously.
Mechanic-Grade Diagnostic Values
- Downstream O2 Sensor (B1S2) Heater Circuit Resistance — expected: 5 to 25 Ohms. Failure: An open circuit (infinite resistance, 'OL' on multimeter) indicates a failed heater element. A reading outside the 5-25 Ohm range also suggests failure.
- Downstream O2 Sensor (B1S2) Signal Voltage (Warm Engine, Steady RPM) — expected: Relatively steady 0.5V - 0.8V. Failure: Voltage stuck near 0.1V (short to ground), stuck near 0.9V (short to power), or fluctuating rapidly like an upstream sensor indicates a failed sensor or circuit issue.
- O2 Sensor Heater Fuse — expected: 15A. Failure: Blown fuse. This will cut power to the heater circuit.
Scan Tool Commands That Help
- Hyundai GDS (Global Diagnostic System) / KDS: DTC Analysis & Data Analysis — The dealer-level tool allows for precise reading and clearing of codes for specific modules. The 'Data Analysis' function provides live data streams for all sensors, including graphing the O2 sensor voltage to confirm if it's flatlined or fluctuating incorrectly.
- Generic OBD-II Scanner with Live Data: Live Data / Data Stream for O2S B1S2 — Essential for initial diagnosis. Observing the live voltage of Bank 1 Sensor 2 is the primary method to confirm sensor failure. A healthy downstream sensor has a steady voltage, while a failed one is often flat or erratic.
Wiring & Ground Locations
- Downstream O2 Sensor Connector — The wiring harness for the downstream sensor runs up from the exhaust pipe. The connector itself is located on a bracket at the back of the engine, near the firewall/wiper cowl area.. This is the primary point for all electrical testing. You can test for resistance on the sensor side and for 12V power/ground on the vehicle harness side. Its location near the hot engine makes it susceptible to heat damage.
- Engine Bay Fuse Box ('SNSR 3' or 'SENSOR 1' fuse) — Located in the main fuse box in the engine compartment.. This 15A fuse provides power to the oxygen sensor's heater circuit. If this fuse is blown, it will trigger a heater circuit code (like P0141) and can also cause a general circuit malfunction code like P0136.
- Ground Point G07 — On the left side of the engine compartment, near the strut tower.. This is a major engine and sensor ground point. While less common for this specific code, a poor ground here can cause a variety of erratic sensor readings and codes.
OEM Part Supersession History
39210-2E200→39210-2E410, 39210-2ECC0 (verify by VIN)— Standard part revisions and supplier changes over the vehicle's production run.
Heads up: While multiple part numbers may fit, the 2018-2020 models often use the 39210-2ECC0 part number. It is critical to verify the correct part number with the vehicle's VIN, as using an incorrect revision can lead to immediate or premature failure.
Model Year Variations Within This Range
- 2019-2020: The 2019 model year marked a facelift for the Elantra. While the 2.0L Nu engine remained, some electrical components and part numbers may have been updated. For example, the O2 sensor part number may have shifted to 39210-2ECC0 for these later years. Always confirm with a VIN.
Diagnostic Flowchart
Other Known Issues on This Vehicle
Issues unrelated to this code that are worth knowing about as an owner of this generation:
- Engine Failure / Excessive Oil Consumption (2.0L Nu MPI) 🔴 High — Affects 2019-2020 models. Caused by improperly heat-treated piston oil rings, leading to cylinder bore scuffing, oil consumption, stalling, and potential fire risk. (Ref: Hyundai Recall 209 / NHTSA 21V301000)
- Transmission Shifting Issues (Hesitation/Jerking) 🟠 Medium — Common complaint, especially on models with the CVT. Symptoms include hesitation from a stop and rough shifting. Often related to transmission control unit (TCU) software. (Ref: Various software update TSBs may apply (e.g., TSB 19-AT-010H, 19-AT-016H).)
- Ignition Coil Failure 🟡 Low — A common wear-and-tear item that can fail after 40,000-70,000 miles, causing misfires and a flashing check engine light. It is recommended to replace all four coils at once.
- Crankshaft Position Sensor Failure 🟠 Medium — Can fail intermittently, causing stalling conditions, or fail completely, causing a no-start condition. A relatively common sensor failure on this platform.
- Canister Purge Valve (CPV) Failure 🟡 Low — A common emissions component failure that can cause a check engine light, rough idle, and difficulty starting immediately after refueling. Typically occurs between 30,000 and 60,000 miles.
Used vs. New Parts: Buying Guide for This Vehicle
When a used part is the smart pick: For this repair, using a used part is strongly discouraged. Oxygen sensors are wear-and-tear items with a limited lifespan determined by heat cycles and mileage. A used sensor from a junkyard has an unknown history and is likely to fail soon, if it works at all, making the labor a wasted effort.
Donor-vehicle mileage cap: roughly under 10000 miles for the part to have meaningful remaining life.
What to inspect on the donor part:
- Not applicable. Do not buy a used oxygen sensor.
OEM-only on this vehicle (don't cheap out):
- While not strictly 'OEM-only', it is highly recommended to use either a genuine Hyundai part or a part from a known OEM supplier like NTK or Denso. This ensures the electrical characteristics (especially heater resistance) match the vehicle's expectations.
Aftermarket brands forum-validated for this vehicle:
- NTK (often the original supplier)
- Denso
Brands owners have reported issues with on this vehicle:
- Universal-fit sensors requiring splicing
- Unbranded, low-cost sensors from online marketplaces
- Some owner reports suggest issues with certain Bosch sensors not meeting the specific resistance requirements for Hyundai vehicles.
Real Owner Stories
Aggregated from forums and TSBs cited above. Mileages and costs reflect what owners reported in those sources.
2019 Elantra — 119304 miles
Symptoms: O2 sensor failed, which led to a rough idle. The heat from the damaged catalytic converter also melted an axle boot.
What fixed it: The owner was quoted for a catalytic converter replacement and an axle boot replacement.
Cost: $1800-$1900
Source hint: r/HyundaiElantra thread titled 'Catalytic converter failing. Can I and should I replace?'
2006 Hyundai Elantra
Symptoms: A user experiences a P0136 code shortly after replacing sensors for a P0420 code.
What fixed it: The source highlights the importance of using correct OEM-spec sensors and checking for wiring damage or exhaust leaks post-repair.
Source hint: Car Talk Community - '2006 Hyundai Elantra - P0136 code'
Related OBD-II Codes
Frequently Asked Questions
Is there a recall for the 2019-2020 Hyundai Elantra that could be related to my engine issues and P0136?
Where is the Bank 1, Sensor 2 oxygen sensor located on my Elantra?
What voltage should I see for the downstream O2 sensor on my scan tool?
Could a blown fuse cause a P0136 code on this vehicle?
I just replaced my sensors but the code returned; what should I check next?
What tools are recommended for replacing the O2 sensor on a 2017-2020 Elantra?
Helpful Videos


We Have This Part in Stock


The information in this article is provided for general reference and educational purposes only. Vehicle specifications, procedures, and part compatibility can vary by production date, trim level, and region. Always consult your vehicle's factory service manual and verify part numbers before purchasing or performing repairs. Safety-critical components such as airbags, seat belts, and braking systems should be installed by a qualified professional.
- Hyundai Elantra:
- 🧭 Diagnostic Flowchart
- 🎬 Helpful Videos
- 🛍️ Shop This Part
- What's Unique About the 2017-2020 Hyundai Elantra
- Symptoms You May Notice
- Most Likely Causes
- Rare But Worth Checking
- Diagnosis Steps
- Parts You'll Likely Need
- Related Codes That Often Appear With This One
- Mechanic-Grade Diagnostic Values
- Scan Tool Commands That Help
- Wiring & Ground Locations
- OEM Part Supersession History
- Model Year Variations Within This Range
- Other Known Issues on This Vehicle
- Used vs. New Parts: Buying Guide for This Vehicle
- Real Owner Stories
- 2019 Elantra — 119304 miles
- 2006 Hyundai Elantra
- Related OBD-II Codes
- Frequently Asked Questions
- 🎟️ Get 5% Off