
P0136 on 2013-2016 Jaguar XF: O2 Sensor Circuit Malfunction Causes and Fixes
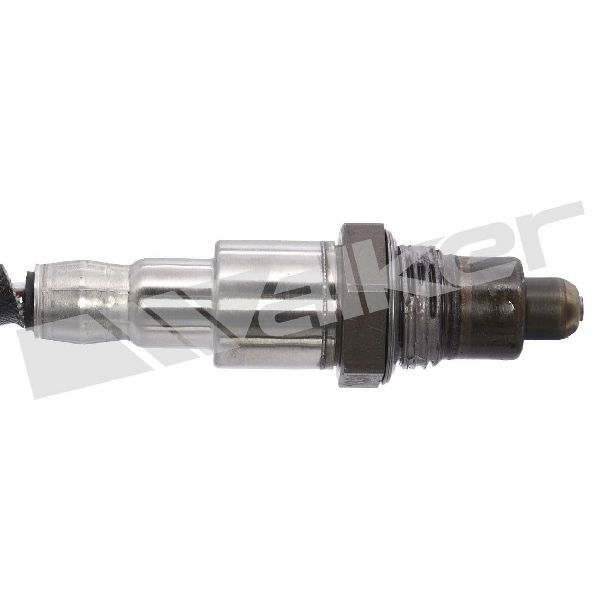
This code indicates a fault with the Bank 1, Sensor 2 oxygen sensor, which is the downstream sensor on the passenger side (in LHD markets). The most common fix is replacing the sensor itself. Expect to pay between $60-$120 for an aftermarket part and $180-$250 for an OEM sensor. It's a manageable DIY job for those with the right tools, but the sensor can be difficult to remove.
- P0136 on your Jaguar XF almost always points to the downstream oxygen sensor on the passenger side (Bank 1, Sensor 2).
- The most likely fix is to replace the sensor itself. This is a very common issue.
- Before buying a new sensor, always perform a quick visual inspection of the wiring and connector for obvious damage like melting or corrosion.
- This issue will not stop you from driving the car, but it should be fixed promptly to ensure you can pass an emissions test and prevent potential damage to your catalytic converter.
- Be sure to buy the correct sensor for your specific year (2013-2015 vs. 2016) and engine, as part numbers differ.
What's Unique About the 2013-2016 Jaguar XF
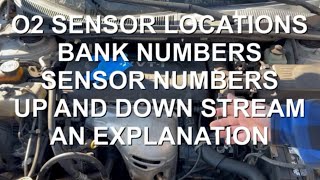
On this generation of Jaguar XF, the code P0136 is part of a larger family of oxygen sensor-related faults that Jaguar has acknowledged in multiple Technical Service Bulletins (TSBs). The manufacturer grouped dozens of HO2S (Heated Oxygen Sensor) codes together, including P0136, suggesting a general pattern of sensor or wiring circuit issues across their model lineup. These TSBs (SSM72477, JTB-00392-NAS-3) serve more as a broad acknowledgment of potential HO2S faults rather than providing a specific single fix for P0136, indicating that standard diagnostics are required. 🎬 Watch: A breakdown of P0136 causes and common fixes. Some engines, like the 3.0L V6, may even have three sensors per bank (upstream, mid-catalyst, and post-catalyst), which can cause confusion, but P0136 specifically points to the post-catalytic converter sensor (Sensor 2).
Diagnostic Flowchart
Tap your situation to follow the diagnostic path that matches what you're seeing on this vehicle.
Generation note: The 2013-2016 period covers two distinct Jaguar XF generations: the end of the first generation (X250, 2013-2015) and the start of the second (X260, 2016). While the code's meaning is the same, exhaust configurations and sensor part numbers can differ, so it's crucial to verify parts for your specific model year, engine, and VIN.
Symptoms You May Notice
- Check Engine Light is on.
- Failure to pass an emissions test.
- Potential for slightly decreased fuel economy.
- In some cases, a rougher than normal idle.
- A strong smell of gasoline from the exhaust if the air-fuel mixture is significantly affected.
- In rare cases, a rotten egg (sulfur) smell from the exhaust if the catalytic converter is affected.
- Replacing the catalytic converter when the actual problem is a much cheaper faulty O2 sensor or an exhaust leak.
- Replacing the wrong oxygen sensor (e.g., replacing the upstream Sensor 1 or a sensor on Bank 2). Always verify the sensor location before replacement. 🎬 See this guide to identifying sensor banks and locations.
Most Likely Causes
- Failed Oxygen Sensor (Bank 1, Sensor 2) 🔴 High Probability → Shop Oxygen Sensor As referenced in manufacturer TSBs (SSM72477, JTB-00392-NAS-3), oxygen sensors are a common point of failure on these vehicles. They are subject to extreme heat and contamination, leading to failure of the internal heating element or the sensing element itself.
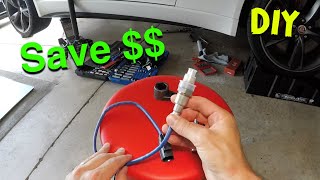
How to confirm: Use a scan tool to monitor the live voltage data from Bank 1, Sensor 2. A healthy downstream sensor should show a relatively stable voltage (typically 0.6V-0.8V). If the voltage is stuck low (near 0V), flatlined, or erratic compared to Bank 2 Sensor 2, the sensor has likely failed.
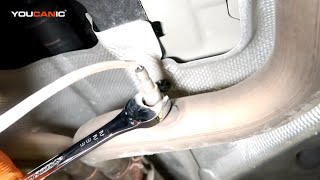
Typical fix: Replace the Bank 1, Sensor 2 oxygen sensor. This can be difficult due to rust and limited access. Using penetrating oil (like PB Blaster) and a specialized O2 sensor socket is highly recommended.
Est. part cost: $60-$250 - Damaged Wiring or Connector 🟡 Medium Probability The sensor wiring is routed under the vehicle and is exposed to heat, moisture, and road debris, which can cause it to become brittle, melt, or corrode over time. The connector itself can also accumulate dirt and moisture, leading to a poor connection.
How to confirm: Visually inspect the wiring harness and connector leading to the sensor for any signs of melting, chafing, corrosion, or loose pins. Perform a continuity test on the signal, ground, and heater circuit wires from the sensor connector to the PCM connector if no visible damage is found. Wiring diagrams are essential for this step.
Typical fix: Repair the damaged section of the wiring harness or replace the connector pigtail.
Est. part cost: $20-$50 - Exhaust System Leak ⚪ Low Probability
How to confirm: Visually inspect the exhaust manifold, pipes, and gaskets for cracks or black soot trails, particularly anywhere before or near the Bank 1 Sensor 2. A smoke test can definitively identify hard-to-see leaks. An audible ticking or hissing sound from the exhaust, especially when cold, can also indicate a leak.
Typical fix: Replace the leaking gasket or repair/replace the cracked exhaust component.
Est. part cost: $20-$300
Rare But Worth Checking
- Faulty Catalytic Converter: → Shop Catalytic Converter While a failing catalytic converter more commonly sets a P0420 code, it can sometimes cause erratic readings that the PCM misinterprets as a P0136 sensor circuit fault. This should be considered only after the sensor and its circuit have been ruled out.
- Faulty Powertrain Control Module (PCM): This is extremely rare. The PCM is the last component to suspect. All other possibilities, including the sensor, wiring, and exhaust leaks, must be exhaustively tested before considering PCM replacement. In some cases, a shorted O2 sensor could potentially damage the driver circuit within the PCM.
- Sensor Contamination: Use of certain fuel additives or internal engine leaks (coolant, oil) can contaminate the tip of the oxygen sensor, causing it to malfunction and produce incorrect voltage readings. A Reddit user noted their replacement sensor failed prematurely and was covered in black soot, suspecting overuse of a fuel additive was the cause.
Diagnosis Steps
- Read the code with an OBD-II scanner to confirm P0136 is present and check for any other related codes (e.g., P0141, P0137).
- Use the scanner's live data feature to observe the voltage from Bank 1, Sensor 2. On a warm engine, it should be relatively steady between 0.5V and 0.8V. Compare it to Bank 2, Sensor 2 for a reference. If it's stuck near 0V or 1V, or is flatlined, the sensor or circuit is faulty.
- Safely raise the vehicle and locate the sensor on the passenger side (LHD) exhaust pipe, after the catalytic converter.
- Thoroughly inspect the sensor's wiring harness and connector for any signs of melting, corrosion, physical damage, or loose pins.
- Check the exhaust system for any leaks between the engine and the sensor. Look for black soot marks or use a smoke machine for a more thorough check.
- If the wiring and exhaust are okay, the oxygen sensor itself is the most likely culprit. Before attempting removal, liberally apply a quality penetrating oil (like PB Blaster) to the sensor's threads and let it soak.
- Use a specialized O2 sensor socket (22mm or 7/8") and a long breaker bar to remove the sensor. Be prepared to use significant force. Some owners have had to cut the sensor wires to fit a 6-point deep socket for better grip on a stubborn sensor.
- After replacement, clear the codes and perform a drive cycle to ensure the fault does not return.
Parts You'll Likely Need
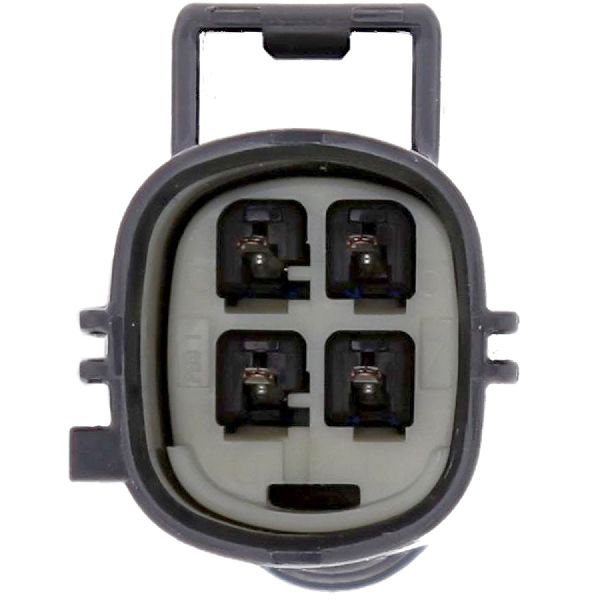
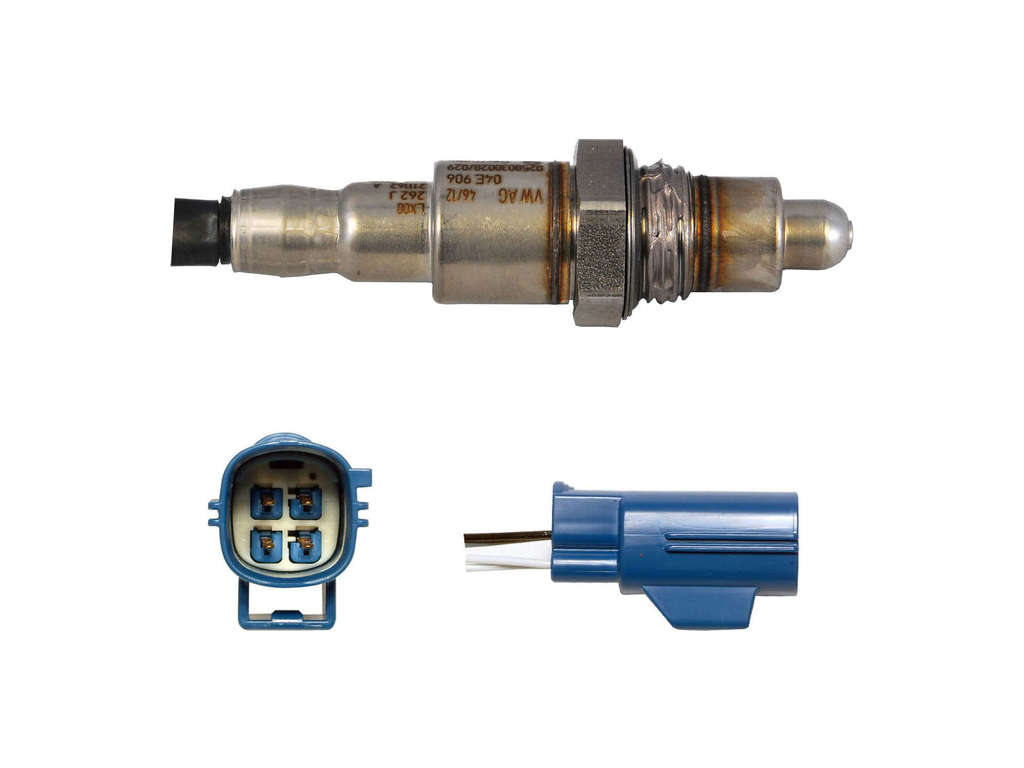
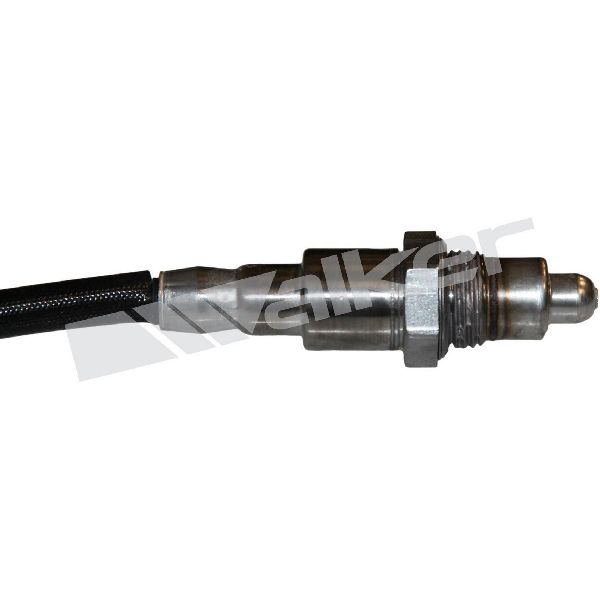
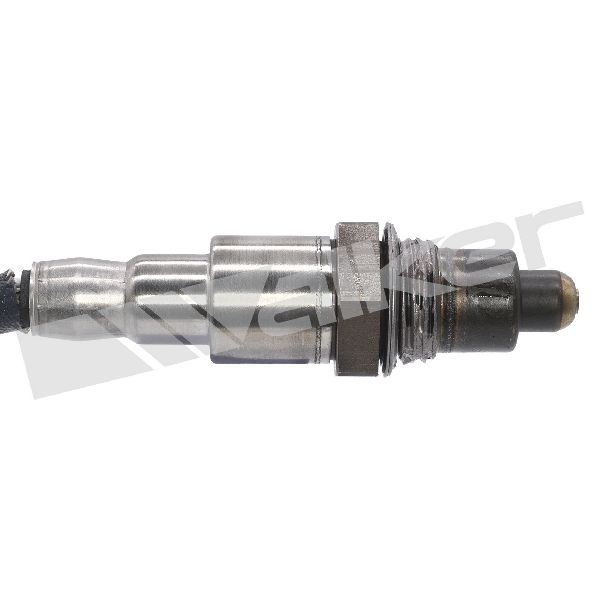
- Oxygen Sensor (Bank 1, Sensor 2)
(OEM #C2D23703 (superseded by T2R54607))— This is the component identified by the code and is the most frequent failure point for P0136.
Trusted brands: Bosch (OEM supplier), Denso, Walker Products, NTK
OEM price range: $180-$250
Aftermarket price range: $60-$120
Related Codes That Often Appear With This One
- P0141 — This code indicates a fault in the heater circuit of the same sensor (Bank 1, Sensor 2). They often appear together when the sensor's internal heating element fails, which is a very common failure mode.
- P0420 — This code means 'Catalyst System Efficiency Below Threshold (Bank 1)'. If the O2 sensor is providing false readings, it can trigger a P0420. Conversely, a failing catalyst can sometimes cause the O2 sensor readings to appear faulty, triggering a P0136.
- P0137 — This code indicates 'O2 Sensor Circuit Low Voltage (Bank 1, Sensor 2)'. P0136 is a general circuit malfunction, while P0137 is more specific to a low voltage condition. They often point to the same root causes.
Technical Service Bulletins (TSBs) & Recalls
- SSM72477: Mentions P0136 in a long list of faults related to pre, mid, or post catalyst heated oxyg
Platform-Specific Known Issues
- Jaguar has issued several Technical Service Bulletins (TSBs) that group P0136 with a wide array of other oxygen sensor codes. This indicates a recognized pattern of faults within the heated oxygen sensor (HO2S) systems on these vehicles. [⭐ MANUFACTURER TSB — highest authority] Bulletin #SSM72477, [⭐ MANUFACTURER TSB — highest authority] Bulletin #JTB-00392-NAS-3, [⭐ MANUFACTURER TSB — highest authority] Bulletin #JTB00392NAS1. These bulletins do not offer a single magic fix but confirm that HO2S circuit faults are a known issue requiring standard diagnosis.
Mechanic-Grade Diagnostic Values
- Downstream O2 Sensor (Sensor 2) Signal Voltage — expected: A relatively stable voltage, typically between 0.5V and 0.8V, on a fully warm engine at idle.. Failure: Voltage is stuck low (near 0.1V), stuck high (near 0.9V), or is completely flatlined.
- O2 Sensor Heater Circuit Wiring Continuity — expected: Less than 5.0 Ohms (typically very low, e.g., 0.4 Ohms).. Failure: High resistance or an open circuit (infinite resistance) indicates a break in the wire.
- O2 Sensor Heater Circuit Resistance at ECM — expected: Should be high, for example, 10 k-Ohm or higher when testing from the harness to ground.. Failure: A low resistance reading (e.g., 650 Ohms) can indicate a short to ground within the ECM itself.
Hidden / Shadow Codes Worth Checking
- Manufacturer-Specific DTCs: Jaguar's Symptom Driven Diagnostics (SDD) software may reveal deeper, more specific fault codes than a standard OBD-II scanner. These are not always presented directly. (see via Use Jaguar's SDD software. A technician noted that it may be necessary to check the 'Unrelated Events' section for codes if they do not appear under 'Related Events' based on the symptoms entered.)
Scan Tool Commands That Help
- Jaguar SDD (Symptom Driven Diagnostics): Configure existing module – Powertrain control module — This function should be run after replacing an oxygen sensor to ensure the Engine Control Module (ECM) is correctly configured for the new component, as per Jaguar's service instructions.
- Jaguar SDD (Symptom Driven Diagnostics): Datalogger / Live Data Monitoring — Used to monitor the live voltage output and heater circuit current of the oxygen sensors to verify their operation in real-time. This is a primary step in diagnosing whether the sensor is faulty.
Wiring & Ground Locations
- G1D120 / G1D123 — Located at the right rear of the engine compartment.. These are primary ground points in the engine bay. A poor connection here can cause a variety of sensor and module communication errors, including erratic readings from oxygen sensors.
- G2D115 — Located behind the instrument cluster.. This ground serves numerous components inside the cabin and within the dash, including modules that process sensor data. A fault here could potentially affect how sensor signals are interpreted.
- O2 Sensor Harness Connector — Under the vehicle, following the exhaust pipe upstream from the sensor location. The connector is typically mounted to the vehicle body or transmission.. This is the primary connection point to inspect for corrosion, moisture ingress, or physical damage that would directly cause a P0136 circuit malfunction.
Real Owner Repair Stories
- Jaguar Forums user (2006 Jaguar S-Type 3.0L (similar platform/engine logic)) — Codes P0036 and P0056 (heater circuit faults for downstream O2 sensors) appeared after major engine work.
❌ Tried (didn't work) Standard pinpoint tests from the factory service manual were followed.
✅ What actually fixed it The root cause was identified as an internal short within the Engine Control Module (ECM). The owner measured a resistance of 650 Ohms between the O2 heater control pin on the ECM connector and ground, indicating a shorted driver circuit on the ECM mainboard, likely damaged by a previous wiring short.
OEM Part Supersession History
C2D23703→C2D54167, then T2R54607 (current)— Standard part evolution for improved reliability or manufacturing changes.
Heads up: While the sensors may look physically similar, using the wrong part number for your VIN range can result in incorrect readings or communication errors. Always verify fitment with the vehicle's VIN.
Model Year Variations Within This Range
- 2013-2015 (X250) vs. 2016 (X260): The 2016 model year marked the introduction of the second-generation XF (X260). It is a completely different vehicle from the 2013-2015 XF (X250), featuring an all-new aluminum-intensive chassis, different engines (introduction of the Ingenium family), new electrical architecture, and a new infotainment system. While the P0136 code's meaning is consistent, the physical location of components, wiring diagrams, and specific part numbers may differ significantly between these two generations.
Helpful Videos

We Have This Part in Stock


The information in this article is provided for general reference and educational purposes only. Vehicle specifications, procedures, and part compatibility can vary by production date, trim level, and region. Always consult your vehicle's factory service manual and verify part numbers before purchasing or performing repairs. Safety-critical components such as airbags, seat belts, and braking systems should be installed by a qualified professional.
- Jaguar XF:
- 🧭 Diagnostic Flowchart
- 🎬 Helpful Videos
- 🛍️ Shop This Part
- What's Unique About the 2013-2016 Jaguar XF
- Symptoms You May Notice
- Most Likely Causes
- Rare But Worth Checking
- Diagnosis Steps
- Parts You'll Likely Need
- Related Codes That Often Appear With This One
- Technical Service Bulletins (TSBs) & Recalls
- Platform-Specific Known Issues
- Mechanic-Grade Diagnostic Values
- Hidden / Shadow Codes Worth Checking
- Scan Tool Commands That Help
- Wiring & Ground Locations
- Real Owner Repair Stories
- OEM Part Supersession History
- Model Year Variations Within This Range
- 🎟️ Get 5% Off