
P0137 on 2012-2018 Audi A6: O2 Sensor Circuit Low Voltage Causes and Fixes
For a 2012-2018 Audi A6, code P0137 almost always points to a failed downstream oxygen sensor (Bank 1, Sensor 2). Replacing the sensor is the most common fix, with parts costing around $80-$150 for an aftermarket brand like Bosch or NGK, and $150-$250 for a genuine Audi part. It's a DIY-friendly job with a difficulty of 2/5, requiring a special 22mm O2 sensor socket.
- P0137 on your Audi A6 points directly to the post-catalytic converter oxygen sensor on Bank 1 (passenger side for LHD).
- The most likely cause is simply that the sensor has worn out. Replacing it solves the problem in the vast majority of cases.
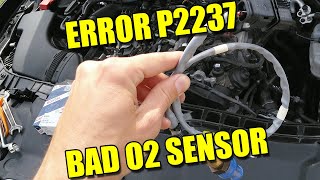
- Before buying a new sensor, perform a quick visual inspection of the sensor's wiring for any obvious melting or damage, as this is the second most likely cause.
- This is a manageable DIY repair. The biggest challenge is often removing the old sensor from the exhaust pipe without stripping it. Use a proper 22mm oxygen sensor socket and penetrating oil.
- Driving with this code is safe, but you won't pass an emissions test and should get it fixed to avoid masking more serious issues.
What's Unique About the 2012-2018 Audi A6
On the Audi A6 C7 platform, P0137 is a common and straightforward fault without significant model-specific complexities. The causes are typical for most modern vehicles: the sensor fails due to age and heat cycles, its wiring gets damaged from being under the car, or an exhaust leak develops. There are no widespread, unique design flaws on the A6 that make it exceptionally prone to this code beyond normal wear and tear for a component exposed to such harsh conditions. Access to the sensor and its connector can be tight but does not typically require removing major components.
Symptoms You May Notice
- Illuminated Check Engine Light is the most common and often only symptom.
- Failure to pass a vehicle emissions test.
- A faint exhaust or fuel smell may be present if the cause is an exhaust leak.
- Rough idle or hesitation, though this is uncommon as the downstream sensor has minimal impact on fuel control.
- Replacing the incorrect oxygen sensor, such as the upstream sensor (Bank 1, Sensor 1) or a sensor on Bank 2 (driver's side on LHD models).
Most Likely Causes
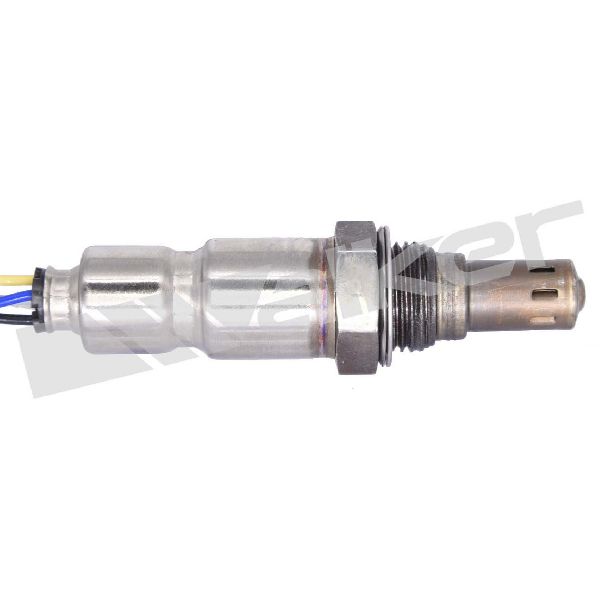
- Failed Downstream Oxygen Sensor (Bank 1, Sensor 2) 🔴 High Probability → Shop Oxygen Sensor Oxygen sensors operate in an extremely hot environment and degrade over time. Contamination from combustion byproducts or failure of the internal heating element are common failure modes after 80,000+ miles.
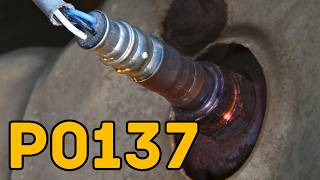
How to confirm: After confirming wiring is intact, use a scan tool to monitor the live voltage data for 'O2S B1S2' (Bank 1, Sensor 2). If the voltage is stuck below 0.2V on a fully warmed engine, the sensor is very likely faulty. A healthy downstream sensor should show a relatively stable voltage, typically between 0.6V and 0.8V. A reading below 400mV for more than 20 seconds can trigger the code. 🎬 Watch: 6 common causes of low O2 sensor voltage
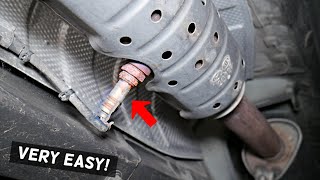
Typical fix: Replace the Bank 1, Sensor 2 oxygen sensor. Applying penetrating fluid to the threads before removal is highly recommended as they are often seized. A special 22mm slotted oxygen sensor socket is required to allow the wire to pass through.
Est. part cost: $80-$250 - Damaged O2 Sensor Wiring or Connector 🟡 Medium Probability → Shop Oxygen Sensor The sensor wiring is routed under the vehicle, making it susceptible to damage from road debris, corrosion, or melting on hot exhaust components. The connector is often located up in the transmission tunnel, requiring feel to disconnect.
How to confirm: Visually inspect the entire wiring harness from the sensor to its connection point. Look for frayed or melted wires, and check for corrosion inside the connector pins. Test for continuity and voltage at the connector with a multimeter. A resistance measurement above 1 Ohm in the circuit suggests a wiring problem.
Typical fix: Repair the damaged section of the wire or clean the connector terminals. If damage is severe, a harness repair pigtail may be needed.
Est. part cost: $10-$50 - Exhaust Leak ⚪ Low Probability Exhaust components can develop small cracks or gasket leaks over time due to rust and thermal stress. A leak before the Sensor 2 location can allow outside air to enter the exhaust stream, artificially lowering the voltage reading.
How to confirm: Perform a smoke test on the exhaust system to visually identify the source of any leaks. You may also hear a ticking or hissing sound from the leaking area, especially when the engine is cold.
Typical fix: Repair the leak by replacing the faulty gasket or welding the cracked component.
Est. part cost: $20-$300
Rare But Worth Checking
- Faulty Engine Control Module (ECM): → Shop Engine Control Module (ECM) This is extremely rare. The ECM's internal circuitry for reading the sensor voltage can fail. This should only be considered after all other possibilities, including the sensor and its entire circuit, have been definitively ruled out.
Diagnosis Steps
- Connect an OBD-II scanner to confirm P0137 is the active code and check for any other stored codes.
- Access the live data stream on the scanner. Warm the engine to operating temperature and observe the voltage for 'O2S B1S2' (Bank 1, Sensor 2). A reading stuck near 0.1V confirms the low voltage condition. A healthy downstream sensor should show a relatively stable voltage, typically between 0.6V and 0.8V on a warm, running engine.
- Raise the vehicle safely using a jack and jack stands. Visually inspect the Bank 1, Sensor 2 wiring harness for any signs of melting, chafing, or physical damage from the sensor to the main connector.
- Inspect the exhaust system for signs of leaks (black soot marks) around gaskets and welds, particularly between the catalytic converter and the downstream sensor.
- If a leak is suspected, perform a smoke test to pinpoint its location.
- If the wiring and exhaust system appear to be in good condition, the oxygen sensor itself is the most probable cause of the fault.
- Before removal, apply penetrating oil to the sensor's threads and let it soak. Use a 22mm oxygen sensor socket (either a crow's foot or slotted deep socket) and a breaker bar to remove the old sensor.
- Apply anti-seize compound to the threads of the new sensor before installation. Install and tighten to the manufacturer's specified torque.
- Clear the fault code with the scanner and perform a drive cycle to ensure the code does not return.
Parts You'll Likely Need
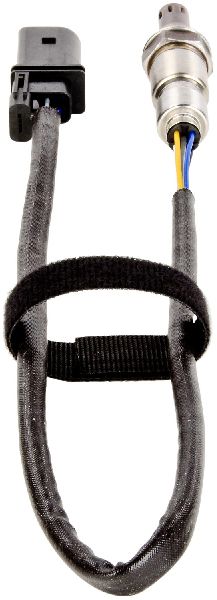
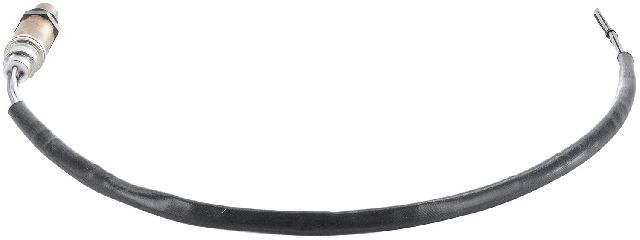
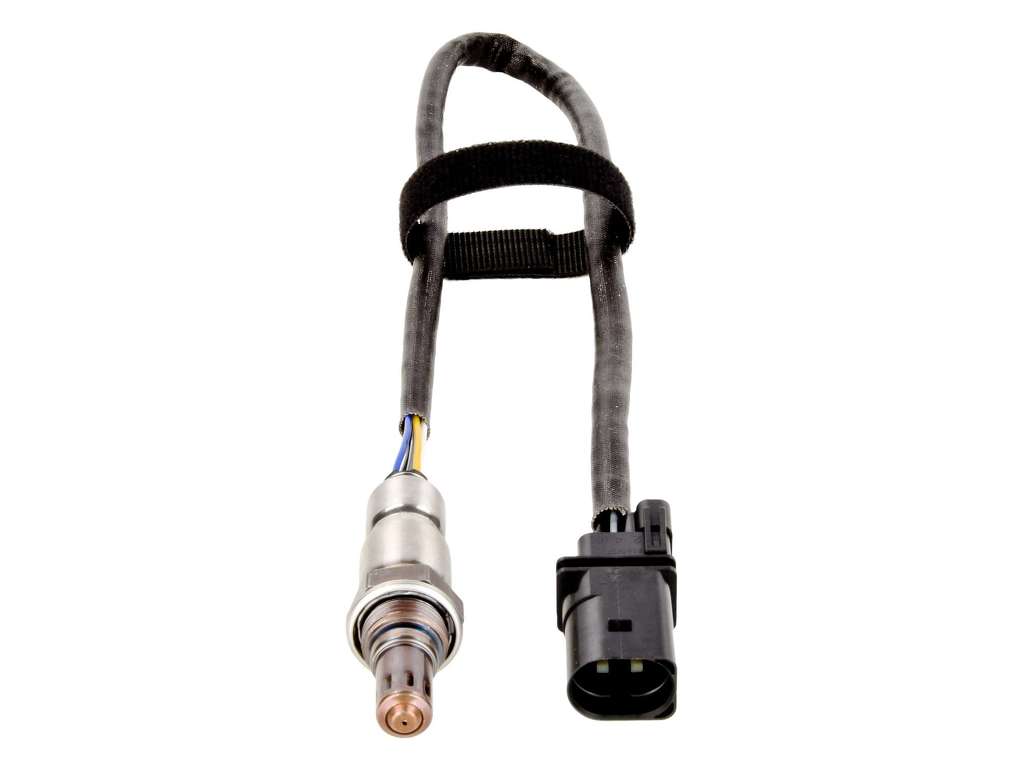
- Downstream Oxygen Sensor (Bank 1, Sensor 2)
(OEM #06E906265S (supersedes 06E906265F, 06E906265AA))— This sensor is the most frequent point of failure for code P0137 due to age, heat, and contamination.
Trusted brands: Bosch (e.g., 17368), NGK/NTK (e.g., 22511)
OEM price range: $150-$250
Aftermarket price range: $80-$150
Related Codes That Often Appear With This One
- P0171 — If a significant vacuum or exhaust leak is the root cause, the system may also register a 'System Too Lean (Bank 1)' code.
- P2096 — This code for 'Post Catalyst Fuel Trim System Too Lean Bank 1' can appear alongside P0137 if an exhaust leak is introducing excess oxygen after the primary sensor but before the secondary sensor.
- P0420 — If the downstream sensor is failing, it may trigger codes related to catalyst efficiency, like P0420, as its primary job is to monitor the converter.
Platform-Specific Known Issues
- On V6 models, Bank 1 is the passenger side (for LHD North American cars) and Bank 2 is the driver's side. A common mistake is replacing the sensor on the wrong bank. 🎬 See this guide to locate Bank 1 Sensor 2
- The electrical connector for the downstream sensor can be difficult to access, as it is often tucked up high on the transmission tunnel. Owners report needing to disconnect it by feel rather than by sight.
Mechanic-Grade Diagnostic Values
- O2 Sensor Signal Circuit Resistance — expected: Less than 1.0 Ω. Failure: Resistance above 1.0 Ω suggests a compromised wire, high-resistance connector, or poor ground connection.
- O2 Sensor Heater Circuit — expected: While a specific resistance (Ohm) value is not readily available, the circuit can be tested for presence of voltage (typically 12V) and continuity. The heater is crucial as the sensor only operates effectively around 600°F.. Failure: Absence of voltage with key-on, or an open circuit (infinite resistance) reading on the heater pins of the sensor indicates a failure.
- VCDS Live Data (Post-Cat) — expected: In VCDS, monitor Measuring Value Blocks (MVB) for Group 030-049, which contain O2 sensor data. A healthy B1S2 sensor should show a steady voltage around 0.6-0.8V.. Failure: The voltage for Bank 1 Sensor 2 is stuck below 0.2V and does not fluctuate.
Scan Tool Commands That Help
- VCDS (VAG-COM): Measuring Value Blocks (MVB) - Groups 032, 033, 036 — Use these groups to observe O2 sensor voltage and lambda control values in real-time. Group 032 shows learned fuel trim values, which can indicate if the ECU is compensating for a perceived lean condition. Group 033 shows the live voltage of the Bank 1 post-cat sensor. Group 036 shows the results of the catalytic converter aging test, which relies on this sensor's reading.
Wiring & Ground Locations
- Engine Block Ground Point — On the C7 platform, a key engine ground point is located in the right (passenger side for LHD) engine compartment, near the alternator.. A poor engine ground can introduce electrical noise or a voltage offset into sensor circuits, including the O2 sensors. While the O2 sensor has its own ground wire in the harness, that ground path ultimately terminates at a chassis or engine block ground. Verifying this main ground is clean and tight is a crucial step when diagnosing persistent, unexplained low voltage codes.
OEM Part Supersession History
06E906265F, 06E906265AA→06E906265S— Standard part revision by the manufacturer to improve longevity, material, or supplier.
Heads up: The new part number (06E906265S) is a direct replacement for the older versions and should be fully compatible.
Diagnostic Flowchart
Other Known Issues on This Vehicle
Issues unrelated to this code that are worth knowing about as an owner of this generation:
- 3.0T Water Pump & Thermostat Failure 🔴 High — Commonly occurs between 60,000 and 100,000 miles. The plastic housings can crack, leading to coolant leaks. (Ref: TSB 01 16 68 / 2040491 addresses a related software update for a false 'Coolant pump mechanical malfunction' DTC (P1B1C00), but physical leaks are the more common owner complaint.)
- 3.0T PCV Valve Failure 🔴 High — Widespread issue. The diaphragm tears, causing a significant vacuum leak, a high-pitched whistling noise at idle, and high/unstable idle.
- 2.0T Timing Chain Tensioner Failure 🔴 High — Primarily affects earlier EA888 Gen 2 engines (approx. 2012-2015). Failure can cause the timing chain to jump, leading to catastrophic engine damage. (Ref: Subject of a class-action lawsuit settlement which extended warranties for this component.)
- 2.0T Excessive Oil Consumption 🟠 Medium — Also more common on earlier EA888 engines due to piston ring design. Owners may need to add oil between changes. (Ref: Also addressed by a class-action lawsuit for some model years.)
- Active Engine Mount Failure 🟠 Medium — The fluid-filled active engine mounts commonly fail around 60,000-80,000 miles, causing excessive engine movement, vibration at idle in drive, and a 'thud' when accelerating or decelerating.
- ADAS Camera Module Failure 🟡 Low — The camera for Adaptive Cruise Control (ACC) and Lane Assist, mounted on the windshield, can fail due to heat cycles, causing faults like C110702 and disabling driver-assist features.
Used vs. New Parts: Buying Guide for This Vehicle
When a used part is the smart pick: It is almost never a smart choice to buy a used oxygen sensor. They are wear-and-tear items with a finite lifespan, and a used part may have very little life left or could be faulty from the start. The labor to install the part is the same, making it a poor value proposition.
Donor-vehicle mileage cap: roughly under 50000 miles for the part to have meaningful remaining life.
What to inspect on the donor part:
- If buying used is unavoidable, ensure the part comes from a low-mileage vehicle.
- Inspect the electrical connector for any signs of corrosion, melted plastic, or broken locking tabs.
- Check that the sensor tip is not physically damaged or heavily coated in white or black deposits.
- Ensure the wiring harness is not frayed, melted, or brittle.
OEM-only on this vehicle (don't cheap out):
- While not strictly 'OEM-only', using a sensor from the original equipment manufacturer (like Bosch or NTK) is highly recommended over generic, no-name brands.
Aftermarket brands forum-validated for this vehicle:
- Bosch (often the OEM supplier for Audi).
- NGK / NTK (a highly regarded OEM supplier for many brands).
- Denso (another top-tier OEM supplier).
Brands owners have reported issues with on this vehicle:
- Avoid 'universal' oxygen sensors that require you to splice the old connector onto the new sensor. The wires in an O2 sensor harness are often made of special materials that are difficult to solder or crimp properly, leading to high resistance and a repeat failure.
Real Owner Stories
Aggregated from forums and TSBs cited above. Mileages and costs reflect what owners reported in those sources.
2012-2018 Audi A6 3.0T V6 — ~85000 miles
Symptoms: The owner experienced a slow-reacting sensor and used an OBD app to diagnose the fault. They noted the difficulty of reaching the connector located high in the transmission tunnel.
What fixed it: Replacement of the oxygen sensor using a 22mm oxygen sensor socket after disconnecting the harness by feel.
Source hint: Audi Resource Forum (Singapore) - ProBoards - 'Oxygen Sensor replacement on C7 A6 3.0T'
2012-2018 Audi A6 (C7 Platform)
Symptoms: Illuminated Check Engine Light with code P0137; the owner was also concerned about other common platform issues like engine mounts and thermostat failures.
What fixed it: Downstream oxygen sensor replacement.
Source hint: AudiWorld - 'A6 (C7 Platform) Discussion'
Related OBD-II Codes
Frequently Asked Questions
Where is Bank 1, Sensor 2 located on my North American 3.0T V6 Audi A6?
I'm seeing P0137; could this be related to the common 3.0T PCV valve failure?
Is there a TSB for the P0137 code on the 2012-2018 Audi A6?
What special tools do I need to replace the Bank 1 Sensor 2 O2 sensor myself?
Why is the connector for the downstream sensor so hard to find?
Could an exhaust leak cause a P0137 instead of a bad sensor?
Helpful Videos

![How to Fix P0137 Engine Code in 4 Minutes [3 DIY Methods / Only $9.42]](https://img.youtube.com/vi/D7iaXnsbzWQ/mqdefault.jpg)
We Have This Part in Stock


The information in this article is provided for general reference and educational purposes only. Vehicle specifications, procedures, and part compatibility can vary by production date, trim level, and region. Always consult your vehicle's factory service manual and verify part numbers before purchasing or performing repairs. Safety-critical components such as airbags, seat belts, and braking systems should be installed by a qualified professional.
- Audi A6:
- 🧭 Diagnostic Flowchart
- 🎬 Helpful Videos
- 🛍️ Shop This Part
- What's Unique About the 2012-2018 Audi A6
- Symptoms You May Notice
- Most Likely Causes
- Rare But Worth Checking
- Diagnosis Steps
- Parts You'll Likely Need
- Related Codes That Often Appear With This One
- Platform-Specific Known Issues
- Mechanic-Grade Diagnostic Values
- Scan Tool Commands That Help
- Wiring & Ground Locations
- OEM Part Supersession History
- Other Known Issues on This Vehicle
- Used vs. New Parts: Buying Guide for This Vehicle
- Real Owner Stories
- 2012-2018 Audi A6 3.0T V6 — ~85000 miles
- 2012-2018 Audi A6 (C7 Platform)
- Related OBD-II Codes
- Frequently Asked Questions
- 🎟️ Get 5% Off