
P0137 on 2017-2022 Honda CR-V: O2 Sensor Circuit Low Voltage Causes and Fixes
On a 2017-2022 Honda CR-V, code P0137 almost always means the downstream oxygen sensor (Bank 1, Sensor 2) has failed. This sensor monitors the catalytic converter. Replacing it is a common DIY fix, with aftermarket parts costing around $50-$120 and OEM parts costing $120-$220. The issue is rarely accompanied by any driveability symptoms other than the Check Engine Light.
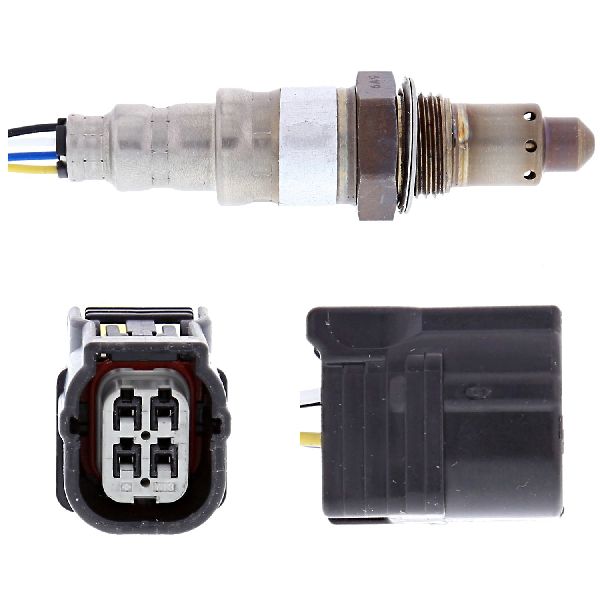
- P0137 on your CR-V points to the downstream oxygen sensor (Sensor 2) having a low voltage reading.
- The most probable cause is a failed sensor, which is a common wear item.
- Before buying parts, perform a quick visual check of the sensor's wiring for any obvious damage.
- It is critical to buy the correct oxygen sensor for your engine: the 1.5L Turbo and 2.4L engines use different parts.
- This is a DIY-friendly repair that can be done with basic tools and an O2 sensor socket, saving on labor costs.
What's Unique About the 2017-2022 Honda CR-V
For the 5th generation Honda CR-V (2017-2022), this code is a straightforward diagnostic issue without widespread factory defects or recalls noted. The key difference for this platform is the engine type, which dictates the correct part number. LX trims from 2017-2019 used a 2.4L engine, while all other trims in this range, and all trims from 2020-2022, used the 1.5L Turbo engine. While the cause and fix are identical, using the correct sensor for your specific engine is critical for the repair to be successful. The issue is also common on platform mates like the Honda Civic and Accord that use the same engines.
Symptoms You May Notice
- Illuminated Check Engine Light
- Failure to pass an emissions/smog test
- Slightly decreased fuel efficiency (often not noticeable)
- Rough or unstable idle (uncommon for this code alone)
- Potential hesitation during acceleration (very rare for this specific code)
- Replacing the upstream (Bank 1, Sensor 1) Air/Fuel ratio sensor. This code specifically points to the downstream (Sensor 2) sensor, which is a different part with a different function.
- Replacing the catalytic converter. While the downstream sensor monitors the converter, it is far more likely for the sensor itself to fail than the converter. A P0137 code alone rarely indicates a bad catalytic converter. Other codes, like P0420, would typically be present if the converter was failing.
Most Likely Causes
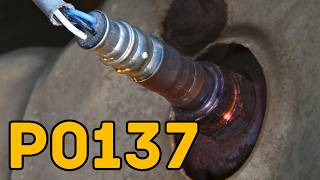
- Failed Downstream Oxygen Sensor (Bank 1, Sensor 2) 🔴 High Probability → Shop Oxygen Sensor Oxygen sensors are wear-and-tear items exposed to extreme heat and exhaust gases, and they have a finite lifespan. The internal heating element can fail, or the sensing element can become contaminated or simply wear out, causing it to read a constant low voltage. 🎬 Watch: A breakdown of the 6 common causes for low voltage.
How to confirm: After visually inspecting the wiring, the most common diagnostic step is to use a scan tool to monitor the live voltage data from the B1S2 sensor. A healthy downstream sensor should show a relatively stable voltage between 0.45V and 0.8V. If the voltage is stuck low (typically under 0.2V) and does not respond when the engine is revved, the sensor has likely failed. Replacing the sensor is the most common fix.
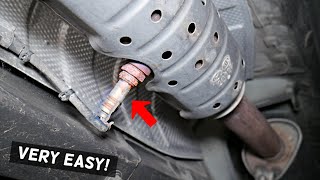
Typical fix: Replace the Bank 1, Sensor 2 oxygen sensor. An O2 sensor socket (a deep socket with a slit for the wire) is highly recommended. Ensure you purchase the correct part for your specific engine (1.5L Turbo or 2.4L).
Est. part cost: $50-$220 - Damaged Wiring or Connector 🟡 Medium Probability The sensor wiring runs underneath the vehicle and is exposed to road debris, moisture, and heat from the exhaust. Wires can become frayed, melted on the exhaust pipe, or corroded. Rodents are also known to chew on Honda's soy-based wire insulation.
How to confirm: Perform a thorough visual inspection of the wiring harness leading to the downstream O2 sensor. Look for any signs of melting, chafing, corrosion, or breaks. Check for a secure connection at the plug. Use a multimeter to check for continuity and for a short to ground on the signal wire.
Typical fix: Repair the damaged section of wiring or replace the connector pigtail. If damage is extensive, the harness section may need replacement.
Est. part cost: $10-$50 - Exhaust Leak ⚪ Low Probability Rust or failed gaskets can cause leaks in the exhaust system. If a leak occurs anywhere between the engine and the downstream O2 sensor, it can draw outside air into the exhaust stream, causing the sensor to read a false lean (low voltage) condition.
How to confirm: Listen for an audible ticking or hissing sound from the exhaust, which may be louder on a cold start. A visual inspection may reveal black soot marks around flanges or cracks. A shop can perform a smoke test to pinpoint the leak's location.
Typical fix: Replace the leaking gasket or repair/replace the damaged section of the exhaust pipe.
Est. part cost: $20-$300
Rare But Worth Checking
- Blown Fuse: The oxygen sensor's internal heater has a dedicated circuit, often protected by a fuse. While uncommon, if this fuse blows, it can prevent the sensor from heating up properly and may trigger a low voltage code. Check the fuse box in the engine bay for fuses labeled 'AF Heater' or similar.
- Faulty Powertrain Control Module (PCM): → Shop Engine Control Module (ECM) This is extremely rare. The PCM is the last component to suspect. All other possibilities, especially the sensor and its wiring, should be exhaustively ruled out before considering a PCM failure.
Diagnosis Steps
- Read the code: Use an OBD-II scanner to confirm P0137 and check for any other related codes.
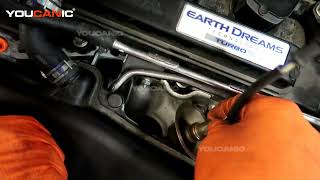
- Visual Inspection: Safely raise the vehicle and visually inspect the downstream O2 sensor 🎬 See this video to quickly locate the Bank 1 Sensor 2. (after the catalytic converter) and its wiring harness. Look for any obvious signs of damage, such as melted wires, corrosion in the connector, or physical impact damage.
- Check for Exhaust Leaks: With the engine running (and cool enough to work around), listen and feel for any air leaks from the exhaust system between the engine and the downstream sensor. Look for soot trails near flanges.
- Analyze Live Data: Use a scan tool with live data capability to monitor the voltage from 'O2S B1S2' (Bank 1, Sensor 2). A healthy downstream sensor should show a fairly steady voltage between 0.45V and 0.8V. If the voltage is stuck below 0.2 volts and doesn't fluctuate, it confirms the low voltage condition.
- Test the Sensor Circuit: Disconnect the sensor. Use a multimeter to check for reference voltage (around 5V on some pins) and ground at the vehicle-side connector. If the scan tool voltage now jumps to a default reading (e.g., ~0.45V), it strongly suggests the sensor itself is shorted internally and is the faulty component.
- Replace the Sensor: If the sensor is confirmed to be the issue, replace it. Use an O2 sensor socket and apply anti-seize compound to the threads of the new sensor if not pre-applied. Torque to manufacturer specifications.
- Clear and Test: After the repair, clear the code with the scanner and perform a drive cycle (a mix of city and highway driving) to ensure the Check Engine Light does not return.
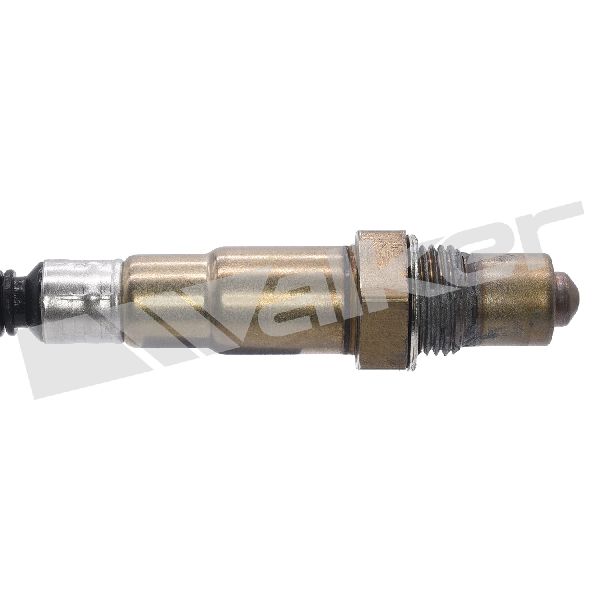
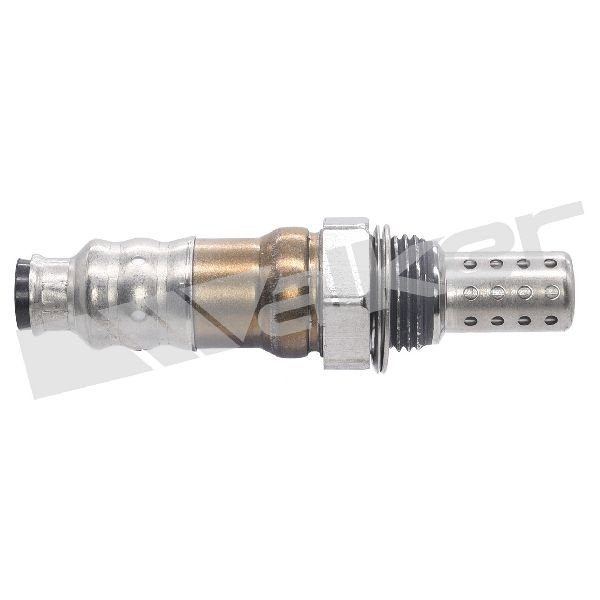
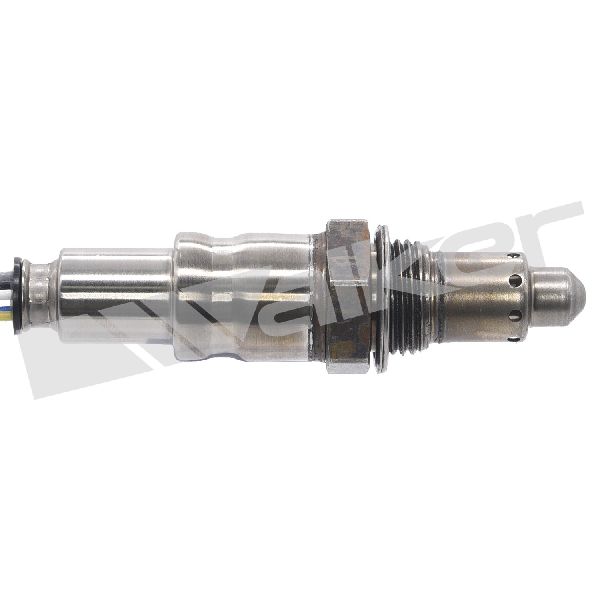
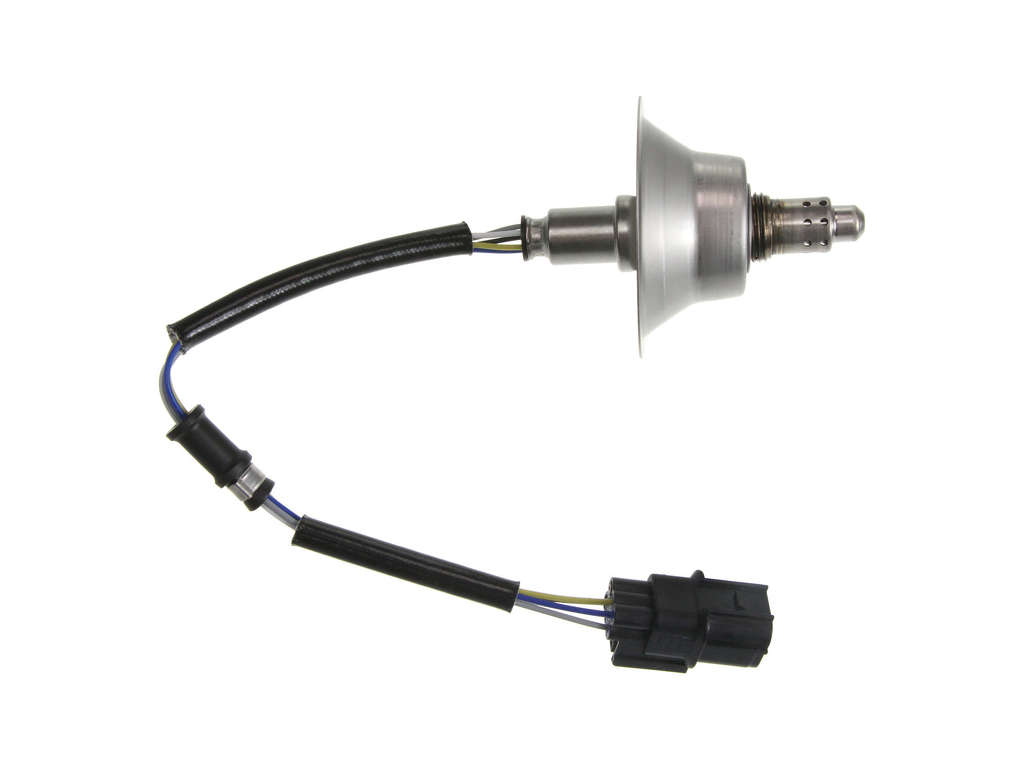
Parts You'll Likely Need
- Downstream Oxygen Sensor (for 1.5L Turbo)
(OEM #36532-5AA-A01)— This is the most common failure point for code P0137 on CR-V models equipped with the 1.5L Turbo engine.
Trusted brands: Honda (Genuine), Denso (Part #234-4993), NTK
OEM price range: $150-$220
Aftermarket price range: $60-$120 - Downstream Oxygen Sensor (for 2.4L)
(OEM #36532-5PH-A51)— This is the most common failure point for code P0137 on CR-V LX models (2017-2019) equipped with the 2.4L engine.
Trusted brands: Honda (Genuine), Denso (Part #234-4573), NTK (Part #25680)
OEM price range: $120-$180
Aftermarket price range: $50-$100 - O2 Sensor Socket Set — A specialized deep socket with a cutout for the sensor's wire is often necessary to remove and install the oxygen sensor without damaging it, especially if it is seized in the exhaust pipe.
Trusted brands: Lisle, OEMTOOLS, GearWrench
Aftermarket price range: $15-$40
Related Codes That Often Appear With This One
- P0136 — P0136 indicates a general malfunction in the same O2 sensor circuit (Bank 1, Sensor 2). P0137 is more specific about the voltage being low. They often appear together as the PCM tries to diagnose the fault.
- P0141 — P0141 indicates a malfunction in the heater circuit for the same sensor (Bank 1, Sensor 2). A failed heater can prevent the sensor from reaching its operating temperature, leading to the low voltage reading that triggers P0137.
- P0420 — While less common to see together, if an exhaust leak is the root cause of P0137, the erratic readings could also potentially trigger a P0420 (Catalyst System Efficiency Below Threshold) code over time.
Platform-Specific Known Issues
- Owner Experience: Simple Sensor Swap Fix: A user on crvownersclub.com with a 2018 CR-V reported getting the P0137 code around 70,000 miles. They had no other symptoms. After confirming the voltage was stuck low with a basic OBD-II scanner, they replaced the downstream sensor (Bank 1, Sensor 2) with a Denso aftermarket part. The repair took about 30 minutes, with the hardest part be
Mechanic-Grade Diagnostic Values
- Downstream O2 Sensor (HO2S S2) Voltage — expected: A relatively stable voltage between 0.45V and 0.7V on a warm, functioning catalytic converter.. Failure: Voltage is stuck at 0.29V or less according to Honda Diagnostic System (HDS) criteria. Other sources cite a trigger below 0.4V for more than 20 seconds.
- O2 Sensor Heater Circuit Resistance — expected: Between 10 and 40 Ohms when measured across the two heater pins on the sensor connector.. Failure: A reading of infinite resistance (OL - Open Loop) or near-zero resistance (short circuit) indicates the internal heater has failed, which can lead to a P0137 code.
Hidden / Shadow Codes Worth Checking
- Temporary DTC P0137: This is a pending or intermittent fault that has been detected by the PCM but may not have met the full criteria to illuminate the Check Engine Light yet. It indicates the problem is present but may not be constant. (see via Using the Honda Diagnostic System (HDS) or an equivalent professional scan tool to check for 'Temporary DTCs' or monitor the 'OBD STATUS' for P0137.)
Scan Tool Commands That Help
- Honda Diagnostic System (HDS): DATA LIST for HO2S S2 — This is the primary function used to confirm the fault. After clearing the code, a technician will hold the engine at 3,000 RPM until warm and then monitor this data parameter. If the voltage remains at or below the failure threshold (0.29V), it confirms a hard fault.
Wiring & Ground Locations
- Engine/Transmission Ground — A primary ground strap is typically located on the transmission housing, often under the air intake box.. While not specific to the O2 sensor circuit, this is a known weak point for corrosion on many Hondas. A poor main ground can introduce electrical noise and voltage issues across multiple sensor circuits, potentially contributing to erroneous readings. Inspecting and cleaning this ground is a good preventative step for any electrical fault.
- A/F Sensor Heater Fuse — In the under-hood fuse/relay box.. The O2 sensor heater circuit is protected by a fuse, often labeled 'AF Heater' or similar. If this fuse is blown, the sensor cannot warm up to its proper operating temperature, which will cause it to output an incorrect low voltage and trigger code P0137.
OEM Part Supersession History
36532-5AA-A01→N/A— This is the current and original part number for the 1.5L Turbo model for the specified years.
Heads up: This part is specific to the 1.5L Turbo engine and is not interchangeable with the sensor for the 2.4L engine (36532-5PH-A51).
Diagnostic Flowchart
Other Known Issues on This Vehicle
Issues unrelated to this code that are worth knowing about as an owner of this generation:
- Fuel Dilution in Oil (1.5L Turbo Engine) 🔴 High — Common, especially in 2017-2018 models and vehicles used for short trips in cold climates. Fuel enters the crankcase, raising the oil level and reducing its lubricating properties. (Ref: Honda issued service bulletins and a warranty extension for early models, involving software updates and sometimes A/C control unit replacement to help the engine warm up faster.)
- Sticky Steering at Highway Speeds 🔴 High — Widespread on 2022+ models, but some earlier models are also affected. Owners report a 'notchy' or 'sticky' feeling in the steering wheel, requiring extra force to make small corrections at speed. (Ref: Recall 24V-744 was issued for 2022-2025 models. The fix involves replacing a spring and re-greasing the worm gear in the steering rack, though some owners report the issue persists.)
- Premature Battery Failure / Parasitic Drain 🟠 Medium — Common on 2017-2019 models. Owners report batteries dying unexpectedly, often traced to software issues or faulty modules that fail to shut down properly. (Ref: Multiple software updates were released to address various sources of parasitic draw, but no single recall covered the entire problem.)
- A/C Compressor Leaks or Failure 🟠 Medium — Reported across the generation. The A/C system may stop blowing cold air due to refrigerant leaking from the compressor or condenser. (Ref: TSB A23-040 addresses a potential compressor shaft seal leak on 2022 models due to a change in refrigerant oil requirements.)
- CVT Transmission Judder 🟡 Low — More common on early 2017-2018 models. Some owners experience a shudder or jerky feeling during light acceleration. (Ref: Software updates for the Transmission Control Unit (TCU) were released to improve CVT behavior.)
Used vs. New Parts: Buying Guide for This Vehicle
When a used part is the smart pick: For this specific repair, buying a used oxygen sensor is almost never a smart choice. O2 sensors are wear-and-tear items with a finite lifespan, similar to spark plugs or brake pads. The risk of getting a part that is already near the end of its life is very high.
Donor-vehicle mileage cap: roughly under 20000 miles for the part to have meaningful remaining life.
What to inspect on the donor part:
- If forced to consider a used part, source it from a very low-mileage wreck (<20k miles).
- Inspect the sensor tip for heavy carbon buildup, white contamination (from coolant/oil), or physical damage.
- Ensure the wiring and connector are pristine with no cuts, melting, or corrosion.
OEM-only on this vehicle (don't cheap out):
- While not strictly 'OEM-only', using an OEM-supplier brand is highly recommended. Honda ECUs can be sensitive to the voltage and resistance characteristics of aftermarket sensors, sometimes causing the code to return even with a new part.
Aftermarket brands forum-validated for this vehicle:
- Denso
- NTK (which is part of NGK)
Brands owners have reported issues with on this vehicle:
- Generic, unbranded, or 'white-box' sensors from online marketplaces should be avoided. While they may be cheap, they have a high failure rate and can have incorrect resistance values, leading to a repeat repair.
Real Owner Stories
Aggregated from forums and TSBs cited above. Mileages and costs reflect what owners reported in those sources.
2018 Honda CR-V 1.5L Turbo — 70000 miles
Symptoms: Illuminated Check Engine Light with no other noticeable symptoms.
What fixed it: Replaced the downstream sensor (Bank 1, Sensor 2) with a Denso aftermarket part.
Source hint: crvownersclub.com thread titled 'P0137 on 2018 CRV EX-L'
Related OBD-II Codes
Frequently Asked Questions
Which replacement oxygen sensor brands are recommended for a 2018 Honda CR-V EX-L with code P0137?
Is the P0137 code on my 1.5L Turbo CR-V related to the fuel dilution issue mentioned in TSBs?
Could an exhaust leak cause a P0137 code on my Honda CR-V?
Are there different sensors for the 1.5L Turbo and the 2.4L CR-V engines?
Does a P0137 code on a 2017-2022 CR-V usually mean I need a new catalytic converter?
Why is my CR-V's wiring prone to damage leading to this code?
Helpful Videos

We Have This Part in Stock


The information in this article is provided for general reference and educational purposes only. Vehicle specifications, procedures, and part compatibility can vary by production date, trim level, and region. Always consult your vehicle's factory service manual and verify part numbers before purchasing or performing repairs. Safety-critical components such as airbags, seat belts, and braking systems should be installed by a qualified professional.
- Honda CR-V:
- 🧭 Diagnostic Flowchart
- 🎬 Helpful Videos
- 🛍️ Shop This Part
- What's Unique About the 2017-2022 Honda CR-V
- Symptoms You May Notice
- Most Likely Causes
- Rare But Worth Checking
- Diagnosis Steps
- Parts You'll Likely Need
- Related Codes That Often Appear With This One
- Platform-Specific Known Issues
- Mechanic-Grade Diagnostic Values
- Hidden / Shadow Codes Worth Checking
- Scan Tool Commands That Help
- Wiring & Ground Locations
- OEM Part Supersession History
- Other Known Issues on This Vehicle
- Used vs. New Parts: Buying Guide for This Vehicle
- Real Owner Stories
- 2018 Honda CR-V 1.5L Turbo — 70000 miles
- Related OBD-II Codes
- Frequently Asked Questions
- 🎟️ Get 5% Off