
P0137 on 2012-2017 Hyundai Veloster: O2 Sensor Circuit Low Voltage Causes and Fixes
On a 2012-2017 Veloster, P0137 almost always means the downstream oxygen sensor (Bank 1, Sensor 2), located after the catalytic converter, has failed. It's a common and straightforward repair. Confirm if you have a Turbo or Non-Turbo model before buying the part, as they are different. An aftermarket sensor costs about $60-$90.
- P0137 on a Veloster almost always means you need a new downstream (post-cat) O2 sensor.
- It's critical to buy the correct sensor for your engine (Turbo vs. Non-Turbo).
- This is a DIY-friendly repair that can be done in under an hour with basic tools and a special O2 sensor socket.
- Before buying the part, do a quick visual check of the sensor's wiring underneath the car for any obvious damage.
What's Unique About the 2012-2017 Hyundai Veloster
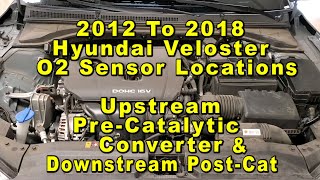
For the 2012-2017 Hyundai Veloster, the P0137 code is a very common and straightforward issue. Unlike some vehicles where this code can be triggered by complex lean conditions or software glitches, on the Veloster it overwhelmingly points to a simple failure of the downstream O2 sensor itself. The wiring for the sensor is somewhat exposed under the car, making it a good idea to visually inspect the harness for damage before replacing the part, but the sensor is the primary culprit in most cases. It is critical to identify whether the vehicle is a Turbo or Non-Turbo model 🎬 Watch: Locate the sensors on a Turbo GDI model, as they use different downstream oxygen sensors.
Symptoms You May Notice
- Check Engine Light is on
- Failing an emissions test
- Slightly reduced fuel economy
- Rough or unstable idle in some cases
- Replacing the upstream (Bank 1, Sensor 1) oxygen sensor. P0137 is specific to the downstream Sensor 2.
- Replacing the catalytic converter. A failing converter typically sets a P0420 code. P0137 points to the sensor or its circuit, not the converter itself.
- Not verifying Turbo vs. Non-Turbo model and ordering the wrong part.
Most Likely Causes
- Failed Downstream Oxygen Sensor (Bank 1, Sensor 2) 🔴 High Probability → Shop Oxygen Sensor Oxygen sensors are wear items that are exposed to extreme heat and exhaust gases. They have a finite lifespan and failure is common after 60,000-100,000 miles. This is the most frequent resolution reported by Veloster owners in forums.
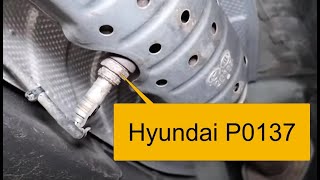
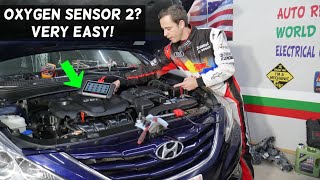
How to confirm: After visually inspecting the wiring for damage, the most practical step is replacement. 🎬 See this walkthrough for fixing the P0137 circuit low code A professional can use a scan tool to monitor the sensor's live voltage data; a healthy downstream sensor should show a relatively stable voltage (typically 0.5V-0.8V), while a faulty one will be stuck low (below 0.1V-0.2V).
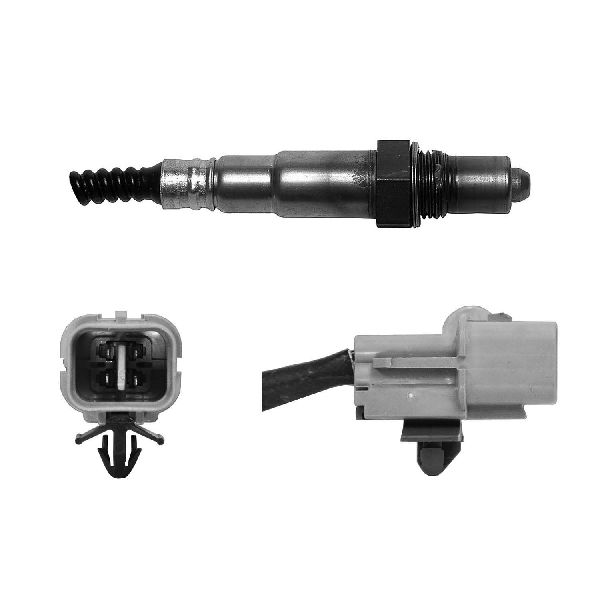
Typical fix: Replace the downstream (post-catalytic converter) oxygen sensor. A special 22mm (7/8") O2 sensor socket is recommended for removal and installation. Applying anti-seize compound to the new sensor's threads is advised.
Est. part cost: $60-$180 - Damaged O2 Sensor Wiring or Connector 🟡 Medium Probability → Shop Oxygen Sensor The wiring harness for the downstream sensor runs underneath the vehicle and can be susceptible to damage from road debris, heat from the exhaust, or corrosion. The connector itself can also become contaminated.
How to confirm: Visually inspect the entire length of the wiring from the sensor to where it enters the vehicle body. Look for melted plastic, frayed wires, or corrosion on the connector pins. A multimeter can be used to check for continuity and voltage at the connector.
Typical fix: Repair the damaged section of wiring or replace the connector pigtail. If damage is severe, a new sensor with an intact harness may be the easiest solution.
Est. part cost: $10-$50 - Exhaust Leak ⚪ Low Probability Exhaust components can develop leaks at gaskets or welds due to rust and vibration over time. A leak before the sensor can introduce outside air, causing a false low voltage reading.
How to confirm: Listen for a ticking or hissing sound from the exhaust, especially when the engine is cold. A visual inspection may reveal black soot around a flange or crack. A shop can perform a smoke test to pinpoint the leak.
Typical fix: Replace the leaking gasket or weld the cracked component. This is often best left to an exhaust shop.
Est. part cost: $20-$200
Rare But Worth Checking
- Faulty Powertrain Control Module (PCM): → Shop Engine Control Module (ECM) This is extremely rare. The PCM should only be considered after all other possibilities, including the sensor and its entire circuit, have been exhaustively tested and ruled out.
Diagnosis Steps
- Scan the vehicle for any other stored trouble codes. Address other codes first if they are present.
- Perform a thorough visual inspection of the downstream O2 sensor (Bank 1, Sensor 2) and its wiring harness. The sensor is located on the exhaust pipe after the catalytic converter.
- Look for any signs of melting, chafing, or physical damage to the wires and connector. Check for corrosion inside the connector.
- If using a scan tool with live data, monitor the voltage for B1S2. A healthy sensor should show a relatively steady voltage (typically between 0.5V and 0.8V) on a warm engine at steady RPM. If the voltage is stuck low (e.g., below 0.2V), the sensor is likely faulty.
- Check for exhaust leaks between the engine and the downstream O2 sensor. Listen for audible leaks and look for soot trails. A smoke test is the most definitive way to find a leak.
- If the wiring is intact and there are no exhaust leaks, the most probable cause is a failed oxygen sensor.
- Verify if your Veloster is a Turbo or Non-Turbo model to order the correct part number.
- Replace the Bank 1 Sensor 2 oxygen sensor using a 22mm or 7/8" O2 sensor so 🎬 Watch: Step-by-step Bank 1 Sensor 2 replacement guidecket.
- Clear the codes and perform a drive cycle to ensure the repair was successful.
Parts You'll Likely Need
- Downstream Oxygen Sensor (Bank 1, Sensor 2) - TURBO models
(OEM #39210-2B250)— This is the most common failure point for code P0137 on the 1.6L Turbo GDI engine.
Trusted brands: Bosch, NGK/NTK, Denso
OEM price range: $160-$190
Aftermarket price range: $60-$90 - Downstream Oxygen Sensor (Bank 1, Sensor 2) - NON-TURBO models
(OEM #39210-2B220)— This is the most common failure point for code P0137 on the naturally aspirated 1.6L GDI engine.
Trusted brands: Bosch, NGK/NTK, Denso
OEM price range: $150-$180
Aftermarket price range: $50-$80
Related Codes That Often Appear With This One
- P0136 — P0136 indicates a general malfunction in the same O2 sensor circuit, and can appear alongside P0137 as they both relate to Bank 1 Sensor 2.
- P2096 — P2096 indicates a 'Post Catalyst Fuel Trim System Too Lean' condition. A faulty downstream O2 sensor giving a false low (lean) reading can sometimes trigger this code as well.
Technical Service Bulletins (TSBs) & Recalls
- TSB 21-01-023H-1 (Campaign 960): While not directly for P0137, this TSB involves a software update for the knock sensor detection system on 2012-2017 Velosters. It's a critical update for engine health and longevity, addressing a known issue with engine bearing wear.
Platform-Specific Known Issues
- Different Part for Turbo vs. Non-Turbo: The 1.6L Turbo and 1.6L non-turbo engines use different downstream oxygen sensors. It is crucial to order the correct part for your specific model. The turbo sensor is OEM part #39210-2B250, while the non-turbo is OEM part #39210-2B220.
Mechanic-Grade Diagnostic Values
- DTC P0137 Set Condition — expected: Signal voltage from sensor remains below 0.06V for a specified duration.. Failure: Live data on a scan tool shows B1S2 voltage stuck below 0.1V.
- Healthy Downstream O2 Sensor Voltage (B1S2) — expected: Relatively stable voltage between 0.5V and 0.8V at steady RPM on a warm engine.. Failure: Voltage is stuck low (below 0.2V) or fluctuates rapidly like an upstream sensor.
- O2 Sensor Heater Circuit Resistance — expected: Typically between 2 and 15 Ohms, depending on sensor manufacturer. Check between the two wires of the same color (usually white or black).. Failure: Infinite resistance (open circuit) or zero resistance (short circuit).
Scan Tool Commands That Help
- Hyundai GDS (Global Diagnostic System): Live Data Graphing / DTC Analysis — Use this to view the B1S2 voltage waveform in high resolution. This helps distinguish between a completely dead sensor (flat low voltage), a lazy sensor (slow response), or an intermittent wiring issue (sharp dropouts).
- Hyundai GDS (Global Diagnostic System): Reset Adaptive Values — After replacing the O2 sensor and clearing the DTC, performing a reset of the engine's adaptive fuel values can help the ECM learn the characteristics of the new sensor more quickly.
Wiring & Ground Locations
- Downstream O2 Sensor Connector (C152) — Underneath the vehicle, connected to the O2 sensor that is screwed into the exhaust pipe after the catalytic converter.. This is the primary connection point to test. It is exposed to road debris and heat, making it a potential point of failure for corrosion or damage.
- O2 Sensor Connector Pinout (Typical 4-wire) — At the sensor connector.. For testing: Pin 1 is typically the Heater Power (12V+ with key on), Pin 2 is the Heater Ground, Pin 3 is the Signal Ground, and Pin 4 is the Sensor Signal (the wire to test for low voltage). Hyundai/KEFICO sensors often use Black for signal, Gray for signal ground, and two White wires for the heater.
- Engine Ground Strap — Typically from the engine block or cylinder head to the chassis frame rail in the engine bay. Specific ground points like Gggt09 are on the left side of the engine.. A poor engine ground can cause noisy or biased sensor readings across the entire engine management system, including the O2 sensors. While not a direct cause of P0137 alone, it can contribute to erratic electrical behavior and should be clean and tight.
Model Year Variations Within This Range
- 2013-2017: The introduction of the 1.6L Turbo GDI engine in 2013 created a split in parts. The Turbo and Non-Turbo models use physically different downstream oxygen sensors with unique part numbers (Turbo: 39210-2B250, Non-Turbo: 39210-2B220). This is the most critical variation for this repair.
Diagnostic Flowchart
Other Known Issues on This Vehicle
Issues unrelated to this code that are worth knowing about as an owner of this generation:
- Connecting Rod Bearing Failure (Engine Seizure) 🔴 High — Widespread enough to trigger recalls and TSBs. Can occur between 30,000 and 80,000 miles, often preceded by knocking noises. (Ref: NHTSA Campaign 20V746000; TSB 21-01-023H-1)
- Dual-Clutch Transmission (DCT) Malfunctions 🟠 Medium — Common complaints of hesitation, shuddering, jerking, and premature failure, particularly on 2012-2016 models. (Ref: Multiple TSBs exist, including one for clutch application logic (5NP-X7J3D-10 for the related Tucson).)
- GDI Carbon Buildup on Intake Valves 🟡 Low — An inherent issue with GDI engines. Typically becomes noticeable after 60,000 miles, causing potential rough idle or slight power loss.
- Premature Timing Chain Wear 🟠 Medium — Reports of rattling noises on startup, especially after 60,000 miles, which can lead to poor performance or engine damage if ignored.
- MDPS Steering Column Coupling Wear 🟡 Low — A common issue causing a clicking or thud noise when turning the steering wheel. A flexible rubber coupling wears out over time. (Ref: TSB 5NP-P5G8M-03)
Used vs. New Parts: Buying Guide for This Vehicle
When a used part is the smart pick: Never. An oxygen sensor is a sensitive electronic component and a wear item with a finite lifespan. The cost savings of a used sensor are minimal compared to the high risk of receiving a part that is already near the end of its life or has been damaged during removal. The labor to install it a second time outweighs any potential savings.
Donor-vehicle mileage cap: roughly under 15000 miles for the part to have meaningful remaining life.
What to inspect on the donor part:
- Not applicable, as buying used is not recommended.
OEM-only on this vehicle (don't cheap out):
- No parts for this specific repair are strictly OEM-only.
Aftermarket brands forum-validated for this vehicle:
- NTK (often the original OEM supplier)
- Denso
- Bosch
Brands owners have reported issues with on this vehicle:
- Unnamed, no-brand 'economy' sensors from online marketplaces. These often have poor calibration, leading to incorrect readings, persistent codes, or premature failure. Some forum users have reported issues with universal sensors that require splicing wires, as improper connections can cause voltage drops.
Real Owner Stories
Aggregated from forums and TSBs cited above. Mileages and costs reflect what owners reported in those sources.
2014 Hyundai Veloster Turbo
Symptoms: Check engine light with code P0137.
What fixed it: The consensus from mechanics was to replace the downstream (Bank 1, Sensor 2) O2 sensor.
Source hint: reddit.com/r/MechanicAdvice: A user with a 2014 Hyundai Veloster Turbo posted about getting code P0137.
2012-2017 Hyundai Veloster
Symptoms: P0137 Code - O2 Sensor Bank 1 Sensor 2.
What fixed it: Replacing the downstream O2 sensor. The owner noted the hardest part was getting the car high enough to get under it.
Source hint: veloster.org: Thread titled 'P0137 Code - O2 Sensor Bank 1 Sensor 2'
2012-2017 Hyundai Veloster
Symptoms: Getting P0137 and P2096 codes together.
What fixed it: Replacing the downstream O2 sensor, which cleared both codes.
Source hint: reddit.com/r/veloster: In a thread about common CEL codes
Related OBD-II Codes
Frequently Asked Questions
Does the software update in TSB 21-01-023H-1 (Campaign 960) fix the P0137 code on my Veloster?
Can I use the same oxygen sensor for both the Turbo and Non-Turbo 1.6L Veloster?
Where is the Bank 1 Sensor 2 located on my 2012-2017 Veloster?
What voltage should I see on a scan tool for a healthy downstream sensor?
Is the P0137 code common after a certain mileage on these cars?
What tool do I need to replace the sensor myself?
Helpful Videos

We Have This Part in Stock


The information in this article is provided for general reference and educational purposes only. Vehicle specifications, procedures, and part compatibility can vary by production date, trim level, and region. Always consult your vehicle's factory service manual and verify part numbers before purchasing or performing repairs. Safety-critical components such as airbags, seat belts, and braking systems should be installed by a qualified professional.
- Hyundai Veloster:
- 🧭 Diagnostic Flowchart
- 🎬 Helpful Videos
- 🛍️ Shop This Part
- What's Unique About the 2012-2017 Hyundai Veloster
- Symptoms You May Notice
- Most Likely Causes
- Rare But Worth Checking
- Diagnosis Steps
- Parts You'll Likely Need
- Related Codes That Often Appear With This One
- Technical Service Bulletins (TSBs) & Recalls
- Platform-Specific Known Issues
- Mechanic-Grade Diagnostic Values
- Scan Tool Commands That Help
- Wiring & Ground Locations
- Model Year Variations Within This Range
- Other Known Issues on This Vehicle
- Used vs. New Parts: Buying Guide for This Vehicle
- Real Owner Stories
- 2014 Hyundai Veloster Turbo
- 2012-2017 Hyundai Veloster
- 2012-2017 Hyundai Veloster
- Related OBD-II Codes
- Frequently Asked Questions
- 🎟️ Get 5% Off