
P0137 on 2012-2017 Hyundai Veloster: Causes and Fixes for O2 Sensor Low Voltage
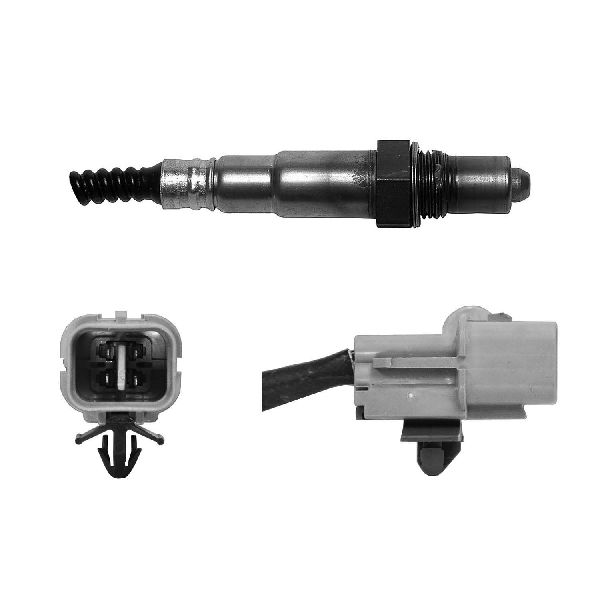
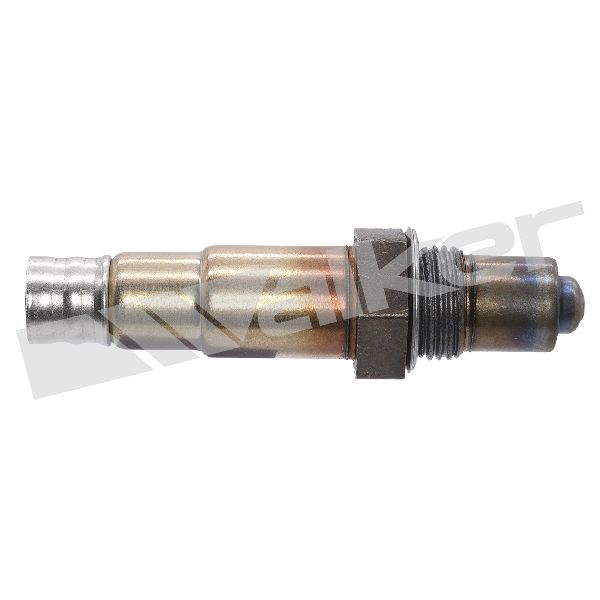
This code almost always points to a failed downstream oxygen sensor (Bank 1, Sensor 2). For the non-turbo 1.6L, this is Hyundai part #39210-2B220. Replacing this sensor is the most common fix. Expect to pay between $50 and $120 for an aftermarket part. Before replacing, inspect the wiring harness near the exhaust for any signs of melting or damage, as this is a known failure point.
- P0137 on a Veloster almost always means the downstream (post-catalytic converter) O2 sensor has failed.
- Before buying a new sensor, always inspect the wiring harness for melting or physical damage, as its proximity to the hot exhaust makes it a common failure point.
- This is a DIY-friendly repair for most home mechanics, typically requiring only basic hand tools and a specialized O2 sensor socket.
- The correct OEM part number for the non-turbo 1.6L GDI engine is 39210-2B220.
What's Unique About the 2012-2017 Hyundai Veloster
The 2012-2017 Veloster (first generation) with the 1.6L GDI engine has a straightforward four-cylinder exhaust layout, making diagnosis simple as there is only one 'Bank 1'. The downstream sensor (Sensor 2) is the primary culprit for P0137. While the sensor itself is the most common failure point, it's worth noting that Hyundai issued a TSB (16-FL-002) for faulty oxygen sensors on some 2013-2015 turbo models, which also involved an ECU update. For the base GDI engine, the issue is almost always the sensor or its wiring.
Symptoms You May Notice
- Check Engine Light is on
- Failure to pass an emissions test
- Slightly decreased fuel efficiency
- Rough or unstable idle in some cases
- Noticeable odor of exhaust fumes in some instances
- Replacing the upstream oxygen sensor (Sensor 1). P0137 specifically refers to the downstream sensor (Sensor 2).
- Replacing the catalytic converter. A bad converter typically causes a P0420 code (Catalyst System Efficiency Below Threshold), not a P0137 low voltage code. A P0137 code must be resolved before diagnosing a P0420.
Most Likely Causes
- Failed Downstream Oxygen Sensor (Bank 1, Sensor 2) 🔴 High Probability → Shop Oxygen Sensor Oxygen sensors are wear-and-tear items that degrade over time due to constant exposure to high-temperature exhaust gases. Many owners on forums for the Veloster and its platform mates (Accent, Rio) confirm that replacing this sensor resolves the code.
How to confirm: Use a scan tool to monitor live data for the B1S2 O2 sensor. If the voltage is stuck consistently low (e.g., below 0.1V) and does not fluctuate on a warm engine, the sensor has likely failed internally. You can also test the sensor's internal heater circuit with a multimeter; an open circuit or incorrect resistance reading confirms failure.
Typical fix: Replace the downstream oxygen sensor. This sensor is located on the exhaust pipe after the catalytic converter. An O2 sensor socket is recommended for removal.
Est. part cost: $50-$120 - Damaged O2 Sensor Wiring or Connector 🟡 Medium Probability → Shop Oxygen Sensor The wiring harness is routed near the hot exhaust system. If factory clips or brackets fail, the harness can sag and make contact with the exhaust pipe, melting the insulation and causing a short to ground, which results in a low voltage reading.
How to confirm: Visually inspect the entire wiring harness for the downstream O2 sensor, from the sensor itself to where it connects to the main harness in the cabin. Pay close attention to the area directly above the exhaust pipe. Look for melted plastic, chafing, and corrosion in the connector pins.
Typical fix: Repair the damaged section of wiring using heat-shrink butt connectors or solder. Replace the connector pigtail if it is melted or corroded. Secure the repaired harness away from the exhaust using high-temperature zip ties.
Est. part cost: $15-$40 - Exhaust Leak ⚪ Low Probability Flex pipes and gasket joints can develop leaks from rust or vibration. A leak located before the downstream O2 sensor can allow outside air (oxygen) to be pulled into the exhaust stream, fooling the sensor into reading a lean (low voltage) condition.
How to confirm: Listen for a ticking or hissing sound from the exhaust, especially when the engine is cold. A common method is to have a helper temporarily block the tailpipe with a rag while you listen and feel for leaks at joints and the flex pipe. A professional can use a smoke machine for a definitive diagnosis.
Typical fix: Replace the leaking gasket or weld/replace the cracked section of the exhaust pipe.
Est. part cost: $20-$150
Rare But Worth Checking
- Engine Running Lean: If the engine is running lean (too much air, not enough fuel), the exhaust will contain excess oxygen, causing a legitimate low voltage reading from the O2 sensor. This condition will almost always be accompanied by other codes, such as P0171 (System Too Lean) or P2096 (Post Catalyst Fuel Trim System Too Lean).
- Faulty Powertrain Control Module (PCM): → Shop Engine Control Module (ECM) This is extremely rare. The PCM itself could be failing to read the sensor's voltage correctly. All other possibilities, including wiring, the sensor itself, and exhaust leaks, must be exhaustively ruled out before considering PCM replacement.
Diagnosis Steps
- Read the code with an OBD-II scanner and check for any other accompanying codes. Note any lean codes (P0171, P2096) or heater circuit codes (P0141).
- Perform a thorough visual inspection of the downstream O2 sensor's wiring harness and connector. Follow the wire from the sensor up into the vehicle body, checking for any signs of melting, chafing, or corrosion. This is a critical step on this platform.
- Inspect the exhaust system for any leaks between the catalytic converter and the downstream O2 sensor. Listen for unusual noises or look for black soot trails at gaskets and welds.
- Use a scan tool to observe the live data stream for the 'O2S B1S2' voltage. At idle on a fully warmed-up engine, a healthy downstream sensor should show a relatively stable voltage, typically between 0.5V and 0.8V. If the voltage is stuck below 0.1V, it confirms the low voltage condition reported by the code.
- If wiring looks good, proceed with sensor testing. Disconnect the sensor and test the heater circuit for proper resistance with a multimeter (typically between 3-15 ohms, check service manual for spec). An open circuit (OL) indicates a failed heater, requiring sensor replacement.
- If the sensor and wiring test good, and there are no exhaust leaks, investigate potential lean running conditions (check fuel pressure, look for vacuum leaks) only if other lean-related codes are present.
- If all other possibilities are ruled out, the issue may be with the PCM, but this is highly unlikely and should be the last resort.
Parts You'll Likely Need
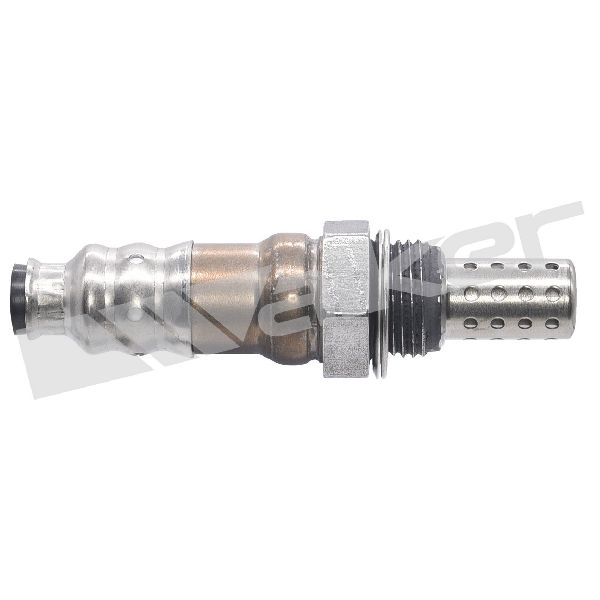
- Downstream Oxygen Sensor (Bank 1, Sensor 2)
(OEM #39210-2B220)— This is the most common component to fail and directly cause the P0137 code. It is a standard wear item. This part number is specific to the non-turbo 1.6L GDI engine.
Trusted brands: Bosch, NGK/NTK, Denso, Walker
OEM price range: $100-$160
Aftermarket price range: $50-$120
Related Codes That Often Appear With This One
- P0136 — This code indicates a general malfunction in the same O2 sensor circuit (Bank 1, Sensor 2) and often appears alongside P0137 as they both point to issues with the same component.
- P0141 — This code points to a failure in the heater circuit of the same downstream O2 sensor. Since the heater and sensor elements are part of the same physical component, a failure in one can often be related to a failure in the other, and replacement of the sensor is the fix for both.
Technical Service Bulletins (TSBs) & Recalls
- 16-FL-002: Addresses a faulty oxygen sensor and requires an ECU update for some 2013-2015 Veloster Turbo models. Not directly applicable to the base 1.6L GDI but indicates a history of O2 sensor issues on the platform.
- 16-AT-001-1: A TSB for resetting adaptive values in the automatic transmission, relevant for owners experiencing DCT issues, which is a separate common problem on this platform.
Platform-Specific Known Issues
- TSB 16-FL-002: For some 2013-2015 Veloster Turbo models, Hyundai issued a service bulletin for a faulty oxygen sensor that could cause the check engine light to illuminate. The fix involved replacing the sensor and performing an engine control software update. This TSB is specific to the Turbo model and does not apply to the naturally aspirated 1.6L GDI.
- Melted Wiring Harness: Owners on forums frequently report that the downstream O2 sensor wiring harness melts due to contact with the hot exhaust pipe. This is a common cause for P0137 and should be the first thing checked after reading the code.
Mechanic-Grade Diagnostic Values
- DTC Set Condition (PCM Logic) — expected: Signal voltage from B1S2 must remain above a certain threshold.. Failure: The PCM detects a signal voltage below 0.06V for a specified period.
- Live Data - Downstream O2 Sensor (B1S2) Voltage at warm idle — expected: Relatively stable voltage, typically between 0.5V and 0.8V.. Failure: Voltage is stuck consistently below 0.2V, often near 0.1V.
- O2 Sensor Heater Circuit Resistance — expected: Approximately 5-7 Ω, though some manuals state a broader 4-20 Ω range.. Failure: An open circuit (infinite resistance/OL) or a short (near zero resistance) indicates a failed heater element.
- O2 Sensor Signal Wire Voltage at Connector (Key-On, Engine-Off) — expected: Approximately 0.42-0.45V (420-450mV) bias voltage supplied by the PCM.. Failure: A reading of 0V or one significantly different from the bias voltage suggests a wiring issue (short/open) or a faulty PCM driver.
- Signal Wire Continuity to Ground — expected: Infinite resistance (OL), indicating no continuity.. Failure: Low resistance (e.g., under 1 ohm) indicates a short to ground in the wiring harness, which is the direct electrical cause of the low voltage signal.
Hidden / Shadow Codes Worth Checking
- Mode $06, TID $05, CID $20: This monitor ID within OBD-II Mode $06 often corresponds to the Bank 1 Sensor 2 (B1S2) switching time or voltage threshold test. A 'FAIL' status for this component ID can confirm a P0137 fault, sometimes before the MIL is consistently illuminated. (see via An advanced OBD-II scan tool capable of displaying Mode $06 test results.)
Scan Tool Commands That Help
- Hyundai GDS (Global Diagnostic System): Live Data Graphing / DTC Analysis — While there is no specific bidirectional command to force the O2 sensor signal, GDS is the dealer-level tool used to view high-resolution live data graphs of the sensor's voltage. This is critical for distinguishing a lazy sensor from a completely dead one or identifying intermittent wiring faults that may not be obvious on a generic scanner.
Wiring & Ground Locations
- ECM Connector Pin 7 — On the main Engine Control Module (ECM) harness connector.. This is the specific pin for the Heated Oxygen Sensor (Sensor 1) heater control on some Hyundai models. While not directly for the B1S2 signal, a fault here could indicate broader wiring or ECM issues. A full pinout diagram is required for the specific year to test the B1S2 signal wire directly at the ECM.
- O2 Sensor Connector (Harness Side) — Under the vehicle, where the downstream O2 sensor connects to the main body harness.. This is the primary test point. One pin should have 12V (heater power), one is the heater ground, one is the sensor signal wire (should show ~0.45V bias with KOEO), and the last is the sensor ground. Testing here can isolate a bad sensor from a wiring problem.
- Chassis Ground Points — Multiple locations in the engine bay and under the vehicle. Specific ground distribution diagrams show points like G-05 on the left side of the engine compartment.. A poor ground for the ECM or the sensor circuit itself can introduce voltage drops and cause incorrect readings, potentially leading to a P0137. While less common than a failed sensor, checking major ground connections is a valid step in advanced diagnosis.
Real Owner Repair Stories
- AliExpress Review / Forum-style post (2014 Hyundai Elantra GLS (platform mate with same engine/sensor)) — Check engine light came on every few weeks, code P0137.
❌ Tried (didn't work) Clearing the code at an auto parts store., Initial mechanic suggestion of a bad catalytic converter (diagnosis was not performed).
✅ What actually fixed it The owner diagnosed the code as specific to Bank 1 Sensor 2, researched the correct part number, and replaced the downstream oxygen sensor themselves. The new sensor provided a stable voltage reading around 0.7V on a scan tool, resolving the code permanently.
OEM Part Supersession History
39210-2B220→39210-2B220 (current)— No supersession found. This part number appears to be stable for the specified vehicle range.
Heads up: This part is for the non-turbo 1.6L GDI engine. It is not compatible with the 1.6L Turbo engine, which uses a different sensor.
Diagnostic Flowchart
Other Known Issues on This Vehicle
Issues unrelated to this code that are worth knowing about as an owner of this generation:
- Catastrophic Engine Failure (Connecting Rod Bearings) 🔴 High — Widespread, with failures often reported between 30,000 and 80,000 miles. Preceded by engine knocking. (Ref: Subject of multiple recalls and a class-action lawsuit (related to Theta II, but Gamma engines had similar issues). Hyundai extended warranties and deployed a Knock Sensor Detection System (KSDS) software update to detect early signs of failure.)
- Excessive Oil Consumption 🟠 Medium — Commonly reported, with some owners noting consumption of over a quart per 1,000-2,000 miles, often linked to piston ring issues. (Ref: Related to engine recalls for piston oil ring heat treatment on some 2.0L engines, but the 1.6L GDI also suffers from oil consumption.)
- Dual-Clutch Transmission (DCT) Malfunctions 🟠 Medium — Affects models with the automatic DCT. Symptoms include hesitation from a stop, clunking noises, and premature failure. (Ref: Multiple TSBs exist for software updates and adaptive value resets (e.g., 16-AT-001-1) to improve shift quality.)
- Electronic Wastegate Actuator Failure (Turbo Models) 🟠 Medium → Shop Turbocharger — A common failure on 1.6T models, causing loss of boost and codes like P0245. The actuator motor fails electrically. (Ref: No specific recall, but a well-documented failure requiring replacement of the actuator (e.g., P/N 28231-2B710).)
- Premature Catalytic Converter Failure 🟡 Low — Some owners have experienced clogged catalytic converters at relatively low mileage (under 50,000 miles), causing loss of power and a ticking sound. This can be a consequence of engine issues like oil consumption. (Ref: Related to TSBs like 16-FL-005 for other Hyundai models, which address catalyst issues via ECU updates.)
Used vs. New Parts: Buying Guide for This Vehicle
When a used part is the smart pick: A used part is generally not recommended for the oxygen sensor itself, as it is a wear-and-tear item with a finite lifespan. However, sourcing a used connector pigtail from a junkyard is a very smart and cost-effective choice if only the connector is melted or damaged.
Donor-vehicle mileage cap: roughly under 50000 miles for the part to have meaningful remaining life.
What to inspect on the donor part:
- For a connector pigtail, ensure the plastic is not brittle or cracked.
- Check for any signs of corrosion (green or white powder) on the metal pins inside the connector.
- Ensure at least 6-8 inches of wiring is attached to the pigtail to allow for easy splicing.
Aftermarket brands forum-validated for this vehicle:
- NTK (also known as NGK)
- Denso
- Bosch
Brands owners have reported issues with on this vehicle:
- No-name, unbranded 'universal' sensors that require cutting and splicing wires. These often have incorrect resistance values for the heater circuit and can cause new, different codes.
Real Owner Stories
Aggregated from forums and TSBs cited above. Mileages and costs reflect what owners reported in those sources.
2013 Hyundai Veloster 1.6L GDI
Symptoms: Check engine light on with code P0137; no major drivability problems noted.
What fixed it: Replacing the downstream O2 sensor with a new Denso or NGK sensor using an O2 sensor socket.
Source hint: Reddit (r/veloster, r/MechanicAdvice)
2012-2017 Hyundai Veloster 1.6L GDI
Symptoms: P0137 code triggered by the wiring harness sagging and making contact with the hot exhaust pipe.
What fixed it: Repairing the melted insulation and securing the harness away from the exhaust using high-temperature zip ties.
Source hint: hyundai-forums.com
2014 Kia Soul 1.6L GDI — ~55000 miles
Symptoms: Check engine light illuminated for P0137 and related emissions codes.
What fixed it: Replacement of the Bank 1 Sensor 2 oxygen sensor.
Source hint: Kia Soul (AM/PS) owner reports cited in platform_mates
Related OBD-II Codes
Frequently Asked Questions
Does TSB 16-FL-002 apply to my naturally aspirated 2012-2017 Hyundai Veloster 1.6L GDI?
What is the most common part number for the replacement sensor on a non-turbo Veloster?
Is there a specific wiring issue I should look for on my Veloster for code P0137?
Will a P0137 code cause my Veloster to fail an emissions test?
Are there other Hyundai or Kia models that share this P0137 issue with the Veloster?
Can I use a standard wrench to replace the sensor on my Veloster?
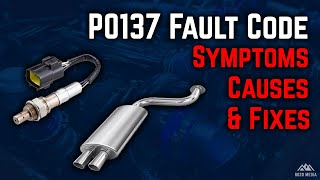
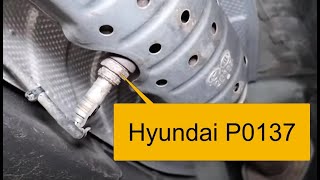
Helpful Videos


We Have This Part in Stock


The information in this article is provided for general reference and educational purposes only. Vehicle specifications, procedures, and part compatibility can vary by production date, trim level, and region. Always consult your vehicle's factory service manual and verify part numbers before purchasing or performing repairs. Safety-critical components such as airbags, seat belts, and braking systems should be installed by a qualified professional.
- Hyundai Veloster:
- 🧭 Diagnostic Flowchart
- 🎬 Helpful Videos
- 🛍️ Shop This Part
- What's Unique About the 2012-2017 Hyundai Veloster
- Symptoms You May Notice
- Most Likely Causes
- Rare But Worth Checking
- Diagnosis Steps
- Parts You'll Likely Need
- Related Codes That Often Appear With This One
- Technical Service Bulletins (TSBs) & Recalls
- Platform-Specific Known Issues
- Mechanic-Grade Diagnostic Values
- Hidden / Shadow Codes Worth Checking
- Scan Tool Commands That Help
- Wiring & Ground Locations
- Real Owner Repair Stories
- OEM Part Supersession History
- Other Known Issues on This Vehicle
- Used vs. New Parts: Buying Guide for This Vehicle
- Real Owner Stories
- 2013 Hyundai Veloster 1.6L GDI
- 2012-2017 Hyundai Veloster 1.6L GDI
- 2014 Kia Soul 1.6L GDI — ~55000 miles
- Related OBD-II Codes
- Frequently Asked Questions
- 🎟️ Get 5% Off