
P0137 on 2002-2007 Jeep Liberty: O2 Sensor Low Voltage Causes and Fixes
This code points to a fault with the Bank 1, Sensor 2 oxygen sensor, which is the downstream sensor on the driver's side. The most common fix is replacing the sensor itself. Expect to pay $25-$75 for an aftermarket sensor and $100+ for an OEM Mopar part. It's a straightforward DIY job if the sensor isn't seized in the exhaust, which is a common issue on these vehicles.
- P0137 on a 2002-2007 Jeep Liberty means the downstream oxygen sensor on the driver's side has failed or has a wiring issue.
- The most common solution is to replace the Bank 1, Sensor 2 oxygen sensor.
- It is highly recommended to use an OEM Mopar or NTK brand replacement sensor (Mopar #56029049AA, NTK #23159 or #23137). Avoid using Bosch sensors as they are known to cause issues on this vehicle.
- Before replacing the sensor, perform a thorough visual inspection of the wiring, especially where it runs near the front driveshaft, as chafing is a known issue.
- This is a DIY-friendly repair, but be prepared for a seized sensor. Use plenty of penetrating oil and the correct O2 sensor socket to avoid damaging the exhaust pipe.
What's Unique About the 2002-2007 Jeep Liberty
For the 2002-2007 (KJ) generation Jeep Liberty, particularly with the common 3.7L V6, this code is a very typical and straightforward repair. Unlike some other vehicles where this code is frequently caused by underlying issues like oil leaks contaminating connectors, on the KJ Liberty, the cause is overwhelmingly just a failed sensor due to age or a damaged wire. Owners and mechanics report that using the correct brand of sensor is important; NTK is the original equipment manufacturer (OEM) and is highly recommended over brands like Bosch, which are known to cause compatibility issues in this platform. The wiring for the downstream sensor is also known to run close to the front driveshaft, and if retaining clips break, it can lead to chafing and damage.
Symptoms You May Notice
- Check Engine Light (Malfunction Indicator Lamp) is on.
- Inability to pass a vehicle emissions test.
- In some rare cases, a rough idle or noticeable exhaust odor may be present if the fault is related to a significant exhaust leak.
- Replacing the wrong oxygen sensor. The code specifically points to Bank 1 (driver's side) and Sensor 2 (downstream/after the catalytic converter).
- Using an incompatible brand of oxygen sensor. Forum members consistently warn against using Bosch sensors in the Jeep Liberty, stating that NTK or Mopar parts should be used to avoid persistent issues.
- Replacing the sensor when the actual fault is a damaged wire. A thorough inspection of the harness, especially near the driveshaft, is critical.
Most Likely Causes
- Failed Bank 1, Sensor 2 Oxygen Sensor 🔴 High Probability → Shop Oxygen Sensor Oxygen sensors are consumable parts that degrade over time and with exposure to exhaust gases. After 15-20+ years of service, failure is very common. The sensors on these Jeeps are also prone to seizing in the exhaust pipe due to rust, making removal difficult.
How to confirm: Visually inspect the sensor for physical damage. Use a scan tool to monitor the live data for the B1S2 sensor; if the voltage is stuck low (typically <0.2V) and does not fluctuate, the sensor is likely bad. 🎬 See how to diagnose these specific Jeep O2 sensor codes. A healthy downstream sensor should show a relatively stable voltage around 0.4-0.6V when the engine is warm.
Typical fix: Replace the Bank 1, Sensor 2 oxygen sensor. This is located on the driver's side of the vehicle, after the catalytic converter. 🎬 Watch: Step-by-step Bank 1 Sensor 2 replacement on a Liberty. Soaking the threads with penetrating oil (like PB Blaster) for several hours or overnight is highly recommended before attempting removal.
Est. part cost: $25-$155 - Damaged O2 Sensor Wiring or Connector 🟡 Medium Probability → Shop Oxygen Sensor The wiring harness for the downstream sensor on the driver's side runs near the front driveshaft. If the factory retaining clips break, the harness can rub against the driveshaft, causing chafed or severed wires. The harness can also be damaged by road debris or contact with hot exhaust components.
How to confirm: Visually inspect the entire length of the sensor's wiring harness from the sensor to the main vehicle harness. Pay close attention to the area near the front driveshaft. Look for chafed, melted, broken, or corroded wires and check for a secure connection at the plug.
Typical fix: Repair the damaged section of the wiring harness with solder and heat shrink. If the connector is damaged, it may need to be replaced. Use zip ties to secure the repaired harness away from moving parts like the driveshaft.
Est. part cost: $5-$30 - Exhaust Leak ⚪ Low Probability Rust is common on the exhaust systems of older vehicles, which can lead to leaks at gaskets or welds, particularly at the Y-pipe flanges.
How to confirm: Listen for an audible ticking or hissing sound from the exhaust, especially when the engine is cold. Visually inspect the exhaust system from the manifold to the O2 sensor for black soot marks, which indicate a leak. A leak before the sensor can introduce outside oxygen, causing the sensor to read a false low voltage.
Typical fix: Repair the exhaust leak. This may involve replacing a gasket, welding a crack, or using exhaust putty for a temporary fix.
Est. part cost: $10-$200
Rare But Worth Checking
- Faulty Powertrain Control Module (PCM): → Shop Engine Control Module (ECM) This is extremely rare. All other possibilities, especially the sensor and wiring, should be exhaustively ruled out before considering the PCM as the cause.
Diagnosis Steps
- Verify the code with an OBD-II scanner. Confirm P0137 is present and check for any other related codes.
- Visually inspect the Bank 1, Sensor 2 oxygen sensor. It is located on the driver's side exhaust pipe, after the catalytic converter.
- Carefully inspect the sensor's wiring harness and connector for any signs of melting, chafing, corrosion, or loose pins. Pay special attention to the area near the front driveshaft.
- If a scan tool with live data is available, monitor the voltage for 'O2S B1S2'. With the engine warm, the voltage should be relatively stable between 0.4V and 0.6V. If it is stuck below 0.2 volts, the sensor or its circuit is faulty.
- Check for exhaust leaks between the engine and the B1S2 sensor. Listen for unusual noises and look for soot trails near flanges and welds.
- If the sensor is suspected to be seized, apply penetrating oil liberally to the threads and let it soak, preferably overnight. A specialized O2 sensor socket and a long breaker bar will be necessary. Applying heat with a torch may also be required.
- If the wiring and exhaust are confirmed to be good, the oxygen sensor itself is the most likely culprit and should be replaced.
Parts You'll Likely Need
- Oxygen Sensor, Bank 1 Sensor 2 (Downstream, Driver's Side)
(OEM #56029049AA)— This is the component that has failed in the vast majority of cases for this specific code on this vehicle.
Trusted brands: Mopar (OEM), NTK (OEM Manufacturer, Part #23159 or #23137 depending on year/connector)
OEM price range: $100-$155
Aftermarket price range: $25-$75
Related Codes That Often Appear With This One
- P0138 — O2 Sensor Circuit High Voltage (Bank 1 Sensor 2). Seeing both high and low voltage codes for the same sensor often points to a wiring short or a failing sensor causing erratic readings.
- P0141 — O2 Sensor Heater Circuit Malfunction (Bank 1 Sensor 2). This indicates a problem with the sensor's internal heating element, which can cause the sensor to report incorrect voltages. It often appears alongside P0137 as the sensor begins to fail completely.
- P0157 — O2 Sensor Circuit Low Voltage (Bank 2, Sensor 2). If both downstream sensors fail simultaneously, it could point to a common cause like a shared ground or power issue, or damage that affected both wiring harnesses.
Platform-Specific Known Issues
- Difficulty Accessing Upstream Sensor Connectors: While this code is for the downstream sensor, owners often replace sensors in pairs or all four at once. The connector for the Bank 1, Sensor 1 (upstream driver's side) is notoriously difficult to reach, located just above the motor mount. Mechanics and DIYers report needing long needle-nose pliers, small screwdrivers, and a lot of patience to disconnect it. Some even add a short extension harness during replacement to make future service easier.
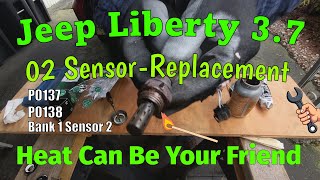
- Seized/Rusted-in Sensors: Due to age and exposure, the oxygen sensors frequently become seized in the exhaust pipe bungs. Attempting removal without proper preparation can damage the threads on the exhaust pipe, leading to a much more expensive repair. It is critical to use a generous amount of penetrating oil (and allow it to soak), a proper 7/8" (22mm) O2 sensor socket, and potentially a torch to heat 🎬 Watch this walkthrough for removing stubborn, rusted-in oxygen sensors. the bung to aid in removal.
Mechanic-Grade Diagnostic Values
- Downstream O2 Sensor (B1S2) Signal Voltage, Key On Engine Off — expected: Approx. 1.25V (Bias Voltage). Failure: A reading of 0V or a value significantly different from the bias voltage suggests a wiring issue or a faulty sensor.
- Downstream O2 Sensor (B1S2) Signal Voltage, Engine Warm at Idle — expected: Relatively stable voltage between 0.4V and 0.6V.. Failure: Voltage stuck below 0.2V or at 0V indicates a fault.
- Downstream O2 Sensor Heater Circuit Resistance — expected: Approximately 8-9 ohms.. Failure: A reading of infinite resistance (open circuit) or zero resistance (short circuit) indicates a failed heater element within the sensor.
Scan Tool Commands That Help
- Professional Scan Tool (e.g., Snap-on, Autel, DRB III): O2 Sensor Heater Test — To actively command the O2 sensor's heater element on and off. This helps verify the integrity of the heater circuit (power, ground, and the element itself) independently of the sensor's voltage signal, which is useful for diagnosing an accompanying P0141 code.
Wiring & Ground Locations
- B1S2 Connector Pinout (Typical) — On the driver's side, after the catalytic converter, connecting the sensor to the main harness.. Knowing the pinout allows for testing of the signal, ground, and heater circuits directly at the connector. The typical 4-wire configuration is: Pin 1 - Heater Power (12V), Pin 2 - Heater Ground, Pin 3 - Signal Wire (to PCM), Pin 4 - Signal Ground (from PCM).
- G102 — On the right rear of the engine compartment.. This is a primary engine ground. While not directly for the O2 sensor signal, a poor engine ground can introduce electrical noise and voltage offsets that may affect sensor readings.
- G101 / G106 — G101 is on the lower left front of the engine block. G106 is on the front center frame cross rail, under the crank pulley. They are often jumpered together.. This ground point serves the Engine Control Module (ECM/PCM). A fault at this location can cause a wide array of sensor and module communication issues, including erratic O2 sensor readings.
Real Owner Repair Stories
- ScannerDanner Forum User (2005 Jeep Liberty 3.7L V6) — P0137 and P0157 codes appeared immediately after a transmission replacement. Downstream O2 sensors would read normally for a few minutes, then drop to 0V.
❌ Tried (didn't work) Verified wiring was intact and showing correct bias voltage (1.25V) when unplugged., Confirmed fuel trims were normal, ruling out a major lean/rich condition.
✅ What actually fixed it The user suspected the non-OEM (Bosch) sensors were damaged during the exhaust removal for the transmission job. A diagnostic test confirmed the sensors were at fault when they flatlined to 0V but the circuit bias voltage returned when they were disconnected. The resolution pointed towards replacing the likely faulty aftermarket sensors with OEM/NTK parts. - Mechanics Stack Exchange User (2005 Jeep Liberty V6) — Extremely rough running and lack of power after the battery died and was replaced. The only code present was P0137.
❌ Tried (didn't work) Plugged in a brand new O2 sensor (without installing it in the exhaust) to see if it would generate a voltage; it still read 0V on the scan tool.
✅ What actually fixed it The user concluded that since a new, hanging sensor also read 0V, the problem was not the sensor itself but a short in the wiring harness leading to it. The rough running was likely a separate issue that had not yet triggered a code after the computer reset, but the P0137 was definitively diagnosed as a wiring fault.
OEM Part Supersession History
56041698AA→56029049AA, 05149171AA, 68144248AA— Standard part evolution and consolidation across multiple Chrysler/Dodge/Jeep platforms.
Heads up: While the Mopar part numbers have superseded, the critical factor for the Liberty is the connector style and wire length. Early models (2002-2003) may have a different connector than later models (2004-2007). Always verify the connector visually or use the NTK part finder, as NTK 23137 and 23159 are often listed for different years within this range.
Model Year Variations Within This Range
- 2002-2003 vs 2004-2007: The physical connector for the oxygen sensors can differ. While the sensor function is the same, early KJ models (2002-2003) may use a different plug compared to the refreshed models (2004-2007). This is a common trap when ordering aftermarket parts. For example, NTK lists part #23137 for 2002-2003 and #23159 for 2004-2007 for the downstream sensor. Always visually match the old connector before purchasing a replacement.
Diagnostic Flowchart
Real Owner Stories
Aggregated from forums and TSBs cited above. Mileages and costs reflect what owners reported in those sources.
2007 Jeep Liberty 3.7L
Symptoms: Check Engine Light illuminated with a P0137 code indicating a fault with the Bank 1 Sensor 2 oxygen sensor.
What fixed it: Replaced the driver's side downstream oxygen sensor with an NTK aftermarket sensor (part number 23159).
Source hint: YouTube - 'Jeep Liberty 3.7 - 02 Sensor Replacement - Bank1 Sensor2 (Drivers Side)'
2002-2007 Jeep Liberty
Symptoms: Attempted to remove old oxygen sensors, but they were completely seized and rusted into the exhaust pipe bungs.
What fixed it: Soaked the sensors in PB Blaster and fabricated a custom tool out of a 7/8" wrench to get enough leverage in the tight spaces under the Jeep.
Source hint: Jeep Liberty Forum - '3 down 1 to go! 02 sensor removal advice/help!'
Jeep Liberty (KJ/KK)
Symptoms: Experienced extreme frustration trying to disconnect the upstream Bank 1 Sensor 1 connector located above the motor mount while doing preventative O2 sensor maintenance.
What fixed it: Used long pliers and a screwdriver to finally release the connector tab, then installed a short extension harness to ensure the connector would be easily accessible for future replacements.
Source hint: Jeep KJ and KK Liberty Forum - 'O2 Oxygen sensor removal bank 1 sensor 1'
Chrysler/Dodge/Jeep 3.7L Platform
Symptoms: Multiple oxygen sensor codes triggered simultaneously, including P0137, P0138, P0157, and P0158.
What fixed it: Repaired a critical wiring harness issue common to the platform where the O2 sensor wiring becomes damaged.
Source hint: YouTube - 'Chrysler Dodge Jeep P0157 P0158 P0137 and/or P0138'
Related OBD-II Codes
Frequently Asked Questions
Where is the Bank 1, Sensor 2 oxygen sensor located on my 2002-2007 Jeep Liberty?
What are the recommended replacement part numbers for the B1S2 oxygen sensor on the 3.7L Liberty?
Why is the O2 sensor wiring harness prone to failing on this specific Jeep platform?
I'm trying to replace the O2 sensors on my Liberty, but they are completely stuck. What should I do?
While fixing P0137, I decided to replace the upstream sensor (Bank 1, Sensor 1) too, but I can't reach the connector. Any tips?
Can an exhaust leak cause the P0137 code on my 3.7L V6?
Helpful Videos


We Have This Part in Stock


The information in this article is provided for general reference and educational purposes only. Vehicle specifications, procedures, and part compatibility can vary by production date, trim level, and region. Always consult your vehicle's factory service manual and verify part numbers before purchasing or performing repairs. Safety-critical components such as airbags, seat belts, and braking systems should be installed by a qualified professional.
- Jeep Liberty:
- 🧭 Diagnostic Flowchart
- 🎬 Helpful Videos
- 🛍️ Shop This Part
- What's Unique About the 2002-2007 Jeep Liberty
- Symptoms You May Notice
- Most Likely Causes
- Rare But Worth Checking
- Diagnosis Steps
- Parts You'll Likely Need
- Related Codes That Often Appear With This One
- Platform-Specific Known Issues
- Mechanic-Grade Diagnostic Values
- Scan Tool Commands That Help
- Wiring & Ground Locations
- Real Owner Repair Stories
- OEM Part Supersession History
- Model Year Variations Within This Range
- Real Owner Stories
- 2007 Jeep Liberty 3.7L
- 2002-2007 Jeep Liberty
- Jeep Liberty (KJ/KK)
- Chrysler/Dodge/Jeep 3.7L Platform
- Related OBD-II Codes
- Frequently Asked Questions
- 🎟️ Get 5% Off