
P0137 on 2006-2012 Toyota RAV4 3.5L V6: O2 Sensor Circuit Low Voltage Causes and Fixes
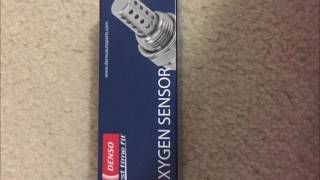
This code almost always points to a failed downstream oxygen sensor (Bank 1, Sensor 2). Expect to pay $40-$90 for an aftermarket sensor (Denso is the OEM supplier) and $120-$200 for an OEM part. The correct part is Toyota P/N 89465-0R010 or Denso P/N 234-4512. It's a DIY-friendly fix with a difficulty of 2/5, but the sensor can be tight.
- P0137 specifically refers to the downstream oxygen sensor (Sensor 2) on the rear cylinder bank (Bank 1) near the firewall.
- The most common cause by far is a failed oxygen sensor, which is a normal wear-and-tear item.
- Before buying a new sensor, perform a quick visual inspection of the wiring harness for any obvious damage.
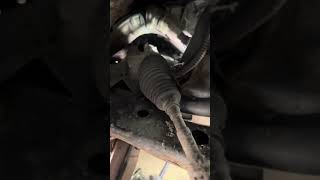
- This is a very manageable DIY repair for those with basic tools. The main challenge is often accessing the sensor and removing it if it's seized by rust.
- Don't be alarmed if the 4WD or other warning lights come on with the Check Engine Light; this is a known quirk of this Toyota platform.
What's Unique About the 2006-2012 Toyota RAV4
On the 2GR-FE V6 engine in the RAV4, 'Bank 1' refers to the cylinder bank closer to the firewall (the rear bank), which is notoriously harder to access for some repairs. 'Sensor 2' is the downstream sensor for that bank, located after the catalytic converter. A common point of confusion for owners is that when the Check Engine Light comes on for this code, Toyota's system often illuminates the 4WD and traction control (VSC) lights as well, which can be alarming but is normal behavior designed to get the driver's attention.
Symptoms You May Notice
- Check Engine Light is on.
- 4WD and/or traction control (VSC) lights may also be illuminated.
- Potential for slightly decreased fuel efficiency.
- In most cases, no noticeable difference in how the vehicle drives.
- Failure to pass an emissions/smog inspection.
- In some cases, engine hesitation or rough idle may be present.
- Replacing the wrong oxygen sensor (e.g., replacing the upstream Air/Fuel Ratio Sensor instead of the downstream Oxygen Sensor).
- Replacing the sensor on the wrong bank (Bank 2, which is the front/radiator side, instead of Bank 1, the rear/firewall side).
- Assuming the sensor is bad without checking the wiring and connector first. There are forum reports of users replacing the sensor only to find the code returns, pointing to a wiring issue.
Most Likely Causes
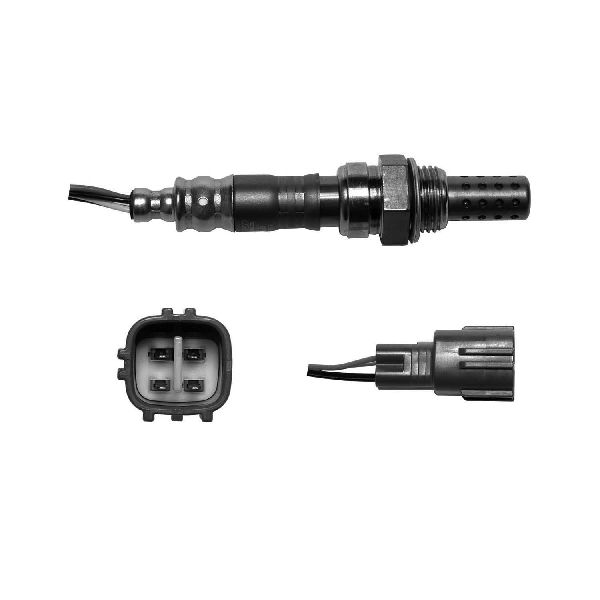
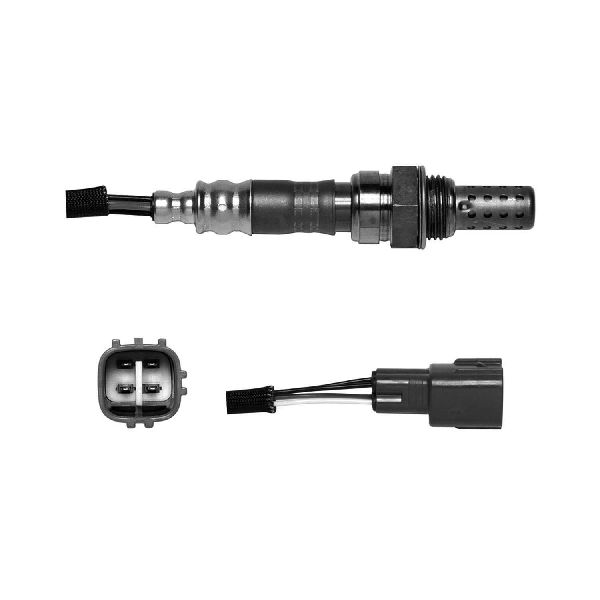
- Failed Downstream Oxygen Sensor (Bank 1, Sensor 2) 🔴 High Probability → Shop Oxygen Sensor Oxygen sensors are consumable parts that wear out over time due to constant exposure to high-temperature exhaust gases. After 100,000+ miles, failure is common and is the most frequent cause for P0137.
How to confirm: Use a scan tool to monitor the live data for the B1S2 oxygen sensor. If the voltage is stuck below 0.2V and doesn't fluctuate when the engine is warm and running at a steady RPM, the sensor has likely failed. You can also test the sensor's internal heater circuit with a multimeter; resistance should be within a specific range (typically 11-16 Ohms).
Typical fix: Replace the Bank 1, Sensor 2 oxygen sensor. The original Toyota OEM part number is 89465-0R010, which has been superseded by 89465-0R080. The direct-fit Denso (OEM supplier) part is 234-4512. 🎬 Watch: A step-by-step guide to replacing the downstream oxygen sensor
Est. part cost: $40 - $200 - Damaged Wiring or Connector 🟡 Medium Probability The sensor's wiring harness runs under the vehicle and is exposed to road debris, heat, and moisture, which can cause chafing, corrosion, or physical breaks.
How to confirm: Visually inspect the entire wiring harness from the sensor to its connection point. On the V6 RAV4, the connector is located inside the vehicle, under the passenger-side carpet and a plastic cover plate. 🎬 See this walkthrough for replacing the Bank 1 Sensor 2 Pull back the carpet near the front of the passenger seat to access it. Check for any signs of damage, melting, or corrosion on the pins of the connector.
Typical fix: Repair the damaged section of the wire or replace the connector pigtail. Ensure the repair is sealed against moisture.
Est. part cost: $5 - $30 - Exhaust Leak ⚪ Low Probability Rust and corrosion can cause leaks at gasket flanges or cracks in the exhaust pipe, especially in regions that use road salt. A leak before the sensor can allow extra oxygen to enter the exhaust stream, causing a false low voltage reading.
How to confirm: Listen for a ticking or hissing sound from the exhaust system, especially when the engine is cold. Visually inspect the exhaust pipes and flanges between the engine and the B1S2 sensor for black soot marks, which indicate a leak. A smoke test is the most definitive way to find small leaks.
Typical fix: Replace the leaking gasket or repair/replace the cracked section of the exhaust pipe.
Est. part cost: $10 - $150
Rare But Worth Checking
- Engine Control Module (ECM) Fault: → Shop Engine Control Module (ECM) This is extremely rare. Before condemning the ECM, all other possibilities (sensor, wiring, exhaust leaks, fuses) must be exhaustively ruled out. Sometimes, other codes like P0606 may appear alongside P0137, but often replacing the faulty sensor resolves both.
- Blown A/F Sensor Fuse: The oxygen sensor heater circuit is protected by a fuse. If this fuse blows, it can prevent the sensor from heating up properly, leading to incorrect voltage readings. While less common, it's a simple check. In many Toyotas, this fuse is labeled 'A/F HEATER' or similar in the engine bay fuse box.
Diagnosis Steps
- Connect an OBD-II scanner and confirm P0137 is the primary code. Note any other codes present.
- Using the scanner's live data function, observe the voltage for 'O2S B1S2'. A healthy downstream sensor on a warm engine at steady RPM should have a relatively stable voltage, typically fluctuating slowly between 0.5V and 0.8V. If it's stuck below 0.2V, it confirms the low voltage condition.
- Locate the Bank 1, Sensor 2 oxygen sensor. On the 2GR-FE V6, Bank 1 is the cylinder bank near the firewall. Sensor 2 is the one located after the catalytic converter for that bank.
- Thoroughly inspect the sensor's wiring harness for any signs of damage, such as burns, chafing, or loose connections. Trace the wire from the sensor to its connector inside the cabin. On the V6 RAV4, this involves pulling up the passenger-side carpet near the front of the seat to find the connector grommet and plug.
- Inspect the exhaust system for any leaks between the engine and the B1S2 sensor. Look for soot trails or listen for audible hissing/ticking sounds.
- If wiring and exhaust are okay, the sensor itself is the most likely culprit. Disconnect the sensor and test the heater circuit with a multimeter. Resistance should be within manufacturer specs (often 11-16 ohms at room temperature). An open circuit (infinite resistance) means the heater is bad and the sensor needs replacement.
- Check the 'A/F HEATER' fuse in the engine compartment fuse box to ensure it is not blown.
- If all else fails, the issue could be with the ECM, but this is highly unlikely and should be diagnosed by a professional.
Parts You'll Likely Need
- Oxygen Sensor (Bank 1, Sensor 2)
(OEM #89465-0R010)— This is the component that has failed in the vast majority of P0137 cases. It is a consumable part that degrades over time.
Trusted brands: Denso (OEM Supplier), Toyota (OEM), Bosch
OEM price range: $120-$200
Aftermarket price range: $40-$90
Technical Service Bulletins (TSBs) & Recalls
- T-SB-0318-08: Addresses a clunking noise from the intermediate steering shaft on 2006-2008 models.
- LSC 90K: A Limited Service Campaign to replace the problematic rubber VVT-i oil line on Bank 1 with an all-metal part on 2006-2009 models.
Platform-Specific Known Issues
- VVT-i Oil Line Preventative Replacement: While not a direct cause of P0137, owners of 2006-2009 RAV4s with the 2GR-FE engine should inspect the Bank 1 VVT-i oil line. The original part used a rubber hose section that is known to rupture without warning, causing rapid oil loss and catastrophic engine failure. Toyota issued a Limited Service Campaign to replace it with an all-metal line (Part No. 15772-31030).
Mechanic-Grade Diagnostic Values
- Downstream O2 Sensor (HO2S) Heater Resistance — expected: 11 to 16 Ω at 20°C (68°F). Failure: An open circuit (infinite resistance) or a reading outside the specified range indicates a failed heater element, requiring sensor replacement.
- Downstream O2 Sensor (HO2S) Voltage (Live Data) — expected: Slowly fluctuating between 0.5V and 0.8V on a warm, stable engine.. Failure: Voltage is stuck at or below 0.21V, especially when the ECM commands a rich mixture during an active test.
- Downstream O2 Sensor (HO2S) Impedance (Mode 6 Data) — expected: Below 15 kΩ. Failure: The ECM will set a P0137 (or related code) if the calculated impedance of the sensor circuit exceeds 15 kΩ, indicating an open or high-resistance fault.
Hidden / Shadow Codes Worth Checking
- Mode 6, Test ID $05: This is not a DTC but a diagnostic monitor in Mode 6 that checks the Bank 1, Sensor 2 switching characteristics and response time. A failing result in this test often precedes the P0137 code. (see via A professional scan tool like Toyota Techstream or any advanced scanner capable of displaying Mode 6 data.)
Scan Tool Commands That Help
- Toyota Techstream: Active Test: 'Control the Injection Volume for A/F Sensor' — This function allows a technician to manually command a rich or lean fuel mixture. While observing the 'O2S B1S2' live data, the technician can confirm if the sensor responds correctly to the commanded change or if it remains stuck at a low voltage, which would confirm a faulty sensor or circuit.
- Toyota Techstream: Data List: 'O2S B1 S2' — This is the primary live data parameter to monitor. It shows the real-time voltage output of the sensor in question. It should be the first step in diagnosis after reading the code.
Wiring & Ground Locations
- Main Engine Grounds — The 2GR-FE engine has two primary ground straps that connect the engine to the chassis. They are located on the top of each valve cover (one front, one rear) and bolt to the body near the strut towers.. A poor engine ground can create a voltage offset and instability for all engine sensors, including the oxygen sensors. This can lead to false low voltage readings and codes like P0137. Ensuring these grounds are clean and tight is a crucial, often overlooked, diagnostic step.
- ECM Pins for B1S2 — At the Engine Control Module (ECM), the Bank 1 Sensor 2 signals are on specific pins. For a typical 2GR-FE ECM, these would be OX1B (signal) and E2 (sensor ground). The heater circuit pins are HT1B (+B from EFI Main Relay) and a ground.. For advanced diagnosis, a technician can test for voltage and continuity directly at the ECM pins to definitively rule out a wiring problem between the sensor and the module.
Real Owner Repair Stories
- Gateway Auto Repair Shop Case Study (2008 Toyota RAV4 Sport V6, 100,000+ miles) — Check Engine Light on with code P0137, accompanied by engine hesitation during driving.
✅ What actually fixed it Diagnostic testing showed inconsistent and low voltage from both downstream oxygen sensors. The repair involved replacing both the Bank 1 and Bank 2 downstream O2 sensors, as well as replacing the overdue spark plugs. This restored proper engine operation and resolved the hesitation. - YouTube DIY Video (2006 Toyota RAV4 V6) — Check Engine, 4WD, and VSC lights all illuminated. Codes P0137 and P0606 were present.
✅ What actually fixed it The owner replaced the Bank 1, Sensor 2 oxygen sensor. This single repair cleared both the P0137 and the P0606 (ECM Processor Fault) codes and extinguished all the warning lights.
OEM Part Supersession History
89465-0R010→89465-0R080— Standard part revision by the manufacturer, likely for improved durability, material changes, or manufacturing process updates.
Heads up: The new part number (89465-0R080) is the correct and direct replacement for the original. There are no known incompatibility issues.
Diagnostic Flowchart
Other Known Issues on This Vehicle
Issues unrelated to this code that are worth knowing about as an owner of this generation:
- Rupturing VVT-i Oil Line (Rubber Section) 🔴 High — Very common on 2006-2009 models that have not had the updated part installed. Failure can be sudden and lead to catastrophic engine failure from oil starvation. (Ref: Toyota Limited Service Campaign (LSC) 90K.)
- Premature Water Pump Failure 🟠 Medium — A known weak point, especially on earlier (pre-2010) 2GR-FE engines. Leaks can lead to overheating. Replacement is labor-intensive and can cost over $1000.
- Clunking Intermediate Steering Shaft 🟡 Low — Commonly causes a clunking or knocking noise when turning the steering wheel at low speeds. It is more of an annoyance than a safety risk. (Ref: T-SB-0318-08)
- Excessive Oil Consumption 🟠 Medium — More prevalent in the 2006-2008 V6 models, though less common than on the 4-cylinder (2AZ-FE) of the same era. Often attributed to piston ring design.
Used vs. New Parts: Buying Guide for This Vehicle
When a used part is the smart pick: For this specific repair, buying a used oxygen sensor is NOT recommended. They are consumable wear-and-tear items. A used part has an unknown remaining lifespan and may fail shortly after installation, wasting time and money. A used wiring harness pigtail from a junkyard can be a cost-effective choice if only the connector is damaged.
Donor-vehicle mileage cap: roughly under 100000 miles for the part to have meaningful remaining life.
What to inspect on the donor part:
- If sourcing a connector pigtail, inspect for any signs of melting, brittle plastic, or corrosion on the pins.
- Ensure the donor vehicle is from a dry, salt-free climate to minimize corrosion risk.
- Check that the wiring insulation is still flexible and not cracked or hardened from heat exposure.
OEM-only on this vehicle (don't cheap out):
- While not a direct cause, if a catalytic converter replacement is ever considered, using an OEM part is highly advised for this platform. Aftermarket converters on Toyotas are known to have a shorter lifespan and may not meet the efficiency thresholds required by the ECM, leading to recurring P0420/P0430 codes.
Aftermarket brands forum-validated for this vehicle:
- Denso (OEM supplier for Toyota)
- NTK
Brands owners have reported issues with on this vehicle:
- Unnamed, no-brand 'white box' sensors from online marketplaces often have high failure rates and may not perform to OEM specifications, causing the code to return.
Real Owner Stories
Aggregated from forums and TSBs cited above. Mileages and costs reflect what owners reported in those sources.
2012 Toyota RAV4 3.5L V6
Symptoms: Check Engine Light on with code P0137.
What fixed it: The owner replaced the sensor with an OEM part, but the code returned, suggesting the issue may lie in the wiring harness or other components.
Source hint: reddit.com/r/AskAMechanic/comments/153l3d9/any_fix/
2006 Toyota RAV4 3.5L V6
Symptoms: Engine Light, 4WD, and VSC lights all illuminated on the dashboard.
What fixed it: Replaced the downstream oxygen sensor; the owner accessed the connector by pulling up the passenger-side carpet.
Source hint: YouTube: P0137 & P0606 fix | Toyota Rav4 | Oxygen sensor DIY | Engine Light+4WD+VSC lights on
2006-2009 Toyota RAV4 3.5L V6 — ~120000 miles
Symptoms: Potential for catastrophic engine failure and rapid oil loss due to a ruptured rubber hose section.
What fixed it: Replacement of the Bank 1 VVT-i oil line with an all-metal part (Part No. 15772-31030) per Limited Service Campaign 90K.
Source hint: LSC 90K: A Limited Service Campaign to replace the problematic rubber VVT-i oil line on Bank 1
Related OBD-II Codes
Frequently Asked Questions
Where is the Bank 1 Sensor 2 connector located on my V6 RAV4?
Why are my 4WD and VSC lights on when the problem is just an oxygen sensor?
What is the specific replacement part number for the Bank 1 Sensor 2 on my 2006-2012 RAV4?
Does the VVT-i oil line TSB or campaign apply to my 2010-2012 RAV4?
How can I tell if my P0137 is caused by a sensor failure or an exhaust leak?
What should the resistance be if I test the O2 sensor heater circuit with a multimeter?
Helpful Videos

We Have This Part in Stock


The information in this article is provided for general reference and educational purposes only. Vehicle specifications, procedures, and part compatibility can vary by production date, trim level, and region. Always consult your vehicle's factory service manual and verify part numbers before purchasing or performing repairs. Safety-critical components such as airbags, seat belts, and braking systems should be installed by a qualified professional.
- Toyota RAV4:
- 🧭 Diagnostic Flowchart
- 🎬 Helpful Videos
- 🛍️ Shop This Part
- What's Unique About the 2006-2012 Toyota RAV4
- Symptoms You May Notice
- Most Likely Causes
- Rare But Worth Checking
- Diagnosis Steps
- Parts You'll Likely Need
- Technical Service Bulletins (TSBs) & Recalls
- Platform-Specific Known Issues
- Mechanic-Grade Diagnostic Values
- Hidden / Shadow Codes Worth Checking
- Scan Tool Commands That Help
- Wiring & Ground Locations
- Real Owner Repair Stories
- OEM Part Supersession History
- Other Known Issues on This Vehicle
- Used vs. New Parts: Buying Guide for This Vehicle
- Real Owner Stories
- 2012 Toyota RAV4 3.5L V6
- 2006 Toyota RAV4 3.5L V6
- 2006-2009 Toyota RAV4 3.5L V6 — ~120000 miles
- Related OBD-II Codes
- Frequently Asked Questions
- 🎟️ Get 5% Off