
P0138 on 2011-2018 Audi A6 3.0T: O2 Sensor High Voltage Causes and Fixes
For a 2011-2018 Audi A6 3.0T, code P0138 almost always means the Bank 1, Sensor 2 (passenger side, downstream) oxygen sensor has failed. The most common fix is to replace the sensor. Expect to pay $80-$150 for an aftermarket Bosch or NGK/NTK sensor and $180-$250 for an OEM part.
- P0138 on your Audi A6 3.0T almost certainly points to a problem with the passenger-side, post-catalytic converter oxygen sensor or its wiring.
- Before buying parts, use a scan tool to watch the live voltage from the sensor. A reading stuck above 1.0V confirms the fault.
- The most likely fix is replacing the oxygen sensor (OEM part # 06E906265AA or a newer revision). Bosch is a widely trusted aftermarket brand.
- This is a manageable DIY repair for those with basic tools, including a special O2 sensor socket.
What's Unique About the 2011-2018 Audi A6
On the Audi A6 C7 3.0T platform, the P0138 code is a straightforward and common issue, typically pointing to a standard component failure rather than a systemic design flaw. There are no widespread technical service bulletins for this specific code, suggesting it's a routine repair. Owners report that the sensor itself is the most frequent failure point, often due to age and heat cycles. Access to the sensor is tight but manageable for a DIY repair without removing major components.
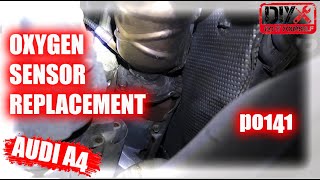
🎬 Watch: Step-by-step guide to removing the downstream O2 sensorSymptoms You May Notice
- Check Engine Light illuminated
- Decreased fuel economy
- Rough or fluctuating idle
- Hesitation or poor acceleration
- Failure to pass emissions testing
- Strong exhaust odor due to a rich fuel mixture
- Replacing the catalytic converter. The P0138 code is for the sensor that *monitors* the converter, not the converter itself. A bad converter typically sets a P0420 code.
- Replacing the wrong oxygen sensor. Ensure you are replacing Bank 1 (passenger side) and Sensor 2 (downstream/post-cat).
- Ignoring a wiring problem. It's common to replace the sensor only to find the code returns because the underlying issue was a short or break in the harness.
Most Likely Causes
- Faulty Bank 1, Sensor 2 Oxygen Sensor 🔴 High Probability → Shop Oxygen Sensor Oxygen sensors are wear items that degrade over time due to extreme heat and exposure to exhaust gases. The internal heating element can fail or the sensor can become contaminated with carbon, leading to inaccurate readings.
How to confirm: Use an OBD-II scanner to monitor live data for the B1S2 O2 sensor. If the voltage is stuck above 1.0V when the engine is warm and running, the sensor is likely bad. You can also test the resistance of the sensor's internal heater circuit; an open or shorted circuit confirms failure. A visual inspection might show discoloration or heavy carbon buildup on a failed sensor.
Typical fix: Replace the Bank 1, Sensor 2 (passenger side, downstream) oxygen sensor. 🎬 See this walkthrough for replacing the Bank 1 Sensor 2
Est. part cost: $80-$250 - Damaged Wiring or Connector 🟡 Medium Probability The wiring harness is located near hot exhaust components and is exposed to the elements under the car, making it susceptible to melting, corrosion, or physical damage from road debris.
How to confirm: Visually inspect the entire wiring harness from the O2 sensor to its connection point. Look for any signs of burnt, chafed, or broken wires. Check the connector for corrosion or loose pins. A multimeter can be used to check for a short to voltage on the signal wire, which would cause a constant high reading.
Typical fix: Repair the damaged section of wiring or replace the connector pigtail.
Est. part cost: $10-$50 - Exhaust Leak ⚪ Low Probability Flex pipes on high-mileage Audis can develop cracks over time. A leak *before* the sensor can allow outside air into the exhaust stream, which would typically cause a lean condition, but a leak near the sensor can sometimes disrupt readings. However, an exhaust leak is more commonly associated with lean codes (e.g., P0171/P0174) than a rich code like P0138.
How to confirm: Listen for an audible ticking or hissing sound from the exhaust, especially when the engine is cold. Visually inspect the exhaust system, particularly around the flex pipe and flanges, for soot trails that indicate a leak.
Typical fix: Repair the leak. This may involve welding a crack or replacing a faulty gasket or flex pipe.
Est. part cost: $5-$300
Rare But Worth Checking
- Engine Control Module (ECM) Fault: This is extremely rare. The ECM should only be considered as the cause after all other possibilities, including the sensor and wiring, have been thoroughly ruled out by a professional. An ECM software update (reflash) could potentially fix logic errors, but hardware failure is unlikely.
- Persistent Rich Condition: If the engine is running excessively rich due to another issue (e.g., a leaking fuel injector, faulty fuel pressure regulator), it could overwhelm the catalytic converter and cause a high voltage reading at the rear O2 sensor. This would almost certainly be accompanied by other fault codes, such as P0172 (System Too Rich, Bank 1) or misfire codes.
Diagnosis Steps
- Connect an OBD-II scanner and confirm that P0138 is the primary code. Check for any other codes that could indicate a root cause, like fuel system or misfire codes.
- View the live data stream for the 'O2 Sensor Voltage B1S2'.
- Start the engine and let it warm up to operating temperature.
- Observe the voltage. A healthy downstream sensor should show a relatively stable voltage, typically between 0.5V and 0.8V. If the voltage is stuck high (e.g., 1.1V or higher), the sensor or its circuit is faulty.
- Turn off the engine and allow the exhaust to cool.
- Perform a thorough visual inspection of the Bank 1, Sensor 2 wiring harness and connector. Look for any signs of melting, chafing, corrosion, or loose pins.
- If the wiring appears intact, the oxygen sensor itself is the most likely cause of the fault.
- For advanced diagnosis, use a multimeter to test the sensor's heater circuit for proper resistance (typically a low ohm value, not an open or short circuit). Also, backprobe the signal wire to confirm the voltage seen by the ECM.
- If a new sensor does not resolve the issue, perform a detailed wiring check with a multimeter to test for continuity, ground, and potential shorts to voltage between the sensor connector and the ECM.
Parts You'll Likely Need
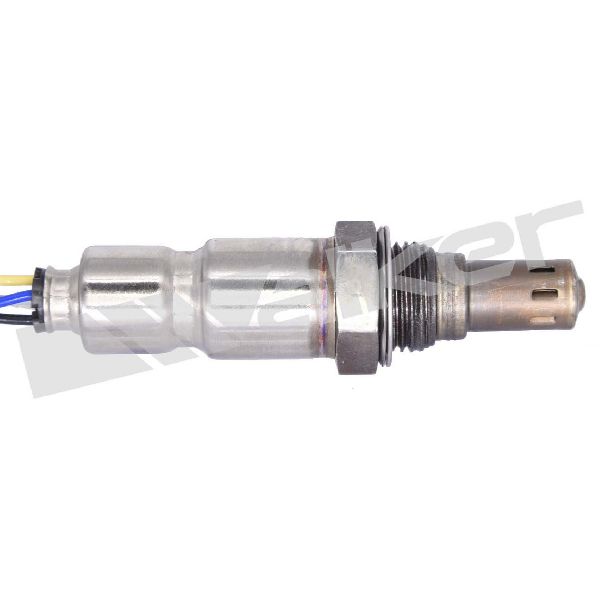
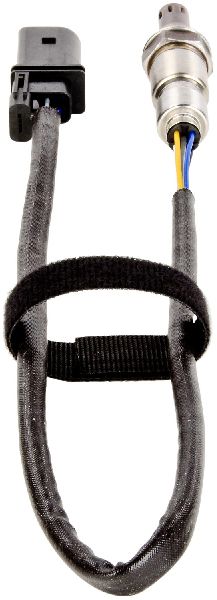
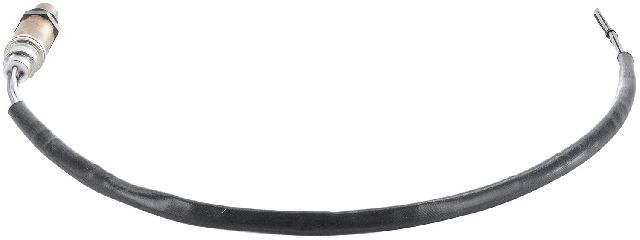
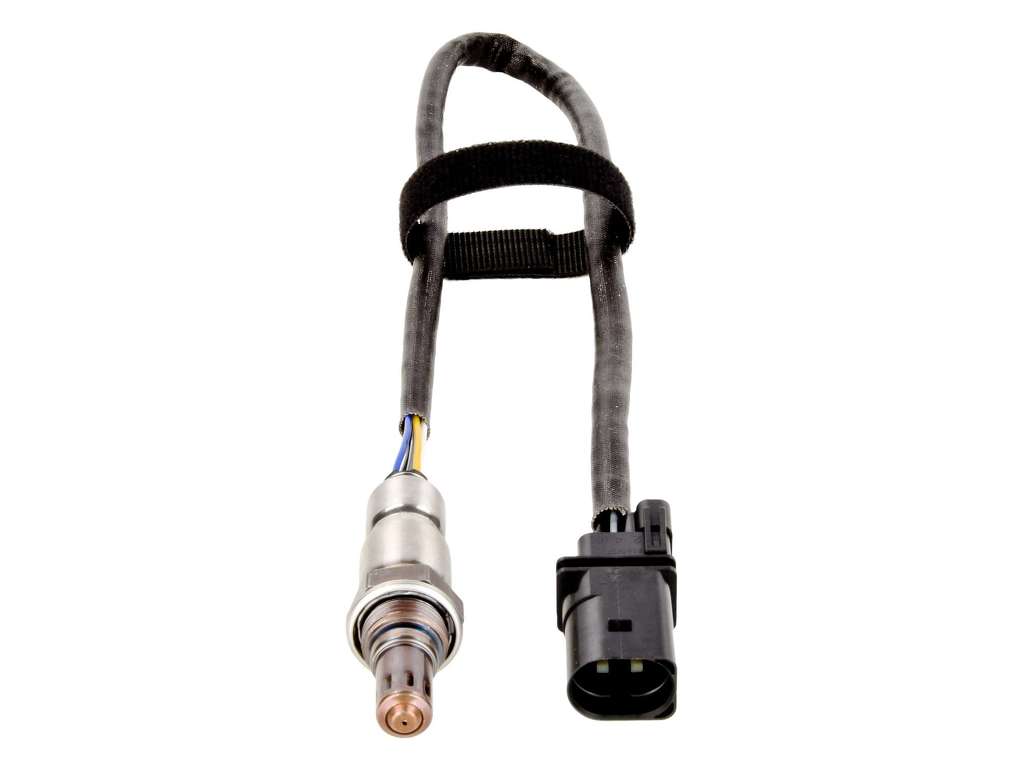
- Downstream Oxygen Sensor (Bank 1 or 2)
(OEM #06E906265AA)— This is the component that fails most often, triggering the P0138 code. The sensor is the same for the left and right sides. This part number may be superseded by newer revisions like 06E906265S. It's critical to verify the correct part for your specific VIN.
Trusted brands: Bosch (often the OEM supplier), NGK/NTK, Denso
OEM price range: $180-$250
Aftermarket price range: $80-$150 - Oxygen Sensor Socket — A special 22mm (or 7/8") slotted socket is required to remove and install the oxygen sensor without damaging its wire. Access can be tight, so a set of O2 sensor sockets with different offsets can be helpful.
Trusted brands: Lisle, OEMTOOLS, GearWrench
OEM price range: $10-$25
Aftermarket price range: $10-$30
Mechanic-Grade Diagnostic Values
- Downstream O2 Sensor Heater Resistance (cold) — expected: 2 - 30 Ohms. Failure: An open circuit (infinite resistance) or a short circuit (zero resistance) indicates a failed heater element.
- VCDS Live Data (Engine-01, MVB 033, Field 2) — expected: Relatively stable voltage between 0.5V and 0.8V on a warm, running engine.. Failure: Voltage is stuck high, at or above 1.1V, indicating a sensor or circuit fault.
- Heater Power Supply at Harness Connector (Key On, Engine Off) — expected: Battery Voltage (approx. 12V). Failure: No voltage or significantly low voltage points to a problem with the fuse, relay, or wiring, not the sensor itself.
Scan Tool Commands That Help
- VCDS (VAG-COM): [01 - Engine] -> [Measuring Blocks - 08] -> Group 033 — This is the primary function to view the live voltage of the downstream O2 sensor (Bank 1, Sensor 2 is in field 2). It allows you to confirm if the voltage is stuck high, which is the main trigger for P0138.
- VCDS (VAG-COM): [01 - Engine] -> [Readiness - 15] — After replacing the sensor, you can use this function to check if the O2 sensor systems have passed their self-tests. This helps confirm the repair was successful without needing to complete a full drive cycle.
Wiring & Ground Locations
- Main Engine Ground Strap — On the C7 platform, a primary engine ground point is located on the right (passenger side in the US) of the engine compartment, running from the engine mount area to a stud on the frame rail.. A corroded or loose main engine ground can cause unstable voltage and erratic sensor readings throughout the engine management system. While less likely to cause a specific 'high voltage' code than a direct short, it can contribute to bizarre electrical issues and should be checked if the sensor and its direct wiring test good.
- G39 (HO2S) Connector — The downstream O2 sensor (G39 for Bank 1) has a 4-pin black connector (T4bp/T4fg) located under the vehicle, clipped to the transmission or chassis near the catalytic converter.. This is the primary connection point to inspect for corrosion, moisture intrusion, or physical damage. All voltage and resistance tests of the sensor and harness begin at this connector.
- ABS Module Ground Point — Two brown ground wires from the ABS module connector bolt to the frame directly below the ABS unit.. While not directly for the O2 sensor, this is a known poor ground location on the C7 platform that can cause intermittent electrical faults and communication errors on the CAN bus. If P0138 is accompanied by other seemingly unrelated electrical or communication codes (like U0100), this ground point is a prime suspect for causing system-wide voltage instability.
OEM Part Supersession History
06E906265AA→06E906265S, 06E906265AJ, and others.— Standard part evolution for improved reliability or supplier change.
Heads up: While many aftermarket sensors from brands like Bosch, NGK, and Denso are listed as compatible, it is crucial to use a high-quality, direct-fit sensor. Universal sensors requiring wire splicing are not recommended as incorrect resistance can cause the code to return.
Model Year Variations Within This Range
- 2016-2018 (C7.5 Facelift): The facelift models introduced the 'CREC' engine, an update to the earlier 'CGXB' 3.0T. While the fundamental design is similar, some ancillary parts, sensors, and their corresponding part numbers may differ. It is critical to verify the O2 sensor part number against the vehicle's VIN, especially for 2016+ models, as there could be running changes.
Diagnostic Flowchart
Other Known Issues on This Vehicle
Issues unrelated to this code that are worth knowing about as an owner of this generation:
- PCV / Oil Separator Failure 🔴 High — Common between 60,000-100,000 miles. Can cause oil consumption, lean codes, or coolant/oil mixing. (Ref: Multiple TSBs exist, including TSB 17-20-10 / TPI 2060033 for MIL on or noise from breather.)
- Water Pump & Thermostat Failure 🔴 High — Common failure item, especially on pre-2013 models. The plastic components become brittle, leading to coolant leaks. Often replaced preventatively. (Ref: Updated parts were released by Audi to improve longevity.)
- Upper Timing Chain Tensioner Rattle 🟠 Medium — A brief (1-3 second) rattle on cold start is common and considered 'normal' by Audi. It's caused by oil pressure bleed-down. It becomes a problem if the noise persists or is accompanied by timing-related fault codes. (Ref: TSB 2039995/2 was released for updated tensioners to reduce the noise.)
- Carbon Buildup on Intake Valves 🟠 Medium — A known issue with all direct-injection engines. Leads to reduced airflow, misfires, and power loss over time (typically noticeable after 60,000+ miles). Not a 'failure' but a required maintenance item (walnut blasting).
- Cracked Exhaust Flex Pipes 🟡 Low — Can occur on higher-mileage vehicles, leading to a loud exhaust leak noise (ticking/hissing).
Used vs. New Parts: Buying Guide for This Vehicle
When a used part is the smart pick: For this repair, buying a used part is not recommended. Oxygen sensors are wear items with a finite lifespan, and a used sensor from a junkyard has an unknown history and could fail shortly after installation.
What to inspect on the donor part:
- Not applicable as used sensors are not advised.
OEM-only on this vehicle (don't cheap out):
- While not strictly 'OEM-only', using a sensor from the original equipment manufacturer (like Bosch) or a reputable OEM-equivalent (NGK/NTK, Denso) is strongly recommended. Avoid generic, unbranded, or 'universal' sensors.
Aftermarket brands forum-validated for this vehicle:
- Bosch (often the direct OEM supplier)
- NGK / NTK
- Denso
Brands owners have reported issues with on this vehicle:
- Unbranded 'eBay' or 'Amazon' special sensors
- Universal sensors that require cutting and splicing wires
Real Owner Stories
Aggregated from forums and TSBs cited above. Mileages and costs reflect what owners reported in those sources.
2012-2017 Audi A6 (C7) 3.0T
Symptoms: Check engine light on; live data showed the O2 sensor voltage stuck at 1.2V.
What fixed it: Replacement of the B1S2 (Bank 1, Sensor 2) oxygen sensor.
Source hint: AudiWorld Forums (audiworld.com) - A thread titled 'P0138 code, O2 sensor?' for a C7 A6
2010-2016 Audi S4/S5 (B8/B8.5) 3.0T
Symptoms: P0138 and its companion code P0158 (Bank 2) appearing together.
What fixed it: Straightforward O2 sensor replacement using Bosch OEM-equivalent parts.
Source hint: Audizine Forums - Numerous threads for B8/C7 3.0T platforms discuss P0138 and its companion code P0158
Related OBD-II Codes
Frequently Asked Questions
Which oxygen sensor brand should I use for my Audi A6 3.0T to avoid compatibility issues?
My Audi A6 has a rattle on cold start; could this be related to the P0138 code?
Could a PCV failure on my 3.0T engine cause oxygen sensor codes?
Is the P0138 code on my Audi A6 likely caused by an exhaust leak?
Where is the Bank 1, Sensor 2 oxygen sensor located on my A6 3.0T?
Helpful Videos

We Have This Part in Stock


The information in this article is provided for general reference and educational purposes only. Vehicle specifications, procedures, and part compatibility can vary by production date, trim level, and region. Always consult your vehicle's factory service manual and verify part numbers before purchasing or performing repairs. Safety-critical components such as airbags, seat belts, and braking systems should be installed by a qualified professional.
- Audi A6:
- 🧭 Diagnostic Flowchart
- 🎬 Helpful Videos
- 🛍️ Shop This Part
- What's Unique About the 2011-2018 Audi A6
- Symptoms You May Notice
- Most Likely Causes
- Rare But Worth Checking
- Diagnosis Steps
- Parts You'll Likely Need
- Mechanic-Grade Diagnostic Values
- Scan Tool Commands That Help
- Wiring & Ground Locations
- OEM Part Supersession History
- Model Year Variations Within This Range
- Other Known Issues on This Vehicle
- Used vs. New Parts: Buying Guide for This Vehicle
- Real Owner Stories
- 2012-2017 Audi A6 (C7) 3.0T
- 2010-2016 Audi S4/S5 (B8/B8.5) 3.0T
- Related OBD-II Codes
- Frequently Asked Questions
- 🎟️ Get 5% Off