
P0139 on 2005-2011 Audi A6: Slow O2 Sensor Response Causes and Fixes
This code means the downstream oxygen sensor (Bank 1, Sensor 2) is reacting too slowly. Most often, the sensor itself has failed due to age and contamination. An exhaust leak before the sensor is the second most likely cause. Replacing the sensor is a common DIY fix.
- P0139 on your Audi A6 means the passenger-side, post-catalytic converter O2 sensor is slow.
- The most likely cause is simply a worn-out sensor that needs to be replaced, a common issue around 100,000 miles.
- Before replacing the sensor, always check for exhaust leaks between the engine and the sensor, as this is a common secondary cause on the C6 platform, especially at the flex pipes.
- Driving with this code won't leave you stranded, but it will cause you to fail an emissions test.
- This is a manageable DIY repair for most home mechanics with basic tools and an O2 sensor socket.
What's Unique About the 2005-2011 Audi A6
On the Audi A6 C6 platform with the 3.2L V6 or 4.2L V8, the P0139 code is a straightforward emissions fault that rarely points to complex engine issues. Bank 1 is the passenger side of the engine for LHD vehicles. The primary culprits are typically the O2 sensor itself, which wears out over time, or small exhaust leaks from gaskets or flex pipes, which are common on aging German vehicles. Unlike some platforms where this code can be a ghost caused by other engine problems, on these Audis, the issue is almost always localized to the sensor, its wiring, or the exhaust path immediately surrounding it.
Symptoms You May Notice
- Check Engine Light is on.
- Failure to pass a state emissions/smog test.
- Slightly reduced fuel economy.
- In rare cases, minor engine hesitation or rough idle.
- Replacing the catalytic converter. A P0139 code points to a slow sensor, not necessarily a bad converter. A bad converter would typically trigger a P0420 (Catalyst System Efficiency Below Threshold) code.
- Replacing the wrong oxygen sensor. This code is for Bank 1, Sensor 2. Bank 1 is the passenger side, and Sensor 2 is the downstream sensor located after the catalytic converter.
Most Likely Causes
- Failing/Worn-Out Oxygen Sensor 🔴 High Probability → Shop Oxygen Sensor Oxygen sensors are consumable parts that degrade over time, typically after 80,000-100,000 miles. Contamination from carbon, soot, and other deposits slows their internal chemical reaction. On FSI engines, which are prone to carbon buildup, this can be exacerbated.
How to confirm: Use an OBD-II scanner with live data capabilities to graph the voltage of Bank 1 Sensor 2. It should show slow, lazy voltage fluctuations. A healthy downstream sensor should have a relatively steady voltage, but when forced (e.g., by revving the engine), it should respond. A slow sensor will lag significantly. A healthy sensor's heater resistance is typically 2-4 Ohms. A VCDS (VAG-COM) scan may show the resistance value in measuring blocks; a cold sensor might show 2.5 kOhms but should drop to 0.5 kOhms or less after running the engine for a couple of minutes.
Typical fix: Replace the Bank 1, Sensor 2 oxygen sensor. This is the downstream (post-catalytic converter) sensor on the passenger side of the vehicle. An O2 sensor socket (22mm) is required. 🎬 Watch: Step-by-step 3.2L oxygen sensor replacement walkthrough
Est. part cost: $70-$150 - Exhaust System Leak 🟡 Medium Probability Exhaust manifold gaskets and especially the flex pipes on the C6 platform are known to develop small cracks or leaks with age and heat cycles. These leaks allow outside oxygen to be drawn into the exhaust stream, confusing the sensor and causing a slow response reading.
How to confirm: Perform a visual inspection of the exhaust system from the engine to the catalytic converter, looking for black soot marks around flanges and joints. A common sign is a ticking noise on a cold start that disappears as the metal expands with heat. A smoke test is the most definitive way to find a small leak.
Typical fix: Replace the leaking gasket or repair/replace the cracked exhaust component (often the downpipe assembly containing the flex pipe). The sensor should only be replaced after the leak is fixed.
Est. part cost: $20-$500 - Damaged Wiring or Connectors ⚪ Low Probability The wiring for the downstream O2 sensor runs underneath the car and is exposed to road debris, water, and heat, which can cause corrosion, chafing, or melting over time. The connector plugs are often located on the transmission housing or firewall and can be difficult to access.
How to confirm: Visually inspect the entire wiring harness from the O2 sensor to its connection point. Check for melted plastic, frayed wires, or green/white corrosion inside the connector plug. Use a multimeter to check for continuity and proper voltage at the connector. Resistance over 5 Ohms in the circuit can trigger the code.
Typical fix: Repair the damaged section of the harness or clean/replace the corroded connector. Apply dielectric grease to the new connection to prevent future corrosion.
Est. part cost: $10-$50
Rare But Worth Checking
- Leaking Fuel Injectors: While less common for this specific code, a leaking fuel injector can create a rich condition that eventually fouls the O2 sensor, causing it to become sluggish. This would typically be accompanied by other codes like P0172 (System Too Rich) and is a known issue on FSI engines.
- PCM Software Issue: In very rare instances, the Powertrain Control Module (PCM) may have outdated software with overly sensitive parameters for the O2 sensor response time. Checking for available TSBs related to ECM/PCM updates is a final diagnostic step.
Diagnosis Steps
- Read the code with an OBD-II scanner to confirm P0139 is present. Note any other codes, especially fuel trim (P0171/P0172) or misfire codes, and address them first.
- Visually inspect the exhaust system from the passenger-side exhaust manifold to the catalytic converter. Look for soot trails indicating a leak, especially at gaskets and the flex pipe. Listen for a ticking noise on cold starts.
- Inspect the Bank 1, Sensor 2 wiring harness and connector for any signs of melting, chafing, or corrosion. The connector is often mounted high on the transmission bellhousing.
- Using a scanner with live data, graph the voltage for Bank 1, Sensor 2. The voltage should be relatively stable (0.6-0.8V) on a warm, running engine. Force a rich/lean condition by snapping the throttle or inducing a small vacuum leak. The sensor's voltage should change, but a P0139 indicates it does so too slowly compared to factory parameters. A healthy sensor should respond in less than 100 milliseconds.
- If an exhaust leak is suspected, perform a smoke test to pinpoint its location.
- If no exhaust leaks or wiring issues are found, the oxygen sensor itself is the most likely culprit and should be replaced.
Parts You'll Likely Need
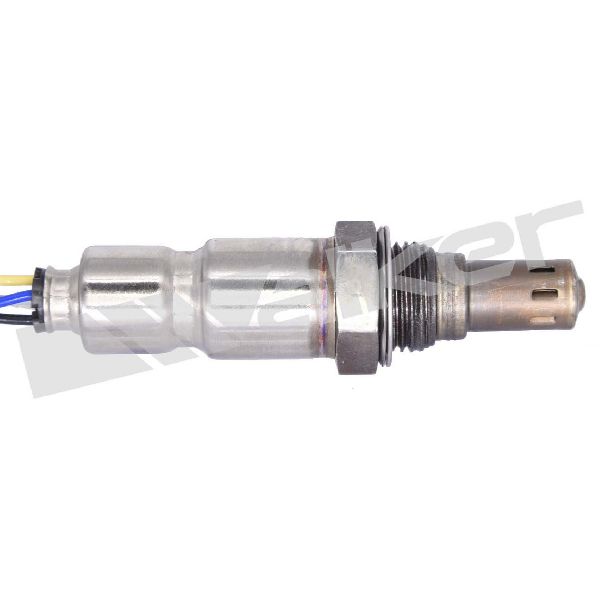
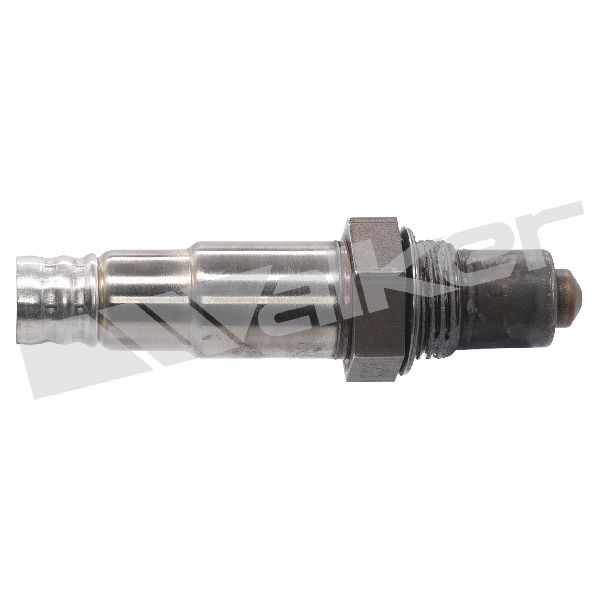
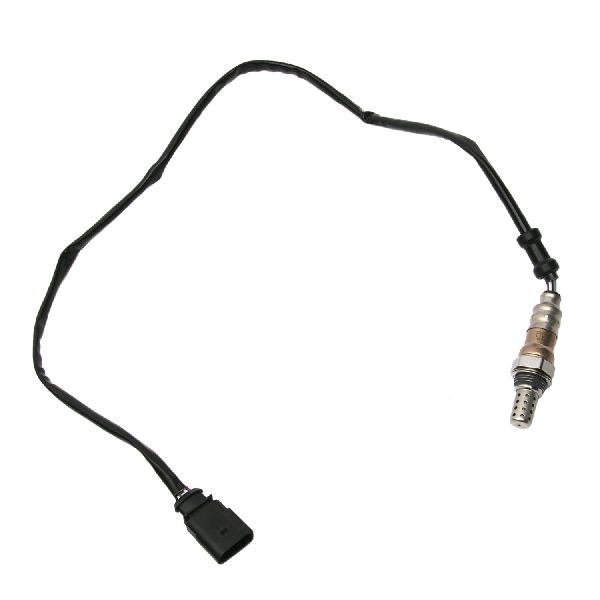
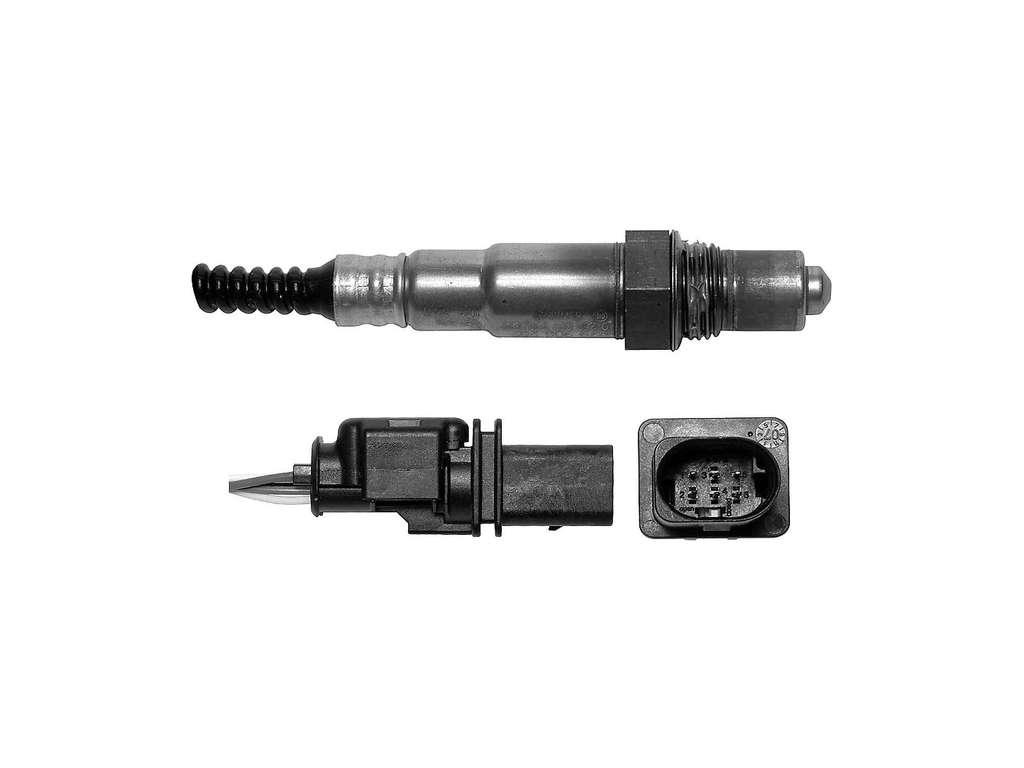
- Oxygen Sensor (Bank 1, Sensor 2)
(OEM #06E906265C, 06E906265S, 1K0998262D (repair kit))— This is the most common failure point for a P0139 code. The sensor becomes contaminated and worn over time, slowing its response.
Trusted brands: Bosch (OEM supplier), NTK, Denso
OEM price range: $120-$180
Aftermarket price range: $70-$150
Related Codes That Often Appear With This One
- P0138 — This code indicates 'O2 Sensor Circuit High Voltage'. It can appear with P0139 if the sensor is failing in a way that causes both a slow response and a signal that is stuck high (rich).
- P0420 — If the O2 sensor is truly slow and not reading correctly, the ECU may eventually misinterpret the data as a failing catalytic converter, triggering the P0420 efficiency code. However, P0139 should be addressed first.
- P0140 — This code for 'O2 Sensor Circuit No Activity Detected' can be a progression from P0139. The sensor first becomes slow (P0139) and then may fail completely, showing no activity at all.
Platform-Specific Known Issues
- Access to Sensor: While Sensor 2 is generally more accessible than Sensor 1, its location on the exhaust pipe under the car can still be tight. The electrical connector is often located further up on the transmission, requiring the removal of underbody panels to trace and disconnect. A proper 22mm O2 sensor socket with a slit for the wire is essential.
- Flex Pipe Leaks: The flexible, braided sections of the downpipes on the C6 A6 are a very common failure point. They rust and crack, causing exhaust leaks that will throw off O2 sensor readings and can cause P0139. Always inspect these flex pipes carefully before replacing a sensor. 🎬 See how to identify and repair common Audi flex pipe leaks
Mechanic-Grade Diagnostic Values
- O2 Sensor Heater Resistance — expected: 2-4 Ohms. Failure: A reading of 20 Ohms or more indicates a defective heater element. A reading over 5 Ohms in the total circuit can trigger a code.
- O2 Sensor Heater Resistance (VCDS Live Data) — expected: Should drop to 0.5 kOhms or less within 2 minutes of running the engine.. Failure: Starting resistance may be high (e.g., 2.5 kOhms) but failure to drop quickly indicates a slow or failing heater.
- Downstream O2 Sensor Voltage (Live Data) — expected: Should swing between 0.1V and 0.9V within 100 milliseconds (0.1 seconds) when conditions change (e.g., throttle snap).. Failure: A flat, choppy, or slow-to-react voltage graph indicates a failing sensor.
- Downstream O2 Sensor Voltage (Deceleration Fuel Cut-Off) — expected: Voltage should drop below 0.2 volts.. Failure: Failure to drop below 0.2 volts for 7 seconds or more during deceleration will trigger the P0139 code.
Scan Tool Commands That Help
- VCDS (VAG-COM): Readiness (Function 15) — After a repair, use this function to check if all emissions monitors have completed their self-tests. The system will show 'Passed' or 'Failed or Incomplete'. Driving for 2-3 days usually sets all monitors to 'Pass'.
- VCDS (VAG-COM): Guided Readiness Script ([Set Readiness] button) — If available for the specific ECU, this function provides on-screen prompts to guide the user through a specific drive cycle to set readiness monitors quickly, often in under 30 minutes.
- VCDS (VAG-COM): Basic Settings - Automatic Test Sequence — If the guided script is not available, this function in Basic Settings can run automated tests. For remaining 'Incomplete' monitors like O2 sensors or catalysts, you can run specific tests (e.g., 'Cat test bank 1') from the Basic Settings list to force the monitor to run.
Wiring & Ground Locations
- Engine Ground Strap — There are multiple ground points in the engine bay. One key ground is located on the front right side of the engine, beside the alternator.. A loose or corroded main engine ground can cause a variety of electrical issues and sensor reading errors, including slow O2 sensor response. This should be checked if multiple, seemingly unrelated electrical faults are present.
- Bank 1 Sensor 2 Connector — The connector for the downstream sensor is located up on the transmission housing, not directly next to the sensor itself. Tracing the wire from the sensor is required.. This connector is a common point for corrosion or damage. Technicians often replace the sensor without realizing the fault is at the connector, which is located further away and is harder to access.
Real Owner Repair Stories
- Audi Revolution forum user (2008 Audi S6 (V10, but exhaust construction is similar)) — Not specified, but found during unrelated A/C and transmission service.
✅ What actually fixed it The passenger side flex pipe was found to be broken in half due to corrosion under the wire mesh. The shop quoted a replacement of the entire downpipe assembly. This is a common failure that can cause P0139 before being visually obvious. - Carly App user story (2016 Audi A4 2.0T (different model, but analogous issue)) — Intermittent check engine light, especially on cold starts. Incomplete readiness monitors preventing emissions pass.
❌ Tried (didn't work) Clearing codes
✅ What actually fixed it The root cause was a combination of a failing oxygen sensor and a small exhaust system leak near the catalytic converter. Both the sensor had to be replaced and the leak repaired to solve the issue and allow readiness monitors to complete.
Model Year Variations Within This Range
- 2008/2009-2011: The Audi A6 C6 received a facelift for the 2009 model year (introduced in 2008). While the 3.2L and 4.2L FSI engines were largely carried over, new 2.8L FSI and supercharged 3.0L TFSI V6 engines were introduced. The exterior styling, lights, and MMI interface were updated. For P0139, the fundamental exhaust layout and sensor function remained the same, but when sourcing used parts like exhaust components, it's important to match pre-facelift (2005-2008) and post-facelift (2009-2011) parts, as small changes to hangers or lengths could exist.
Diagnostic Flowchart
Other Known Issues on This Vehicle
Issues unrelated to this code that are worth knowing about as an owner of this generation:
- Intake Valve Carbon Buildup 🔴 High — Noticeable performance degradation often occurs by 40,000-60,000 miles. A universal issue for all early FSI engines.
- Timing Chain System Failure (4.2L V8) 🔴 High — Plastic guides become brittle and can fail after 80,000-120,000 miles, causing a 'death rattle' on cold starts. This is an engine-out repair. (Ref: Audi issued TSBs regarding start-up noise, but no recall.)
- Timing Chain Tensioner Wear (3.2L V6) 🟠 Medium — Less catastrophic than the 4.2L issue, but a cold-start rattle from the rear of the engine after 60,000 miles often indicates tensioner wear.
- MMI System Failure 🟠 Medium — Often caused by liquid spills in the center console or water ingress in the trunk (for Avant models) or plenum drains, shorting out control modules. Can happen at any mileage.
- High Oil Consumption 🟡 Low — Both 3.2L and 4.2L FSI engines can consume oil due to wear on piston rings and valve seals, particularly at higher mileage (>100,000 miles).
Used vs. New Parts: Buying Guide for This Vehicle
When a used part is the smart pick: A used part is a reasonable choice for the exhaust downpipe assembly if the original has a cracked flex pipe. It is often more economical to get a used OEM downpipe from a low-mileage donor car than to have a new flex pipe welded in or to buy a new OEM assembly.
Donor-vehicle mileage cap: roughly under 80000 miles for the part to have meaningful remaining life.
What to inspect on the donor part:
- For a used downpipe, inspect the braided flex section thoroughly. Squeeze it and bend it to check for internal cracks or excessive softness.
- Look for minimal rust, especially at the welds and flanges.
- Ensure the catalytic converter honeycomb (if attached) is intact and not melted or broken.
- Verify the part comes from a vehicle in a dry, salt-free climate if possible.
OEM-only on this vehicle (don't cheap out):
- While not strictly 'OEM-only', it is highly advised to avoid generic, unbranded oxygen sensors. They often have incorrect heater resistances or slow response times out of the box, leading to a repeat of the P0139 code.
Aftermarket brands forum-validated for this vehicle:
- Bosch (often the OEM supplier for Audi)
- NTK
- Denso
Brands owners have reported issues with on this vehicle:
- Avoid 'universal' oxygen sensors that require you to splice wires. The connection is a common failure point and the sensor may not be calibrated correctly for the vehicle.
Real Owner Stories
Aggregated from forums and TSBs cited above. Mileages and costs reflect what owners reported in those sources.
2005-2011 Audi A6 2.0 FSI
Symptoms: The owner reported a P0139 code indicating 'Czujnik O2 (Bank 1 Czujnik 2) - powolna reakcja' (slow response).
What fixed it: Replacement of the post-catalyst O2 sensor resolved the issue.
Source hint: Audi A6 Klub Polska: 'błąd P0139 Czujnik O2 (Bank 1 Czujnik 2) - powolna reakcja'
2005-2011 Audi A6 (High Mileage) — ~100000 miles
Symptoms: The owner noted a drop in MPG along with the P0139 code.
What fixed it: The owner was advised to replace the sensor due to age/mileage and opted for a universal Bosch sensor.
Source hint: Reddit r/MechanicAdvice: 'P0139 code troubleshooting'
2006-2011 Audi A6 3.2L FSI
Symptoms: A rich condition on Bank 1 where the user was chasing performance issues and eventually replaced both O2 sensors.
What fixed it: Replacement of O2 sensors, though the owner noted that other issues like injectors or fuel pressure can impact sensor life.
Source hint: AudiWorld Forums: 'A6 3.2L FSI too rich bank 1'
Related OBD-II Codes
Frequently Asked Questions
Where is the Bank 1 Sensor 2 oxygen sensor located on my Audi A6 3.2L or 4.2L?
I hear a ticking noise on cold starts that goes away when the engine warms up. Could this be related to P0139?
Are the flex pipes on the C6 A6 platform a known issue for this code?
Can I use a universal O2 sensor to fix this code on my Audi?
Does the 4.2L FSI V8 have any specific TSBs related to engine noise that might be confused with exhaust leaks?
What tools do I need to replace the sensor on my A6?
Helpful Videos


We Have This Part in Stock


The information in this article is provided for general reference and educational purposes only. Vehicle specifications, procedures, and part compatibility can vary by production date, trim level, and region. Always consult your vehicle's factory service manual and verify part numbers before purchasing or performing repairs. Safety-critical components such as airbags, seat belts, and braking systems should be installed by a qualified professional.
- Audi A6:
- 🧭 Diagnostic Flowchart
- 🎬 Helpful Videos
- 🛍️ Shop This Part
- What's Unique About the 2005-2011 Audi A6
- Symptoms You May Notice
- Most Likely Causes
- Rare But Worth Checking
- Diagnosis Steps
- Parts You'll Likely Need
- Related Codes That Often Appear With This One
- Platform-Specific Known Issues
- Mechanic-Grade Diagnostic Values
- Scan Tool Commands That Help
- Wiring & Ground Locations
- Real Owner Repair Stories
- Model Year Variations Within This Range
- Other Known Issues on This Vehicle
- Used vs. New Parts: Buying Guide for This Vehicle
- Real Owner Stories
- 2005-2011 Audi A6 2.0 FSI
- 2005-2011 Audi A6 (High Mileage) — ~100000 miles
- 2006-2011 Audi A6 3.2L FSI
- Related OBD-II Codes
- Frequently Asked Questions
- 🎟️ Get 5% Off