
P0139 on 2010-2012 Hyundai Genesis Coupe: Slow O2 Sensor Response Causes and Fixes
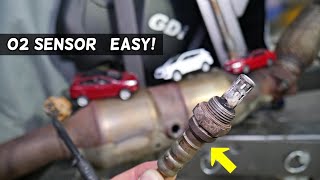
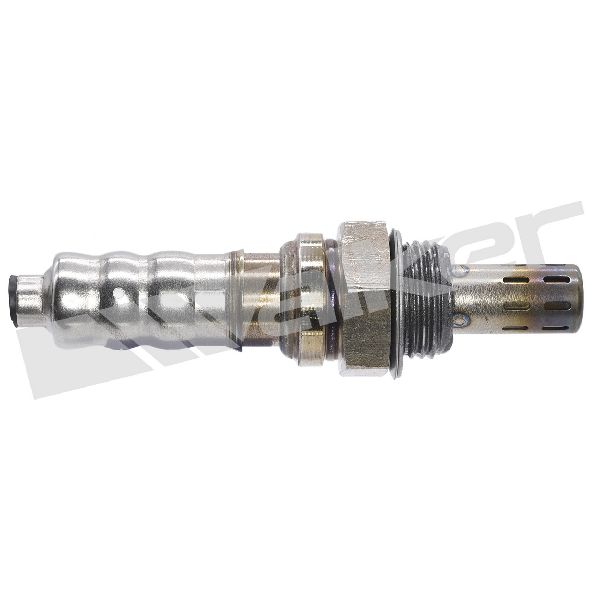
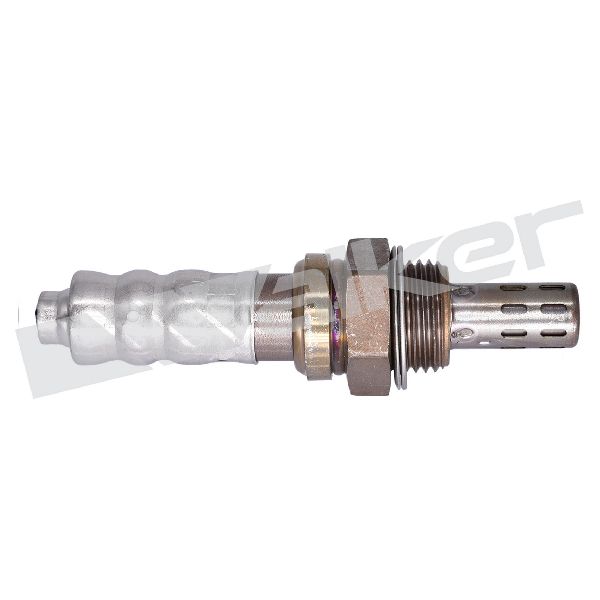
For the 2010-2012 Genesis Coupe, code P0139 almost always means the downstream oxygen sensor (Bank 1, Sensor 2) has failed due to age or contamination. Replacing this sensor is the most common fix. Expect to pay $50-$120 for a quality aftermarket sensor (like Denso or NTK) and $150+ for an OEM part. It's a DIY-friendly job with a 22mm offset O2 sensor socket, but the sensor can be seized in the exhaust pipe.
- P0139 points directly to the downstream oxygen sensor (Sensor 2) on Bank 1 (passenger side on V6).
- The most likely solution is to replace the oxygen sensor itself. The OEM part for the 2.0T is likely 39210-2C200.
- Before buying parts, perform a quick visual inspection of the sensor's wiring, check for exhaust leaks, and check the relevant fuse.
- This is a manageable DIY repair for most home mechanics, but be prepared for a seized sensor. An offset 22mm O2 sensor socket and penetrating oil are essential tools.
- Driving with this code will hurt your fuel economy and cause you to fail an emissions test.
What's Unique About the 2010-2012 Hyundai Genesis Coupe
On the Genesis Coupe, this code applies to both the 2.0T and 3.8L V6 engines. For the 2.0T inline-4, 'Bank 1' is the only bank of cylinders. For the 3.8L V6, 'Bank 1' refers to the passenger side of the engine. In both cases, 'Sensor 2' is the downstream sensor located after the primary catalytic converter. The most frequent cause is simply the sensor reaching the end of its service life. However, this enthusiast-focused car is often modified with aftermarket exhausts, which can introduce small leaks at flanges or welds, allowing outside air to enter and disrupt sensor readings, also potentially causing this code. A particularly common scenario on modified Genesis Coupes is triggering P0139 after installing an O2 sensor spacer to try and fix a P0420 catalyst code; the spacer slows the sensor's response time too much, trading one code for another.
Symptoms You May Notice
- Check Engine Light is on
- Decreased fuel economy
- Failing a vehicle emissions test
- In rare cases, slight hesitation or rough idle, particularly after deceleration
- Replacing the upstream (Sensor 1) oxygen sensor. This code specifically points to the downstream (Sensor 2) sensor.
- Replacing the catalytic converter. While a failing converter can trigger other codes (like P0420), it is not the direct cause of P0139. A P0139 is a fault with the sensor's response time, not the catalytic efficiency itself.
Most Likely Causes
- Failing Downstream Oxygen Sensor (Bank 1, Sensor 2) 🔴 High Probability → Shop Oxygen Sensor Oxygen sensors are wear items with a typical lifespan of 50,000 to 100,000 miles. Age, heat cycles, and exposure to exhaust gases cause the internal ceramic element to degrade and respond slowly.
How to confirm: Use a scan tool to monitor the live voltage data for Bank 1 Sensor 2. A healthy downstream sensor's voltage should fluctuate slowly and steadily, typically between 0.1V and 0.9V. A bad sensor may have a flat, stuck, or extremely lazy voltage signal that does not respond to changes in engine RPM 🎬 See how to diagnose a slow response O2 sensor or a forced rich/lean condition. A healthy sensor should switch between 0.1V and 0.9V in under 100 milliseconds (0.1 seconds).
Typical fix: Replace the Bank 1, Sensor 2 oxygen sensor. A special 22mm slotted socket for O2 sensors is highly recommended for removal. Applying penetrating oil to the threads before attempting removal is crucial as they are often seized from heat cycles.
Est. part cost: $50-$120 - Exhaust System Leak 🟡 Medium Probability Leaks can develop at gasket flanges or from cracks in the exhaust pipes, especially if aftermarket exhaust components have been installed. This allows outside air to enter the exhaust stream, skewing the O2 sensor's readings and causing it to appear 'slow' to the ECM.
How to confirm: Visually inspect the exhaust system from the catalytic converter back for any signs of black soot, cracks, or loose connections. A common method is to have a helper temporarily block the tailpipe with a rag while the engine is running, which can make small leaks more audible (hissing/ticking sounds).
Typical fix: Repair the leak by replacing the faulty gasket, welding the crack, or tightening the loose connection.
Est. part cost: $10-$100 - Damaged Wiring or Connector ⚪ Low Probability The sensor's wiring harness runs under the car and is exposed to heat from the exhaust, moisture, and road debris. Wires can become brittle and crack, or the connector pins can corrode, leading to high resistance or an intermittent signal.
How to confirm: Visually inspect the O2 sensor's wiring harness and connector for any signs of melting, chafing, corrosion, or loose pins. Use a multimeter to check for continuity and resistance between the sensor connector and the ECM connector; resistance above 5 ohms indicates a problem.
Typical fix: Repair the damaged section of the harness or clean/replace the connector. Sometimes the wire has simply come loose from a retaining clip and is touching the hot exhaust pipe.
Est. part cost: $5-$50
Rare But Worth Checking
- Leaking Fuel Injector: A leaking injector can cause a persistent rich condition that fouls the O2 sensor with carbon over time, slowing its response. This would typically be accompanied by other codes related to a rich fuel mixture (e.g., P0172) and possibly a smell of raw fuel.
- Engine Control Module (ECM) Fault: → Shop Engine Control Module (ECM) In very rare instances, the ECM itself may have an internal processing delay or require a software update. This should only be considered after all other possibilities, including the sensor, wiring, and exhaust integrity, have been thoroughly exhausted and confirmed to be in good condition.
- Blown O2 Sensor Fuse: → Shop Oxygen Sensor The oxygen sensor's heater circuit is protected by a fuse. If this fuse blows, the sensor won't heat up to its proper operating temperature, causing slow response times. This will usually be accompanied by a heater circuit code like P0141. The fuse is typically in the under-hood fuse box, often labeled 'SENSOR 1' or similar. For the 2010 Genesis Coupe, this may be labeled 'SNSR 2 FUSE 15A' in the right-side engine room junction box.
Diagnosis Steps
- Read the code with an OBD-II scanner to confirm P0139 is present and note any other codes.
- Visually inspect the Bank 1, Sensor 2 oxygen sensor wiring and connector for any obvious damage, such as melting, corrosion, or breaks. Ensure the harness is secured and not touching the exhaust pipe. The sensor is located after the catalytic converter (on the passenger side for the 3.8L V6). 🎬 Watch: Locate all engine sensors on the 2.0T model
- Inspect the exhaust system for any leaks between the engine and the downstream O2 sensor. Listen for hissing sounds and look for black soot marks at flanges and welds.
- Use a scan tool with live data capability to observe the voltage of Bank 1 Sensor 2. Warm the engine to operating temperature. The voltage should be relatively stable, fluctuating slowly (e.g., once every few seconds) on a warm engine at a steady 2500 RPM. If it is stuck at a specific voltage or responds very slowly to changes in engine load (snapping the throttle), the sensor is likely faulty.
- Check the O2 sensor fuse in the engine bay fuse box to ensure it is not blown. On a 2010 model, this may be the 'SNSR 2 FUSE 15A' in the right engine room junction box.
- If the wiring, fuse, and exhaust are intact, the most probable cause is a failed oxygen sensor.
- Replace the Bank 1, Sensor 2 oxygen sensor. Liberally apply a penetrating lubricant on the threads and let it soak before attempting removal, as they are often seized. An offset 22mm O2 sensor socket is highly recommended. 🎬 Watch: Step-by-step downstream O2 sensor replacement guide
- Apply a small amount of anti-seize compound to the threads of the new sensor (if not pre-applied), being careful not to get any on the sensor tip.
- After replacement, clear the trouble code with the scanner and perform a drive cycle to ensure the code does not return.
Parts You'll Likely Need
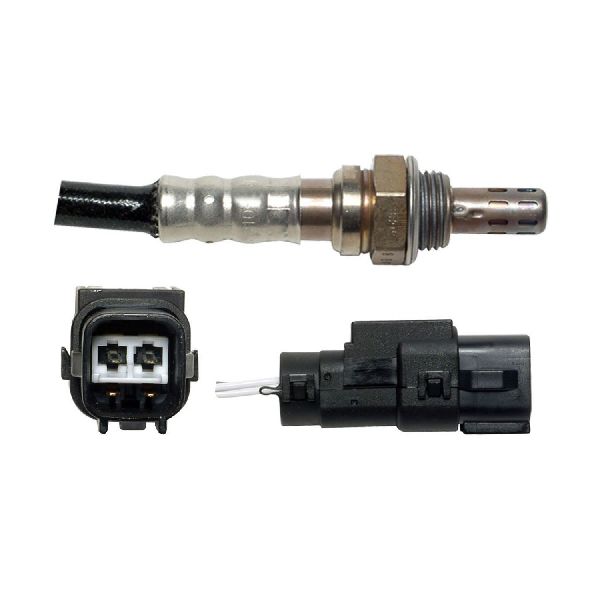
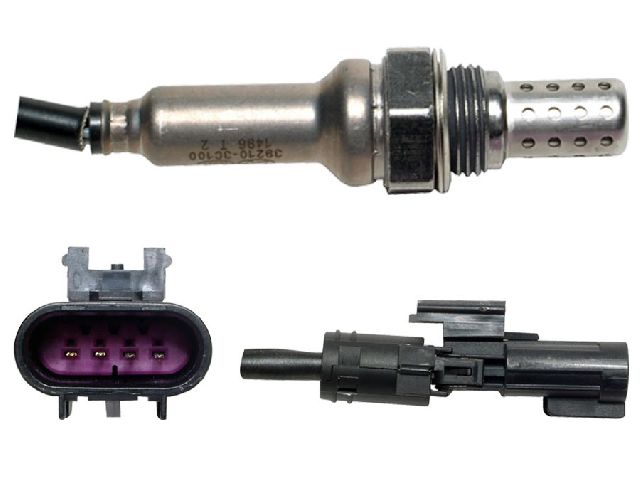
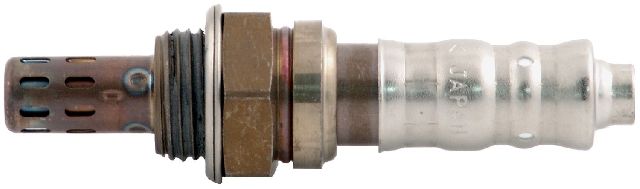
- Downstream Oxygen Sensor (Bank 1, Sensor 2)
(OEM #39210-2C200 (for 2.0T, verify with VIN))— This is the component identified by the code as responding too slowly. It is a common wear-and-tear item. The OEM part for the 2.0T appears to be 39210-2C200. The 3.8L V6 may use a different part number, so VIN verification is critical.
Trusted brands: Denso (e.g., 234-4851, 234-4854 - verify fitment), Bosch, NTK/NGK (e.g., 24353 - verify fitment)
OEM price range: $150-$200
Aftermarket price range: $50-$120
Related Codes That Often Appear With This One
- P0136 — P0136 indicates a general malfunction in the same O2 sensor circuit (Bank 1, Sensor 2), and can appear alongside P0139.
- P0141 — P0141 indicates a fault in the heater circuit of the same O2 sensor. Since the sensor is a single unit, a fault in one part can lead to replacing the whole sensor.
- P0420 — While not a direct cause, a truly failing catalytic converter can sometimes lead to erratic readings that might be misinterpreted by the ECM, or the conditions that ruined the cat (like a rich condition) may have also damaged the O2 sensor.
Platform-Specific Known Issues
- Aftermarket Exhaust Complications: Many Genesis Coupe owners install aftermarket exhausts. This can increase the likelihood of P0139 due to small leaks at new clamp or weld points. It can also be triggered if the new exhaust design changes the flow characteristics or temperature around the sensor, or if an O2 sensor spacer/extender is used improperly. Often, a spacer is installed to defeat a P0420 code from a high-flow or deleted cat, but the spacer slows the sensor's reaction time so much that it triggers P0139 instead.
- Seized O2 Sensors: → Shop Oxygen Sensor A very common owner complaint during repair is the sensor being completely seized in the exhaust bung. This requires significant force, heat (from a torch), and liberal use of penetrating oil to remove, and in some cases, the bung threads can be damaged, requiring repair.
Mechanic-Grade Diagnostic Values
- Downstream O2 Sensor (B1S2) Heater Circuit Resistance — expected: 11.7 - 14.5 Ω. Failure: A reading of 0 Ω (short) or infinite/OL (open circuit) indicates a failed heater element.
- Downstream O2 Sensor (B1S2) Voltage (Live Data) — expected: Relatively stable voltage, slowly fluctuating between 0.1V and 0.9V on a warm, running engine.. Failure: A flat, stuck voltage, or a signal that takes more than 100ms to switch during a forced lean/rich condition (like throttle snap) indicates a slow sensor. Specifically for this code, the ECM is looking for the voltage to drop below 0.2V within 7 seconds during deceleration fuel cut-off.
- O2 Sensor Signal Circuit Resistance to ECM — expected: Less than 5 Ω. Failure: Resistance greater than 5 Ω suggests corrosion in the connector or a damaged wire in the harness, which can slow the signal.
Hidden / Shadow Codes Worth Checking
- Mode $06, TID $05: This refers to the On-Board Diagnostic Monitor for the Oxygen Sensor test results. Accessing this data with an advanced scan tool can show the raw performance values the ECM is using to determine if the sensor is slow, even before a code is set. It can show the sensor's last response time measurement compared to the minimum and maximum allowable thresholds. (see via An advanced OBD-II scan tool that supports Mode $06 data display.)
Wiring & Ground Locations
- PDM (Power Distribution Module) — Under the driver's side dash, to the right of the steering column.. The PDM houses multiple fuses and relays that supply power to various engine sensors and control circuits, including potentially the O2 sensor heater circuit power supply.
- SNSR 2 FUSE 15A — In the right-side engine room junction box (under the hood).. This fuse specifically protects the Sensor 2 circuits. A blown fuse would disable the heater, causing the sensor to warm up too slowly and trigger a slow response code, likely along with a heater circuit code like P0141.
- ECM (Engine Control Module) — Located in the left rear of the engine compartment.. This is the computer that receives the signal from the O2 sensor. All wiring for the sensor ultimately terminates here. Knowing its location is critical for advanced diagnostics like checking for continuity or shorts on specific pins.
Real Owner Repair Stories
- Reddit user in r/Cartalk (Unknown vehicle, but common issue on modified cars.) — Initially had a P0421 (Catalyst Efficiency) code.
❌ Tried (didn't work) Replacing other O2 sensors., Replacing the downstream catalytic converter.
✅ What actually fixed it The user installed an O2 sensor spacer to clear the P0421 code. This worked, but after 160 miles, a new code, P0139 (Slow Response), appeared. The community confirmed that the spacer, by design, slows down the sensor's readings to trick the ECM about catalyst efficiency, but this slowing effect is often too much, causing the P0139 self-test to fail. - Reddit user in r/MechanicAdvice (Unknown vehicle with a catless downpipe.) — Check Engine Light with code P0139.
❌ Tried (didn't work) Using a right-angle O2 sensor spacer that came with the downpipe (worked for 8 years before rotting out)., Replacing the O2 sensor., Trying several different new spacers, including adjustable ones and stacking them.
✅ What actually fixed it The user was still diagnosing, but the problem started immediately after replacing an old, simple spacer with a new one that had a built-in mini-catalyst screen. The strong implication is that the new spacer design was incompatible and was causing the slow response code, highlighting that not all spacers work the same.
Model Year Variations Within This Range
- 2010-2012: The 2010-2012 BK1 Genesis Coupe 2.0T uses a specific engine and turbo setup. The 2013+ BK2 model received a significant engine update, including a twin-scroll turbo, larger intercooler, and different injectors, resulting in a power increase from 210hp to 274hp. While the P0139 code's meaning is the same, part numbers and diagnostic specifics may differ between the BK1 (2010-2012) and BK2 (2013+) generations. This article is specific to the BK1.
Diagnostic Flowchart
Real Owner Stories
Aggregated from forums and TSBs cited above. Mileages and costs reflect what owners reported in those sources.
2010 Hyundai Genesis Coupe 2.0T A/T
Symptoms: Check Engine Light (CEL) triggered during normal driving. Car still runs good.
What fixed it: The user did not report a fix, but the cause was heavily implied to be the installation of a test pipe which removed the secondary catalytic converter.
Source hint: reddit.com - o2 sensor problem : r/genesiscoupe
Hyundai Genesis Coupe (General)
Symptoms: P0139 and related O2 sensor codes (P0136, P0141) appearing on the dash.
What fixed it: Replacing the downstream (post-cat) sensor. Owners frequently mention the difficulty of removing the old sensor due to rust and recommend a good penetrating oil and the correct O2 sensor socket.
Source hint: gencoupe.com
Related OBD-II Codes
Frequently Asked Questions
Why did my 2010-2012 Genesis Coupe get a P0139 code after installing an aftermarket exhaust?
Where is the Bank 1 Sensor 2 oxygen sensor located on my 3.8L V6 Genesis Coupe?
I'm trying to replace the O2 sensor on my Genesis Coupe but it won't budge. Is this normal?
Which fuse should I check for the O2 sensor on a 2010 Genesis Coupe?
At what mileage do the oxygen sensors typically fail on the Genesis Coupe?
Helpful Videos


We Have This Part in Stock


The information in this article is provided for general reference and educational purposes only. Vehicle specifications, procedures, and part compatibility can vary by production date, trim level, and region. Always consult your vehicle's factory service manual and verify part numbers before purchasing or performing repairs. Safety-critical components such as airbags, seat belts, and braking systems should be installed by a qualified professional.
- Hyundai Genesis Coupe:
- 🧭 Diagnostic Flowchart
- 🎬 Helpful Videos
- 🛍️ Shop This Part
- What's Unique About the 2010-2012 Hyundai Genesis Coupe
- Symptoms You May Notice
- Most Likely Causes
- Rare But Worth Checking
- Diagnosis Steps
- Parts You'll Likely Need
- Related Codes That Often Appear With This One
- Platform-Specific Known Issues
- Mechanic-Grade Diagnostic Values
- Hidden / Shadow Codes Worth Checking
- Wiring & Ground Locations
- Real Owner Repair Stories
- Model Year Variations Within This Range
- Real Owner Stories
- 2010 Hyundai Genesis Coupe 2.0T A/T
- Hyundai Genesis Coupe (General)
- Related OBD-II Codes
- Frequently Asked Questions
- 🎟️ Get 5% Off