
P0140 on 1999-2004 Chrysler 300M 3.5L: Causes and Fixes for O2 Sensor Inactivity
On a 1999-2004 Chrysler 300M, code P0140 almost always means the downstream oxygen sensor on the passenger side (Bank 1, Sensor 2) has failed or its wiring is compromised. It's a common DIY repair with an aftermarket sensor costing between $30 and $70. This issue is shared across the Chrysler LH platform, including the Dodge Intrepid and Chrysler Concorde.
- P0140 points to the downstream (post-catalytic converter) oxygen sensor on the passenger side.
- The most likely cause is a failed sensor, which is a common wear-and-tear item.
- This is a DIY-friendly repair; the main challenge is often removing the old sensor if it's seized by rust.
- Before buying parts, always perform a visual inspection of the wiring and connector for obvious damage.
- Driving with this code is not dangerous, but it will cause an automatic failure on an emissions test.
What's Unique About the 1999-2004 Chrysler 300M
For the Chrysler 300M's longitudinally mounted 3.5L V6, the location of Bank 1 is consistently the passenger side of the engine. This is a critical piece of information for correctly identifying the sensor. While the code itself is generic, owners should be aware that the vehicle has four separate oxygen sensors, and P0140 points specifically to the monitoring sensor after the catalytic converter on the right side of the car. A common point of confusion for owners and even some mechanics is locating the downstream sensors, which are tucked underneath the car, as opposed to the easily visible upstream sensors in the engine bay. There are no widespread, unique platform flaws that cause this code; failures are typically due to normal sensor aging or wiring damage common to all vehicles on the Chrysler LH platform.
Symptoms You May Notice
- Illuminated Check Engine Light is the most common and often only symptom.
- Vehicle will fail an emissions test.
- In rare cases, a slight decrease in fuel economy may be noticed.
- An intermittent Check Engine Light that turns on and off over several days can occur, sometimes confusing owners. 🎬 Watch: A breakdown of P0140 causes, symptoms, and fixes
- Replacing the wrong oxygen sensor. The 3.5L V6 has four sensors. P0140 is specifically for Bank 1 (passenger side) and Sensor 2 (downstream/post-catalyst). Many owners have mistakenly replaced the upstream sensors which are more visible in the engine bay.
- Replacing the catalytic converter. While the sensor monitors the converter, a P0140 code indicates a problem with the sensor's circuit, not necessarily the converter itself.
- Immediately replacing the sensor without checking the wiring. Many forum users report that fixing a damaged wire or loose connector resolved the code after a new sensor did not.
Most Likely Causes
- Failed Downstream Oxygen Sensor (Bank 1, Sensor 2) 🔴 High Probability → Shop Oxygen Sensor Oxygen sensors are wear items that degrade over time due to constant exposure to high-temperature exhaust gases. After many years and miles (typically 80,000-120,000), the internal sensing element simply fails, leaving the circuit open.
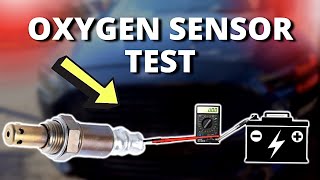
How to confirm: Use a scan tool to monitor live data for the 'O2S B1S2' voltage. A healthy downstream sensor shows a relatively steady voltage. If the voltage is flat, stuck at a specific value (e.g., 350-580 mV), or shows no reading, the sensor has likely failed. 🎬 See this guide on how to test an oxygen sensor
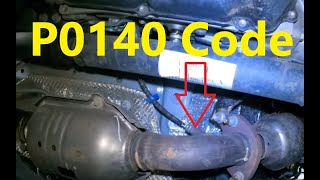
Typical fix: Replace the Bank 1, Sensor 2 oxygen sensor. This is the downstream sensor on the passenger side, located after the catalytic converter. 🎬 Watch: How to replace the downstream O2 sensor
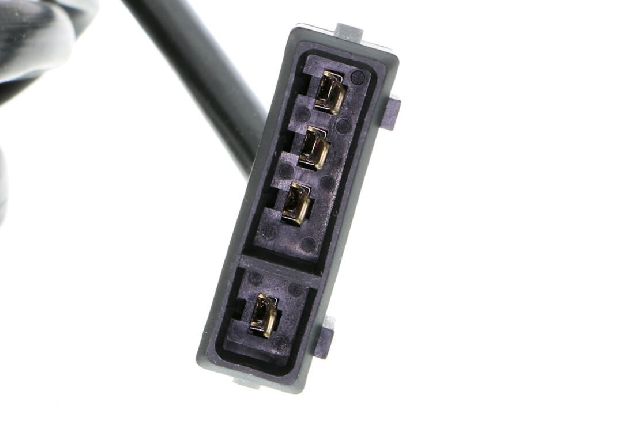
Est. part cost: $30-$70 - Damaged Wiring or Connector 🟡 Medium Probability The sensor's wiring harness runs underneath the vehicle, where it is exposed to road debris, moisture, and extreme heat from the exhaust. Wires can become frayed, melted, or corroded, leading to an open or shorted circuit. This is a very common cause for a P0140, as a bad connection prevents the PCM from receiving a signal even from a good sensor.
How to confirm: Visually inspect the wiring harness leading to the sensor for any signs of physical damage, melting on the exhaust pipe, or corrosion in the connector pins. Check for loose grounds on the exhaust. Use a multimeter to check for continuity between the sensor connector and the PCM connector.
Typical fix: Repair the damaged section of wire or replace the connector pigtail. Ensure the wiring is properly secured away from the hot exhaust pipe.
Est. part cost: $10-$30 - Blown Fuse for O2 Sensor Heater Circuit ⚪ Low Probability → Shop Oxygen Sensor The oxygen sensor has an internal heater to bring it to operating temperature quickly. This heater circuit is protected by a fuse. A short in the heater element or its wiring can cause the fuse to blow, preventing the sensor from warming up and becoming active.
How to confirm: Consult your owner's manual or a service manual to locate the fuse for the O2 sensors (often shared). Visually inspect the fuse to see if it has blown. In the 300M, this fuse is typically located in the Power Distribution Center under the hood.
Typical fix: Replace the blown fuse. If the fuse blows again immediately, there is a short circuit in the heater wiring or the sensor itself that must be diagnosed.
Est. part cost: $1-$5 - Exhaust Leak ⚪ Low Probability Rust can cause cracks or holes in the exhaust manifold or pipes upstream of the O2 sensor. This allows outside air to enter the exhaust stream, which can cause the sensor to give an inaccurate or flat reading, sometimes interpreted as 'no activity'.
How to confirm: Listen for an audible ticking or hissing noise from the exhaust, especially when the engine is cold. A mechanic can perform a smoke test to pinpoint the location of any leaks.
Typical fix: Repair the leak by replacing the faulty exhaust component or gasket.
Est. part cost: $50-$300
Rare But Worth Checking
- Faulty Powertrain Control Module (PCM): → Shop Engine Control Module (ECM) This is very uncommon. Before condemning the PCM, all other possibilities, including the sensor, wiring, and fuses, must be exhaustively tested and ruled out. A faulty PCM driver circuit or analog-to-digital converter can fail to read a signal from a perfectly good sensor.
Diagnosis Steps
- Scan for Codes: Use an OBD-II scanner to confirm P0140 is the only code present. If other codes exist, address them first.
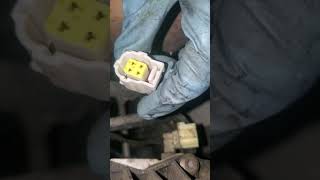
- Visual Inspection: Safely raise the vehicle. Locate the downstream O2 sensor on the passenger side exhaust pipe, just after the catalytic converter. Inspect the sensor, its connector, and the wiring harness for any obvious damage, such as melting, chafing, corrosion, or being unplugged.
- Check Fuses: Locate the fuse panel (Power Distribution Center under the hood) and check the fuse related to the O2 sensor heaters. Replace if blown.
- Analyze Live Data: With a scan tool, observe the live data stream for the 'O2S B1S2' voltage. The engine must be fully warmed up. If the voltage reading is flat, stuck (e.g., between 0.35V and 0.58V), or shows 0V, it confirms no activity.
- Test the Sensor Circuit: Disconnect the sensor. With the key on, check for battery voltage at the heater power wire and a good ground on the heater ground wire. Check for a reference voltage (typically around 0.45V) on the signal wire from the PCM. If power is present at the connector, the issue is likely between the sensor and the PCM; if not, the issue is between the fuse box and the connector.
- Check for Exhaust Leaks: With the engine running, carefully check for any audible leaks in the exhaust system between the engine and the downstream O2 sensor.
- Replace the Sensor: If the wiring, fuse, and PCM reference voltage are all good, the oxygen sensor itself is faulty and should be replaced. Use an O2 sensor socket for easier removal and installation.
Technical Service Bulletins (TSBs) & Recalls
- TSB Bulletin #9003790: While specifically referencing the 3.6L V6 in other Chrysler models, this bulletin highlights a relevant diagnostic path where oil leaking from a valve cover (due to a pinched or cut gasket) can contaminate the O2 sensor, leading to fault codes including P0140.
Parts You'll Likely Need
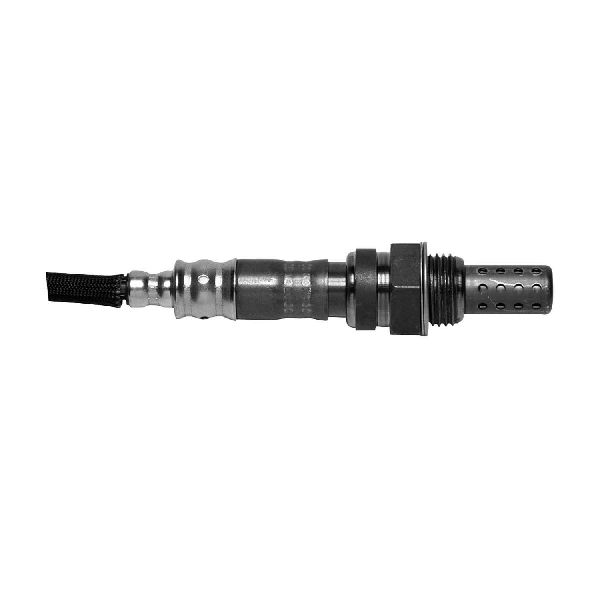
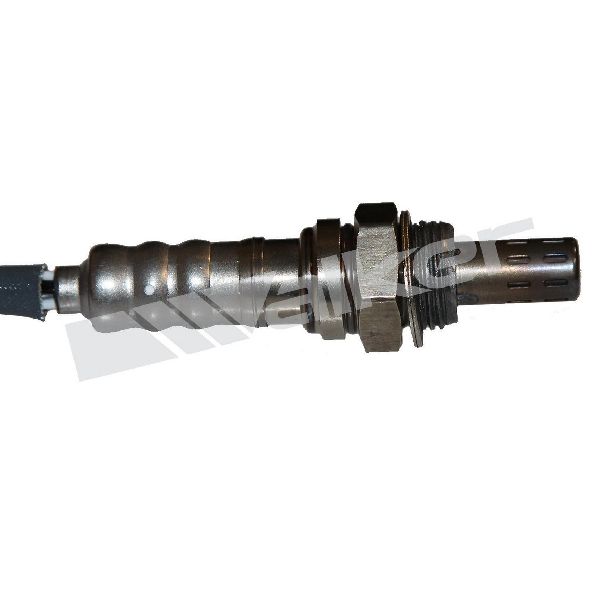
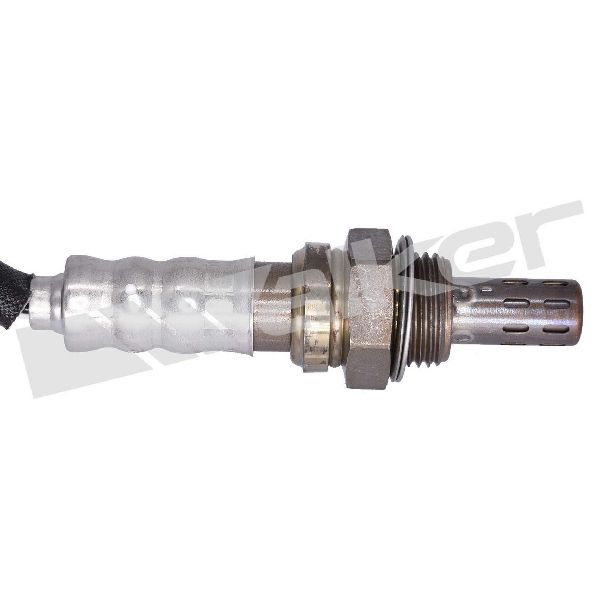
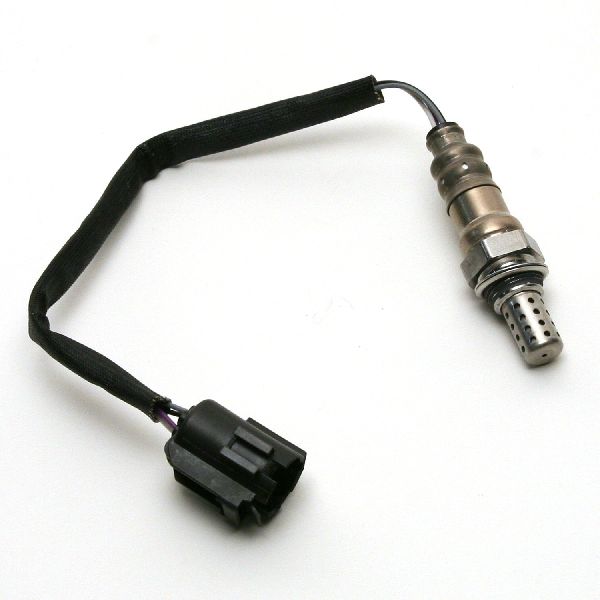
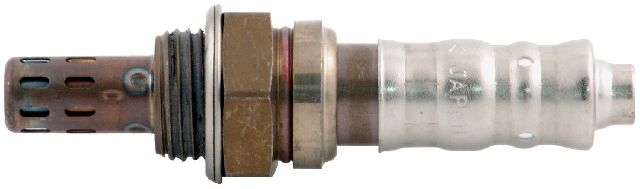
- Downstream Oxygen Sensor (Bank 1, Right/Passenger Side)
(OEM #4606133AC)— This is the component that the P0140 code directly identifies as having no circuit activity. It is the most common point of failure.
Trusted brands: Denso, NGK/NTK (NTK is often cited as the OEM supplier), Bosch, Walker
OEM price range: $100-$150
Aftermarket price range: $30-$70
Related Codes That Often Appear With This One
- P0160 — P0160 is the identical 'No Activity' code for the other side of the engine (Bank 2, Sensor 2). Seeing both at once could point to a common issue like a shared fuse or wiring problem affecting both downstream sensors.
- P0141 — P0141 indicates a malfunction in the heater circuit for the same sensor (Bank 1, Sensor 2). A failed heater can prevent the sensor from becoming active, which can sometimes trigger P0140 as well.
Platform-Specific Known Issues
- Owner Confusion on Sensor Location: A recurring theme in owner forums is confusion about which sensor is Bank 1, Sensor 2. Many owners or their mechanics mistakenly replace the upstream sensors, which are easily visible from the engine bay, only for the code to return. The downstream sensors are located underneath the car, after the catalytic converters.
Mechanic-Grade Diagnostic Values
- O2 Sensor Heater Circuit Resistance — expected: 2 to 30 Ohms when measured across the two heater pins on the sensor.. Failure: A reading of OL (infinite resistance) indicates an open heater element, while a reading near zero ohms indicates a short. Both require sensor replacement.
- O2 Sensor Heater Circuit Current Draw — expected: 0.5 - 1.0 Amps. Failure: Significantly higher or lower current indicates a problem with the heater element or wiring.
- ASD Relay Power at Sensor Connector — expected: Battery voltage (approx. 12V) with key on, engine off.. Failure: No voltage indicates a problem with the ASD relay, its fuse (Fuse 'W', 10A in PDC), or the wiring between the PDC and the sensor.
Scan Tool Commands That Help
- DRB III or equivalent professional scan tool: O2 Sensor Heater Actuation Test — Use this to verify if the PCM can command the heater on and if the sensor responds. After the engine is off for 10+ minutes, turn the ignition on, command the heater on, and monitor the O2 sensor voltage. A working sensor will begin to generate a voltage, while a dead sensor or one with a failed heater will show no change.
Wiring & Ground Locations
- Power Distribution Center (PDC) — Located on the left (passenger) side of the engine bay.. This box contains the Automatic Shutdown (ASD) relay (labeled as relay #1) and its associated fuses which supply power to the O2 sensor heater circuits.
- Fuse W (10A) in PDC — Inside the Power Distribution Center in the engine bay.. This fuse provides power to the control side of the Automatic Shutdown (ASD) relay, which in turn powers the O2 sensor heaters. A failure here will disable all O2 sensor heaters.
- Automatic Shutdown (ASD) Relay — Position #1 in the Power Distribution Center (PDC) in the engine bay.. This relay provides the 12V power to the heater elements of all four oxygen sensors. A failure of this common relay can cause heater circuit codes or no-activity codes for multiple sensors simultaneously.
- PCM (Powertrain Control Module) — Located at the left rear of the engine compartment.. The PCM provides the ground/return path for the O2 sensor signal and heater circuits. It is the destination for the sensor's voltage signal. A wiring diagram shows the sensor's signal and return wires terminate at the PCM.
Real Owner Repair Stories
- 2CarPros.com Forum User (2000 Chrysler 300M) — Check Engine Light with codes P0140 and P0160.
❌ Tried (didn't work) The owner's mechanic replaced the two upstream oxygen sensors, which were visible from the top of the engine bay.
✅ What actually fixed it A forum technician identified the misdiagnosis, clarifying that the vehicle has four O2 sensors and that codes P0140 and P0160 refer to the two downstream sensors located under the car, after the catalytic converters. The implied fix was to replace the correct (downstream) sensors.
OEM Part Supersession History
4606133AC→4606133AD, 4606133AE— Standard part revision and improvement by the manufacturer.
Heads up: No known incompatibilities exist between these OEM revisions for the 1999-2004 300M. Aftermarket parts like NTK 23099 and Bosch 13138 are common, direct-fit replacements.
Model Year Variations Within This Range
- 1999-2004: While minor trim, color, and feature changes occurred throughout the 300M's production run (e.g., a more advanced computer in 2001, the 'Special' model in 2002), the fundamental 3.5L engine, exhaust layout, and O2 sensor system related to code P0140 remained consistent.
Diagnostic Flowchart
Used vs. New Parts: Buying Guide for This Vehicle
When a used part is the smart pick: A used part is a smart choice for replacing a damaged connector pigtail. Sourcing a pigtail with a few inches of wire from a junkyard vehicle is an effective and inexpensive repair for a melted or corroded connector.
Donor-vehicle mileage cap: roughly under 150000 miles for the part to have meaningful remaining life.
What to inspect on the donor part:
- For a wiring pigtail, inspect for brittle or cracked plastic on the connector body.
- Ensure connector pins are clean, straight, and free of green or white corrosion.
- Check that the wiring insulation is flexible and not melted, hardened, or frayed.
OEM-only on this vehicle (don't cheap out):
- Powertrain Control Module (PCM) - A used PCM from a donor car will not work as it is programmed to the original vehicle's VIN and options. If the PCM is condemned, a remanufactured unit programmed specifically to your car's VIN is required.
Aftermarket brands forum-validated for this vehicle:
- O2 Sensors: NTK (often the OEM supplier), Denso, and Bosch are highly recommended for reliability and proper function.
- Connector Pigtails: Dorman is a widely available and trusted source for replacement electrical connectors.
Brands owners have reported issues with on this vehicle:
- Universal O2 Sensors: Avoid generic or 'universal' oxygen sensors that do not have a direct-fit connector. Cutting and splicing wires can introduce resistance and signal problems, potentially causing the code to persist or new codes to appear.
Real Owner Stories
Aggregated from forums and TSBs cited above. Mileages and costs reflect what owners reported in those sources.
2000 Chrysler 300M 3.5L — 273000 miles
Symptoms: Check engine light with codes P0140 and P0160 initially, with only P0140 returning after an attempted repair.
What fixed it: The owner did not report a final fix, but the forum discussion pointed out that they had likely replaced the two upstream O2 sensors instead of the downstream ones. The implied fix was to replace the correct sensor for code P0140, which is the Bank 1 Sensor 2 (downstream) O2 sensor, located on the passenger side behind the catalytic converter.
Source hint: 2CarPros.com thread titled '2000 Chrysler 300 Trouble Code P0140'
Related OBD-II Codes
Frequently Asked Questions
I have a P0140 code on my 300M. Where exactly is the Bank 1, Sensor 2 oxygen sensor located?
My mechanic wants to replace the O2 sensor for a P0140 on my 300M. Is there anything else I should check first?
I have a scan tool for my 2001 300M. What should the live data for 'O2S B1S2' look like if the sensor has failed?
I hear a ticking noise from my exhaust on my 300M. Could this be related to my P0140 code?
The Check Engine Light on my 2002 300M for code P0140 turns on and off every few days. Is this a common symptom?
I own a 2003 Dodge Intrepid with the 3.5L V6. Does this P0140 information apply to my car?
Helpful Videos


We Have This Part in Stock

The information in this article is provided for general reference and educational purposes only. Vehicle specifications, procedures, and part compatibility can vary by production date, trim level, and region. Always consult your vehicle's factory service manual and verify part numbers before purchasing or performing repairs. Safety-critical components such as airbags, seat belts, and braking systems should be installed by a qualified professional.
- Chrysler 300M:
- 🧭 Diagnostic Flowchart
- 🎬 Helpful Videos
- 🛍️ Shop This Part
- What's Unique About the 1999-2004 Chrysler 300M
- Symptoms You May Notice
- Most Likely Causes
- Rare But Worth Checking
- Diagnosis Steps
- Technical Service Bulletins (TSBs) & Recalls
- Parts You'll Likely Need
- Related Codes That Often Appear With This One
- Platform-Specific Known Issues
- Mechanic-Grade Diagnostic Values
- Scan Tool Commands That Help
- Wiring & Ground Locations
- Real Owner Repair Stories
- OEM Part Supersession History
- Model Year Variations Within This Range
- Used vs. New Parts: Buying Guide for This Vehicle
- Real Owner Stories
- 2000 Chrysler 300M 3.5L — 273000 miles
- Related OBD-II Codes
- Frequently Asked Questions
- 🎟️ Get 5% Off