
P0140 on 2011-2019 Ford Explorer 3.5L: Causes and Fixes for O2 Sensor Inactivity
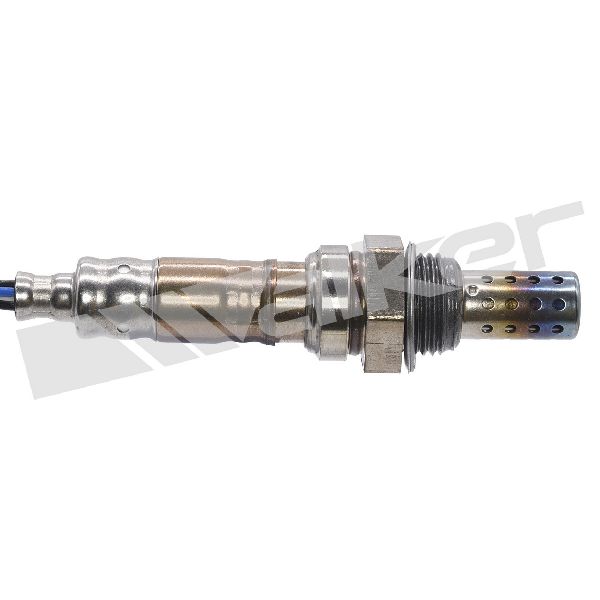
This code means the downstream oxygen sensor on Bank 1 (rear, firewall side) is not sending a signal. The most common fix is replacing the Bank 1, Sensor 2 oxygen sensor itself. Expect to pay $50-$150 for the part. Accessing the sensor, which is tucked behind the engine against the firewall, is the main challenge.
- P0140 points to an electrical issue with the Bank 1, Sensor 2 O2 sensor, not a mechanical problem with the catalytic converter.
- The most probable cause is a failed O2 sensor, which is a standard wear-and-tear part.
- Before replacing the sensor, always perform a quick visual inspection of the wiring and connector for obvious damage, and check the related fuse.
- Bank 1 is the rear cylinder bank (firewall side) on this engine. Sensor 2 is the one located after the catalytic converter.
- Driving with this code is generally safe but will cause an automatic failure on an emissions test.
What's Unique About the 2011-2019 Ford Explorer
The 2011-2019 Explorer covers the fifth generation, and this code is a common issue across many Ford vehicles, not just the Explorer. The primary challenge on the 3.5L V6 is physically accessing the Bank 1 (rear) sensor. Its connector is often located near the back of the engine, and the sensor itself is on the exhaust pipe tucked between the engine and the firewall, making it difficult to reach without specialized tools or removing other components. While the cause is almost always a simple sensor failure, the location can make the repair more time-consuming for a DIYer compared to the more easily accessible Bank 2 sensor on the radiator side.
Symptoms You May Notice
- Check Engine Light is illuminated.
- Vehicle will fail an emissions test.
- Slightly reduced fuel economy.
- In some cases, a rough idle or sluggish acceleration if the PCM defaults to a rich fuel mixture.
- Replacing the Catalytic Converter: P0140 is an electrical circuit code for the sensor, not a code for converter efficiency (like P0420). Replacing the converter will not fix a P0140 code.
- Replacing the wrong O2 sensor: Ensure you are replacing Bank 1, Sensor 2. Bank 1 is the rear bank (firewall side) on a transverse-mounted 3.5L V6. Sensor 2 is the downstream sensor, after the catalytic converter. A very common mistake is ordering the part for Bank 2 (front/radiator side), which is a different part number.
Most Likely Causes
- Failed Bank 1, Sensor 2 Oxygen Sensor 🔴 High Probability → Shop Oxygen Sensor Oxygen sensors are wear items with a finite lifespan, typically 60,000 to 90,000 miles. Contamination from engine byproducts, age, and failure of the internal heating element are common reasons for failure. The high heat environment of the EcoBoost engine can also contribute to a shorter sensor life.
How to confirm: Use an OBD-II scanner with live data capability. Monitor the voltage for 'O2S12' (Bank 1, Sensor 2). If the voltage is stuck at a fixed value (often around 0.45V) and does not fluctuate, the sensor is inactive. A healthy downstream sensor on a warm engine should show a relatively stable voltage between 0.5V and 0.8V.
Typical fix: Replace the Bank 1, Sensor 2 oxygen sensor. This sensor is located on the rear (firewall side) exhaust pipe, after the catalytic converter. Penetrating oil and a specialized O2 sensor socket are highly recommended for removal. Torque the new sensor to 35 ft-lbs.
Est. part cost: $50-$150 - Wiring or Connector Damage 🟡 Medium Probability The sensor wiring is routed under the vehicle and can be exposed to road debris, water, and extreme exhaust heat, which can cause corrosion, melting, or physical breaks in the wires or connector. The connector for Bank 1 is often clipped to the back of the engine block, where it can become brittle from heat cycles.
How to confirm: Visually inspect the entire wiring harness from the O2 sensor to the main engine harness. Check for melted plastic, chafed wires, or corrosion inside the connector pins. Use a multimeter to check for continuity between the sensor connector and the PCM connector to find hidden breaks. 🎬 Watch: A master mechanic's guide to Ford O2 sensor diagnostics. On many Fords, the O2 signal wire does not have a bias voltage, so unplugging the sensor should result in a 0V reading on a scan tool; if it does, the wiring to the PCM is likely intact.
Typical fix: Repair the damaged section of the wiring harness or clean/replace the connector. Apply dielectric grease to the new connector to prevent future corrosion.
Est. part cost: $10-$50 - Blown Fuse for O2 Heater Circuit ⚪ Low Probability A short in the sensor's internal heating element or its wiring can cause the associated fuse to blow. Without a working heater, the sensor won't reach its required operating temperature (around 600°F) and will not show activity, especially during initial warm-up.
How to confirm: Consult the owner's manual to locate the fuse for the O2 sensor heater circuits (often labeled 'HEGO' or 'A/F HEATER'). Visually inspect the fuse or test it for continuity with a multimeter.
Typical fix: Replace the blown fuse. If the fuse blows again immediately, it indicates a short circuit in the wiring or the sensor itself that needs to be diagnosed and repaired before replacing the fuse again.
Est. part cost: $1-$5
Rare But Worth Checking
- Exhaust Leak: An exhaust leak before the sensor can introduce outside oxygen, but this usually triggers lean condition codes (like P0171/P0174) or slow response codes (P0139) rather than a 'no activity' code. It's less likely for P0140 but worth considering if other causes are ruled out.
- Powertrain Control Module (PCM) Fault: → Shop Engine Control Module (ECM) This is extremely rare. The PCM's internal driver or analog-to-digital converter for the sensor circuit could fail, but all other possibilities (sensor, wiring, fuses) should be exhausted before considering PCM replacement. A failed PCM might also present other unrelated codes.
Diagnosis Steps
- Connect an OBD-II scanner and confirm P0140 is the active code. Check for any other codes, especially P0141.
- Access the live data stream on the scanner. Watch the voltage for 'B1S2' (Bank 1, Sensor 2). The voltage should be relatively stable between 0.5V and 0.8V on a fully warmed engine. If it is flat, stuck (likely around 0.45V), or shows 0V, the sensor is not active.
- Perform a thorough visual inspection of the O2 sensor's wiring harness and connector. Look for any signs of melting from contact with the exhaust, corrosion in the pins, or physical damage from road debris.
- Check the fuse for the O2 sensor heater circuit in the vehicle's fuse box. Consult the owner's manual for the specific fuse location.
- If the wiring and fuse are good, the most likely cause is a failed oxygen sensor.
- To be certain, you can test the sensor's heater circuit for resistance using a multimeter. Disconnect the sensor and measure between the two heater wires (usually the same color). A healthy resistance is typically between 3 and 30 ohms; a reading of 'OL' (over limit) indicates a broken heater element.
- If a new sensor does not resolve the issue, perform a continuity test on the signal and ground wires between the sensor connector and the PCM to rule out a hidden wire break.
Parts You'll Likely Need
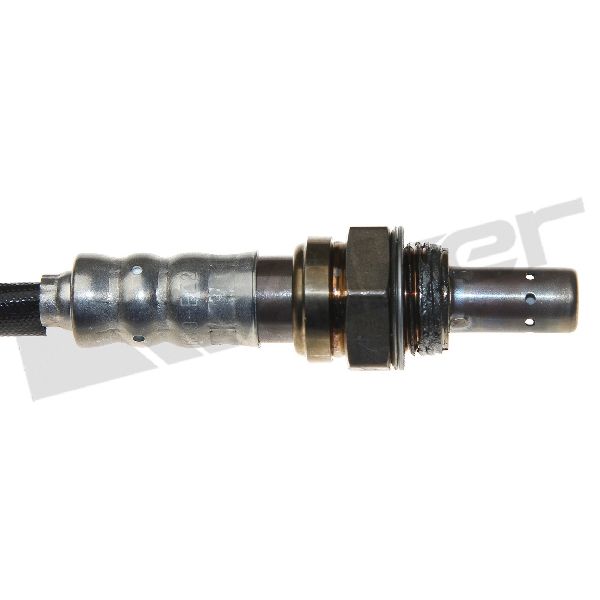
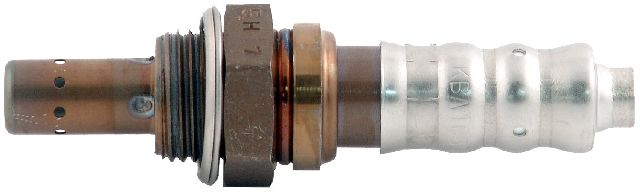
- Oxygen Sensor (Bank 1, Sensor 2)
(OEM #BE5Z-9G444-D)— This is the most common failure point for a P0140 code. The sensor is a wear item that eventually fails from age and exposure to exhaust gases. Note: This is the sensor for the REAR (firewall side) bank. The sensor for the front bank is a different part number.
Trusted brands: Motorcraft, Bosch, Denso, NTK
OEM price range: $90-$140
Aftermarket price range: $50-$100
Related Codes That Often Appear With This One
- P0141 — P0141 indicates a malfunction in the heater circuit for the same sensor (Bank 1, Sensor 2). A failed heating element is a common cause of the sensor not showing activity, so these codes often appear together.
Platform-Specific Known Issues
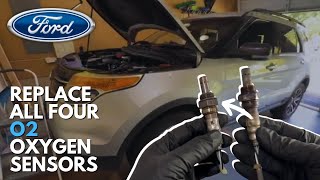
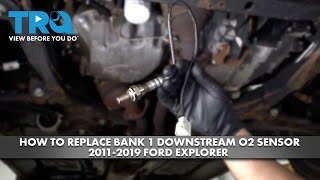
- Difficult Access to Bank 1 Sensor: On the transverse-mounted 3.5L V6 in the Explorer, Bank 1 is against the firewall. The Sensor 2 O2 sensor is located low on the exhaust pipe in this tight space, making it very difficult to access from either the top or bottom of the vehicle. A detailed video shows it located next to the oil pan. 🎬 Watch: This video shows exactly how to reach the Bank 1 sensor. Many DIYers find this specific sensor to be the most difficult of the four to replace. 🎬 See this complete walkthrough for replacing all four O2 sensors.
Mechanic-Grade Diagnostic Values
- O2 Sensor Heater Element Resistance — expected: 3 to 30 Ohms between the two heater circuit pins on the sensor connector.. Failure: A reading of infinity (OL) indicates an open circuit, while a reading near zero indicates a shorted circuit.
- B1S2 Signal Voltage (Live Data) — expected: Relatively stable voltage between 0.5V and 0.8V on a fully warmed-up engine at idle.. Failure: A flatlined voltage that is stuck at 0V, 0.45V, or another value and does not change.
- B1S2 Signal Circuit Voltage (Sensor Unplugged) — expected: 0 Volts on the scan tool.. Failure: A reading of ~0.5V or another voltage may indicate a short to another circuit, as many Ford systems of this era do not use a bias voltage on the signal wire.
Hidden / Shadow Codes Worth Checking
- Mode $06, Test ID $81, Component ID $10: This specific monitor in Mode $06 data corresponds to the Bank 1, Sensor 2 activity test. The PCM uses this internal test to determine if the sensor is active. A 'Fail' status for this component is the direct trigger for the P0140 DTC. (see via A professional scan tool or an advanced OBD-II scanner app with Mode $06 capability.)
Wiring & Ground Locations
- Bank 1 Sensor 2 Connector — The sensor wire runs from the exhaust pipe (firewall side, next to the oil pan) up to the back of the engine block. The electrical connector is typically clipped to a bracket on the rear of the engine.. The connector's location exposes it to high heat, which can make the plastic brittle and cause connection issues. It must be disconnected to replace the sensor.
- O2 Sensor Reference Ground — This is one of the four wires in the sensor's own harness, providing a ground path back to the PCM.. In rare cases, a break or high resistance in this specific ground wire can cause a 'no activity' reading, even if the sensor and signal wire are good. This is often overlooked during diagnosis.
OEM Part Supersession History
BE5Z-9G444-D→Motorcraft DY-1173— Standard part number update.
Heads up: This is the correct part for Bank 1 Sensor 2 (rear/firewall). Do NOT use Motorcraft DY-1153 (BE5Z-9G444-A), as that part is for Bank 2 Sensor 2 (front/radiator) and will not work in this location.
Model Year Variations Within This Range
- 2016-2019: A mid-cycle refresh occurred in 2016, introducing the much-improved SYNC 3 infotainment system and updated exterior styling. However, there is no evidence this refresh changed the part numbers or locations for the 3.5L EcoBoost V6 oxygen sensors.
Diagnostic Flowchart
Other Known Issues on This Vehicle
Issues unrelated to this code that are worth knowing about as an owner of this generation:
- Internal Water Pump Failure 🔴 High — Common after 80,000-120,000 miles. Failure can be catastrophic, as it's driven by the timing chain and leaks coolant into the engine oil, destroying the timing components and potentially the engine.
- Power Transfer Unit (PTU) Overheating/Failure 🔴 High — Fluid is considered 'lifetime' by Ford but often breaks down due to heat from the nearby exhaust, leading to failure. Owners recommend changing the fluid every 30,000 miles to prevent expensive replacement.
- Intake Valve Carbon Buildup 🟠 Medium — A known issue on all direct-injection engines, including the first-generation 3.5L EcoBoost. Can cause misfires, rough idle, and loss of power over time. Typically requires media blasting (walnut blasting) to clean.
- Timing Chain Stretch & Cam Phaser Rattle 🟠 Medium — Common on earlier EcoBoost models, often exacerbated by oil contamination from a failing water pump or extended oil change intervals. Symptoms include a distinct rattle on cold starts. (Ref: TSB 23-2143 addresses cold start rattle on 2017-2020 models due to worn VCT units.)
- Exhaust Odor in Cabin 🟡 Low — Widespread complaints led to a NHTSA investigation and a Ford customer satisfaction program. The issue involves exhaust fumes potentially entering the cabin, particularly under heavy acceleration. (Ref: TSB 16-0166, NHTSA Investigation PE16-013 (closed without recall).)
Used vs. New Parts: Buying Guide for This Vehicle
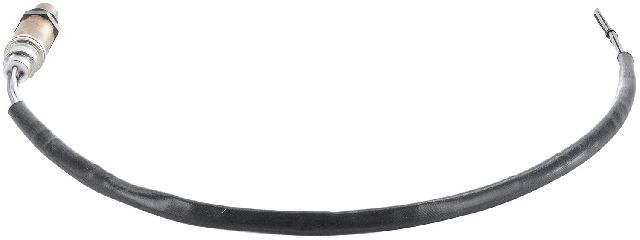
When a used part is the smart pick: Never for the oxygen sensor itself, as it is a wear item with a finite lifespan. A used wiring pigtail from a junkyard is acceptable if only your connector is damaged.
Donor-vehicle mileage cap: roughly under 80000 miles for the part to have meaningful remaining life.
What to inspect on the donor part:
- For a wiring pigtail, inspect for flexible, non-brittle insulation.
- Ensure connector pins are clean, straight, and free of corrosion.
- Check that the connector's locking tab is intact.
OEM-only on this vehicle (don't cheap out):
- While not strictly 'OEM-only', using a Motorcraft sensor is the safest bet to avoid compatibility issues. If going aftermarket, stick to well-known OEM suppliers.
Aftermarket brands forum-validated for this vehicle:
- NTK
- Denso
- Bosch
Brands owners have reported issues with on this vehicle:
- Unbranded, 'white-box' sensors from online marketplaces should be avoided due to inconsistent quality and high failure rates.
Real Owner Stories
Aggregated from forums and TSBs cited above. Mileages and costs reflect what owners reported in those sources.
Ford Explorer (3.5L EcoBoost V6)
Symptoms: A user found that wiggling the sensor's electrical connector caused the live data signal to drop out.
What fixed it: Addressing a bad connection at the electrical connector.
Source hint: Explorer ST Forum | explorerst.org
Ford Explorer (3.5L EcoBoost V6)
Symptoms: The user noted extremely cramped conditions while working near the catalytic converters, mentioning the converter is only about an inch and a half away from other components.
What fixed it: The source describes the difficulty of accessing the B1S2 O2 sensor area due to the tight space near the catalytic converters.
Source hint: Reddit r/FordExplorer
Related OBD-II Codes
Frequently Asked Questions
Where is the Bank 1, Sensor 2 oxygen sensor located on my 3.5L EcoBoost Explorer?
Does TSB 23-2143 relate to my P0140 oxygen sensor code?
Is it true that the Bank 1 Sensor 2 is the hardest one to change on this vehicle?
Could a blown fuse be causing my P0140 code on the Explorer?
What should the voltage reading be for a healthy downstream O2 sensor on my 3.5L EcoBoost?
Does the 3.5L EcoBoost engine have any specific issues that shorten O2 sensor life?
Helpful Videos


We Have This Part in Stock

The information in this article is provided for general reference and educational purposes only. Vehicle specifications, procedures, and part compatibility can vary by production date, trim level, and region. Always consult your vehicle's factory service manual and verify part numbers before purchasing or performing repairs. Safety-critical components such as airbags, seat belts, and braking systems should be installed by a qualified professional.
- Ford Explorer:
- 🧭 Diagnostic Flowchart
- 🎬 Helpful Videos
- 🛍️ Shop This Part
- What's Unique About the 2011-2019 Ford Explorer
- Symptoms You May Notice
- Most Likely Causes
- Rare But Worth Checking
- Diagnosis Steps
- Parts You'll Likely Need
- Related Codes That Often Appear With This One
- Platform-Specific Known Issues
- Mechanic-Grade Diagnostic Values
- Hidden / Shadow Codes Worth Checking
- Wiring & Ground Locations
- OEM Part Supersession History
- Model Year Variations Within This Range
- Other Known Issues on This Vehicle
- Used vs. New Parts: Buying Guide for This Vehicle
- Real Owner Stories
- Ford Explorer (3.5L EcoBoost V6)
- Ford Explorer (3.5L EcoBoost V6)
- Related OBD-II Codes
- Frequently Asked Questions
- 🎟️ Get 5% Off