
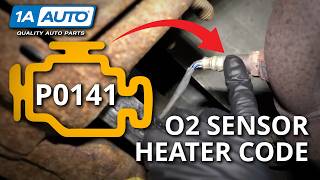
P0141 on 2001-2010 Chrysler PT Cruiser 2.4L: O2 Sensor Heater Fixes and Causes
This code means the heater inside the downstream oxygen sensor has failed. The most likely fix is replacing the Bank 1, Sensor 2 (post-catalytic converter) O2 sensor. Before replacing, check for a blown fuse and inspect the wiring for oil contamination from a leaking oil pressure switch, a common and well-documented PT Cruiser issue that can wick oil all the way to the main computer.
- P0141 on a PT Cruiser almost always means the downstream (post-catalytic converter) O2 sensor needs to be replaced.
- CRITICAL: Before buying parts, inspect the O2 sensor's electrical connector and the main PCM connectors for engine oil. If oil is present, the root cause is a leaking oil pressure switch that must be replaced.
- Check the correct fuse before replacing sensors. For 2001-2005, check fuse #13 in the engine bay. For 2006-2010, check fuses F18, F23, and F26 in the engine bay TIPM.
- Replacing the sensor is a DIY-friendly job, but the sensor can be seized, and a special slotted O2 sensor socket is highly recommended.
What's Unique About the 2001-2010 Chrysler PT Cruiser
While a bad O2 sensor is a common failure on any car, the PT Cruiser has a specific and notorious issue that can lead to misdiagnosis. A leaking oil pressure switch can allow engine oil to travel up the wiring harness through capillary action, contaminating the oxygen sensor connectors and even the main PCM connectors. This oil contamination can short out the heater circuit, triggering the P0141 code, often along with P0135 for the other sensor. Mechanics and owners unfamiliar with this may wrongly replace the O2 sensors or even the PCM, failing to address the root cause.
Symptoms You May Notice
- Check Engine Light is illuminated
- Failing an emissions/smog test
- Slight decrease in fuel economy
- Replacing the PCM before checking for oil contamination in the connectors from a leaking oil pressure switch.
- Replacing the O2 sensor without first checking for a blown fuse or damaged wiring.
- Replacing the O2 sensor when the true fault is oil contamination in the connector from the oil pressure switch.
Most Likely Causes
- Failed Downstream Oxygen Sensor 🔴 High Probability → Shop Oxygen Sensor The internal heater element is a common wear-and-tear component that fails over time due to constant, extreme heat cycles in the exhaust.
How to confirm: Disconnect the sensor and measure the resistance across the two heater circuit pins (usually the two same-colored wires) with a multimeter. A good heater should have a resistance between 5 and 7 ohms when at room temperature. An infinite resistance reading (open circuit) or near-zero ohms (short circuit) means the heater has failed and the sensor must be replaced.
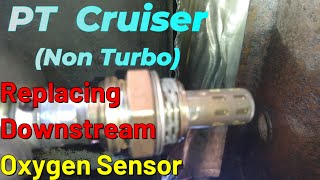
Typical fix: Replace the Bank 1, Sensor 2 (downstream) oxygen sensor. 🎬 Watch: Step-by-step guide to replacing the oxygen sensor. This may require a special slotted socket, and penetrating oil is recommended as the sensor is often seized in the exhaust pipe.
Est. part cost: $30-$80 - Damaged Wiring or Connector 🟡 Medium Probability The sensor's wiring is routed under the vehicle and is susceptible to damage from road debris, speed bumps, or melting from contact with the hot exhaust pipe. Check for oil contamination from the oil pressure switch wicking through the harness.
How to confirm: Visually inspect the entire length of the wiring harness from the O2 sensor to where it enters the main loom. Look for any signs of chafing, melting, corrosion, or breaks. Disconnect the connector and check for oil inside.
Typical fix: Repair the damaged section of wire or replace the connector pigtail. If oil is present, the oil pressure switch must also be replaced to prevent a repeat failure.
Est. part cost: $10-$30 - Blown Fuse ⚪ Low Probability A short circuit in the sensor's heater element or its wiring can cause the protective fuse to blow.
How to confirm: For 2001-2005 models, check fuse #13 (20A) in the Power Distribution Center (under-hood fuse box). For 2006-2010 models with the TIPM, the O2 heaters are powered via the Auto Shutdown (ASD) relay. Check fuses F18 (40A), F23 (15A), and F26 (15A) in the TIPM.
Typical fix: Replace the blown fuse. If it blows again immediately, a short circuit exists that must be found and repaired.
Est. part cost: $1-$5
Rare But Worth Checking
- Leaking Oil Pressure Switch Contaminating Wiring: This is a well-documented and frequent issue on Chrysler 2.4L engines. A faulty oil pressure switch leaks oil internally, which then wicks through the wiring harness via capillary action. This oil can travel several feet to contaminate the O2 sensor connectors and even the main PCM connectors, causing shorts and multiple heater circuit codes (P0141, P0135). If you find oil in the O2 sensor connector, the oil pressure switch is the root cause and must be replaced.
- Faulty Powertrain Control Module (PCM): → Shop Engine Control Module (ECM) This is very rare. The internal driver circuit in the PCM that controls the O2 sensor heater can fail. This should be the last consideration after all other causes, especially oil contamination in the PCM's own connectors, have been ruled out.
Diagnosis Steps
- Read the code with an OBD-II scanner to confirm P0141 is present. 🎬 Watch: Understanding and diagnosing the P0141 heater circuit code.
- Visually inspect the downstream O2 sensor's wiring harness and connector for any obvious damage, melting, or corrosion.
- CRITICAL: Disconnect the O2 sensor and the PCM connectors. Check both for any signs of engine oil. If oil is present, the oil pressure switch is leaking and is the root cause. The switch must be replaced and the harness and connectors must be thoroughly cleaned with electrical cleaner.
- Check the fuse(s) for the O2 sensor heater circuit. For 2001-2005 models, this is fuse #13 (20A) in the under-hood fuse box. For 2006-2010 models, check fuses F18, F23, and F26 in the under-hood TIPM.
- If the fuse and wiring are good, test the heater circuit of the O2 sensor itself. Use a multimeter to measure resistance between the two heater wires (typically same color). A good heater should have a resistance between 5 and 7 ohms. An infinite reading indicates a failed heater.
- If the sensor's heater circuit tests good, check for 12V power at the heater circuit pins on the harness-side connector when the ignition is on.
- If all other steps fail to find the issue, the problem may be with the PCM, but this is highly unlikely.
Parts You'll Likely Need
- Downstream Oxygen Sensor (Bank 1, Sensor 2)
(OEM #56044214AA)— The internal heater element is the most common failure point for the P0141 code.
Trusted brands: Denso, NGK, Bosch, Mopar
OEM price range: $70-$110
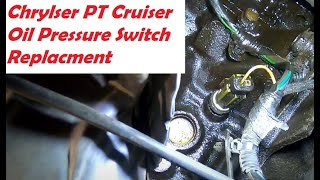
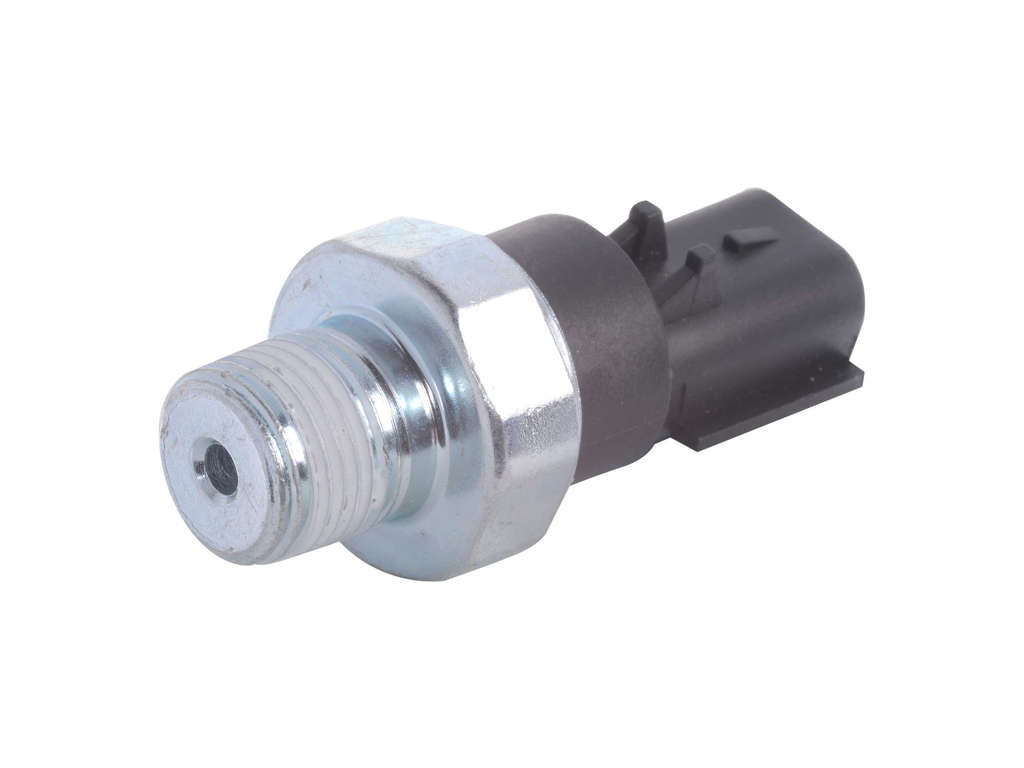
Aftermarket price range: $30-$80 - Engine Oil Pressure Switch
(OEM #4608303AB)— This is the source of the common oil leak that wicks into the wiring harness, causing the P0141 code. If oil is found in the O2 sensor or PCM connector, this part is the root cause.
Trusted brands: Mopar, Standard Motor Products
OEM price range: $35-$55
Aftermarket price range: $15-$30
Related Codes That Often Appear With This One
- P0135 — P0135 is the heater circuit code for the upstream sensor (Bank 1, Sensor 1). If both P0141 and P0135 appear together, it strongly suggests a common power or ground issue, a blown fuse that supplies both heaters, or, most likely on this vehicle, oil contamination in the PCM connectors affecting both circuits simultaneously.
Platform-Specific Known Issues
- A leaking oil pressure switch can force oil into the main wiring harness, contaminating the O2 sensor and PCM connectors, causing this code. This should be checked before replacing any parts.
- Owners report that the oil pressure switch can be very difficult to access for replacement, often requiring work from underneath the car 🎬 See how to access and replace the oil pressure switch. with limited visibility.
Technical Service Bulletins (TSBs) & Recalls
- TSB Bulletin #68070702A: This manufacturer bulletin notes that before replacing a part due to a P0141 fault code, technicians should perform the normal diagnostic routine for this Diagnostic Trouble Code. It emphasizes proper verification before part replacement.
Mechanic-Grade Diagnostic Values
- Downstream O2 Sensor (1/2) Heater Element Resistance — expected: 5 to 7 ohms at room temperature.. Failure: An infinite resistance reading (Open Loop on multimeter) or near-zero ohms indicates a failed heater element.
- O2 Sensor Heater Power Supply Voltage — expected: Approximately 12V (battery voltage) at the harness-side connector on the power wire with Key On, Engine Off.. Failure: 0 Volts indicates a problem with the power source, likely the ASD relay or its fuse.
- PCM Heater Diagnostic Bias Voltage (SBEC/NGC) — expected: The PCM sends a 5V bias signal to the O2 sensor circuit to monitor its temperature and resistance, particularly during the heater test cycle.. Failure: Technicians should be aware of this 5V signal during testing; it is not a fault. A failure is determined by the PCM based on the voltage drop response over time.
Scan Tool Commands That Help
- Chrysler DRB III / WiTECH: O2 Heater Test (e.g., 1/2 O2 Heater Test) — This bidirectional command allows a technician to manually activate the heater circuit. It is used to confirm if the PCM driver is capable of commanding the heater on and to verify the integrity of the wiring and power supply under active test conditions.
Wiring & Ground Locations
- PCM Connector C2, Pin 18 (2001-2005 JTEC/SBEC models) — On the second connector (C2) of the Powertrain Control Module, located on the firewall.. This is the specific pin for the 'O2 1/2 Heater Control' circuit. A technician can test this pin for the ground signal from the PCM to confirm if the PCM driver is functioning.
- PCM Connector C3, Pin 9 (2006-2010 NGC models) — On the third connector (C3, often white) of the 4-plug Next Generation Controller (NGC) PCM, located on the firewall.. This is the specific pin for the 'O2 1/2 HEATER CONTROL' circuit, typically a Brown/White wire. It provides the ground control for the heater and is the primary test point at the PCM for diagnosing a circuit fault.
- Ground G104 — Located at the front of the right (passenger side) front fender.. Wiring diagrams for 2008 models indicate the rear oxygen sensor uses this as its ground point. A corroded or loose G104 could cause high resistance in the circuit, potentially contributing to a heater code.
OEM Part Supersession History
4608303AB→5149098AB— Standard part number update and replacement.
Heads up: The new part number is a direct replacement for the old one.56044214AA→Discontinued— Part is no longer produced by Mopar.
Heads up: This OEM part is no longer available directly from Mopar. Owners must rely on New Old Stock (NOS) or aftermarket alternatives.
Model Year Variations Within This Range
- 2001-2005: These models use a JTEC or SBEC Powertrain Control Module. The downstream O2 sensor heater is controlled by Pin 18 on connector C2. The fuse box is a Power Distribution Center (PDC).
- 2006-2010: These models use a Next Generation Controller (NGC) PCM. The downstream O2 sensor heater is controlled by Pin 9 on connector C3. The fuse box is a Totally Integrated Power Module (TIPM).
Diagnostic Flowchart
Other Known Issues on This Vehicle
Issues unrelated to this code that are worth knowing about as an owner of this generation:
- Front Lower Control Arm Bushing Failure 🔴 High — Extremely common, often occurs before 100,000 miles. Results in clunking/knocking noises from the front suspension, especially over bumps, and can cause uneven tire wear.
- Timing Belt and Water Pump Replacement 🔴 High — This is critical preventative maintenance. The 2.4L is an interference engine, meaning a broken timing belt will cause catastrophic engine damage. The recommended replacement interval is typically between 90,000 and 105,000 miles. The water pump is driven by the timing belt and should always be replaced at the same time.
- Automatic Transmission Solenoid Pack Failure 🟠 Medium — Common on the 4-speed automatic (41TE). Can cause harsh shifting, getting stuck in one gear (limp mode), or shifting issues. Often requires replacing the solenoid pack on the front of the transmission.
- General Electrical Problems 🟠 Medium — PT Cruisers are known for various electrical issues, including failing window switches, malfunctioning dashboard lights, and problems with the Totally Integrated Power Module (TIPM) on later models (2006-2010), which can cause a wide range of difficult-to-diagnose symptoms.
- Cooling System Component Failure 🟠 Medium — The plastic thermostat housing and water pump impeller are known to become brittle and fail, leading to coolant leaks and potential overheating.
Used vs. New Parts: Buying Guide for This Vehicle
When a used part is the smart pick: For this repair, buying a used part is generally not recommended for the sensors themselves. However, obtaining a used wiring harness connector pigtail from a junkyard is a viable option if the original connector is melted or damaged.
Donor-vehicle mileage cap: roughly under 100000 miles for the part to have meaningful remaining life.
What to inspect on the donor part:
- For a connector pigtail, ensure the plastic is not brittle or cracked.
- Check that the locking tab is intact.
- Inspect the pins inside the connector for corrosion or signs of oil contamination.
- Ensure there is at least 4-6 inches of wire attached to allow for easy splicing.
OEM-only on this vehicle (don't cheap out):
- While not strictly 'OEM-only', sticking to the original equipment manufacturer brand is highly recommended for oxygen sensors on this vehicle.
Aftermarket brands forum-validated for this vehicle:
- NTK (often the OEM supplier for Chrysler)
- Denso
Brands owners have reported issues with on this vehicle:
- Bosch (Forum users report issues with Bosch sensors on Chrysler vehicles when Bosch was not the original supplier).
- Universal 'cut-to-fit' sensors (These often lead to improper connections and repeat failures).
Real Owner Stories
Aggregated from forums and TSBs cited above. Mileages and costs reflect what owners reported in those sources.
2003 Chrysler PT Cruiser Limited 2.4L
Symptoms: Check Engine Light (MIL) illuminated for P0141. The owner replaced the O2 sensor with an OEM unit and found chewed wires.
What fixed it: The owner repaired the chewed wires and checked resistance, though they initially suspected the PCM because they weren't getting a pulsing signal for the heater.
Source hint: iATN (International Automotive Technicians Network)
2001-2010 Chrysler PT Cruiser 2.4L
Symptoms: P0031 and P0037 heater circuit codes appearing due to oil contamination.
What fixed it: Replacing the leaking oil pressure switch and thoroughly cleaning the wiring harness and main PCM connector with electrical cleaner to remove wicked oil.
Source hint: YouTube (Heater circuit o2 sensor fix! Chrysler PT Cruiser Dodge Neon p0031 & p0037)
2001-2010 Chrysler PT Cruiser 2.4L
Symptoms: Frustration with a 'brutal' repair job involving the oil pressure sensor, described as needing to be done 'blind' from under the car.
What fixed it: Replacement of the oil pressure sensor/switch from underneath the vehicle.
Source hint: Reddit (r/PTCruiser) - 'Oil pressure sensor nightmare, I need help.'
2001-2010 Chrysler PT Cruiser 2.4L
Symptoms: P0141 code appeared immediately after the owner installed an aftermarket downstream oxygen sensor.
What fixed it: The report suggests potential issues with non-OEM parts or underlying wiring problems that the aftermarket sensor could not resolve.
Source hint: ptcruiser.pl Forum
Related OBD-II Codes
Frequently Asked Questions
I replaced my downstream O2 sensor but the P0141 code came back immediately. Could it be the part?
How can a leaking oil pressure switch cause an O2 sensor code on my PT Cruiser?
Where is the fuse for the O2 sensor heater on a 2004 PT Cruiser?
My 2007 PT Cruiser has P0141; which fuses should I check in the TIPM?
Is it true I have to replace the oil pressure switch from under the car?
What resistance should I see when testing the O2 sensor heater on this 2.4L engine?
Helpful Videos

We Have This Part in Stock


The information in this article is provided for general reference and educational purposes only. Vehicle specifications, procedures, and part compatibility can vary by production date, trim level, and region. Always consult your vehicle's factory service manual and verify part numbers before purchasing or performing repairs. Safety-critical components such as airbags, seat belts, and braking systems should be installed by a qualified professional.
- Chrysler PT Cruiser:
- 🧭 Diagnostic Flowchart
- 🎬 Helpful Videos
- 🛍️ Shop This Part
- What's Unique About the 2001-2010 Chrysler PT Cruiser
- Symptoms You May Notice
- Most Likely Causes
- Rare But Worth Checking
- Diagnosis Steps
- Parts You'll Likely Need
- Related Codes That Often Appear With This One
- Platform-Specific Known Issues
- Technical Service Bulletins (TSBs) & Recalls
- Mechanic-Grade Diagnostic Values
- Scan Tool Commands That Help
- Wiring & Ground Locations
- OEM Part Supersession History
- Model Year Variations Within This Range
- Other Known Issues on This Vehicle
- Used vs. New Parts: Buying Guide for This Vehicle
- Real Owner Stories
- 2003 Chrysler PT Cruiser Limited 2.4L
- 2001-2010 Chrysler PT Cruiser 2.4L
- 2001-2010 Chrysler PT Cruiser 2.4L
- 2001-2010 Chrysler PT Cruiser 2.4L
- Related OBD-II Codes
- Frequently Asked Questions
- 🎟️ Get 5% Off