
P0142 on 2004-2008 Ford F-150 5.4L: O2 Sensor Circuit Causes and Fixes
P0142 on a 2004-2008 F-150 most often points to a failed downstream oxygen sensor on the passenger side or a damaged wiring harness. The harness is known to melt where it passes over the transmission crossmember. Inspect the wiring for melting near the exhaust before replacing the sensor, which costs about $40-$80 for an aftermarket part or $90-$150 for OEM.
- P0142 points to the downstream O2 sensor on the passenger side.
- Before buying any parts, ALWAYS inspect the wiring harness for melting where it passes over the transmission crossmember.
- If the wiring is good, the sensor itself is the next likely culprit.
- Ignoring the code can lead to failed emissions tests and potential catalytic converter damage.
What's Unique About the 2004-2008 Ford F-150
On the 11th generation F-150 (2004-2008), the wiring harness for the downstream oxygen sensors is notoriously prone to damage. It is often routed too close to the hot exhaust manifold or, most commonly, drapes over the transmission crossmember where it can chafe and melt from contact with the exhaust pipe. Many owners replace the O2 sensor multiple times only to have the code return, because the actual fault lies within the compromised wiring. A thorough inspection of the harness, specifically where it passes over the transmission, is the most critical first step on these trucks before spending money on parts.
Symptoms You May Notice
- Check Engine Light is on
- Failing an emissions test
- Slightly reduced fuel economy
- Replacing the oxygen sensor without first inspecting the wiring harness. A recurring P0142 code after a sensor replacement almost always points to an unfixed wiring issue. Many owners have replaced the sensor multiple times before finding the melted harness.
Most Likely Causes
- Damaged Oxygen Sensor Wiring Harness 🔴 High Probability → Shop Oxygen Sensor The wiring harness for the O2 sensors is frequently routed with insufficient clearance, leading to heat damage, melting, and chafing against the exhaust or transmission crossmember over many heat cycles.
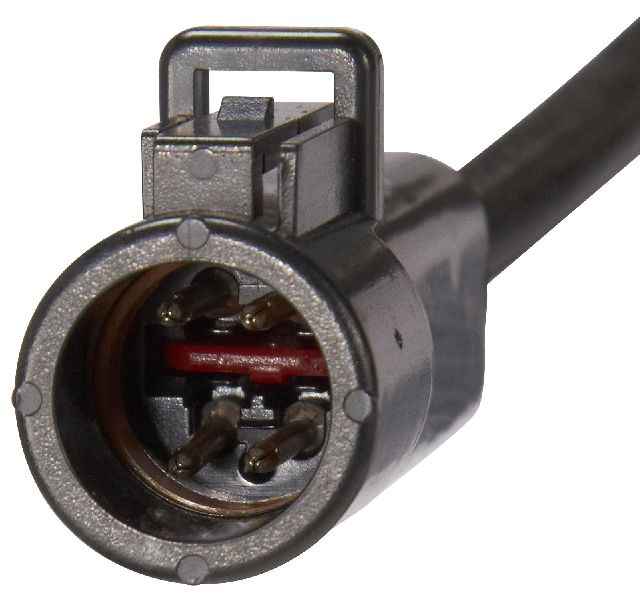
How to confirm: Visually trace the wiring from the passenger-side downstream O2 sensor up towards the engine bay. Pay close attention to the section that runs over the transmission crossmember. Look for any melted plastic conduit, frayed wires, or signs of direct contact with the hot exhaust pipe. The connector itself can also melt.
Typical fix: Repair the damaged section of wire using heat-shrink butt connectors or solder. Secure the repaired harness away from the heat source using high-temperature zip ties or rerouting. If the connector is melted, it will need to be replaced with a new pigtail.
Est. part cost: $10-$50 - Failed Downstream Oxygen Sensor (Bank 1, Sensor 2) 🔴 High Probability → Shop Oxygen Sensor Oxygen sensors are consumable parts. The internal heating element can burn out or the sensing element can become contaminated and fail over time, typically after 80,000-100,000 miles.
How to confirm: If a thorough wiring inspection reveals no damage and the relevant fuse is intact, the sensor itself is the most likely cause. You can test the sensor's heater circuit resistance with a multimeter; an open circuit (infinite resistance) indicates failure.
Typical fix: Replace the Bank 1, Sensor 2 (passenger side, downstream) oxygen sensor. Use a 22mm or 7/8" O2 sensor s 🎬 Watch: Step-by-step guide to replacing the O2 sensor yourself.ocket for easier removal.
Est. part cost: $40-$150 - Exhaust Leak ⚪ Low Probability Rust can cause leaks at exhaust manifold gaskets or pipe flanges, especially on high-mileage trucks in regions that use road salt. This can allow outside oxygen into the exhaust stream, confusing the sensor.
How to confirm: Listen for a ticking or puffing noise from the exhaust, especially when the engine is cold. You can also use a shop rag to briefly block the tailpipe while the engine is running to build pressure and make leaks more audible (use caution).
Typical fix: Replace the leaking gasket or repair the leaking section of the exhaust pipe.
Est. part cost: $20-$200 - Blown Fuse ⚪ Low Probability
How to confirm: Check the fuses in the passenger compartment fuse box, located behind the kick panel on the passenger side. While fuse numbers can vary slightly by year, check fuse #41 (2004-2007) or other fuses related to the PCM or emissions controls. A blown fuse almost always indicates a short circuit in the wiring (see first cause) or a shorted O2 sensor.
Typical fix: Replace the blown fuse after repairing the underlying short circuit. Simply replacing the fuse without finding the short will result in the new fuse blowing immediately.
Est. part cost: $1-$5
Rare But Worth Checking
- Faulty Powertrain Control Module (PCM): → Shop Engine Control Module (ECM) This is very uncommon. The PCM should only be suspected after all other possibilities, including the sensor, wiring, fuses, and exhaust system, have been exhaustively tested and ruled out.
Diagnosis Steps
- Read the code with an OBD-II scanner to confirm P0142 is the primary code present.
- Perform a thorough visual inspection of the Bank 1, Sensor 2 (passenger side, downstream) oxygen sensor and its wiring harness.
- Crucial Step: Carefully trace the harness from the sensor up and over the transmission crossmember. This is the most common failure point. Look for any signs of melting, chafing, or corrosion where the harness may contact the exhaust pipe.
- Inspect the electrical connector for pushed-out pins, corrosion, or melting.
- Check fuses related to the O2 sensor heaters in the passenger compartment fuse box (kick panel).
- If wiring appears intact, use a multimeter to test the connector on the vehicle side (with the sensor unplugged and key on, engine off). Check for ~12V power on the heater circuit wire and check for a good ground.
- If power and ground are present at the connector, the oxygen sensor itself has most likely failed and should be replaced.
- If power or ground is missing, the fault is in the wiring harness between the connector and the PCM, and the faulty wire must be located and repaired.
- After any repair, clear the codes with the scanner and perform a drive cycle to ensure the fix was successful.
Parts You'll Likely Need
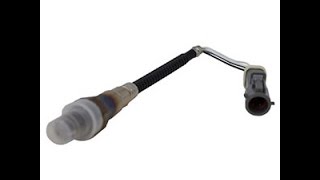
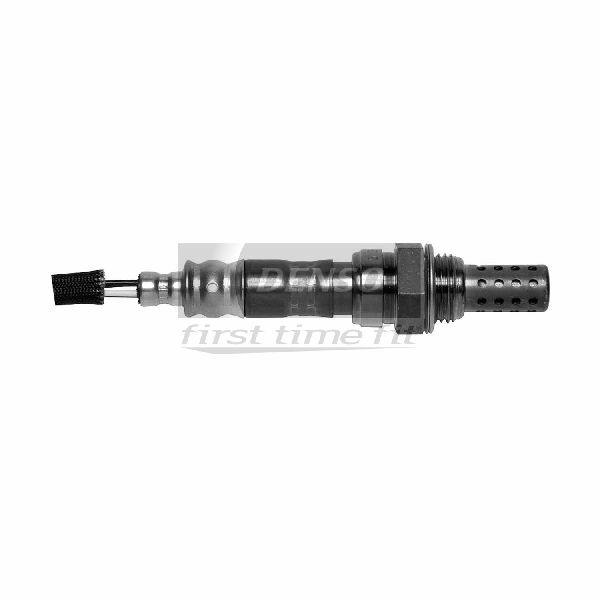
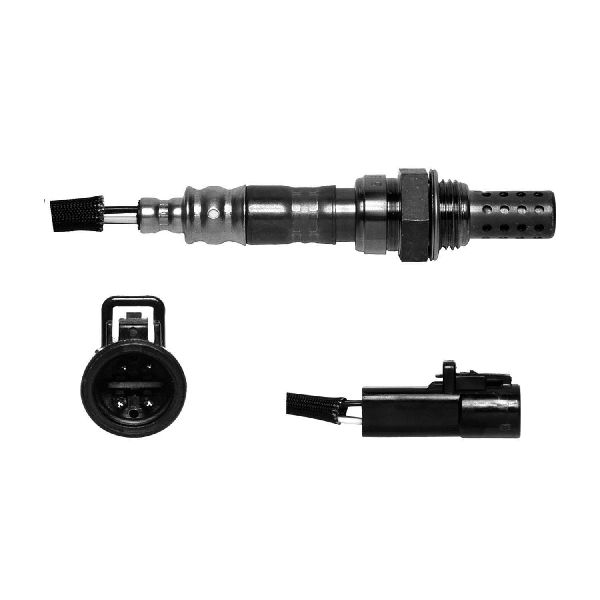
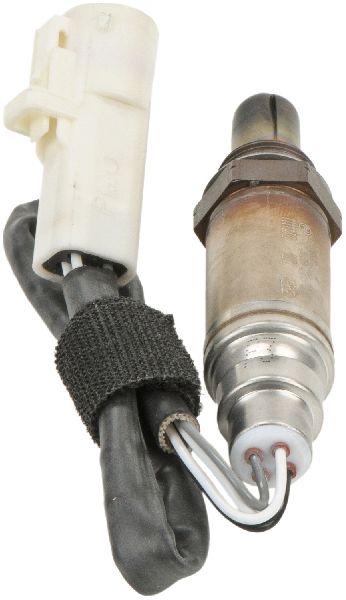
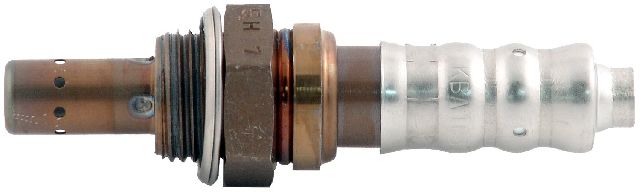
- Downstream Oxygen Sensor (Bank 1, Sensor 2)
(OEM #4L3Z-9G444-AA or DY-992 (Motorcraft))— This is the most common part to fail and cause a P0142 code, assuming the wiring is intact.
Trusted brands: Motorcraft, Bosch, Denso, NGK/NTK
OEM price range: $90-$150
Aftermarket price range: $40-$80 - Oxygen Sensor Connector Pigtail — If the connector itself is melted or corroded from heat exposure, replacing the pigtail is often easier than repairing individual pins.
Trusted brands: Motorcraft, Dorman
OEM price range: $30-$50
Aftermarket price range: $15-$30
Related Codes That Often Appear With This One
- P0141 — P0141 refers specifically to a malfunction in the heater circuit of the same sensor (Bank 1, Sensor 2). They often appear together because a failure in the sensor's internal heater or its wiring (e.g., a melted harness) will trigger both the general circuit fault 🎬 See this quick video on fixing common Ford heater circuit codes. (P0142) and the specific heater fault (P0141).
Platform-Specific Known Issues
- Melted Wiring Harness Over Transmission: A recurring issue on 2004-2008 F-150s is the oxygen sensor wiring harness melting where it passes over the transmission crossmember, in close proximity to the exhaust. This can cause an intermittent or persistent short/open circuit that will not be fixed by replacing the sensor alone. This is the first place to look.
Mechanic-Grade Diagnostic Values
- O2 Sensor Heater Element Resistance — expected: 3 to 30 Ohms. Failure: A reading of 'OL' (Open Loop/infinite resistance) or near-zero Ohms (short circuit) indicates a failed heater element requiring sensor replacement.
- Heater Circuit Power Supply Voltage — expected: 11-13 Volts (Battery Voltage). Failure: 0V at the harness-side connector (with key on, engine off) points to a blown fuse or a break in the power supply wire.
- Downstream O2 Sensor Live Data Voltage (at steady cruise) — expected: A relatively stable voltage, typically between 0.5V and 0.8V.. Failure: A voltage that is stuck low (near 0V), stuck high (near 1V), or not responding indicates a sensor or circuit fault.
Hidden / Shadow Codes Worth Checking
- Mode 6, Test ID $01, Comp ID $21: This test monitors the voltage amplitude of the HO2S21 (Heated Oxygen Sensor, Bank 2, Sensor 1). While not directly for B1S2/3, a failure here alongside a P0142 could indicate a systemic issue like a shared fuse or ground problem. The equivalent for Bank 1 Sensor 2 would be Test ID $01, Comp ID $12. (see via A professional scan tool capable of displaying OBD-II Mode 6 data.)
Scan Tool Commands That Help
- Ford IDS (Integrated Diagnostic System): Datalogger - HO2S PID Monitoring — To view the live voltage output of the Bank 1 Sensor 2/3 (PID name may vary, look for O2S12 or similar). This allows a technician to see if the sensor is producing a signal, stuck, or switching erratically, which helps differentiate a sensor failure from a complete circuit failure.
- Ford IDS (Integrated Diagnostic System): Self-Test - Key On Engine Off (KOEO) and Key On Engine Running (KOER) — Running these self-tests can help confirm if the P0142 fault is currently active. The PCM will test the integrity of sensor circuits during these tests and may flag related codes that provide more diagnostic clues.
Wiring & Ground Locations
- B1S2/3 Connector Pins — On the 4-wire connector for the passenger-side downstream O2 sensor.. Testing for 12V power on the heater circuit pins and checking for continuity to ground on the ground pin are essential steps. The two same-colored wires are typically for the heater circuit.
- G103 — Typically located on the passenger side fender apron in the engine bay.. This is a major engine and PCM ground point. While not the direct ground for the O2 sensor heater (which is often PCM-controlled), a poor connection at G103 can cause a host of strange electrical issues and erratic sensor behavior due to an unstable ground reference for the PCM.
Real Owner Repair Stories
- Ford F150 Forum (2006 F-150 XLT 5.4L) — Check Engine Light on, occasional shaking at idle, blowing a lot of exhaust.
❌ Tried (didn't work) Replacing the Bank 1 Sensor 1 oxygen sensor based on an initial (and likely incorrect) code reading.
✅ What actually fixed it The user later reported a code P2195 (stuck lean). Another user suggested the actual cause was a leak at the exhaust manifold from loose bolts, which is a common issue that can introduce unmetered air and cause O2 sensor codes. While the original poster did not confirm the final fix, this points to a common misdiagnosis where the sensor is blamed for a mechanical fault.
OEM Part Supersession History
4L3Z-9G444-AA→DY-992— Standard part number update by Ford/Motorcraft.
Heads up: DY-992 is the correct service replacement for the original part number for this application. No known incompatibilities.
Model Year Variations Within This Range
- 2008: The fuse numbering in the passenger compartment fuse box changed for the 2008 model year. While Pass 2 mentioned fuse #41 for 2004-2007, 2008 models use a different layout. For 2008, the HEGO (Heated Exhaust Gas Oxygen) sensors are protected by fuse #32 (15A), which also powers other components like the MAF sensor and VCT solenoids.
Diagnostic Flowchart
Other Known Issues on This Vehicle
Issues unrelated to this code that are worth knowing about as an owner of this generation:
- Variable Cam Timing (VCT) / Cam Phaser Failure 🔴 High — Very common, often starts as a light ticking or diesel-like clatter at warm idle between 800-1200 RPM and progresses. Can occur at any mileage but is more frequent on trucks over 75,000 miles. (Ref: TSB 06-19-8, TSB 14-0114)
- Two-Piece Spark Plug Breakage During Removal 🔴 High → Shop Spark Plug — Extremely common on engines built before 10/9/07. Carbon buildup seizes the lower part of the plug in the cylinder head, causing it to break when removal is attempted. Requires a special extraction tool. (Ref: TSB 08-7-6)
- Fuel Pump Driver Module (FPDM) Corrosion and Failure 🔴 High — Very common, especially in regions with road salt. The aluminum module is mounted directly to the steel frame above the spare tire, causing galvanic corrosion that cracks the housing, allows water intrusion, and leads to a no-start or stalling condition.
- Cracked Exhaust Manifolds 🟠 Medium — Common issue causing a ticking sound, particularly when the engine is cold, that may quiet down as the metal expands. Often mistaken for cam phaser noise.
- Timing Chain Tensioner Seal Failure 🔴 High — A root cause of the VCT/Phaser issues. The plastic tensioners have seals that can blow out, causing a loss of oil pressure to the timing components and the top end of the engine, leading to chain slap and phaser noise.
Used vs. New Parts: Buying Guide for This Vehicle
When a used part is the smart pick: A used wiring harness pigtail from a junkyard is a viable option if your original connector is melted and you can find a donor vehicle with an intact harness. It is almost never a good idea to buy a used oxygen sensor.
Donor-vehicle mileage cap: roughly under 80000 miles for the part to have meaningful remaining life.
What to inspect on the donor part:
- For a harness pigtail, inspect for any signs of melting, brittleness, or cracked insulation.
- Ensure the locking tab on the connector is intact and the pins are not corroded or pushed out.
- Cut the pigtail with as much wire length as possible to make splicing easier.
OEM-only on this vehicle (don't cheap out):
- While not strictly 'OEM-only', many forum users and technicians strongly recommend using Motorcraft (OEM) or high-quality OEM-supplier brands like NTK/NGK or Denso for oxygen sensors on this platform. Some cheaper aftermarket sensors can have slightly different heater resistances or response times that can cause codes to return.
Aftermarket brands forum-validated for this vehicle:
- Motorcraft
- NTK (also known as NGK)
- Denso
- Bosch
Brands owners have reported issues with on this vehicle:
- Unnamed 'white box' or generic store-brand sensors have a higher reported failure rate or incompatibility issues. One user reported getting a 'heater resistance' code after installing a TRQ sensor set.
Real Owner Stories
Aggregated from forums and TSBs cited above. Mileages and costs reflect what owners reported in those sources.
2004-2008 Ford F-150 5.4L
Symptoms: The Bank 1 Sensor 2 (downstream, passenger side) electrical connector was completely melted.
What fixed it: The melted connector needed to be cut off and replaced with a new pigtail, and the wiring harness was repaired and secured away from the exhaust.
Source hint: f150forum.com - Thread 'How To Wire O2 Connector - Color To Color Please'
2004-2008 Ford F-150 5.4L — ~95000 miles
Symptoms: A recurring P0142 code that would not go away even after replacing the oxygen sensor.
What fixed it: Repairing a section of the oxygen sensor wiring harness that had melted from contact with the exhaust pipe where it runs over the transmission crossmember.
Source hint: Vehicle Specific Issue: Melted Wiring Harness Over Transmission
2004 F-150 5.4L
Symptoms: Check Engine Light with codes P0141 and P0142. After clearing, the light returned with lean codes P0171 and P0174, and the truck idled rough and stalled when warm.
What fixed it: The source report did not specify the final repair, but the combination of O2 sensor and lean codes points towards a significant vacuum or exhaust leak as a likely root cause.
Source hint: F150online Forums
Related OBD-II Codes
Frequently Asked Questions
Where is the most common place for the wiring to fail and cause a P0142 code on my 2004-2008 F-150?
I replaced the Bank 1 Sensor 2 oxygen sensor, but the P0142 code came back. What's wrong?
Which fuse should I check for an O2 sensor code on my 2006 F-150?
My truck has a ticking noise and a P0142 code. Are these issues related?
Does the common melted O2 sensor wiring issue on the F-150 also affect the Ford Expedition?
What special tool is needed to replace the downstream oxygen sensor on this F-150?
Helpful Videos
![How to Fix FORD P0141 Engine Code in 2 Minutes [1 DIY Method / Only $19.45]](https://img.youtube.com/vi/BsJ3I_EaEJo/mqdefault.jpg)
We Have This Part in Stock


The information in this article is provided for general reference and educational purposes only. Vehicle specifications, procedures, and part compatibility can vary by production date, trim level, and region. Always consult your vehicle's factory service manual and verify part numbers before purchasing or performing repairs. Safety-critical components such as airbags, seat belts, and braking systems should be installed by a qualified professional.
- Ford F-150:
- 🧭 Diagnostic Flowchart
- 🎬 Helpful Videos
- 🛍️ Shop This Part
- What's Unique About the 2004-2008 Ford F-150
- Symptoms You May Notice
- Most Likely Causes
- Rare But Worth Checking
- Diagnosis Steps
- Parts You'll Likely Need
- Related Codes That Often Appear With This One
- Platform-Specific Known Issues
- Mechanic-Grade Diagnostic Values
- Hidden / Shadow Codes Worth Checking
- Scan Tool Commands That Help
- Wiring & Ground Locations
- Real Owner Repair Stories
- OEM Part Supersession History
- Model Year Variations Within This Range
- Other Known Issues on This Vehicle
- Used vs. New Parts: Buying Guide for This Vehicle
- Real Owner Stories
- 2004-2008 Ford F-150 5.4L
- 2004-2008 Ford F-150 5.4L — ~95000 miles
- 2004 F-150 5.4L
- Related OBD-II Codes
- Frequently Asked Questions
- 🎟️ Get 5% Off