
OBD-II Code P0144: O2 Sensor Circuit High Voltage (Bank 1, Sensor 3)
The Ultimate Guide to Diagnosing and Fixing P0144
- Code P0144 triggers when the rearmost oxygen sensor (Bank 1, Sensor 3) voltage locks above 0.9V, signaling a circuit short or a rich running engine.
- A failed oxygen sensor causes 70% of P0144 codes, with melted wiring harnesses shorting to a 12V power source making up most remaining cases.
- Driving with an active P0144 guarantees an emissions test failure and risks destroying a $1,500+ catalytic converter if a rich condition goes ignored.
- Never replace the sensor without first checking live data for a stuck 0.9V signal and scanning for companion codes like P0172 (System Too Rich).
- Always install OEM-brand sensors (like Denso or NTK) to prevent immediate code recurrence, and check for mandatory PCM software updates on European makes like Jaguar.
What Does P0144 Mean?
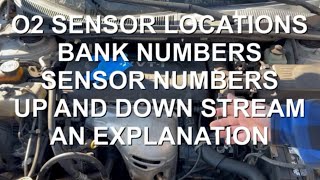
Your car's Powertrain Control Module (PCM) detects the voltage signal from the Bank 1, Sensor 3 oxygen (O2) sensor is stuck abnormally high. Located after the final catalytic converter, this sensor monitors converter efficiency. 🎬 Watch: Understand O2 sensor locations and bank numbers A continuous high voltage (above 0.9V) indicates a failed sensor, a wiring short, or a legitimate rich running condition.
Technical definition: The SAE/OBD-II definition is 'O2 Sensor Circuit High Voltage (Bank 1, Sensor 3)'. The Engine Control Module (ECM) triggers this when the sensor's voltage remains above the high-voltage threshold (typically 0.9V - 1.0V) for a specified duration, sometimes as short as 2 seconds.
Can I Drive With P0144?
Yes, But With Caution. Yes, you can drive with a P0144 code, but do not exceed a few hundred miles. This sensor monitors catalytic converter efficiency rather than controlling the primary air-fuel mixture, so immediate engine damage is unlikely. However, ignoring the code guarantees a failed emissions test, drops fuel economy by 10-15%, and masks rich running conditions that destroy $1,500+ catalytic converters.
Common Causes
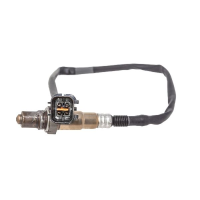
- Faulty Bank 1, Sensor 3 Oxygen Sensor (Very Common) — This causes the majority of P0144 codes. The sensor's internal heater circuit shorts out from age and heat cycles, sending a fixed high voltage signal to the PCM.
- Wiring or Connector Short to Power (Common) — The sensor's wiring harness routes near extremely hot exhaust pipes. Wires melt and short to a 12V power source, or connectors fill with moisture, creating a short circuit.
- Engine Running in a Rich Condition (Less Common) — If the engine burns too much fuel, the exhaust lacks oxygen, causing the O2 sensor to produce a legitimately high voltage reading. This is usually accompanied by a P0172 code.
- Sensor Contamination (Less Common) — Internal oil or coolant leaks contaminate the O2 sensor tip. This fouls the sensing element, causing it to send an incorrect high voltage signal.
- Exhaust Leak Before Sensor (Rare) — While exhaust leaks typically cause low voltage (lean) readings, a significant leak can disrupt exhaust flow enough to confuse the sensor and trigger a high voltage fault.
- PCM Software/Calibration Issues (Rare) — Manufacturers occasionally release Technical Service Bulletins (TSBs) and software updates to correct overly sensitive fault logic, particularly on Jaguar and Land Rover models.
- Faulty Powertrain Control Module (PCM) (Very Rare) — An internal short in the sensor's input circuit within the PCM causes it to misinterpret the signal from a perfectly good sensor. Consider this only after exhausting all other options.
Symptoms
- Failed Emissions Test — A fault with this sensor's circuit results in an automatic failure of state OBD-II emissions inspections.
- Decreased Fuel Economy — The PCM makes incorrect fuel adjustments in response to the fault, or an underlying rich condition causes a noticeable drop in MPG.
- Strong Fuel Smell or Black Smoke — If accompanied by a P0172 code, the sensor is correctly reporting a rich condition, resulting in raw gasoline smells or visible black smoke.
- Check Engine Light is On (also visible on scanner) — The PCM illuminates the Malfunction Indicator Lamp (MIL) immediately after confirming the P0144 fault condition.
Diagnostic Flowchart
Tap your situation to follow the diagnostic path that matches what you're seeing on this code.
Common Fixes & Costs
- Replace Bank 1, Sensor 3 Oxygen Sensor — Parts: $50-$180, Labor: $100-$250, ~0.8 hr book time (DIY)
- Repair Damaged Wiring or Connector — Parts: $20-$75, Labor: $150-$450, ~2.5 hr book time (Intermediate)
- Address Rich Condition (e.g., Fuel Injectors, Regulator) — Parts: $50-$600, Labor: $150-$500, ~3 hr book time (Professional)
- Repair Exhaust Leak — Parts: $25-$120, Labor: $100-$400, ~1.8 hr book time (Intermediate)
- Reprogram or Replace PCM — Parts: $100-$1200, Labor: $150-$300, ~1.5 hr book time (Professional)
Used vs. New Parts: Buying Guide
When a used part is worth it: It never makes sense to buy a used oxygen sensor. They are wear-and-tear items, and the labor to install them exceeds the cost savings.
Donor-vehicle mileage cap: roughly under 20000 miles for the part to have meaningful remaining life.
Donor quality checklist:
- Only consider if it's a very low-mileage part from a collision vehicle.
- Avoid parts from the rust belt due to thread corrosion.
- Never buy a used 'universal' sensor.
Decision logic:
- If The cost of a new OEM sensor is less than one hour of shop labor. → Always buy new. The risk of a used sensor failing is too high.
- If The vehicle manufacturer is sensitive to sensor brands (Subaru, Honda, Toyota). → Buy a new OEM or OEM-supplier (Denso, NTK) sensor. Do not use generic or used parts.
Warranty tradeoff: Used parts have a 30-day warranty that does not cover labor. New OEM sensors carry a 12-month/12,000-mile warranty.
Worst-case if a used part fails: $200-$450 if a used part fails, requiring repeat labor and a new part.
What Happens If You Wait — Timeline
- 0-1 month: Check Engine Light is on. The vehicle automatically fails OBD-II emissions tests. No other symptoms are perceived. (MPG impact: 0-5%% · Added cost: $0-$50 in wasted fuel.)
- 1-3 months: If caused by a rich condition, fuel economy drops. The driver notices a subtle rough idle. The catalytic converter experiences sustained high temperatures. (MPG impact: 5-15%% · Added cost: $50-$150 in wasted fuel.)
- 3-6 months: If a rich condition persists, the catalytic converter's internal substrate melts and breaks apart, creating a rattling noise and loss of engine power. (MPG impact: 10-20%% · Added cost: $800-$2,500 for catalytic converter replacement.)
- 6+ months: Complete catalyst meltdown. The exhaust becomes severely restricted, leading to engine overheating, stalling, and potential internal engine damage. (MPG impact: >20%% · Added cost: $1500-$3000+ for catalytic converter and engine repairs.)
Cost of Not Fixing It
- 0-1 Month: Automatic failure of state emissions inspection and a 5-15% decrease in fuel economy. (Added cost: $50-$100 in wasted fuel.)
- 1-6 Months: If caused by a rich condition, the catalytic converter overheats and degrades, causing a rattling noise and reduced engine power. (Added cost: $0 if a circuit fault. Up to $2800 if the catalytic converter is damaged.)
- 6+ Months: Complete failure of the catalytic converter creates excessive backpressure, leading to severe engine performance issues. (Added cost: $1200-$2800+ for catalytic converter replacement.)
Diagnosis Steps
- Scan for Codes and Review Freeze Frame Data
Use an OBD-II scanner to confirm P0144. Check for companion codes, especially P0172 (Rich Condition) or P0420 (Catalyst Efficiency). Analyze freeze frame data to see engine conditions when the fault occurred.
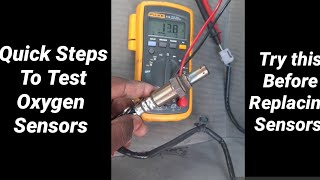
Tools: OBD-II Scanner (Beginner) - Analyze Live Sensor Data
With the engine running, observe the voltage from Bank 1, Sensor 3. If the voltage is stuck high (above 0.8V or 0.9V) and does not fluctuate, it confirms the fault condition.
Tools: OBD-II Scanner with Live Data (Intermediate) - Visually Inspect the Sensor and Wiring
Locate Bank 1, Sensor 3. Inspect the wiring harness for melting, chafing, or breaks where it contacts the exhaust or chassis. Ensure the connector is secure and free of moisture or oil.
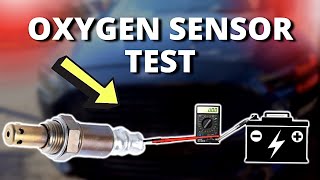
Tools: Flashlight, Safety Glasses, Inspection Mirror (Beginner) - Test the Oxygen Sensor Heater Circuit
Disconnect the sensor. Measure resistance between the two heater wires (usually the same color) on the sensor side. A good cold sensor reads 2-30 Ohms. Zero Ohms means it is shorted.
Tools: Digital Multimeter (Intermediate) - Test for Continuity Between Heater and Signal Pins
Check for continuity between each heater pin and the signal pin on the disconnected sensor. It should show infinite resistance. If the multimeter beeps, the sensor is internally shorted and requires replacement.
Tools: Digital Multimeter (Advanced) - Test the Wiring for a Short to Power
Turn the ignition 'On' (engine off). Measure voltage on the signal wire terminal in the harness-side connector. It should read close to 0V or a ~0.45V bias. A reading of 5V or 12V indicates a short to power in the harness.
Tools: Digital Multimeter, Vehicle-Specific Wiring Diagram (Advanced) - Check for a Rich Running Condition via Fuel Trims
If the sensor and wiring pass, check long-term fuel trims (LTFT) for Bank 1. High negative numbers (-10% or more) confirm the PCM is removing fuel to compensate for a rich mixture.
Tools: OBD-II Scanner with Live Data (Intermediate) - Check Fuel Pressure
If fuel trims indicate a rich condition, connect a fuel pressure gauge. Pressure exceeding manufacturer specifications (typically 30-60 PSI for port injection) causes a rich condition.
Tools: Fuel Pressure Gauge, Vehicle-Specific Service Manual (Advanced)
When This Code Triggers (Freeze-Frame Conditions)
- Engine Coolant Temp: 180-210°F (Fully warmed up and in closed-loop operation.)
- RPM: 1200-3000 RPM (Steady cruise or light acceleration, not typically at idle.)
- Engine Load: 20-70% (The engine is under a moderate, stable load.)
- Vehicle Speed: 40-65 mph (Highway or steady suburban driving conditions.)
Related Codes
- P0143 — The direct opposite code: 'O2 Sensor Circuit Low Voltage'. Seeing both intermittently points to a severe wiring problem shorting to both ground and power.
- P0145 — 'O2 Sensor Circuit Slow Response'. A sensor stuck high (P0144) is not responding, so P0145 frequently triggers alongside it.
- P0172 — 'System Too Rich'. If present with P0144, the O2 sensor is working correctly and reporting a genuinely rich exhaust. Diagnose the P0172 fuel system issue first.
- P0420 — 'Catalyst System Efficiency Below Threshold'. Fix P0144 first. A faulty Sensor 3 makes catalyst efficiency readings unreliable.
Climate & Environmental Factors
- Cold Climates / Road Salt: Road salt accelerates corrosion of electrical connectors and breaks down wiring insulation, causing the shorts that trigger P0144.
- High Humidity: Sustained humidity promotes moisture intrusion into poorly sealed connectors, creating electrical resistance or short circuits.
How to Talk to a Mechanic About This Code
Say this: "I have a P0144 code indicating high voltage on the Bank 1, Sensor 3 O2 sensor circuit. Before replacing the sensor, please test the wiring harness for a short-to-power and check live data to confirm the voltage is stuck high. Also, check the long-term fuel trims to rule out an underlying rich condition."
This directs the technician to perform a proper electrical diagnosis rather than firing the parts cannon. It prevents you from paying for a $200 sensor replacement if the real issue is a $50 wiring repair.
Avoid saying:
- 'Just fix whatever's wrong'
- 'My check engine light is on, can you look at it?'
- 'I'm pretty sure it just needs a new O2 sensor'
- 'Whatever you recommend'
Questions to ask before authorizing the repair:
- What was the live data voltage from the sensor, and did it drop to 0V when disconnected?
- Did you test the signal wire for a short to 12V power?
- Are there any companion codes present, like P0172 for a rich condition?
- What is the warranty on the part and the labor for this repair?
Where to Take It: Dealer vs Independent vs Chain
- Dealer:
Best for: Vehicles under powertrain or emissions warranty., Vehicles with mandatory manufacturer software updates (e.g., Jaguar/Land Rover TSBs).
Downsides: Labor rates are typically 50% to 100% higher than independent shops., Often suggests replacing entire wiring harnesses instead of repairing a single broken wire. (Typical cost: +50% vs. baseline) - Independent Shop:
Best overall fit. A reputable independent shop offers the best balance of electrical diagnostic skill and value for a P0144 code.
Best for: Out-of-warranty vehicles requiring cost-effective diagnosis., Tracing electrical shorts and performing targeted wiring repairs.
Downsides: Diagnostic skill varies; requires verifying ASE certifications., Often lacks proprietary software for mandatory PCM updates on certain European makes. (Typical cost: +0% vs. baseline) - Chain Shop:
Avoid for initial diagnosis. Acceptable only if you have already confirmed a failed sensor and just need the part swapped.
Best for: Simple, pre-diagnosed O2 sensor swaps.
Downsides: High pressure to upsell unnecessary fuel system services., Rarely equipped or trained for in-depth electrical diagnostic work. (Typical cost: -10% vs. baseline)
When to Walk Away From the Repair
If the repair estimate exceeds 50% of your car's private-party value (via Kelley Blue Book), sell or trade it in.
- Car worth $4000, fix is $2200: Walk away. The repair cost is over 50% of the car's value.
- Car worth $12000, fix is $450: Fix it. The repair cost is well below the threshold.
- Car worth $2500, fix is $1500: Walk away. A $1,500 repair on a $2,500 car is a poor investment.
What Scan Tool You Need for This Code
Minimum: A scanner that reads live data and graphs O2 sensor voltage.
A basic $20 code reader only shows the P0144 code. It cannot display live sensor voltage, which is essential to confirm the 'stuck high' condition and prevent wasting money on unnecessary parts.
Budget: BlueDriver Pro Scan Tool (~$100) — Pairs with your smartphone to read codes and display live O2 sensor voltage graphs to confirm the stuck-high condition.
Mid-range: Foxwell NT510 Elite (~$180) — Provides OE-level diagnostics and bi-directional controls to test specific circuits, speeding up electrical troubleshooting.
Professional: Autel MaxiCOM MK808 (~$500) — Offers professional-level live data graphing and deep analysis of the O2 sensor circuit and PCM logic.
Rent vs buy: Rent a capable OBD-II scanner for free from AutoZone for a one-time diagnosis. Buy the BlueDriver if you perform DIY diagnostics more than twice a year.
How to Clear the Code After You Fix It
- Use an OBD-II scan tool to clear the diagnostic trouble codes.
- Perform a complete OBD-II drive cycle to allow the system's readiness monitors to run.
Drive cycle (~30 minutes): A generic drive cycle includes a cold start, 3 minutes of idling, 15 minutes of mixed city/highway driving at steady speeds of 55 mph, and several coast-down periods without braking.
Readiness monitors affected: Catalyst monitor, O2 sensor monitor, O2 sensor heater monitor
Before emissions retest: drive at least 100 miles to fully set monitors.
Watch out for:
- Clearing the code resets all OBD-II readiness monitors to 'Not Ready', causing an automatic emissions test failure until driven.
- The code returns immediately if a wiring short was ignored during a sensor replacement.
Will This Fail Emissions / State Inspection?
Yes — this code typically fails an OBD-II emissions inspection.
- California: An active P0144 causes an immediate failure. All readiness monitors must be set to 'Ready' before a re-test, requiring up to 200 miles of driving.
- New York: A P0144 causes an automatic failure. After clearing, you cannot have more than one monitor 'Not Ready' to pass.
- Texas: In the 17 emissions counties, an active P0144 fails the OBD-II test. The vehicle must be driven to set readiness monitors before re-inspection.
Most Commonly Affected Vehicles
- Jaguar F-TYPE, XF, XJ (2013-2016) — Jaguar TSB JTB-00392-NAS-3 requires replacing the affected sensor and performing a mandatory PCM software update. Replacing the sensor alone fails.
- Dodge / Ram Ram 1500, Charger, Durango (2009-2018) — Commonly caused by an internal short in the O2 sensor's heater circuit or heat damage to the wiring harness near the exhaust manifold.
- Chevrolet / GMC Silverado, Sierra, Tahoe (2007-2014) — A short within the sensor's heater element feeding voltage into the signal wire is the primary failure mode.
- Ford F-150, Focus, Explorer (2011-2018) — On trucks, check for wiring harness damage near the frame rails. On Focus models, check for sensor contamination.
- Honda Civic, Accord, CR-V (2008-2015) — Wiring issues or a legitimate rich condition from faulty injectors trigger the code. Non-OEM sensors cause immediate recurrence.
- Subaru Forester, Outback, Impreza (2010-2018) — Highly sensitive to O2 sensor brand. Exhaust leaks at the flange gaskets are a common secondary cause.
- Volkswagen GTI, Jetta, Passat (2008-2015) — Frequently appears alongside fuel trim codes (P0172), requiring investigation of vacuum leaks or fuel system issues before sensor replacement.
- Jeep Wrangler, Grand Cherokee (2012-2018) — Off-roading leads to wiring harness damage. Internal shorts in the heater circuit are also frequent.
Manufacturer-Specific Notes
- Jaguar / Land Rover: TSBs require replacing the O2 sensor with an updated part AND reprogramming the PCM. Skipping the software update guarantees the code returns.
- General Motors (GM): A short circuit within the O2 sensor's internal heater element feeds 12V directly into the signal wire, causing the high voltage reading.
- Ford: Wiring harnesses are highly susceptible to damage from heat or improper routing after transmission repairs. Visual inspection is critical.
- Toyota / Honda / Subaru: Engine management systems reject generic aftermarket sensors. Using non-OEM (Denso or NTK) sensors causes the P0144 code to return immediately.
Real Owner Stories
2015 Chevy Silverado 1500 at 110K miles - The Simple Fix
Check Engine Light came on with P0144. No other symptoms were noticeable.
What they tried:
- Inspected the wiring harness near Bank 1, Sensor 3.
- Used an OBD-II scanner to confirm the sensor voltage was stuck at 0.9V.
- Replaced the sensor with an ACDelco OEM part.
Outcome: Replacing the sensor fixed the issue. The code cleared and did not return. Total cost: $70 for the part and 30 minutes of DIY labor.
Lesson: For a high-mileage vehicle with no companion codes, a failed sensor is the highest probability culprit.
2013 Ford Focus at 85K miles - The Misdiagnosis
P0144 code appeared. The owner immediately installed a new aftermarket O2 sensor.
What they tried:
- Replaced the sensor; the code returned within a day.
- Took the car to a mechanic who inspected the wiring.
- The mechanic found the O2 sensor harness had rubbed against the chassis, causing a short to power.
Outcome: The mechanic repaired the damaged wire. The original sensor was fine. Final repair cost: $150 for diagnostic labor and repair.
Lesson: Don't replace parts without a full diagnosis. A simple visual inspection and wiring test prevents unnecessary sensor replacements.
2014 Jaguar XF at 70K miles - The Manufacturer Quirk
P0144 code was persistent. The owner replaced the sensor twice, but the code kept returning.
What they tried:
- Replaced sensor with a Bosch part - code returned.
- Checked wiring for shorts and found none.
- Replaced sensor with an NTK part - code returned.
- Consulted a Jaguar forum and found the TSB.
Outcome: Jaguar TSB JTB-00392-NAS-3 specifies a new OEM sensor AND a PCM software update. The dealer performed the update for $250, resolving the issue.
Lesson: Always check for Technical Service Bulletins (TSBs), especially on European makes. The fix often requires a mandatory software update.
2012 Dodge Ram 1500 - The Rich Condition
Truck had P0144 and P0172 (System Too Rich). The owner noted poor fuel economy and a gas smell.
What they tried:
- Ignored the P0172 and replaced the O2 sensor; codes returned.
- A mechanic checked live data and saw Long Term Fuel Trims at -25%.
- A fuel pressure test found pressure 20 PSI over spec.
Outcome: The root cause was a failing fuel pressure regulator. Replacing the fuel pump assembly ($700 total) corrected the pressure, resolving both codes.
Lesson: A 'System Too Rich' code (P0172) means the O2 sensor is working correctly and reporting a real problem. Fix the companion code first.
How to Prevent This Code From Triggering
- Use Top Tier gasoline and periodic fuel system cleaners. (Every fill-up / Every 5,000 miles) — Detergents prevent deposits on fuel injectors. This stops rich-running conditions that foul O2 sensors and overheat catalytic converters.
- Perform regular engine tune-ups (spark plugs, filters). (Per manufacturer schedule (e.g., every 60K-100K miles)) — Worn spark plugs cause misfires, sending unburnt fuel into the exhaust, which fouls the O2 sensor and destroys the catalytic converter.
- Address engine oil and coolant leaks promptly. (As needed) — Internal leaks from bad gaskets contaminate the exhaust. Coolant and oil additives permanently foul the sensing element of an oxygen sensor.
- Avoid long periods of idling. (Daily habit) — Extended idling lowers exhaust temperatures, allowing soot to build up on sensor elements and within the catalytic converter.
Frequently Asked Questions
What does 'Bank 1, Sensor 3' actually mean?
Bank 1 is the engine side containing cylinder number one. Sensor 3 is the third sensor in the exhaust stream on that bank. In modern vehicles, this is the diagnostic sensor located after the final catalytic converter.
What is the most common mistake when fixing P0144?
The biggest mistake is replacing the sensor without checking for melted wiring or ignoring a co-existing P0172 (System Rich) code. Always verify the electrical circuit and fuel trims first.
Can I use a cheaper aftermarket O2 sensor?
Using cheap aftermarket sensors often causes the code to return immediately on sensitive vehicles like Toyota, Honda, and Subaru. Always use an OEM-branded sensor (like Denso or NTK) for these makes. High-quality aftermarket sensors are generally acceptable for domestic and European vehicles.
My mechanic replaced the sensor, but the P0144 code came back. What now?
The problem is almost certainly a short to power in the wiring harness. The entire circuit from the sensor connector to the PCM must be meticulously tested. On certain makes like Jaguar, a PCM software update is also mandatory.
Does P0144 mean I need a new catalytic converter?
No, this code points to a problem with the sensor's electrical circuit. However, ignoring the root cause—especially a persistent rich condition—will eventually overheat and destroy the converter.
Can a bad battery or alternator cause a P0144 code?
It is highly unlikely. P0144 is specific to the O2 sensor circuit. The fault is localized to the sensor, its dedicated wiring, or the PCM.
What is the difference between O2 Sensor 2 and Sensor 3?
On vehicles with multiple catalytic converters per bank, Sensor 2 is located between the primary and secondary converters. Sensor 3 is located after the secondary (final) converter. Both monitor catalyst efficiency at different stages.
Key Takeaways
- Code P0144 triggers when the rearmost oxygen sensor (Bank 1, Sensor 3) voltage locks above 0.9V, signaling a circuit short or a rich running engine.
- A failed oxygen sensor causes 70% of P0144 codes, with melted wiring harnesses shorting to a 12V power source making up most remaining cases.
- Driving with an active P0144 guarantees an emissions test failure and risks destroying a $1,500+ catalytic converter if a rich condition goes ignored.
- Never replace the sensor without first checking live data for a stuck 0.9V signal and scanning for companion codes like P0172 (System Too Rich).
- Always install OEM-brand sensors (like Denso or NTK) to prevent immediate code recurrence, and check for mandatory PCM software updates on European makes like Jaguar.
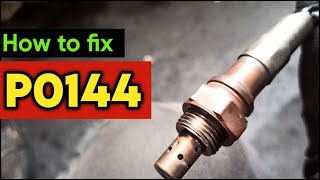
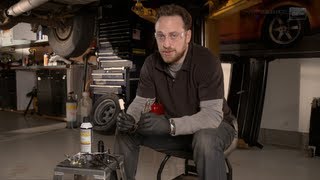
Helpful Videos
Shop the Parts Behind P0144
Below are the parts most often responsible for code P0144, ranked by how frequently each one is the actual culprit (per the diagnosis above). Tap any to see what we have for your vehicle.


The information in this article is provided for general reference and educational purposes only. Vehicle specifications, procedures, and part compatibility can vary by production date, trim level, and region. Always consult your vehicle's factory service manual and verify part numbers before purchasing or performing repairs. Safety-critical components such as airbags, seat belts, and braking systems should be installed by a qualified professional.
- 🧭 Diagnostic Flowchart
- 🎬 Helpful Videos
- 🛍️ Shop This Part
- What Does P0144 Mean?
- Can I Drive With P0144?
- Common Causes
- Symptoms
- Common Fixes & Costs
- Used vs. New Parts: Buying Guide
- What Happens If You Wait — Timeline
- Cost of Not Fixing It
- Diagnosis Steps
- When This Code Triggers (Freeze-Frame Conditions)
- Related Codes
- Climate & Environmental Factors
- How to Talk to a Mechanic About This Code
- Where to Take It: Dealer vs Independent vs Chain
- When to Walk Away From the Repair
- What Scan Tool You Need for This Code
- How to Clear the Code After You Fix It
- Will This Fail Emissions / State Inspection?
- Most Commonly Affected Vehicles
- Manufacturer-Specific Notes
- Real Owner Stories
- 2015 Chevy Silverado 1500 at 110K miles - The Simple Fix
- 2013 Ford Focus at 85K miles - The Misdiagnosis
- 2014 Jaguar XF at 70K miles - The Manufacturer Quirk
- 2012 Dodge Ram 1500 - The Rich Condition
- How to Prevent This Code From Triggering
- Frequently Asked Questions
- What does 'Bank 1, Sensor 3' actually mean?
- What is the most common mistake when fixing P0144?
- Can I use a cheaper aftermarket O2 sensor?
- My mechanic replaced the sensor, but the P0144 code came back. What now?
- Does P0144 mean I need a new catalytic converter?
- Can a bad battery or alternator cause a P0144 code?
- What is the difference between O2 Sensor 2 and Sensor 3?
- Key Takeaways
- 🎟️ Get 5% Off