
P0164 on 2014-2016 Land Rover LR4: O2 Sensor High Voltage Causes and Fixes
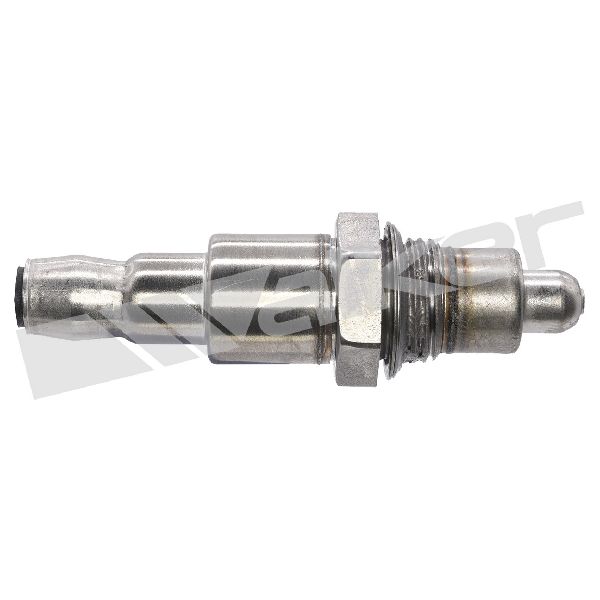
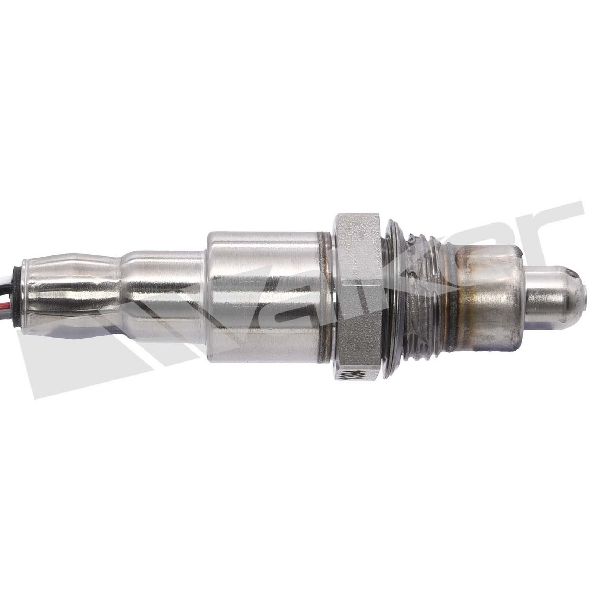
P0164 on a 2014-2016 LR4 almost always means the rearmost oxygen sensor on the driver's side (Bank 2, Sensor 3) has failed. A continuous high voltage reading from this sensor, which monitors final catalyst efficiency, triggers the code. A replacement sensor is the typical fix, costing about $100-$150 for an aftermarket part and is a straightforward DIY for those with the right tools.
- P0164 points to a high voltage fault from the rearmost O2 sensor on the driver's side.
- The most probable cause is a failed oxygen sensor, a known issue confirmed by Land Rover TSBs.
- This is a non-critical fault that does not affect drivability, but it will prevent the vehicle from passing an emissions test.
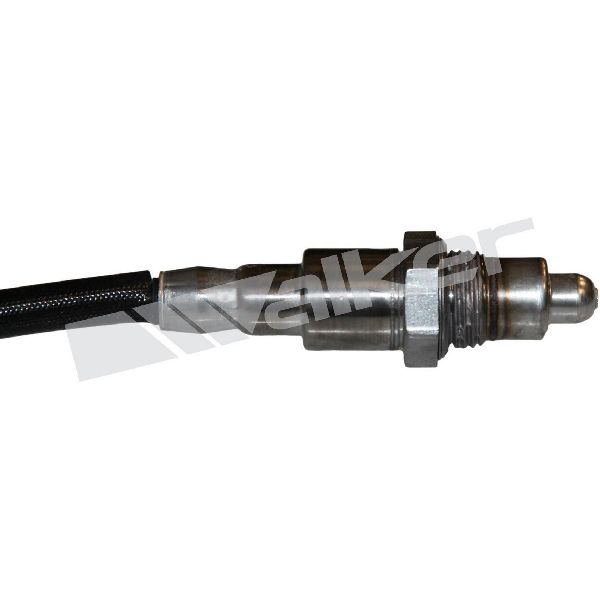
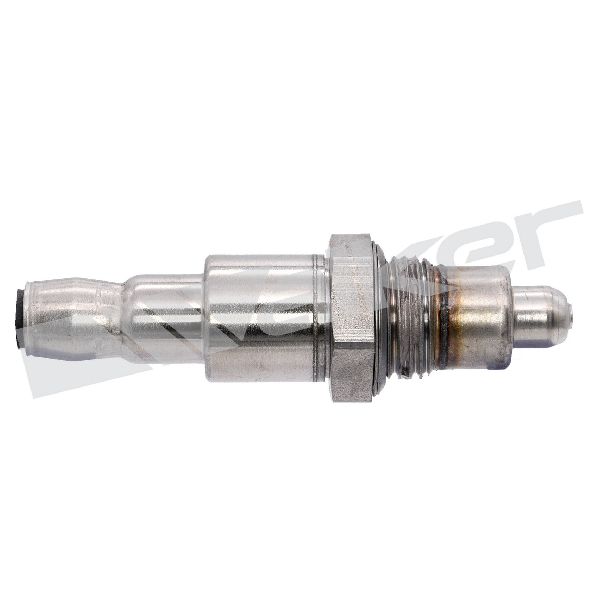
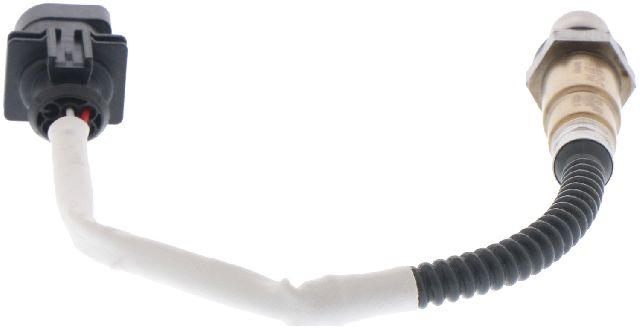
- The correct replacement part is crucial; ensure you are buying the sensor for Bank 2, Sensor 3 (downstream/rear left). The OEM part number is LR052425.
- DIY replacement is possible with a 22mm O2 sensor socket, but always inspect the wiring harness for chafing or heat damage before replacing the sensor.
What's Unique About the 2014-2016 Land Rover LR4
On the 3.0L Supercharged V6 (AJ126 engine), Land Rover uses a three-sensor-per-bank exhaust setup, which is more complex than the typical two-sensor system. The P0164 code specifically points to the final diagnostic sensor (Sensor 3) on the driver's side. Land Rover issued multiple Technical Service Bulletins (including SSM72448 and LTB00671NAS3) acknowledging that when this and other related O2 sensor codes appear, and the wiring is intact, the sensor itself is the most likely component to have failed. In some cases for related Jaguar models with the same engine, a software error in the PCM was also identified as a potential cause, requiring a dealer update.
Diagnostic Flowchart
Tap your situation to follow the diagnostic path that matches what you're seeing on this vehicle.
Symptoms You May Notice
- Check Engine Light (Malfunction Indicator Lamp) is illuminated.
- Failure to pass a vehicle emissions test.
- Slight decrease in fuel economy in some cases.
- Black soot on the tailpipe, in rare cases if the high voltage is due to a rich condition rather than sensor failure.
- Replacing the wrong oxygen sensor. It is critical to identify Bank 2 (driver's side) and Sensor 3 (rearmost, post-catalyst) correctly before replacement.
- Assuming the sensor is bad without checking the wiring. A shorted wire can mimic a failed sensor perfectly, leading to wasted money on a new part.
Most Likely Causes
- Failed Bank 2, Sensor 3 Oxygen Sensor 🔴 High Probability → Shop Oxygen Sensor Land Rover TSB #SSM72448 directly states that if wiring and connectors are not at fault, the issue is determined to be the sensor itself. TSB LTB00671NAS3 also points to sensor failure, sometimes caused by thermal shock from water contact. These sensors are a known failure point across the JLR lineup using the AJ126 engine.
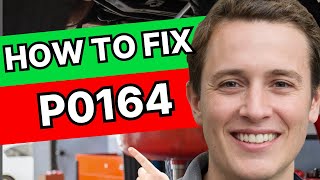
How to confirm: Use a scan tool to monitor live data for the 'O2S B2S3' sensor. A reading that is stuck high (e.g., at or near 1.0V) and does not fluctuate indicates a faulty sensor. 🎬 Watch: A breakdown of P0164 symptoms, causes, and solutions. You can also test the sensor's internal heater circuit resistance with a multimeter; a typical healthy sensor reads between 3 and 20 Ohms when cold. An open circuit (infinite resistance) confirms failure.
Typical fix: Replace the Bank 2, Sensor 3 oxygen sensor. This is the rearmost sensor on the driver's side exhaust pipe. The connector is often located on a crossmember above the exhaust.
Est. part cost: $80-$200 - Damaged Wiring or Connector 🟡 Medium Probability The sensor and its wiring are located underneath the vehicle, making them susceptible to damage from road debris, water intrusion causing corrosion, or heat from the exhaust system. Forum users have reported wiring chafing against the chassis or driveshaft on Land Rover models, leading to shorts.
How to confirm: Visually inspect the wiring harness and connector leading to the B2S3 O2 sensor. Look for any signs of melting, chafing, corrosion, or broken wires. A short to power in the harness can also cause a persistent high voltage reading. Trace the harness from the sensor to its connection point on the chassis.
Typical fix: Repair the damaged section of the wiring harness or replace the connector pigtail. Ensure the harness is properly routed and secured away from heat sources and moving parts.
Est. part cost: $20-$100
Rare But Worth Checking
- Powertrain Control Module (PCM) Fault or Software Error: → Shop Engine Control Module (ECM) This is very uncommon, but a fault in the PCM's internal driver circuit can cause it to misread the voltage. More plausibly, a software glitch could be the cause. Jaguar issued TSB JTB00392 for the same engine in other models, which addressed O2 sensor codes via a PCM software update. This should only be considered after the sensor and wiring have been proven to be good.
- Exhaust Leak: An exhaust leak before the sensor could theoretically alter readings, but it's a less direct cause for a persistent high voltage fault compared to a sensor or wiring failure. A high voltage reading indicates a lack of oxygen, which is the opposite of what an air leak would typically cause.
- Leaking Fuel Injector: A severely leaking fuel injector on Bank 2 could create a rich condition (too much fuel, not enough air) that the O2 sensor would report as high voltage. This is a rare cause for a Sensor 3 code and would almost certainly be accompanied by other codes like misfires (P030x) or a rich condition code for that bank (P0175).
Diagnosis Steps
- Connect an OBD-II scanner and confirm P0164 is the active code. Note any other codes present, especially misfire or heater circuit codes for the same bank.
- Using the scanner's live data function, monitor the voltage from 'O2S B2S3' (Oxygen Sensor Bank 2, Sensor 3).
- Observe the voltage reading. A healthy downstream sensor should have a relatively stable voltage. If the voltage is stuck high (typically 0.9V or above), it confirms the fault condition.
- Raise the vehicle safely using jack stands. Locate Bank 2, Sensor 3 – it is the rearmost sensor on the driver's side exhaust pipe, after the final catalytic converter.
- Perform a thorough visual inspection of the sensor's wiring harness and connector for any signs of melting, corrosion, or physical damage. Pay close attention to where the harness may rub against the chassis or other components.
- If wiring appears intact, the most likely cause is a failed sensor. Disconnect the sensor and test the resistance of its heater circuit with a multimeter. Compare the reading to the manufacturer's specification (typically 3-20 ohms). An open circuit or incorrect resistance confirms a bad sensor.
- If the sensor tests good, you must then check for power, ground, and signal integrity at the vehicle-side harness connector to rule out a wiring or PCM issue. Check for a short to power on the signal wire.
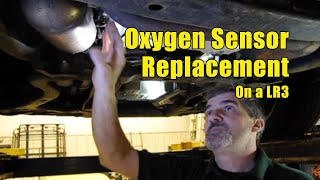
- Replace the oxygen sensor if it is confirmed to be faulty. Applying anti-seize compound to the threads 🎬 Watch this DIY walkthrough for replacing the sensor yourself. of the new sensor is recommended.
- Clear the trouble codes and perform a drive cycle to ensure the repair was successful and the Check Engine Light does not return.
Parts You'll Likely Need
- Oxygen Sensor (Bank 2, Sensor 3)
(OEM #LR052425)— This is the most common failure point for code P0164, as identified by diagnostics and Land Rover's own service bulletins.
Trusted brands: Genuine Land Rover, Denso, Bosch
OEM price range: $250-$350
Aftermarket price range: $80-$150
Related Codes That Often Appear With This One
- P0144 — This is the equivalent code for Bank 1, Sensor 3 (O2 Sensor Circuit High Voltage). It's possible for sensors on both banks to fail around the same time due to age or shared conditions.
- P0162 — This code indicates a circuit malfunction for the same sensor (Bank 2, Sensor 3). Electrical issues can sometimes trigger multiple related codes for the same component.
- P0061 — This code is for the heater resistance circuit of the same sensor (B2S3). A sensor failure often involves both the sensing element and the internal heater, so these codes frequently appear together.
Technical Service Bulletins (TSBs) & Recalls
- SSM72448: Notes that if wiring/connectors are good, the fault is with the sensor itself.
- LTB00671NAS3: Identifies P0164 as a possible Diagnostic Trouble Code related to post-catalyst heated oxygen sensors, sometimes caused by thermal shock.
- LTB00671NAS2: An earlier version of the above bulletin with the same information regarding code P0164.
- JTB00392 (Jaguar): While for Jaguar models, it's relevant as it covers the same AJ126 engine and points to a potential software error causing various O2 sensor codes, including P0164.
Platform-Specific Known Issues
- Land Rover issued Technical Service Bulletin #SSM72448 which covers a wide range of O2 sensor codes, including P0164. It advises that if diagnosis finds no fault with the wiring or connectors, the sensor itself should be considered the cause.
- Bulletins LTB00671NAS2 and LTB00671NAS3 also list P0164 as a potential code related to post-catalyst heated oxygen sensors, indicating this is a known area of concern for the manufacturer. The cause is sometimes cited as thermal shock from water contacting the hot sensor.
- A related TSB for Jaguar models with the same engine (JTB00392) notes that a PCM software error could also cause these codes, requiring a dealer-level software update.
Mechanic-Grade Diagnostic Values
- Downstream O2 Sensor (B2S3) Voltage at Idle — expected: Relatively stable voltage between 0.4V and 0.6V.. Failure: Voltage is stuck high, at or near 1.0V, and does not fluctuate.
- O2 Sensor Heater Circuit Resistance — expected: 3 to 20 Ohms when the sensor is cold.. Failure: Infinite resistance (open circuit) or a reading outside the specified range.
- O2 Sensor Circuit Wire Continuity — expected: Less than 1 Ω of resistance from end-to-end of a single wire.. Failure: Resistance is higher than 1 Ω, indicating a break or corrosion in the wire.
- O2 Sensor Circuit Wire Integrity (Short to Ground/Power) — expected: Greater than 10 kΩ of resistance between any circuit wire and chassis ground.. Failure: Low resistance (less than 10 kΩ) indicates a short circuit to ground or between wires.
Hidden / Shadow Codes Worth Checking
- Mode $06, Test ID (TID) for O2 Sensors: → Shop Oxygen Sensor Mode $06 provides access to the raw results of the PCM's self-tests before a full-blown DTC is set. For oxygen sensors, this includes monitoring for slow response, high/low voltage, and heater circuit performance. A technician can view the current test value against the minimum and maximum allowable limits to see if a sensor is borderline failing, even without a Check Engine Light. (see via A professional scan tool with Mode $06 capability (e.g., BlueDriver, Autel, or the dealer's JLR SDD/Pathfinder) is required. The specific Test IDs for the AJ126 engine are not publicly documented but will be labeled within the scan tool's interface.)
Scan Tool Commands That Help
- JLR SDD / Pathfinder: Configure existing module - Powertrain control module — This function should be run after replacing an oxygen sensor. Multiple Land Rover and Jaguar TSBs instruct technicians to perform this step to ensure the PCM software is correctly calibrated and updated to work with the new sensor, preventing the code from returning due to software/hardware mismatch.
Wiring & Ground Locations
- Bank 2 Sensor 3 Connector — The connector for the rearmost driver's side O2 sensor is typically found clipped to a bracket on a chassis crossmember, above the exhaust pipe and near the transfer case.. Its exposed location under the vehicle makes it a prime candidate for water intrusion, corrosion, or physical damage from road debris, which can cause the high voltage fault of P0164.
- Sensor Wire Repair Method — Anywhere along the sensor's pigtail or the vehicle harness.. Technicians advise that O2 sensor wires must be repaired using high-quality, heat-shrinkable crimp connectors, not solder. Some sensors draw their reference air sample through the gaps in the wire strands, and solder can block this path, leading to incorrect readings and repeat failures.
Real Owner Repair Stories
- landroverforums.com user 'CMZ062016' (2016 Land Rover LR4 HSE 3.0 SC) — Check Engine Light with code P0164.
❌ Tried (didn't work) The owner was in the process of diagnosis.
✅ What actually fixed it The key finding was a parts mismatch. The owner reported ordering a replacement O2 sensor that came with a 5-pin electrical connector, while their vehicle required a 4-pin connector. This highlights a critical pitfall in sourcing parts for this repair and confirms the vehicle uses a 4-wire sensor for this position.
OEM Part Supersession History
C2D23702 (Jaguar)→C2D54166, then T2H48050— Standard part revision and updates by the manufacturer.
Heads up: While the parts are meant to be interchangeable, always verify fitment with a VIN. The existence of multiple supersessions suggests changes were made over time.LR052425 (Land Rover)→LR140072 (Bosch alternate)— Aftermarket equivalent.
Heads up: Ensure the connector is a 4-pin square type.
Helpful Videos

We Have This Part in Stock


The information in this article is provided for general reference and educational purposes only. Vehicle specifications, procedures, and part compatibility can vary by production date, trim level, and region. Always consult your vehicle's factory service manual and verify part numbers before purchasing or performing repairs. Safety-critical components such as airbags, seat belts, and braking systems should be installed by a qualified professional.
- Land Rover LR4:
- 🧭 Diagnostic Flowchart
- 🎬 Helpful Videos
- 🛍️ Shop This Part
- What's Unique About the 2014-2016 Land Rover LR4
- Symptoms You May Notice
- Most Likely Causes
- Rare But Worth Checking
- Diagnosis Steps
- Parts You'll Likely Need
- Related Codes That Often Appear With This One
- Technical Service Bulletins (TSBs) & Recalls
- Platform-Specific Known Issues
- Mechanic-Grade Diagnostic Values
- Hidden / Shadow Codes Worth Checking
- Scan Tool Commands That Help
- Wiring & Ground Locations
- Real Owner Repair Stories
- OEM Part Supersession History
- 🎟️ Get 5% Off