
OBD-II Code P0195: Engine Oil Temperature Sensor Circuit Malfunction
The Ultimate Guide to Understanding, Diagnosing, and Fixing P0195
- Code P0195 indicates an electrical failure in the Engine Oil Temperature sensor circuit, not an actual overheating engine.
- A faulty $30-$80 EOT sensor or a corroded wiring connector causes over 80% of P0195 codes.
- Fix this code within 1-2 weeks to prevent the PCM from running a rich fuel mixture that destroys a $1,500 catalytic converter.
- Test the sensor connector for a 5-volt reference signal using a multimeter before spending money on replacement parts.
What Does P0195 Mean?
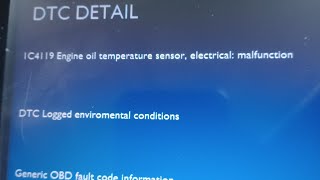
Code P0195 means the Powertrain Control Module (PCM) detects a fault in the Engine Oil Temperature (EOT) sensor's electrical circuit. The computer relies on this sensor to monitor engine oil temperature, which dictates fuel mixture, ignition timing, and cooling fan operation. When the sensor signal is missing, erratic, stuck, or electrically out of range, the PCM triggers the Check Engine Light.
Technical definition: The SAE/OBD-II definition is "Engine Oil Temperature Sensor 'A' Circuit Malfunction". This specifies the PCM detects abnormal voltage, complete signal loss, or an electrical fault within the EOT sensor circuit. The fault is an open circuit, a short to ground, or a short to voltage. The PCM expects a signal voltage between 0.5V and 4.5V; readings outside this range trigger the code.
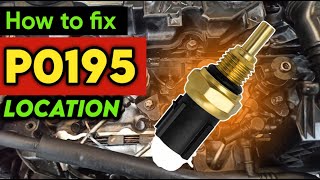
🎬 Watch: A quick overview of the P0195 code and its meaning.Can I Drive With P0195?
Yes, But With Caution. You can drive for short, essential trips, but diagnose and repair the code within a few days. Ignoring it forces the engine to run inefficiently, dropping fuel economy by up to 10%. Without accurate oil temperature data, the PCM fails to run cooling fans correctly, causing overheating. Prolonged driving under these conditions damages the catalytic converter, a repair costing between $800 and $2,500.
Common Causes
- Faulty Engine Oil Temperature (EOT) Sensor (Very Common) — The sensor itself is the most frequent culprit, failing due to age, internal short circuits, or sludge contamination. Its location on the oil pan makes it vulnerable to physical damage from road debris.
- Damaged Wiring or Electrical Connectors (Common) — The wiring harness is a common failure point. Wires become brittle from engine heat, get chewed by rodents, or suffer corrosion at the connector pins, interrupting the signal to the PCM.
- Engine Cooling System Problems (Less Common) — If the thermostat sticks open, oil temperature fails to rise normally. The PCM compares EOT and Engine Coolant Temperature (ECT) readings; illogical differences trigger P0195.
- Low or Severely Degraded Engine Oil (Less Common) — Incorrect oil levels or sludgy oil cause the sensor to overheat or provide irrational readings, which the PCM interprets as a circuit fault.
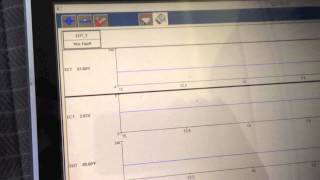
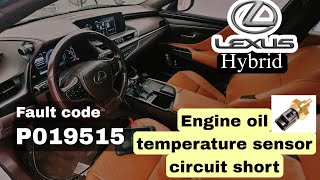
- Water Intrusion or Environmental Damage (Rare) — Driving through deep water forces moisture into the sensor's connector, causing corrosion and signal loss. 🎬 Watch: An easy fix for an oil temperature sensor circuit fault. Off-road driving also exposes the sensor to physical damage.
- PCM Software/Calibration Issues (Rare) — The PCM's software logic for interpreting EOT data is sometimes too sensitive. Manufacturers issue Technical Service Bulletins (TSBs) and software updates to correct this without replacing parts.
- Faulty Powertrain Control Module (PCM) (Very Rare) — The internal PCM circuit processing the EOT signal rarely fails. Consider this only after exhaustively ruling out the sensor, wiring, connectors, and software.
Symptoms
- Check Engine Light is On — This is the most common and often the only initial symptom you notice.
- Engine Cooling Fans Run Constantly or Not At All — The PCM uses oil temperature to activate cooling fans. A bad signal causes fans to run continuously as a fail-safe, or fail to turn on, increasing overheating risks.
- Incorrect or Erratic Oil Temperature Gauge Reading — The dashboard oil temperature gauge reads zero, maxes out, or fluctuates wildly. On a cold start, it instantly shows a high temperature.
- Reduced Fuel Economy — Without accurate oil temperature data, the PCM fails to optimize fuel mixture and ignition timing, causing a noticeable drop in gas mileage.
- Rough Engine Performance — The engine experiences a rough idle, hesitation during acceleration, or stalling, particularly when cold or under heavy load.
- Hard Starting (Especially in Diesel Engines) — Diesel engines rely on oil temperature for cold-start fuel adjustments and glow plug operation. A faulty EOT signal makes the engine difficult to start in cold weather.
- Activation of Limp Mode — The PCM enters a 'limp mode' or 'fail-safe' mode, significantly reducing engine power to prevent damage.
Diagnostic Flowchart
Tap your situation to follow the diagnostic path that matches what you're seeing on this code.
Common Fixes & Costs
- Replace the Engine Oil Temperature (EOT) Sensor — Parts: $20 - $100, Labor: $70 - $250, ~1.2 hr book time (DIY)
- Repair Damaged Wiring or Replace Connector Pigtail — Parts: $10 - $50, Labor: $100 - $300, ~1.5 hr book time (Intermediate)
- Address Cooling System Faults — Parts: $20 - $80, Labor: $150 - $300, ~2 hr book time (Intermediate)
- Perform a PCM Software/Firmware Update — Parts: $0, Labor: $100 - $200, ~1 hr book time (Professional)
- Replace the Powertrain Control Module (PCM) — Parts: $800 - $1,200, Labor: $150 - $250, ~1.5 hr book time (Professional)
DIY vs Professional
- Replace EOT Sensor — Beginner: Yes, for easily accessible sensors.
Tools: Socket set, ratchet, drain pan, replacement sensor. - Repair Wiring/Connector — Beginner: No, this is an intermediate task.
Tools: Multimeter, wire strippers, crimpers, heat shrink tubing, soldering iron. - PCM Update — Beginner: No.
Tools: Professional-grade scan tool with manufacturer-specific software.
Used vs. New Parts: Buying Guide
When a used part is worth it: For a simple electronic part like an EOT sensor costing under $100 new, buying used never makes sense. The labor to install it exceeds the part cost, and the risk of premature failure is high.
Donor-vehicle mileage cap: roughly under 40000 miles for the part to have meaningful remaining life.
Donor quality checklist:
- Verify the part number exactly.
- Avoid sensors from high-mileage vehicles or regions with heavy road salt.
- Inspect connector pins for corrosion.
Decision logic:
- If The new OEM or quality aftermarket sensor is less than $100. → Always buy new. The cost savings of a used part are negligible compared to repeat labor costs.
- If The sensor is integrated into a larger assembly (e.g., oil pan level sensor) costing over $500. → A used assembly from a low-mileage, accident-damaged vehicle is a cost-effective option.
Warranty tradeoff: Used salvage parts have a 30-90 day warranty. New aftermarket sensors offer 1-year to lifetime warranties. OEM parts provide the best fitment guarantee.
Worst-case if a used part fails: $150 - $400 if a used sensor fails, requiring repeat labor and a new part.
What Happens If You Wait — Timeline
- 0-1 month: Check Engine Light is on. The PCM defaults to a pre-set oil temperature. Fuel economy drops 2-5%. (MPG impact: 2-5%% · Added cost: $10-30 in wasted fuel)
- 1-4 months: Engine runs on a less-than-optimal fuel map, increasing carbon buildup on valves. The catalytic converter risks overheating from a rich mixture. (MPG impact: 5-10%% · Added cost: $50-150 in wasted fuel and future cleaning services.)
- 4-8 months: Prolonged operation degrades the catalytic converter from thermal stress. Engine wear accelerates due to incorrect oil viscosity assumptions. (MPG impact: 7-15%% · Added cost: $800 - $2,500 for a catalytic converter replacement.)
- 8+ months: Severe neglect leads to internal engine damage. If fail-safe fan controls fail during towing, severe overheating warps cylinder heads. (MPG impact: 10-20%% · Added cost: $3,000 - $8,000+ for major engine repairs.)
Cost of Not Fixing It
- 0-1 month: Reduced fuel economy by 2-5%, rough idle, and potential hesitation. The Check Engine Light remains on. (Added cost: $10 - $30 in wasted fuel.)
- 1-6 months: The engine runs on incorrect fuel and timing maps, causing the catalytic converter to overheat from an overly rich mixture. (Added cost: $800 - $2,500 for catalytic converter replacement.)
- 6+ months: Prolonged operation with incorrect oil temperature data accelerates engine wear. If fail-safe fan controls fail, severe overheating warps cylinder heads. (Added cost: $3,000 - $8,000+ for major engine repairs or replacement.)
Diagnosis Steps
- Scan for Codes and Check Oil Level
Use an OBD-II scanner to confirm P0195 is active and check for related codes (P0196, P0197, P0198, P0115). Inspect the engine oil level and condition on the dipstick. Extremely low or sludgy oil causes reading issues.
Tools: OBD-II Scanner, Oil Dipstick (Beginner) - Check for Technical Service Bulletins (TSBs)
Before touching a wrench, check for manufacturer TSBs related to P0195 for your specific VIN. A simple PCM software update at a dealership often resolves overly sensitive sensor parameters.
Tools: Smartphone or Computer (Beginner) - Visually Inspect the Sensor and Wiring
Locate the EOT sensor on the oil pan, engine block, or near the oil filter housing. Inspect the connector for corrosion, moisture, or bent pins. Trace the wiring harness for frayed insulation, breaks, or heat damage.
Tools: Flashlight (Beginner) - Analyze Live Sensor Data
Use an advanced scanner to observe the Engine Oil Temperature (EOT) PID. On a cold engine, EOT must match Engine Coolant Temperature (ECT) and Ambient Air Temperature (AAT). An impossible value (e.g., -40°F) indicates a hard circuit fault. Start the engine; the temperature must rise steadily to 195-220°F.
Tools: Advanced OBD-II Scanner (Intermediate) - Test the Sensor's Electrical Connector for Voltage
Disconnect the sensor connector. Turn the ignition 'On' (engine off). Use a multimeter to verify a 5-volt reference signal on one pin. Check the ground pin for continuity to the chassis (less than 1 ohm). Missing voltage or bad ground means the wiring harness or PCM is faulty.
Tools: Multimeter (Intermediate) - [ADVANCED] Test the Signal Wire Voltage
Reconnect the sensor. Back-probe the signal wire with the key on. On a cold engine, voltage is typically 2.0V-3.0V. As the engine warms, voltage drops smoothly to around 0.5V. Voltage stuck near 0V is a short to ground; stuck near 5V is an open circuit.
Tools: Multimeter with back-probe pins (Advanced) - [ADVANCED] Test the Sensor's Resistance vs. Temperature
With the sensor unplugged, measure resistance (Ohms) across its terminals. Compare the reading to the service manual (e.g., ~10,000 Ohms at 77°F, dropping to ~2,000 Ohms at 176°F). Infinite resistance (open) or near zero (short) means the sensor is defective.
Tools: Multimeter, Vehicle Service Manual, Infrared Thermometer (Advanced) - [Pro Tip] Perform a Circuit Integrity 'Wiggle Test'
With the engine running and live EOT data displayed on your scanner, wiggle the wiring harness at the connector and along its path. If the temperature reading jumps or drops out, you found the exact location of the wiring break.
Tools: Advanced OBD-II Scanner (Advanced) - [Pro Tip] Use a Lab Scope for Waveform Analysis
Connect a lab scope to the signal wire. A good sensor produces a clean, steady voltage signal that changes smoothly. A scope reveals micro-glitches or electrical noise in the circuit that a multimeter is too slow to catch.
Tools: Automotive Oscilloscope (Lab Scope) (Advanced)
When This Code Triggers (Freeze-Frame Conditions)
- Engine Coolant Temp: 185-210°F (85-99°C) (The code sets when the engine is fully warmed up, as the PCM expects a rational oil temperature reading by this point.)
- RPM: 1500-2500 (The fault is frequently detected during steady-state cruising, not during idle or heavy acceleration.)
- Engine Load: 25-50% (The code triggers under light to moderate engine load, consistent with highway or city cruising.)
- Vehicle Speed: 40-65 mph (64-105 km/h) (Often triggered during highway driving when the engine has run for a significant period.)
Related Codes
- P0196 — Indicates 'EOT Sensor Circuit Range/Performance'. P0195 points to a hard electrical fault (open/short), while P0196 means the signal is plausible but incorrect for the engine's state (e.g., temperature not rising).
- P0197 — Specifies 'EOT Sensor Circuit Low Voltage', indicating a short to ground. If you see P0197, immediately hunt for a shorted wire or a shorted-out sensor.
- P0198 — Specifies 'EOT Sensor Circuit High Voltage', indicating an open circuit. This triggers if a wire is broken, the sensor is unplugged, or the sensor fails internally.
- P0115 — Indicates 'Engine Coolant Temperature (ECT) Sensor Circuit Malfunction'. The PCM compares EOT and ECT readings. A fault in one triggers a rationality code for the other. Inspect shared wiring or grounds.
Climate & Environmental Factors
- Moisture and Road Salt: Humid environments, deep water, or winter road salt introduce moisture into the EOT sensor's electrical connector. This causes rapid pin corrosion, increasing electrical resistance and triggering P0195, P0197, or P0198.
- Extreme Cold: In climates below 0°F (-18°C), moisture in engine ventilation systems freezes, causing crankcase pressure issues and erratic sensor behavior that indirectly triggers related codes.
How to Talk to a Mechanic About This Code
Say this: "I have an active P0195 code for the Engine Oil Temperature sensor circuit. Before replacing the sensor, please test the connector for the 5-volt reference and ground, and check the signal wire's integrity."
This directs the technician to perform a proper electrical diagnosis instead of just replacing the most common part, saving you money if the sensor isn't the problem.
Avoid saying:
- 'My check engine light is on, can you just fix it?'
- 'I'm pretty sure it's just a bad oil sensor, can you replace it?'
- 'Just do whatever you think is best.'
Questions to ask before authorizing the repair:
- Did you get a specific reading from the sensor, like -40 degrees, or was it erratic?
- Did you test the voltage and ground at the sensor's connector?
- If the wiring is the problem, can you show me where the damage is?
- Is there a Technical Service Bulletin (TSB) for this code on my vehicle?
- What is the warranty on this specific repair?
Where to Take It: Dealer vs Independent vs Chain
- Dealer:
Recommended if you suspect a software issue or are under warranty; otherwise, an independent shop is more cost-effective.
Best for: Vehicles under powertrain or emissions warranty., Persistent P0195 issues where a PCM software update is required (common on Subaru)., Complex electrical issues requiring manufacturer-specific diagnostic tools.
Downsides: Higher labor rates (30-60% more than independent shops)., May recommend expensive assembly replacements over smaller components. (Typical cost: +50% vs. baseline) - Independent Shop:
Best fit for most P0195 scenarios. A good independent shop easily diagnoses faulty sensors, connectors, and wiring.
Best for: Out-of-warranty vehicles where cost is a major factor., Standard diagnosis and repair of sensors and wiring harnesses.
Downsides: Diagnostic skill varies widely; look for ASE certifications., May lack the latest manufacturer-specific software for PCM updates. (Typical cost: +0% vs. baseline) - Chain Shop:
Use with caution. Acceptable for a simple sensor swap, but AVOID for initial diagnosis of an electrical circuit code.
Best for: Simple, easily accessible sensor replacements where you have already confirmed the diagnosis.
Downsides: Technician skill varies dramatically., Lack advanced diagnostic tools for tracing intermittent electrical faults., High pressure to upsell services. (Typical cost: -10% vs. baseline)
When to Walk Away From the Repair
If the total estimated repair cost exceeds 40-50% of your car's private-party value, seriously consider selling or trading it in.
- Car worth $3500, fix is $350: Fix it. The repair cost is 10% of the car's value, well below the threshold.
- Car worth $4000, fix is $1400: Borderline. This worst-case PCM replacement is 35% of the car's value. Get a second opinion.
- Car worth $2500, fix is $1500: Walk away. The repair cost is 60% of the vehicle's value. It is not a sound financial decision.
What Scan Tool You Need for This Code
Minimum: An OBD-II reader that displays live data, specifically the Engine Oil Temperature (EOT) PID.
A basic $20 code reader only confirms P0195 is present. It cannot show live sensor data. Without seeing if the temperature reading is stuck at -40°F or erratic, you are guessing and will waste money replacing a good sensor.
Budget: BlueDriver Pro (~$119) — Connects via Bluetooth to display live EOT data, allowing you to compare it with coolant temperature as the engine warms up.
Mid-range: Foxwell NT510 Elite (~$180) — Offers bidirectional controls to command vehicle systems, helpful in complex diagnoses. It is a dedicated handheld unit.
Professional: Autel MaxiCOM MK808 / MK808BT (~$450-550) — Provides full bidirectional control, OE-level diagnostics, and advanced data graphing to pinpoint wiring or PCM issues with certainty.
Rent vs buy: For a one-time diagnosis, use AutoZone's 'Loan-A-Tool' program. You pay a deposit, fully refunded upon return. Buy a scanner only if you perform diagnostics multiple times a year.
How to Clear the Code After You Fix It
- Use an OBD-II scan tool to clear the P0195 code.
- Perform a complete drive cycle to allow the vehicle's readiness monitors to run.
- Disconnecting the battery for 15 minutes clears the code but resets all readiness monitors.
Drive cycle (~30 minutes): Start the engine cold (sitting for 8+ hours). Idle for 3 minutes. Drive at a steady 55 mph for 15 minutes. Perform stop-and-go driving for 5 minutes. Allow the vehicle to cool down completely.
Readiness monitors affected: Catalyst monitor, O2 sensor monitor, EVAP monitor
Before emissions retest: drive at least 100 miles to fully set monitors.
Watch out for:
- Clearing the code without performing a drive cycle leaves readiness monitors incomplete, causing an automatic emissions test failure.
- If the root cause (e.g., a wiring short) is not fixed, the code returns immediately upon starting the engine.
Will This Fail Emissions / State Inspection?
Yes — this code typically fails an OBD-II emissions inspection.
- California: An illuminated Check Engine Light from P0195 is an automatic failure. After repair, a full drive cycle must set all readiness monitors before re-testing.
- New York: The NYVIP3 inspection includes an OBD-II scan. Any active P0195 code results in a failed inspection.
- Texas: In the 17 counties requiring emissions testing, a vehicle with an active P0195 code fails the OBD portion of the inspection.
Most Commonly Affected Vehicles
- Ford F-Series (F-150, Super Duty) (1999-2024) — Highly common on Powerstroke diesels and 5.4L 3v Triton engines. The sensor's location on the oil pan makes it vulnerable to damage and corrosion.
- Chevrolet / GMC Silverado / Sierra (2007-2024) — On V8 models (4.8L, 5.3L, 6.0L), the sensor sits at the rear of the engine behind the intake manifold, making replacement labor-intensive.
- Subaru Outback, Forester (2015-2022) — Persistent P0195 codes are frequently resolved with a PCM software update from a dealer, indicating PCM sensitivity to sensor readings.
- Honda Accord (2003-2024) — On 7th generation V6 models, the sensor is located on the rear of the engine. Connector corrosion is a frequent issue.
- BMW 3-Series, 5-Series, X-Series (2012-2019) — The sensor is integrated into the oil level sensor assembly at the bottom of the oil pan. Replacement requires draining the engine oil.
- Toyota Camry, Yaris, Tundra (2010-2020) — Wiring harnesses routed too close to hot exhaust components cause insulation to degrade and short out over time.
- Hyundai / Kia Sonata, Optima, Sorento (2012-2022) — Susceptible to standard sensor failure due to age or internal faults.
- Dodge / Ram Ram 1500 / 2500 (2009-2024) — On HEMI V8 and Cummins diesel engines, EOT sensor failures are common and follow the typical pattern of sensor or wiring faults.
Manufacturer-Specific Notes
- Ford: On Powerstroke diesels, the PCM uses EOT to control injector timing. A faulty sensor causes poor performance, hard starting, and incorrect turbo operation. Additionally, check for recalls like 23S64 (EcoSport 1.0L) where oil pressure loss presents with related codes.
- General Motors (GM): On specific GM trucks, the EOT sensor is integrated into the oil level sensor assembly inside the oil pan. Replacing it requires draining the oil and removing the pan.
- Subaru: Subaru PCMs are highly sensitive to voltage fluctuations. A persistent P0195 code that survives sensor and wiring checks almost always requires a dealership software update (TSB 09-97-22 or 15-305-22).
Real Owner Stories
2015 Ford F-150 with intermittent P0195
Check Engine Light came on during long highway drives in hot weather. No performance issues.
What they tried:
- Replaced the EOT sensor, but the code returned a week later.
- Performed a 'wiggle test' on the wiring harness but couldn't replicate the fault.
Outcome: A technician discovered the wiring harness rubbed against a hot exhaust component, causing an intermittent short when hot. Repairing the wire and securing the harness with a zip tie permanently solved the problem for a 1-hour labor charge.
Lesson: Intermittent electrical faults are usually wiring issues, not the sensor. Visual inspection of harness routing is critical on high-vibration engines.
2018 Chevrolet Silverado with P0195 and hard starting
Vehicle was hard to start on cold mornings, and the oil temperature gauge was erratic. Code P0195 was active.
What they tried:
- Suspected a battery or starter issue.
- A shop scanned the code and recommended replacing the EOT sensor.
Outcome: The shop found heavy corrosion on the sensor's connector pins. Instead of replacing the sensor, they cleaned the terminals and applied dielectric grease. The code cleared, and the hard starting resolved.
Lesson: Always inspect and clean connectors before replacing parts. Corrosion is a common, cheap fix for sensor circuit codes.
2017 Subaru Outback with persistent P0195
P0195 would not clear after replacing the EOT sensor and verifying wiring continuity.
What they tried:
- Replaced the EOT sensor with a new OEM part.
- Confirmed the wiring harness had a 5V reference and good ground.
- Considered replacing the PCM.
Outcome: The owner called a Subaru dealership. The advisor found a TSB indicating a required PCM software update to correct overly sensitive EOT parameters. A 1-hour reflash permanently fixed the issue.
Lesson: Before replacing a PCM, check for manufacturer TSBs. Software updates are the intended fix for persistent electronic codes.
How to Prevent This Code From Triggering
- Perform Regular Oil Changes with Quality Oil (Per manufacturer's schedule (e.g., 5,000-7,500 miles)) — Clean oil prevents sludge buildup on the sensor, which insulates it and causes inaccurate readings or overheating.
- Inspect Wiring During Other Maintenance (During every oil change or tune-up) — Checking the EOT wiring harness for brittleness or rubbing catches potential failures before they trigger a code.
- Apply Dielectric Grease to the Connector (When the sensor is replaced or disconnected) — Dielectric grease seals out moisture and prevents the corrosion that causes high resistance and P0195 codes.
- Maintain the Engine Cooling System (As recommended by the vehicle manufacturer) — A functioning cooling system ensures the engine operates at the correct temperature, preventing illogical differences between coolant and oil temperatures.
Frequently Asked Questions
Where is the engine oil temperature sensor located?
The EOT sensor is typically screwed into the engine's oil pan, near the oil filter housing, or directly into the engine block. Its exact location varies significantly by make and model. Consult a vehicle-specific repair manual for exact placement.
Can I fix P0195 myself?
Yes, replacing an easily accessible sensor is a straightforward DIY repair. However, diagnosing intermittent wiring issues or replacing a sensor hidden behind an intake manifold requires professional tools and experience. Stop DIY and go to a shop if you cannot locate the 5-volt reference signal.
What is the most common mistake when fixing P0195?
The most common mistake is replacing the EOT sensor without testing the electrical circuit. A 5-minute multimeter test confirms if the fault lies in the sensor, the wiring, or the connector. This prevents wasting money on an unnecessary part.
Why did my P0195 code come back after replacing the sensor?
If the code returns, the sensor was not the root cause. The actual problem is an intermittent wiring harness short, a corroded connector, a poor ground, or a PCM requiring a software update.
Will a P0195 code clear itself?
No, P0195 indicates a hard electrical fault that will not clear itself. The Check Engine Light remains on until the underlying issue is repaired. You must manually clear the code with an OBD-II scanner afterward.
Will P0195 cause my car to fail an emissions test?
Yes, any active trouble code that illuminates the Check Engine Light results in an automatic failure of a state emissions or smog inspection.
What's the difference between an oil temperature sensor and an oil pressure sensor?
The oil temperature sensor (EOT) measures how hot the oil is. The oil pressure sensor measures the mechanical force of the oil pumping through the engine. They are separate systems that trigger entirely different trouble codes.
What are the most common misdiagnosis pitfalls for P0195?
Mechanics frequently blame the sensor when the actual fault is a corroded wiring connector. Another pitfall is overlooking a stuck-open thermostat that prevents the oil from warming up properly. Finally, failing to check for PCM software updates leads to unnecessary parts replacement.
Key Takeaways
- Code P0195 indicates an electrical failure in the Engine Oil Temperature sensor circuit, not an actual overheating engine.
- A faulty $30-$80 EOT sensor or a corroded wiring connector causes over 80% of P0195 codes.
- Fix this code within 1-2 weeks to prevent the PCM from running a rich fuel mixture that destroys a $1,500 catalytic converter.
- Test the sensor connector for a 5-volt reference signal using a multimeter before spending money on replacement parts.
Helpful Videos
Shop the Parts Behind P0195
Below are the parts most often responsible for code P0195, ranked by how frequently each one is the actual culprit (per the diagnosis above). Tap any to see what we have for your vehicle.


The information in this article is provided for general reference and educational purposes only. Vehicle specifications, procedures, and part compatibility can vary by production date, trim level, and region. Always consult your vehicle's factory service manual and verify part numbers before purchasing or performing repairs. Safety-critical components such as airbags, seat belts, and braking systems should be installed by a qualified professional.
- 🧭 Diagnostic Flowchart
- 🎬 Helpful Videos
- 🛍️ Shop This Part
- What Does P0195 Mean?
- Can I Drive With P0195?
- Common Causes
- Symptoms
- Common Fixes & Costs
- DIY vs Professional
- Used vs. New Parts: Buying Guide
- What Happens If You Wait — Timeline
- Cost of Not Fixing It
- Diagnosis Steps
- When This Code Triggers (Freeze-Frame Conditions)
- Related Codes
- Climate & Environmental Factors
- How to Talk to a Mechanic About This Code
- Where to Take It: Dealer vs Independent vs Chain
- When to Walk Away From the Repair
- What Scan Tool You Need for This Code
- How to Clear the Code After You Fix It
- Will This Fail Emissions / State Inspection?
- Most Commonly Affected Vehicles
- Manufacturer-Specific Notes
- Real Owner Stories
- 2015 Ford F-150 with intermittent P0195
- 2018 Chevrolet Silverado with P0195 and hard starting
- 2017 Subaru Outback with persistent P0195
- How to Prevent This Code From Triggering
- Frequently Asked Questions
- Where is the engine oil temperature sensor located?
- Can I fix P0195 myself?
- What is the most common mistake when fixing P0195?
- Why did my P0195 code come back after replacing the sensor?
- Will a P0195 code clear itself?
- Will P0195 cause my car to fail an emissions test?
- What's the difference between an oil temperature sensor and an oil pressure sensor?
- What are the most common misdiagnosis pitfalls for P0195?
- Key Takeaways
- 🎟️ Get 5% Off