
P0204 on 1998-2005 Dodge RAM 2500: Injector Circuit Fault Causes & Fixes
On a 1998-2005 Dodge Ram 2500, especially with the 5.9L Cummins engine, code P0204 is most often caused by a faulty injector wiring harness that passes through the valve cover gasket. Before replacing the #4 injector, always inspect and test this harness, as it's a very common failure point due to heat, oil saturation, and vibration. The nuts on the injector solenoid can also loosen, causing an intermittent connection.
- For a P0204 code on a 1998-2005 Ram 2500, especially a Cummins, suspect the wiring harness under the valve cover before the injector itself.
- A simple diagnostic step is to swap the #4 injector with a neighboring one; if the code moves, the injector is bad. If it stays, the wiring is the problem.
- This is a manageable DIY repair for those comfortable with removing the valve cover, with a difficulty of about 3 out of 5.
- Always replace the valve cover gasket when performing this repair to prevent future oil leaks.
What's Unique About the 1998-2005 Dodge RAM 2500
This generation of Dodge Ram, particularly models with the 5.9L Cummins diesel engine, has a well-documented weakness in the fuel injector wiring. The harness passes through the valve cover gasket, where it is constantly exposed to engine heat, oil, and vibration. This design leads to the wires becoming brittle, the insulation cracking, or the connectors shorting out, making it a more common cause for a P0204 code than the injector itself. A manufacturer Technical Service Bulletin (TSB #9002688) specifically advises checking this wiring before replacing any injectors, as it is a known root cause. [⭐ MANUFACTURER TSB — highest authority]
Diagnostic Flowchart
Tap your situation to follow the diagnostic path that matches what you're seeing on this vehicle.
Generation note: This range covers the end of the 2nd Generation (1998-2002) and the start of the 3rd Generation (2003-2005) Ram. The 5.9L Cummins engine changed from a 24-valve VP44 injection system to a common-rail system in 2003. While the P0204 code applies to both, the specific injector wiring harness and injector part numbers are different. The issue with the wiring harness under the valve cover is a known problem on both generations, but is especially prevalent on the 2003-2005 common-rail models.
Symptoms You May Notice
- Check Engine Light is on
- Rough or shaking idle
- Engine misfire or stumble
- Reduced power and poor acceleration
- Increased fuel consumption
- Engine may be hard to start or stall
- Audible engine knock or backfiring
- Replacing the #4 fuel injector without first testing the injector wiring harness under the valve cover. The TSB specifically warns against this, as the harness is a more frequent point of failure. [⭐ MANUFACTURER TSB — highest authority]
- Overlooking the simple loose nuts on top of the injector solenoid. Many owners have fixed the code simply by re-torquing these nuts to the correct 8.8 in-lbs spec.
Most Likely Causes
- Faulty Valve Cover Pass-Through Wiring Harness 🔴 High Probability → Shop Engine Valve Cover The harness for injectors 4, 5, and 6 runs under the valve cover, where constant exposure to heat and oil causes the wiring insulation to become brittle and fail. Vibration can also cause the wires to chafe against the valve cover or each other. This is a widely known issue and is mentioned in TSB #9002688. [⭐ MANUFACTURER TSB — highest authority]
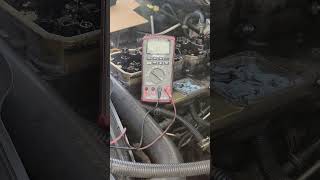
How to confirm: Disconnect the harness at the valve cover and at the injector. Check for continuity and resistance on the wires for cylinder #4. A resistance reading above 5.0 ohms or an open circuit (infinite resistance) indicates a bad harness. 🎬 See this comprehensive walkthrough for testing the entire injector circuit. Visually inspect for cracked, brittle, or oil-soaked wiring. Forum users report this as the fix in the vast majority of cases.
Typical fix: Replace the injector wiring harness. On 2003-2005 models, there are three separate harnesses under the valve cover; the rear-most one serves cylinders 4, 5, and 6. It is recommended to use a genuine Cummins part for longevity.
Est. part cost: $50-$150 - Loose or Corroded Injector Connector Nuts 🟡 Medium Probability The two small nuts that secure the wiring harness to the top of the injector solenoid can work themselves loose due to constant engine vibration. This creates a poor connection, leading to an open circuit fault.
How to confirm: After removing the valve cover, physically check the two nuts on top of the #4 injector. A wiggle test on the wires may cause the connection to change. Visually inspect for corrosion or arcing marks on the terminals.
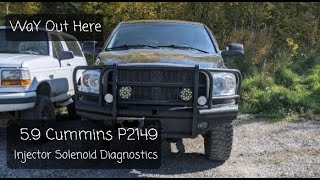
Typical fix: Clean the terminals and tighten the connector nuts to the proper torque specification. For 2003-2005 common-rail engines, this spec is extremely low: 8.8 in-lbs (inch-pounds), which is approximately 1 Nm. DO NOT overtighten, as this can break the injector solenoid post. 🎬 Watch: How to diagnose solenoid issues and check for loose connections.
Est. part cost: $0 if tightening is all that's needed - Failed #4 Fuel Injector 🟡 Medium Probability → Shop Fuel Injector
How to confirm: Swap the #4 fuel injector with an adjacent one (e.g., #5). Clear the codes and run the engine. If the code changes to P0205, the injector is faulty. Alternatively, measure the resistance across the two terminals of the injector solenoid. A healthy Cummins injector should have a resistance of less than 1.0 ohm. A reading of infinite resistance (Open Line) or a very high reading indicates the internal coil has failed.
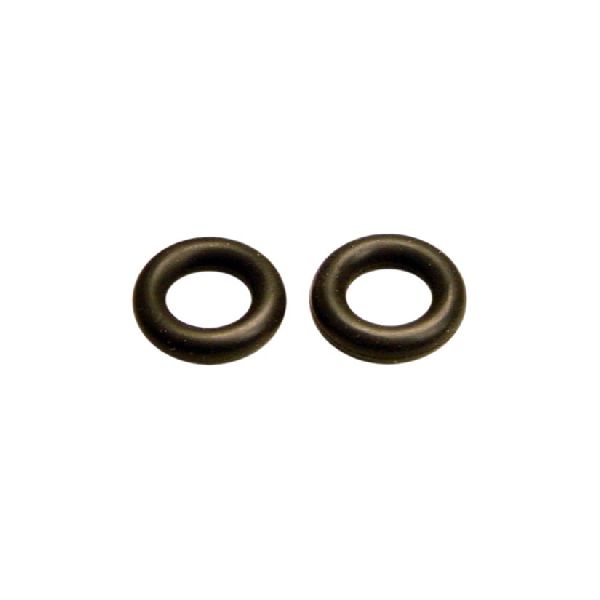
Typical fix: Replace the failed fuel injector. It is highly recommended to replace the high-pressure connector tube and its O-ring at the same time to ensure a proper seal. Always use a new copper washer on the injector tip.
Est. part cost: $200-$500 - Open or Short in the Main Engine Harness ⚪ Low Probability
How to confirm: Check for continuity on the injector #4 control wire between the PCM connector and the valve cover pass-through connector. Check the same wire for a short to ground or voltage. Common chafe points are where the harness may rub against the firewall, steering shaft, or other engine components.
Typical fix: Locate and repair the damaged section of the wiring harness using solder and heat-shrink tubing for a durable repair.
Est. part cost: $5-$100 in materials
Rare But Worth Checking
- Faulty Powertrain Control Module (PCM): → Shop Engine Control Module (ECM) This is the least likely cause. The PCM's internal injector driver can fail, but all other possibilities, especially wiring and the injector itself, should be exhaustively ruled out first. This is sometimes suspected when injector codes for an entire bank (e.g., P0204, P0205, and P0206) appear simultaneously after the harness has been verified as good.
Diagnosis Steps
- Read the code with an OBD-II scanner to confirm P0204 is present.
- Visually inspect the main engine wiring harness leading to the valve cover for any obvious signs of damage, chafing, or melting.
- Perform a 'Noid Light' Test: Disconnect the main injector harness connector at the valve cover. Plug a noid light into the terminal for cylinder #4. Start the engine. A consistent flashing light indicates the PCM and main harness are good, pointing the problem to under the valve cover. No light or a steady light points to a wiring or PCM issue.
- Remove the Valve Cover: This is necessary to access the injectors and internal harness. Be prepared to replace the valve cover gasket.
- Check Injector Solenoid Nuts: Check that the two electrical connector nuts on top of injector #4 are tight. Use a torque wrench to verify they are at 8.8 in-lbs. Do not overtighten.
- Test the Injector Solenoid: Disconnect the wires from the #4 injector. Set a multimeter to Ohms (Ω). A good injector should read very low, less than 1.0 Ohm. 🎬 Watch: A quick guide on how to test the injector solenoid. An 'OL' or infinite reading means the injector's internal coil is open and the injector is bad.
- Test the Internal Harness: With the harness disconnected from the injector and the main pass-through connector, use a multimeter to check for continuity on both wires for cylinder #4 from end to end. Resistance should be less than 5 ohms. Also check for a short to ground from each pin.
- Perform an Injector Swap Test (If needed): If tests are inconclusive, swap the #4 injector with an adjacent one (e.g., #5). Reassemble, clear codes, and run the engine. If the code changes to P0205, the injector is confirmed bad. If P0204 returns, the problem is definitively in the wiring.
- If all wiring and the injector are confirmed good, suspect a faulty PCM, though this is rare.
Parts You'll Likely Need
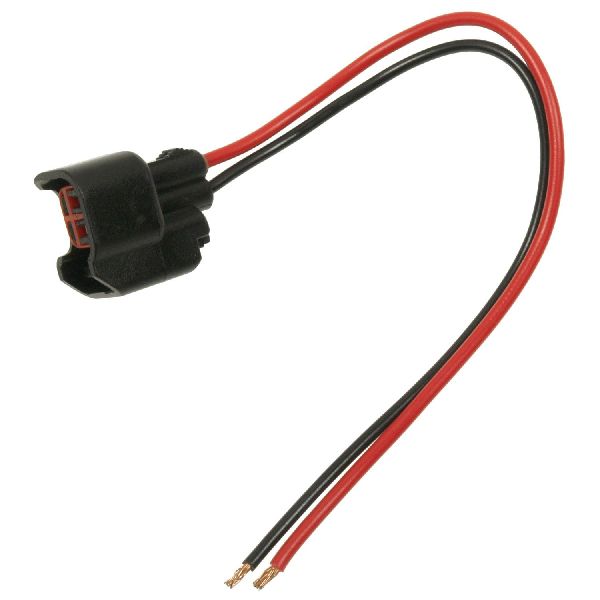
- Fuel Injector Wiring Harness (Internal, Cyls 4-6)
(OEM #3966805)— This is the most common failure point for this code on 2003-2005 5.9L Cummins engines due to heat and vibration under the valve cover.
Trusted brands: Cummins (OEM), Dorman
OEM price range: $100-$150
Aftermarket price range: $50-$90 - Fuel Injector
(OEM #Bosch 0986435503 (2003-2004.5), Bosch 0986435505 (2004.5-2007))— If the injector's internal coil fails its resistance test or the fault follows the injector in a swap test, it needs to be replaced.
Trusted brands: Bosch (OEM supplier), Cummins
OEM price range: $350-$500
Aftermarket price range: $200-$350 - Valve Cover Gasket
Related Codes That Often Appear With This One
- P0304 — P0304 means 'Cylinder 4 Misfire Detected.' Since P0204 indicates an electrical fault that stops the injector from firing, it directly causes a misfire in that cylinder.
- P0205, P0206 — On Cummins engines, injectors 4, 5, and 6 are on the same bank and share a common internal harness. A short or open in this harness can sometimes trigger fault codes for all three injectors in that bank.
- P2149 — This code means 'Fuel Injector Group 'B' Supply Voltage Circuit/Open'. On Cummins engines, cylinders 4, 5, and 6 make up Group B. A problem with the harness or a single injector in this group can sometimes trigger the group fault code along with the specific cylinder code.
Technical Service Bulletins (TSBs) & Recalls
- TSB #9002688: Advises technicians to check the injector wiring loom and connector in the valve cover gasket as a probable root cause for codes P0201 through P0206 before replacing the fuel injectors themselves.
Platform-Specific Known Issues
- TSB #9002688 explicitly identifies the wiring loom in the valve cover gasket as a primary root cause for P020x codes, advising technicians to check it before replacing injectors. [⭐ MANUFACTURER TSB — highest authority]
Mechanic-Grade Diagnostic Values
- Fuel Injector Solenoid Resistance — expected: Less than 1.0 Ohm, but greater than 0 Ohms.. Failure: A reading of 0 Ohms indicates a short, while a high or infinite (OL) reading indicates an open coil.
- Injector Control Circuit Resistance (Harness) — expected: Less than 5.0 Ohms.. Failure: Resistance above 5.0 Ohms indicates excessive resistance or an open in the wiring between the PCM and the injector.
- Injector Solenoid Nut Torque (Common Rail) — expected: 8.8 in-lbs (approx. 1 Nm). Failure: Loose nuts can cause an open circuit; over-tightening can break the solenoid post.
- Rail Pressure at Idle — expected: 6,000 - 7,000 PSI. Failure: Fluctuations over 500 PSI can indicate injector or Fuel Control Actuator (FCA) issues.
- Rail Pressure during Cranking (for start) — expected: Approximately 4,000 PSI. Failure: Significantly lower pressure can indicate major leaks from injectors, connector tubes, or the pressure relief valve, preventing the engine from starting.
Scan Tool Commands That Help
- DRB III, Snap-on, Autel, Launch X431: Injector Kill Test / Cylinder Cutout Test — This bidirectional command allows the user to shut off individual injectors one at a time while the engine is running. If shutting off cylinder #4 causes no change in engine idle, it confirms that cylinder was not contributing, strongly pointing to a fault in that injector or its circuit. If shutting it off makes the idle worse, the injector was likely working.
- Snap-on, Autel, etc.: Injector Quantity Adjustment / Flow Rate Programming — After replacing an injector, some scan tools allow you to input the new injector's calibration code into the ECM. This helps the ECM fine-tune fuel delivery for the new part.
- DRB III or equivalent: Actuate ASD Relay / Actuate Fuel Injector — During guided diagnostics, the scan tool can be used to command the Auto Shutdown (ASD) relay on to test for power at the injector, or to pulse the injector driver circuit to be checked with a test light.
Wiring & Ground Locations
- ECM C2 Connector (50-pin) — The 50-pin connector on the Engine Control Module (ECM) mounted on the driver's side of the engine block.. This connector contains the driver circuits for the injectors. The control wire for injector #4 can be tested for continuity from this connector to the valve cover pass-through connector.
- Injector #4 Driver Circuit (Pin K14) — This is the specific circuit/wire for the cylinder 4 injector control, running from the ECM C2 connector to the injector.. Diagnostic procedures require testing this specific wire for opens, shorts to ground, or shorts to voltage.
- Main Engine Ground — A thick, heavy-gauge wire running from the driver's side battery negative terminal to a mounting point on the lower engine block.. A poor engine ground can cause a variety of electrical issues, including erratic sensor readings and problems with actuator circuits like injectors. Ensuring this connection is clean and tight is a fundamental step.
- Firewall/Cowl Ground Strap — A braided strap typically running from the rear of the cylinder head or engine block to the firewall/cowl of the truck body.. This ground ensures the chassis and engine have a common ground potential. A broken or corroded strap can cause electrical feedback through other circuits, potentially affecting ECM operation.
Real Owner Repair Stories
- YouTube channel 'Auto Repair Guys' (Land Rover Discovery (demonstrating a universal P0204 fix)) — Engine light on, misfiring sound.
❌ Tried (didn't work) Initial diagnosis was uncertain between a bad injector or a bad connection after an engine replacement.
✅ What actually fixed it The electrical connector for the #4 injector had come loose. The retaining spring clip was missing/not installed correctly. Securing the connector with a new clip and ensuring it clicked into place resolved the P0204 code and the misfire. - Dodge Diesel - Diesel Truck Resource forum (2003-2007 Dodge Ram with 5.9L Cummins) — Intermittent P0204 code, rough running.
❌ Tried (didn't work) Initial thoughts pointed to a bad injector or the common under-cover wiring harness failure.
✅ What actually fixed it The user discovered the two small nuts on top of the #4 injector solenoid were loose. After removing the valve cover, simply tightening the nuts to the correct (very low) torque spec fixed the intermittent open circuit and cleared the code.
OEM Part Supersession History
Bosch 0445120018→Bosch 0986435503— Standard part evolution, updates to internal components and manufacturing processes.
Heads up: This part is for 2003-2004.5 engines. It is physically different (nozzle spray angle) from the injectors used in 2004.5-2007 engines and should not be interchanged.
Model Year Variations Within This Range
- 2003-2004: These models use injectors with an eight-hole nozzle and a 143-degree spray angle. The pistons have a corresponding fuel bowl design.
- 2004.5-2005: To meet new emissions standards, these engines use injectors with a five-hole nozzle and a tighter, 124-degree spray angle. The pistons were redesigned with a different fuel bowl and an added oil cooling gallery to accommodate the change. Using the wrong injector for the piston type will lead to poor combustion, smoke, and potential engine damage.
- 1998.5-2002: These 24v engines use a VP44 injection pump system, not a common rail. While they can still set a P0204 code, the injectors are electronically controlled but hydraulically actuated in a different manner. The diagnostic process is similar (check wiring, check injector) but the parts are completely different from the 2003+ common rail models.
Helpful Videos

We Have This Part in Stock


The information in this article is provided for general reference and educational purposes only. Vehicle specifications, procedures, and part compatibility can vary by production date, trim level, and region. Always consult your vehicle's factory service manual and verify part numbers before purchasing or performing repairs. Safety-critical components such as airbags, seat belts, and braking systems should be installed by a qualified professional.
- Dodge RAM 2500:
- 🧭 Diagnostic Flowchart
- 🎬 Helpful Videos
- 🛍️ Shop This Part
- What's Unique About the 1998-2005 Dodge RAM 2500
- Symptoms You May Notice
- Most Likely Causes
- Rare But Worth Checking
- Diagnosis Steps
- Parts You'll Likely Need
- Related Codes That Often Appear With This One
- Technical Service Bulletins (TSBs) & Recalls
- Platform-Specific Known Issues
- Mechanic-Grade Diagnostic Values
- Scan Tool Commands That Help
- Wiring & Ground Locations
- Real Owner Repair Stories
- OEM Part Supersession History
- Model Year Variations Within This Range
- 🎟️ Get 5% Off