
P0264 on 2013-2016 Cadillac ATS: Cylinder 2 Injector Circuit Low Causes and Fixes
On a 2013-2016 Cadillac ATS with the 3.6L V6 engine, code P0264 is almost always caused by a damaged wire in the fuel injector harness. Specifically, the wiring for injector #2 chafes against a bolt on the thermostat housing (water outlet). This is a known design flaw documented in GM TSB PIP5386A. The fix involves repairing the wire, protecting the harness with abrasion-resistant tape, and shielding the contact point on the engine, which is a low parts cost but moderately labor-intensive repair
- P0264 on a 2013-2016 ATS 3.6L almost always points to a specific, known wiring issue.
- Before buying any parts, you must inspect the wiring harness for the #2 fuel injector where it passes over the thermostat housing.
- The repair requires removing the intake manifold, which makes it a moderately difficult DIY job.
- Ignoring this code will lead to poor performance and can cause expensive damage to the catalytic converter.
What's Unique About the 2013-2016 Cadillac ATS
For this specific vehicle and engine family (LFX/LGX), the cause of P0264 is exceptionally well-documented by General Motors. Multiple Technical Service Bulletins (TSBs), most notably PIP5386A, point to a specific design flaw where the fuel injector wiring harness is routed too close to the engine's water outlet (thermostat housing), causing it to rub through on a bolt boss. This isn't a random failure; it's a known pattern of wear directly addressed by manufacturer repair procedures that also affects platform mates like the 2016 Cadillac CTS and Chevy Camaro. This makes a wiring inspection the most critical first step.
Diagnostic Flowchart
Tap your situation to follow the diagnostic path that matches what you're seeing on this vehicle.
Symptoms You May Notice
- Check Engine Light is on
- Rough or shaking idle
- Engine misfire, which may feel like a shudder or hesitation
- Loss of power and poor acceleration
- Reduced fuel economy
- Hesitation during acceleration
- Replacing the spark plug or ignition coil for cylinder #2. While these parts can cause a misfire (P0302), the code P0264 points specifically to an electrical fault in the fuel injector's circuit, not the ignition system.
Most Likely Causes
- Chafed/Damaged Wiring at Fuel Injector #2 🔴 High Probability → Shop Fuel Injector As documented in GM TSBs PIP5386 and PIP5386A, the wiring harness for fuel injector #2 is prone to rubbing against a bolt boss on the water outlet/thermostat housing. This constant friction wears through the wire's insulation, causing a short to ground and triggering P0264. This is the most common and well-documented cause for this specific code on this platform.
How to confirm: Remove the intake manifold to gain access to the fuel injectors. Visually inspect the wiring harness leading to injector #2, specifically where it passes over the thermostat housing. Look for bare, damaged, or flattened wires at the point of contact with the metal bolt boss. A 'wiggle test' on the harness with the engine running may also change the idle quality, confirming a wiring fault.
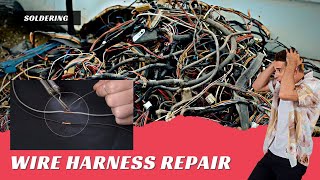
Typical fix: Per TSB PIP5386A: Repair the damaged section of wire. 🎬 Watch: How to properly repair, solder, and seal damaged wiring. This involves removing the terminals from the connector, placing heat shrink tubing over the damaged wire(s), shrinking the tubing to seal the repair, and reinstalling the terminals. Then, wrap the harness with high-quality abrasion-resistant tape (like Tesa cloth tape) and, crucially, apply high-temp, tear-resistant tape to the bolt boss on the thermostat housing to prevent future rubbing.
Est. part cost: $5-$25 - Faulty Fuel Injector #2 🟡 Medium Probability → Shop Fuel Injector Direct injection (DI) injectors operate under high pressure and can fail electrically. An internal short in the injector's solenoid coil will cause a 'Circuit Low' condition.
How to confirm: If wiring inspection reveals no damage, test the injector. Measure its internal resistance with a multimeter; it should be between 1.2 - 1.8 Ohms for LFX/LGX engines. Compare the reading to an adjacent injector. The most definitive test is to swap injector #2 with another cylinder's injector (e.g., cylinder #4). Clear the codes and run the engine. If the code follows the injector (e.g., changes to P0270 for cylinder 4), the injector is bad.
Typical fix: Replace the faulty fuel injector. Since this is a direct injection engine, this is a more involved job than on a port-injected engine and may require special tools. It is often recommended to replace the Teflon seal and retaining clip when replacing the injector.
Est. part cost: $70-$150 - Loose or Corroded Connector ⚪ Low Probability Engine vibration can lead to fretting corrosion on the connector pins over time, or the plastic locking tab can become brittle and break, leading to a poor connection.
How to confirm: While inspecting the wiring, unplug the connector at injector #2 and check for any bent, loose, or corroded pins inside the connector and on the injector itself. Check for a broken locking tab that would prevent a secure connection.
Typical fix: Clean the connector terminals with electrical contact cleaner. If the terminals are damaged or the connector housing is broken, replace the connector pigtail. This requires cutting the old connector off and splicing the new one in using butt connectors and heat shrink tubing.
Est. part cost: $15-$40
Rare But Worth Checking
- Faulty Engine Control Module (ECM): → Shop Engine Control Module (ECM) This is very rare and should only be considered after all other possibilities (wiring, injector) have been definitively ruled out. The ECM's internal driver circuit for the injector can fail, but it is far less common than the known wiring issue. A professional diagnosis is required to confirm an ECM failure.
Diagnosis Steps
- Scan the vehicle for all DTCs. Note if P0302, P0300, or P0265 are also present, as this strongly supports the known TSB issue.
- Use a noid light. Disconnect the injector #2 connector and plug in the noid light. Crank the engine. A rhythmic flashing light indicates the ECM and wiring are likely okay. No flash or a steady light points to a wiring or ECM driver issue.
- Based on the high probability from TSB PIP5386A, the primary suspect is the wiring. Remove the upper intake manifold to access the fuel injectors.
- Carefully inspect the wiring harness for fuel injector #2. Pay close attention to the area where it passes over the thermostat housing/water outlet for signs of rubbing or chafing against the bolt boss.
- If damage is found, repair the wire per the TSB. Insulate the repair with heat shrink tubing, protect the harness with abrasion-resistant tape, and apply protective tape to the engine component that caused the rubbing.
- If no wiring damage is visible, test the injector. Unplug the connector and check the injector's resistance with a multimeter. It should be 1.2 - 1.8 ohms. An open (infinite) or shorted (zero) reading indicates a bad injector.
- Alternatively, swap the #2 fuel injector with one from another cylinder (e.g., #4). Clear the codes and run the engine. If the fault code changes to P0270 (Cylinder 4 Injector Circuit Low), the injector is faulty and must be replaced.
- If the wiring and injector are confirmed to be good, the final step would be to diagnose the ECM driver circuit, which typically requires a professional technician.
Parts You'll Likely Need
- Fuel Injector Wiring Repair Supplies — This is for the most common cause: a chafed wire. You will need wire, heat shrink butt connectors, and high-temperature abrasion-resistant tape (e.g., Tesa 51036).
Trusted brands: 3M, Tesa
OEM price range: $10-$25
Aftermarket price range: $5-$20 - Fuel Injector
(OEM #12638530 or 12634126 (Verify by VIN))— If the injector itself has failed internally, it will need to be replaced. Part numbers vary for the LFX/LGX engines, so confirming with the vehicle's VIN is critical. The number from Pass 1 (12669384) appears to be for the older LLT engine.
Trusted brands: ACDelco, Bosch
OEM price range: $120-$180
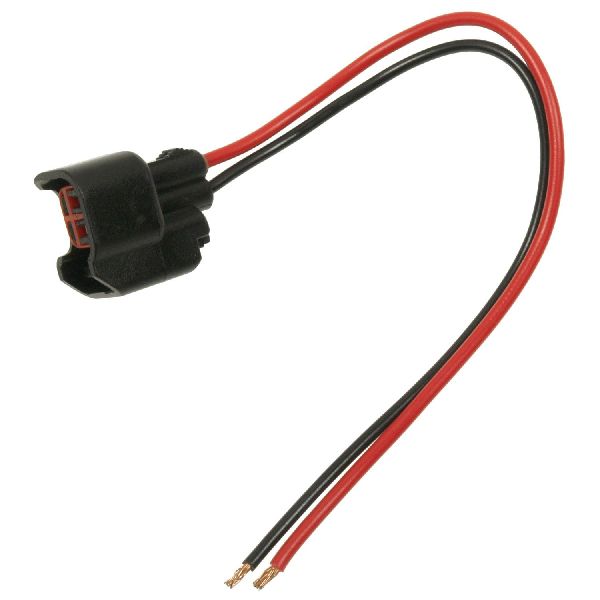
Aftermarket price range: $70-$120 - Fuel Injector Connector Pigtail
(OEM #ACDelco PT2160 (Example, verify fitment))— If the connector itself or the wires immediately attached to it are damaged, replacing the pigtail is the most reliable repair. Standard Motor Products (SMP) also offers compatible connectors.
Trusted brands: ACDelco, Dorman, Standard Motor Products (HP3945)
OEM price range: $30-$50
Aftermarket price range: $15-$30
Related Codes That Often Appear With This One
- P0302 — This code means 'Cylinder 2 Misfire Detected'. Since P0264 indicates a fuel delivery problem for cylinder 2, a misfire in that same cylinder is a direct and expected consequence.
- P0300 — This code means 'Random/Multiple Cylinder Misfire'. TSB PIP5386A explicitly mentions that P0264 can appear alongside P0300, as a severe misfire in one cylinder can affect overall engine balance.
- P0265 — This code means 'Cylinder 2 Injector Circuit High'. TSB PIP5386A also notes this code can appear with P0264, suggesting the damaged wire may be intermittently shorting to power or creating an open circuit, not just shorting to ground.
Technical Service Bulletins (TSBs) & Recalls
- PIP5386A: The most critical TSB. Communicates the exact diagnostic and repair steps for P0264/P0265 with P0300 on 2016 LGX engines due to wiring chafe at the water outlet.
- PIP4924D: A broader TSB covering various injector codes on earlier models, including the 2013 LFX, also pointing to wiring harness rub-through issues.
Platform-Specific Known Issues
- Injector #2 Wiring Chafe at Water Outlet: A known wiring harness routing issue causes the #2 fuel injector wires to chafe on the thermostat housing (water outlet) bolt boss, leading to a short circuit and triggering code P0264. This is documented in GM Technical Service Bulletin PIP5386A for the 2016 ATS and related vehicles.
Mechanic-Grade Diagnostic Values
- Fuel Injector Coil Resistance (LFX/LGX Engine) — expected: 1.2 - 1.8 Ohms. Failure: A reading near 0 Ohms (short), OL/infinity (open), or outside the specified range.
- Injector Pulse Width (at idle) — expected: 2 - 4 milliseconds (ms). Failure: A value of 0 ms on cylinder 2 while other cylinders are pulsing indicates the ECM is not commanding the injector or the signal is lost.
- Injector Circuit Voltage (Key On, Engine Off, at connector) — expected: Approx. 12V (Battery Voltage) on the power supply wire.. Failure: Low or no voltage suggests a problem with the power feed circuit or fuse, not the control side.
- Injector Circuit Continuity (ECM to Injector Connector) — expected: < 0.5 Ohms. Failure: A reading of OL (Open Line) indicates a break in the wire.
Scan Tool Commands That Help
- GM GDS2 / Professional Scan Tool: Injector Balance Test — This bidirectional test commands the ECM to fire each injector individually and measures the corresponding drop in fuel rail pressure. If the pressure drop for cylinder 2 is significantly different from the others (typically by more than 1.5-3 PSI), it confirms a functional problem with the injector itself (clogged/restricted) after the wiring has been confirmed good.
- GM GDS2 / Professional Scan Tool: Cylinder Power Balance / Injector Kill — This function helps confirm the misfire is on cylinder 2. By deactivating fuel to each cylinder one by one, the tool measures the RPM drop. If disabling cylinder 2 causes little or no change in RPM, it confirms that cylinder was not contributing power, which is the expected symptom of P0264.
Wiring & Ground Locations
- G104 — On the front of the right cylinder head (for 3.6L engine).. This is a primary engine ground. A poor connection here can cause a variety of sensor and actuator issues, including erratic behavior in injector circuits.
- G101 — Above the left headlight on the radiator support.. This ground point serves the Electronic Brake Control Module and is tied into the main engine harness grounds. While less direct, corrosion here can affect overall system voltage stability.
- Cylinder #2 Injector Wires — At the injector connector under the intake manifold. For a 2015 ATS, the wire colors are Green (GRN) and Green/Gray (GRN/GRY).. These are the specific wires to test for continuity and shorts. The Green/Gray wire is the control wire from the ECM, and the Green wire is the power feed. The chafe point described in TSB PIP5386A directly affects these wires.
- Engine Block Grounds — General locations include the back of the cylinder head and a point behind the passenger side engine mount bracket.. Multiple grounds are critical for the ECM and its sensor readings. A loose or corroded engine block ground can create a floating ground, causing unpredictable voltage drops in circuits like the fuel injectors.
OEM Part Supersession History
12632255→12638530— Standard part update/revision.
Heads up: Part 12638530 is specified for LFX engines up to around 2011 in many applications, but may not be correct for the 2013-2015 ATS LFX. It was later superseded by 12669384 for some models.12642128→12634126— Standard part update/revision.
Heads up: Part 12634126 is listed as fitting the 2013-2015 ATS with the LFX engine. It is critical to verify by VIN as this is a different part from the one used in earlier LFX applications.
Model Year Variations Within This Range
- 2013-2015 (LFX) vs. 2016 (LGX): The 2016 model year introduced the LGX V6, a significant redesign of the LFX. While they share displacement, the block, heads, timing system, and connecting rods are different. TSB PIP5386A specifically calls out the 2016 LGX engine for the wiring chafe issue, though the problem is known to exist on LFX models as well. The fuel injectors and their part numbers may differ between these two engines, making VIN verification for parts essential.
Helpful Videos
We Have This Part in Stock


The information in this article is provided for general reference and educational purposes only. Vehicle specifications, procedures, and part compatibility can vary by production date, trim level, and region. Always consult your vehicle's factory service manual and verify part numbers before purchasing or performing repairs. Safety-critical components such as airbags, seat belts, and braking systems should be installed by a qualified professional.
- Cadillac ATS:
- 🧭 Diagnostic Flowchart
- 🎬 Helpful Videos
- 🛍️ Shop This Part
- What's Unique About the 2013-2016 Cadillac ATS
- Symptoms You May Notice
- Most Likely Causes
- Rare But Worth Checking
- Diagnosis Steps
- Parts You'll Likely Need
- Related Codes That Often Appear With This One
- Technical Service Bulletins (TSBs) & Recalls
- Platform-Specific Known Issues
- Mechanic-Grade Diagnostic Values
- Scan Tool Commands That Help
- Wiring & Ground Locations
- OEM Part Supersession History
- Model Year Variations Within This Range
- 🎟️ Get 5% Off