
P0271 on 2009-2013 Chevrolet Malibu: Injector Circuit Fault Causes & Fixes
On a 2009-2013 Malibu, code P0271 is most often caused by a chafed or damaged fuel injector wiring harness, as noted in GM Technical Service Bulletin PIP4924C. Before replacing the injector, carefully inspect the harness for rub spots, especially near the intake, valve cover, and fuel lines. This is a well-documented pattern failure on many GM vehicles from this era.
- P0271 on a 2009-2013 Malibu means there's a high voltage fault in the cylinder 4 fuel injector circuit.
- The most likely cause is a chafed wiring harness, as documented in GM TSB PIP4924C.
- Always inspect the wiring harness for damage before replacing the fuel injector.
- Common symptoms are a steady Check Engine Light and a rough, misfiring engine.
- Driving with this code can damage your catalytic converter over time.
What's Unique About the 2009-2013 Chevrolet MALIBU
For this generation of Chevrolet Malibu, along with many other GM vehicles from the same era using similar engines, the primary cause of injector circuit codes like P0271 is well-documented. GM issued a specific Technical Service Bulletin (PIP4924C) pointing technicians directly to a problem with the fuel injector wiring harness rubbing through its insulation. This makes a wiring inspection the most critical first step, often revealing the problem without the need for expensive component replacement. The issue is so common that many owner forums and repair videos cite this TSB as the starting point for diagnosis.
Diagnostic Flowchart
Tap your situation to follow the diagnostic path that matches what you're seeing on this vehicle.
Generation note: The 2009-2013 year range covers the end of the seventh generation (2008-2012) and the beginning of the eighth generation (2013). The key issue, a chafing fuel injector wiring harness, is cited in TSB PIP4924C, which covers a wide range of GM models and years, including the 2009-2013 Malibu. This indicates the problem is related to engine and harness designs used across these years and platforms.
Symptoms You May Notice
- Check Engine Light is on
- Rough, shaky engine idle
- Noticeable loss of power and hesitation during acceleration
- Engine misfire, which may be felt as a consistent stumble
- Reduced fuel economy
- Strong fuel smell from the exhaust due to unburned fuel.
- In some cases, black smoke from the exhaust if the injector is stuck open.
- Replacing the fuel injector without first thoroughly inspecting the wiring harness. The TSB for this vehicle makes it clear that the harness is the most likely culprit.
- Replacing the PCM when the fault lies in the wiring or the injector itself. This is an expensive and unnecessary repair if the circuit is not fully tested first.
Most Likely Causes
- Chafed/Shorted Fuel Injector Wiring Harness 🔴 High Probability → Shop Engine Wiring Harness As documented in GM TSB PIP4924C, the engine harness is known to rub against various engine components, causing wires to short to each other or to ground. This is a known pattern failure on this platform and many related GM models. Engine vibration causes the harness to make contact with sharp edges on brackets, the cylinder head, and other components.
How to confirm: With the engine off, carefully inspect the entire fuel injector wiring harness. TSB PIP4924C specifically mentions chafe points against the intake plenum, at valve cover bolts, against fuel lines, and on the side of the cylinder head under the plenum. Owners and technicians also report finding broken wires inside the insulation near the injector connector itself, which may not be visually obvious without feeling for soft spots in the wire.
Typical fix: Repair the damaged section of wire using solder and heat shrink, or quality butt connectors. Insulate the repair thoroughly and re-route or protect the harness with convoluted tubing or abrasion-resistant tape to prevent future rubbing. 🎬 Watch: How to properly repair and protect damaged automotive wiring. In severe cases, the entire injector harness pigtail or the full engine harness may need replacement.
Est. part cost: $5-$20 for repair materials, $70-$150 for a replacement harness. - Faulty Fuel Injector 🟡 Medium Probability → Shop Fuel Injector Injectors can fail internally from heat, age, or contaminants. A "circuit high" fault is most often caused by an open circuit in the injector's internal coil.
How to confirm: If the wiring is confirmed to be good, test the injector. The easiest way is to swap the cylinder 4 injector with another cylinder (e.g., cylinder 3). Clear the codes and run the engine. If the code changes to P0268 (Cylinder 3 Injector Circuit High), the injector is faulty. You can also test the injector's internal resistance with a multimeter set to ohms. A typical high-impedance injector for this system should have a resistance of around 13.8-15.2 ohms at room temperature. An infinite reading (Open Line or 'OL') confirms a failed internal coil.
Typical fix: Replace the faulty fuel injector. It is often recommended to replace all fuel injectors as a set if they are high-mileage. When replacing, it's good practice to lubricate the new O-rings with clean engine oil. 🎬 See this walkthrough for replacing fuel injectors on GM 2.4L engines.
Est. part cost: $40-$90 for a single aftermarket injector, $100-$180 for OEM. - Faulty Powertrain Control Module (PCM) ⚪ Low Probability → Shop Engine Control Module (ECM)
How to confirm: This should be the last resort after confirming the wiring and injector are both good. A professional shop can perform advanced diagnostics, such as using a lab scope on the injector control wire at the PCM, to test the injector driver circuit within the module. Unnecessary PCM replacement is a common misdiagnosis for this issue.
Typical fix: The PCM must be replaced and programmed by a dealer or a qualified shop with the correct tools.
Est. part cost: $200-$600 for a remanufactured PCM plus programming fees.
Rare But Worth Checking
- Corroded or Bent Connector Pins: Always check the connector at the fuel injector and at the PCM. Moisture intrusion can cause corrosion, and improper handling can bend pins, leading to a poor connection that can mimic a circuit high fault. Applying dielectric grease during reassembly can help prevent future corrosion.
Diagnosis Steps
- Read the trouble codes with an OBD-II scanner and confirm P0271 is present. Note any other codes like P0304.
- Perform a detailed visual inspection of the fuel injector wiring harness as per TSB PIP4924C. Check for chafing against the intake manifold, valve cover bolts, fuel lines, and cylinder head. Pay extra attention to the harness loom where it bends near the injectors.
- If damage is found, repair the wire(s), insulate the area, and secure the harness away from the contact point using convoluted tubing and zip ties.
- If no wiring damage is visible, disconnect the connector at the cylinder 4 injector and inspect for corrosion or bent pins.
- If the connector is good, test the injector's resistance using a multimeter. Set it to Ohms (Ω) and touch the probes to the two pins on the injector. A good injector should read between 13.8-15.2 Ohms at room temperature. An open circuit (no reading or 'OL') confirms the injector is bad.
- As an alternative test, swap the cylinder 4 fuel injector with an adjacent one (e.g., cylinder 3).
- Clear the codes and start the engine. Let it run for a few minutes.
- Re-scan for codes. If the code has moved to the other cylinder (e.g., P0268 for cylinder 3), the injector is bad and needs to be replaced.
- If code P0271 returns after the swap, the problem is in the wiring between the injector and the PCM. You will need to perform a continuity test on both wires from the injector connector back to the PCM connector to find the open circuit or short.
- If the wiring and injector are confirmed to be 100% intact, the PCM is the likely failure point, though this is rare.
Parts You'll Likely Need
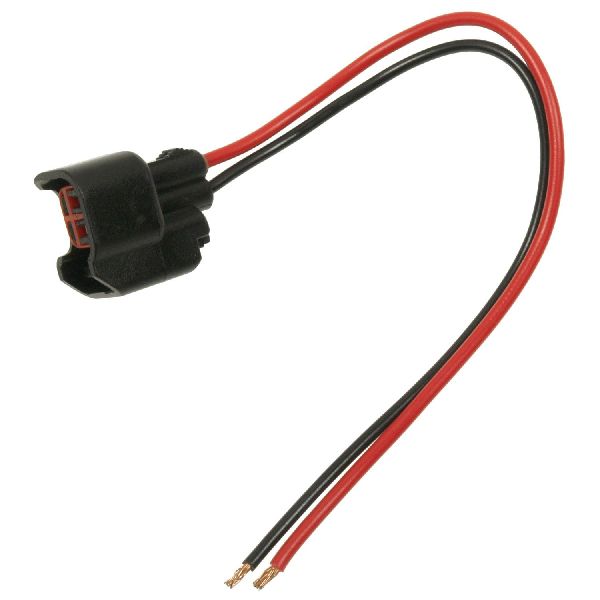
- Fuel Injector Wiring Harness Repair materials — This is the most common failure point according to GM TSB PIP4924C. Often only a small section of wire needs repair, not the whole harness.
Trusted brands: Wire, butt connectors, heat shrink tubing, Tesa tape
OEM price range: $10-$25
Aftermarket price range: $5-$20 - Fuel Injector
(OEM #12633784)— If the wiring harness is intact, the fuel injector itself is the next most likely component to have failed. Part number 12633784 is a common ACDelco injector for the 2.4L engine in this era, but always verify with VIN.
Trusted brands: ACDelco, Bosch, Delphi, Standard Motor Products
OEM price range: $100-$180
Aftermarket price range: $40-$90
Related Codes That Often Appear With This One
- P0304 — P0304 means 'Cylinder 4 Misfire Detected.' Since P0271 causes the PCM to shut down the cylinder 4 injector, that cylinder will not fire, logging a misfire code. 🎬 Watch: Understanding the causes and fixes for a P0304 misfire code.
- P0204 — P0204 is 'Cylinder 4 Injector Circuit Malfunction.' This is a more general code for the same circuit and may appear alongside the more specific 'Circuit High' fault.
- P0262, P0265, P0268 — If the wiring harness has chafed in a spot where multiple injector wires are bundled together, you may see circuit high/low codes for other cylinders simultaneously. This strongly points to a harness issue rather than multiple failed injectors.
Technical Service Bulletins (TSBs) & Recalls
- PIP4924C: SES Light And Misfire With Injector Codes - This is the primary document identifying the wiring harness chafe issue as the cause for P0271 on this vehicle. It lists numerous injector codes and applies to a wide range of GM models.
- PI0296: Malfunction Indicator Lamp (MIL) Illuminated, DTC P0201, P0300 and/or P0301 Set - While for a different cylinder,
Platform-Specific Known Issues
- GM Technical Service Bulletin PIP4924C specifically calls out the 2009-2013 Malibu for a series of injector codes, including P0271, caused by the fuel injector wiring harness rubbing through. Common chafe points are against the intake plenum, valve cover bolts, fuel lines, and the side of the cylinder head.
Mechanic-Grade Diagnostic Values
- Fuel Injector Coil Resistance — expected: 13.8 - 15.2 Ω (at 20°C/68°F). All injectors should be within 0.5 Ω of each other.. Failure: A reading of 'OL' (Open Line) or infinite resistance indicates a broken internal coil. A reading significantly lower than spec or inconsistent with other injectors indicates a problem.
- Injector Control Circuit Voltage (Lab Scope) — expected: A square waveform pattern that switches between battery voltage (approx. 12V+) and near 0V as the PCM grounds the circuit to fire the injector.. Failure: A flat line at or near battery voltage indicates the circuit is open or the PCM driver is not grounding the circuit.
- Fuel Injector Balance Test (Pressure Drop) — expected: The fuel pressure drop for each injector should be within 1.5-3 PSI (approx. 10-20 kPa) of the average pressure drop across all cylinders.. Failure: An injector with a pressure drop significantly different from the others is either clogged (low drop) or leaking (high drop).
Hidden / Shadow Codes Worth Checking
- Mode $06, OBDMID $A5: This is not a DTC, but a monitor ID within the OBD-II system's Mode $06 data that tracks raw misfire counts for Cylinder 4. (see via A professional scan tool capable of viewing Mode $06 data. You can observe the misfire counter for cylinder 4 to see if it's incrementing, even if it hasn't reached the threshold to set a P0304 misfire code. This can help confirm an intermittent issue on that cylinder.)
Scan Tool Commands That Help
- GDS2 / Tech 2: Fuel Injector Balance Test — Use this bidirectional test after verifying wiring integrity. The tool commands the fuel pump on, then individually fires each injector for a set duration, measuring the fuel pressure drop. It's the most effective way to identify a mechanically faulty or clogged injector without removing it from the engine.
- GDS2 / Tech 2: Injector Test (Actuator Test) — This function allows you to command a single injector to click on and off. It's a quick way to verify that the PCM is capable of controlling the injector and that the injector's coil is energizing (you can often hear or feel it click).
Wiring & Ground Locations
- ECM Location — For the 2008-2012 (7th gen) Malibu with the 2.4L engine, the Engine Control Module (ECM) is located on the right (passenger) side of the engine bay, near the firewall.. Knowing the ECM's location is essential for testing the injector control circuit directly at the source or inspecting the main harness connectors for issues.
- G106 / G107 / G110 — For the 2.4L engine, key engine grounds are located at the left rear (G106), lower left side (G107), and right rear (G110) of the engine.. The ECM and its injector drivers rely on solid engine grounds to function correctly. A poor ground at one of these locations can introduce electrical noise or voltage offsets, potentially causing a variety of issues, including injector circuit faults.
OEM Part Supersession History
12633784→No direct supersession found. This part number remains current.
Heads up: This part number is often listed as interchangeable with GM part numbers 12608362 and 12633789 for the same application. Always verify fitment with the vehicle's VIN before purchasing.
Model Year Variations Within This Range
- 2013: The 2013 model year was a transition. GM sold both the older 7th generation body style as the 'Malibu Classic' (primarily for fleets) and the new 8th generation model. Both could be equipped with a 2.4L engine, but they were different engine families (e.g., LE9/LUK vs LCA). Wiring harness routing and part numbers may differ between these two distinct 2013 models, so it is critical to identify which version of the car you are working on before ordering parts or tracing wires.
Helpful Videos
We Have This Part in Stock


The information in this article is provided for general reference and educational purposes only. Vehicle specifications, procedures, and part compatibility can vary by production date, trim level, and region. Always consult your vehicle's factory service manual and verify part numbers before purchasing or performing repairs. Safety-critical components such as airbags, seat belts, and braking systems should be installed by a qualified professional.
- Chevrolet MALIBU:
- 🧭 Diagnostic Flowchart
- 🎬 Helpful Videos
- 🛍️ Shop This Part
- What's Unique About the 2009-2013 Chevrolet MALIBU
- Symptoms You May Notice
- Most Likely Causes
- Rare But Worth Checking
- Diagnosis Steps
- Parts You'll Likely Need
- Related Codes That Often Appear With This One
- Technical Service Bulletins (TSBs) & Recalls
- Platform-Specific Known Issues
- Mechanic-Grade Diagnostic Values
- Hidden / Shadow Codes Worth Checking
- Scan Tool Commands That Help
- Wiring & Ground Locations
- OEM Part Supersession History
- Model Year Variations Within This Range
- 🎟️ Get 5% Off