
P0325 on 2010-2015 Chevrolet Camaro 3.6L: Knock Sensor Circuit Malfunction Causes and Fixes
P0325 on a Camaro with the 3.6L V6 engine typically points to a faulty Bank 1 (passenger side) knock sensor or its wiring. A very common cause is a damaged wiring harness, often pinched near the oil filter housing after an oil change. Before replacing the sensor, thoroughly inspect the wiring. A genuine ACDelco sensor costs around $30-$50.
- P0325 on your Camaro points to an issue with the Bank 1 (passenger side) knock sensor circuit.
- Before buying any parts, carefully inspect the sensor's wiring harness, especially around the oil filter housing, for damage. This is a very common cause of the code.
- If the wiring is intact, the knock sensor itself is the next most likely culprit.
- This is a DIY-friendly repair for those with basic tools, with the main challenge being access to the sensor on the side of the engine block.
- Do not ignore the code, as it can mask real engine-damaging detonation, leading to more expensive repairs down the road.
What's Unique About the 2010-2015 Chevrolet Camaro
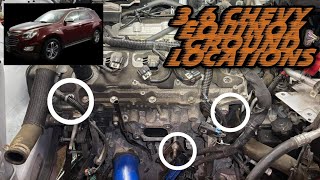
The 2010-2015 Camaro spans two V6 engines: the LLT (2010-2011) and the LFX (2012-2015). This guide focuses primarily on the LFX. On the 3.6L V6, the two knock sensors are located on the exterior sides of the engine block, making them more accessible than on many other engines where they are located under the intake manifold. Bank 1 is on the passenger side of the engine. A notorious issue for this platform is the wiring harness for the knock sensors being susceptible to damage, particularly being pinched or melted near the oil filter housing or exhaust components, which is a frequent trigger for this code.
Generation note: The 2010-2015 year range covers the fifth-generation Chevrolet Camaro. It's crucial to distinguish between the V6 engines. The 2010-2011 models used the 3.6L LLT engine, while the 2012-2015 models came with the updated 3.6L LFX engine. While the P0325 code applies to both, the LFX features a composite intake manifold and integrated exhaust manifolds, and some part numbers may differ. The core issue of wiring damage and sensor location is similar for both engines.
Symptoms You May Notice
- Check Engine Light is on
- Reduced engine power and acceleration
- Engine may hesitate during acceleration
- Decreased fuel economy
- Audible engine pinging or knocking (in some cases, though often the code indicates a circuit fault, not actual knock)
- Replacing the knock sensor without first thoroughly inspecting the wiring harness. Many owners replace the sensor only to find the code returns because the actual problem was a damaged wire.
- Confusing Bank 1 and Bank 2. On the GM 3.6L V6, Bank 1 (for P0325) is the passenger side, where cylinder #1 is located. A forum user spent weeks diagnosing the driver's side (Bank 2) before realizing they were working on the wrong side of the engine.
Most Likely Causes
- Damaged Knock Sensor Wiring or Connector 🔴 High Probability → Shop Ignition Knock (Detonation) Sensor The wiring harness, especially for Bank 1 (passenger side), is routed in a way that makes it vulnerable. It can be pinched near the oil filter housing during an oil change, or become brittle and crack from heat exposure near the exhaust manifold, causing a short or open in the circuit. Multiple forum threads confirm this is the most common culprit.
How to confirm: Visually inspect the entire length of the wiring harness leading to the Bank 1 knock sensor for any signs of pinching, melting, chafing, or corrosion. Pay extremely close attention to the area around the oil filter housing and near exhaust components. Use a multimeter to check for continuity and for shorts to ground between the sensor connector and the ECM connector.
Typical fix: Repair the damaged section of wire by soldering and using heat-shrink tubing. Using butt connectors is discouraged as they can introduce resistance and cause the code to return. If the damage is near the connector, replace the pigtail.
Est. part cost: $15-$35 - Faulty Bank 1 Knock Sensor 🟡 Medium Probability → Shop Ignition Knock (Detonation) Sensor The sensor's internal piezoelectric crystal can fail due to constant engine vibration and extreme heat cycles. A Camaro5 forum user ultimately solved their P0325 issue by replacing the sensor after confirming the wiring was good, noting that GM engines can be sensitive to aftermarket sensors.
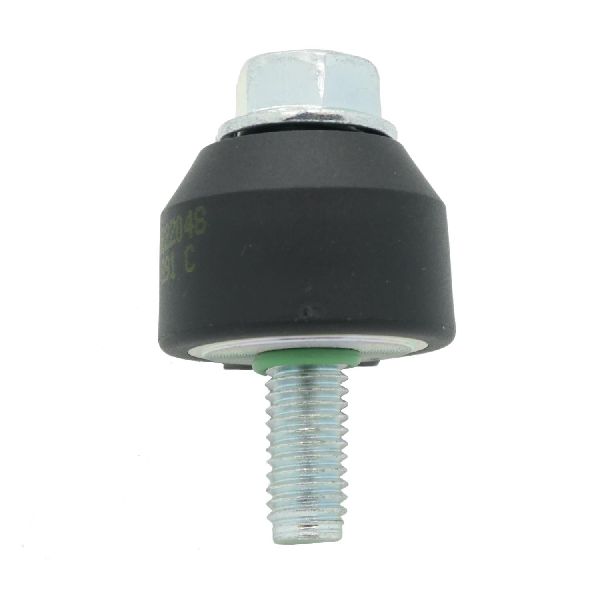
How to confirm: After confirming the wiring is good, test the sensor. Disconnect it and measure its internal resistance with a multimeter. A common specification for these sensors is around 93-110 kOhms. An open or out-of-spec reading indicates a faulty sensor. Also, ensure the sensor is torqued correctly (typically 18 lb-ft for the LFX); improper torque can cause false readings.
Typical fix: Replace the Bank 1 knock sensor. It is highly recommended to use a genuine ACDelco part and to torque it to the manufacturer's specification.
Est. part cost: $30-$60
Rare But Worth Checking
- Faulty Engine Control Module (ECM): → Shop Engine Control Module (ECM) This is very rare. Before condemning the ECM, all other possibilities must be exhaustively ruled out. One forum user considered this as a last resort after replacing the sensor and harness multiple times, though the final solution was found to be a simple location mix-up. GM has issued TSBs for other models (like 19-NA-032) related to software anomalies causing knock sensor codes, which involves an ECM reprogram.
- Internal Engine Problems or External Noise: If the sensor and circuit are functioning correctly, the code could be triggered by actual, excessive engine noise. This could be from severe carbon buildup causing pre-ignition, or even other failing components (like a water pump on some GM engines) creating vibrations that the sensor misinterprets as knock. This would likely be accompanied by other symptoms and codes.
Diagnosis Steps
- Read the trouble codes with an OBD-II scanner to confirm P0325 is present. Note any other codes.
- Confirm the correct bank. Bank 1 on the 3.6L V6 is the passenger side of the engine.
- Locate the Bank 1 knock sensor on the side of the engine block. It may be partially obscured by heat shields or other components.
- Perform a thorough visual inspection of the knock sensor wiring harness. Trace it from the sensor back as far as possible. Pay extremely close attention to the area around the oil filter housing and near the exhaust manifold for signs of pinching, melting, or chafing.
- If wiring appears damaged, repair it by soldering and using heat-shrink tubing. If the connector is damaged, replace the pigtail. Clear the codes and test drive.
- If the wiring is intact, disconnect the sensor and check for moisture or corrosion in the connector. Clean with electrical contact cleaner and apply dielectric grease.
- Test the sensor's resistance with a multimeter set to kilo-ohms. The reading should be within the manufacturer's specification (typically 93-110 kOhms for these GM sensors). An open circuit (infinite resistance) or a reading far out of spec means the sensor is bad.
- If the sensor tests good, check the wiring circuit integrity back to the ECM. This involves checking for continuity on the signal wire and ensuring it's not shorted to power or ground.
- If the wiring is good but the sensor fails the resistance test, replace the Bank 1 knock sensor. Use a quality OEM part (ACDelco is recommended) and tighten it to the specified torque (e.g., 18 lb-ft).
- If the code persists after replacing the sensor and verifying the wiring, the issue may lie with the ECM, which is a rare but possible cause. Check for any applicable TSBs related to ECM software updates.
Parts You'll Likely Need
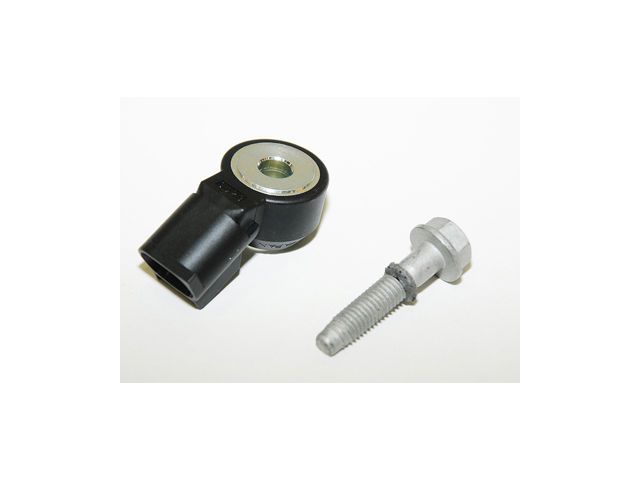
- Knock Sensor (Bank 1)
(OEM #ACDelco 213-4674 (GM 12643623) or ACDelco 12729597)— This is the primary component that fails or is identified by the code. GM parts are recommended as some vehicles are sensitive to aftermarket sensor tolerances. Part number 12729597 is listed for many LFX applications.
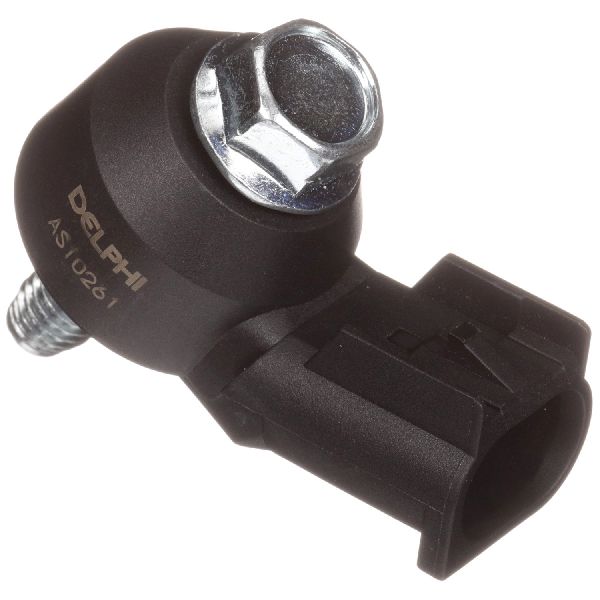
Trusted brands: ACDelco, Delphi, NTK
OEM price range: $30-$50
Aftermarket price range: $20-$40 - Knock Sensor Wiring Pigtail
(OEM #e.g., ACDelco PT2652)— The wiring is a very common point of failure, often getting damaged during other services. Replacing the pigtail is often necessary to fix a circuit fault when the damage is at the connector.
Trusted brands: ACDelco, Dorman
OEM price range: $25-$40
Aftermarket price range: $15-$25
Related Codes That Often Appear With This One
- P0330 — This is the equivalent code for the Bank 2 (driver's side) knock sensor. It's common to see wiring issues or sensor failures occur on both banks around the same time. One forum user experienced a frustrating journey with both codes appearing at different times during diagnosis.
- P0300 — A random/multiple misfire code. This can appear alongside P0325 if the knock sensor issue is causing the ECM to apply incorrect timing adjustments, or if a separate issue is causing both misfires and knock.
Technical Service Bulletins (TSBs) & Recalls
- TSB 19-NA-032: While for a different GM vehicle, this TSB shows a precedent for knock sensor codes (P0325/P0330) being caused by a software anomaly requiring an ECM reprogram, indicating it's a potential, though rare, cause.
- TSB PIP5529B: Pertains to many GM engines including the LFX, noting that loose intake manifold bolts can trigger a variety of codes, including knock sensor performance codes. While P0325 is a circuit code, it's a related known issue for the engine family.
Platform-Specific Known Issues
- A known issue on GM 3.6L engines is the knock sensor wiring getting pinched or damaged by the oil filter housing cap during an oil change, leading to a short or open circuit and triggering codes P0325 or P0330.
- A user on Camaro5 forums detailed a frustrating multi-week diagnostic process involving both P0325 and P0330, which was ultimately resolved by discovering they were diagnosing the wrong side of the engine. Bank 1 is the passenger side.
Mechanic-Grade Diagnostic Values
- Knock Sensor Internal Resistance — expected: 93k - 110k Ohms. Failure: An open circuit (infinite resistance) or a reading significantly outside this range.
- Knock Sensor Mounting Bolt Torque — expected: 18 lb-ft (25 Nm) for LFX/LGX engines.. Failure: Over or under-tightening the bolt can alter the sensor's sensitivity, leading to false signals or a failure to detect real knock.
- Knock Sensor Signal Voltage (AC) — expected: A small AC voltage should be generated when tapping the engine block near the sensor with the key on, engine off.. Failure: A reading of 0V or extremely low voltage (e.g., 0.01V) when simulating knock suggests a dead sensor or an open circuit.
Scan Tool Commands That Help
- GDS2/Tech2: DTC Status — Used to confirm the P0325 code is active or stored in history. This is the first step in any professional diagnosis to understand the fault's current state.
- GDS2/Tech2: Knock Retard Live Data — While P0325 is a circuit code, observing the knock retard data can provide context. If the value for Bank 1 is frozen at 0 degrees while the code is active, it further confirms the ECM is receiving no signal. If you see erratic high values, it might point to an intermittent short or external noise.
Wiring & Ground Locations
- G104 — At the front of the engine for the 3.6L V6 LFX.. This is a primary engine ground. A poor connection here due to corrosion or looseness can introduce electrical noise or cause voltage drops in sensor circuits, potentially leading to false sensor codes like P0325. A GM service bulletin for other electrical issues on this platform specifically calls out inspecting this ground.
- Engine Block Grounds (General) — The LFX engine typically has three smaller ground connections on the engine itself, plus the main battery ground. Locations can include the back of the cylinder heads and the front of the block.. The knock sensor circuit relies on a clean ground path. Any of these engine-to-chassis grounds being compromised can affect the sensor's reference and lead to circuit malfunction codes.
- ECM Connector — The Engine Control Module (ECM) is located in the engine bay. The knock sensor wires run from the engine block directly to specific pins on the ECM's main connector.. This is the termination point for the circuit. Verifying continuity and checking for shorts must be done between the sensor connector and the corresponding pins at the ECM connector to fully test the wiring harness.
Real Owner Repair Stories
- Camaro5 Forums user 'Babybyler15' (2013 Camaro 3.6L V6 Manual) — Initial codes P0330 (Bank 2) and P06B7. After shop repair, code P0325 (Bank 1) appeared.
❌ Tried (didn't work) A shop replaced both knock sensors., The shop found and repaired a frayed wire on the Bank 1 harness, but the Bank 2 code was the one present., User re-spliced switched wires on the Bank 2 harness, which made P0325 go away but brought back P0330., Replacing the wiring harness fixed P0330, but P0325 returned., Replacing the Bank 1 knock sensor again did not solve the P0325.
✅ What actually fixed it The user discovered they had been confusing Bank 1 (passenger side) and Bank 2 (driver side) the entire time. The final fix was correctly identifying and working on the passenger side sensor and wiring for the P0325 code. The story emphasizes the critical importance of correctly identifying the banks before starting work.
Documented NHTSA Reports
- An owner of a similar GM vehicle reported in NHTSA ODI #11384952 that the engine would retard itself and throw a P0325 code even after the knock sensor was replaced twice and the wiring was checked, suggesting persistent circuit issues.
- In NHTSA ODI #11680315, a driver noted that the MIL illuminated with code P0325 for a knock sensor fault, which was accompanied by a slight metallic rattle sound.
- Sluggish performance causing a safety risk when entering traffic was reported in NHTSA ODI #11669525 after multiple occurrences of the P0325 knock sensor code.
- NHTSA ODI #11469699 describes a check engine light with code P0325 appearing after a loss of power at highway speeds, noting that improper detonation regulation is a dangerous condition.
- A complex case involving multiple codes including P0325, P0700, and P1101 was documented in NHTSA ODI #11721239, where the vehicle eventually stopped moving forward while driving up an incline.
OEM Part Supersession History
12636736, 12605738→12729597— Standard part evolution for improved reliability, material changes, or manufacturing process updates.
Heads up: Part number 12729597 is listed as the replacement for several older knock sensor numbers and is widely used across many GM engines, including the LFX family. No major incompatibilities are noted, but it's always best to verify fitment with the vehicle's VIN.
Model Year Variations Within This Range
- 2010-2011 (LLT) vs 2012-2015 (LFX): The 2012-2015 LFX engine is a significant update to the 2010-2011 LLT. The LFX features integrated exhaust manifolds within the cylinder heads and a lighter composite intake manifold. While the function and location of the knock sensors on the sides of the block remain the same, some surrounding components and access points may differ slightly. Part numbers for the sensors themselves are generally shared, but it's crucial to verify for the specific year.
Diagnostic Flowchart
Other Known Issues on This Vehicle
Issues unrelated to this code that are worth knowing about as an owner of this generation:
- Premature Timing Chain Stretch 🔴 High — More common on the 2010-2011 LLT engine, but still a concern for early LFX models. Often appears between 70,000 and 120,000 miles. The original Oil Life Monitor (OLM) allowed for long intervals, contributing to wear. (Ref: TSB 12-06-01-009D/F)
- Intake Valve Carbon Buildup 🟠 Medium — An inherent issue for all direct-injection engines (LLT & LFX). Typically becomes problematic after 60,000-100,000 miles, causing rough idle, hesitation, and misfires. Many owners install catch cans to mitigate this. (Ref: TSB PIP5029E)
- Torque Converter Shudder 🟠 Medium — Common on 2012-2015 LFX models with the 6L50 automatic transmission. Causes a vibration or shudder, often felt at low speeds (40-50 mph) under light load. (Ref: TSB PI0700A)
- Failed Catalytic Converters 🟠 Medium — Can fail prematurely, sometimes due to other engine issues like misfires. This is an expensive repair if outside of the federally mandated emissions warranty. The federal emissions warranty covers catalytic converters for 8 years or 80,000 miles.
Used vs. New Parts: Buying Guide for This Vehicle
When a used part is the smart pick: A used wiring harness pigtail from a junkyard is a viable option if you need a factory-style connector and a length of wire to splice, especially if the damage to your original harness is extensive. It's often cheaper than a new pigtail.
Donor-vehicle mileage cap: roughly under 100000 miles for the part to have meaningful remaining life.
What to inspect on the donor part:
- For a wiring pigtail, inspect for any brittleness, cracking, or melting of the plastic connector and wire insulation.
- Ensure the connector's locking tab is intact and clicks securely.
- Check the wire colors to ensure they match your vehicle's harness.
- Avoid parts from vehicles with obvious signs of engine fire or heavy front-end collision damage.
OEM-only on this vehicle (don't cheap out):
- Knock Sensor
Aftermarket brands forum-validated for this vehicle:
- Delphi
- NTK/NGK
Brands owners have reported issues with on this vehicle:
- Unbranded, 'white-box' sensors from online marketplaces are frequently cited as unreliable and a common cause of recurring codes.
Real Owner Stories
Aggregated from forums and TSBs cited above. Mileages and costs reflect what owners reported in those sources.
2010-2015 Chevrolet Camaro 3.6L LFX V6
Symptoms: The owner battled both P0325 and P0330 codes for multiple weeks during a frustrating diagnostic process.
What fixed it: The issue was resolved after the owner realized they were diagnosing the wrong side of the engine; Bank 1 is the passenger side. They also emphasized soldering wire repairs rather than using butt connectors.
Source hint: Camaro5.com / KNOCK SENSOR CODES PLEASE HELP (2021)
2016+ Chevrolet Camaro 3.6L
Symptoms: The P0325 code appeared immediately after the installation of a 'Mighty Mouse Wild' aftermarket part.
What fixed it: The discussion confirmed P0325 is an electrical circuit code, pointing to a bad connection or damaged wire caused during the install rather than actual engine knock.
Source hint: Camaro6.com / P0325 after Mighty Mouse Wild install (2018)
Related OBD-II Codes
Frequently Asked Questions
Which side of the 3.6L LFX engine is Bank 1 for the P0325 code?
Can an oil change cause a P0325 code on my Camaro?
Does TSB 19-NA-032 apply to the P0325 code on GM vehicles?
Should I use aftermarket sensors to fix this code?
What is the correct torque specification for the knock sensor on the LFX engine?
Could my intake manifold bolts be causing knock sensor codes?
Helpful Videos
We Have This Part in Stock


The information in this article is provided for general reference and educational purposes only. Vehicle specifications, procedures, and part compatibility can vary by production date, trim level, and region. Always consult your vehicle's factory service manual and verify part numbers before purchasing or performing repairs. Safety-critical components such as airbags, seat belts, and braking systems should be installed by a qualified professional.
- Chevrolet Camaro:
- 🧭 Diagnostic Flowchart
- 🎬 Helpful Videos
- 🛍️ Shop This Part
- What's Unique About the 2010-2015 Chevrolet Camaro
- Symptoms You May Notice
- Most Likely Causes
- Rare But Worth Checking
- Diagnosis Steps
- Parts You'll Likely Need
- Related Codes That Often Appear With This One
- Technical Service Bulletins (TSBs) & Recalls
- Platform-Specific Known Issues
- Mechanic-Grade Diagnostic Values
- Scan Tool Commands That Help
- Wiring & Ground Locations
- Real Owner Repair Stories
- Documented NHTSA Reports
- OEM Part Supersession History
- Model Year Variations Within This Range
- Other Known Issues on This Vehicle
- Used vs. New Parts: Buying Guide for This Vehicle
- Real Owner Stories
- 2010-2015 Chevrolet Camaro 3.6L LFX V6
- 2016+ Chevrolet Camaro 3.6L
- Related OBD-II Codes
- Frequently Asked Questions
- 🎟️ Get 5% Off