
P0325 on 2004-2012 Chevrolet Colorado: Knock Sensor Circuit Malfunction Causes and Fixes
P0325 on a 2004-2012 Colorado indicates a fault in the knock sensor circuit. The most common fix is replacing the knock sensor itself, which is located on the driver's side of the engine block. This is a manageable DIY repair, with a new sensor costing between $40 and $100. The correct torque for the sensor bolt is a critical 18 lb-ft.
- P0325 on a 2004-2012 Colorado almost always points to a bad knock sensor or its wiring.
- The sensor is located on the driver's side of the engine block and is relatively easy to access, making this a good DIY project.
- Always inspect the wiring and connector for damage before replacing the sensor.
- Use a quality replacement sensor (OEM like ACDelco or a reputable aftermarket brand) and torque it to the correct specification of 18 lb-ft to prevent the code from returning.
What's Unique About the 2004-2012 Chevrolet Colorado
The first-generation Chevrolet Colorado (and its platform mates, the GMC Canyon and Hummer H3) primarily uses the Atlas family of inline engines (I4 and I5). Unlike V-type engines where knock sensors are often buried under the intake manifold, the single sensor on these trucks is located on the driver's side of the engine block. This makes access significantly easier, turning a potentially complex job into one that can be done by a DIY mechanic, often just by removing the driver's side front wheel for access.
Symptoms You May Notice
- Check Engine Light is on
- Reduced engine power and sluggish acceleration
- Decreased fuel economy
- Engine pinging or knocking noise (in some cases)
- Replacing spark plugs or ignition coils without diagnosis. While these can cause performance issues, they won't directly set a P0325 circuit code. A circuit code points specifically to the sensor or its wiring.
Most Likely Causes
- Faulty Knock Sensor 🔴 High Probability → Shop Ignition Knock (Detonation) Sensor The sensor is exposed to constant heat cycles and engine vibrations, leading to eventual failure over time. Its location on the side of the block also exposes it to road spray and debris, which can contribute to its demise. This is the most common reason for the P0325 code.
How to confirm: After checking the wiring, the sensor itself is the most likely culprit. You can test it with a multimeter for resistance (compare against factory specs) or for AC voltage output while lightly tapping the engine block near the sensor. A resistance reading between 93 and 100 kOhms is often cited as the expected range for a good sensor.
Typical fix: Replace the knock sensor. Ensure the mounting surface on the engine block is clean and torque the new sensor to the manufacturer's specification of 18 lb-ft (25 Nm) to ensure it functions correctly. Over or under-torquing can lead to improper readings and a recurring code.
Est. part cost: $40-$100 - Damaged Wiring or Connector 🟡 Medium Probability The wiring and plastic connector can become brittle from heat and age, leading to cracks, corrosion, or loose connections. The harness is somewhat exposed behind the front wheel, making it susceptible to damage from road debris or moisture. Rodent damage is also a possibility.
How to confirm: Visually inspect the entire length of the wiring harness from the sensor to the main loom. Check the connector for cracks, corrosion on the pins, or a loose fit. Tug gently on the wires to ensure they are secure in the connector. Use a multimeter to check for continuity between the sensor connector and the PCM.
Typical fix: If the connector is damaged, replace it with a new pigtail connector. If the wire is damaged, repair the section of wire with a solder and heat shrink for a durable connection.
Est. part cost: $15-$30
Rare But Worth Checking
- Powertrain Control Module (PCM) Issue: → Shop Engine Control Module (ECM) This is extremely rare. The PCM should only be considered as a cause after all other possibilities, including the sensor and wiring, have been exhaustively tested and ruled out.
Diagnosis Steps
- Read the code with an OBD-II scanner to confirm P0325 and check for any other pending or active codes.
- Visually inspect the knock sensor, which is located on the driver's side of the engine block, just above the oil pan rail. Access is best achieved by removing the driver's side front wheel and the plastic wheel well liner.
- Carefully examine the sensor's electrical connector and wiring for any signs of damage, corrosion, melting, or loose connections.
- If the wiring appears intact, the next step is to test the sensor. Disconnect the sensor and use a multimeter to check its internal resistance. Compare this reading to the specifications in a service manual (often 93-100 kOhms).
- Alternatively, with the sensor connected, you can back-probe the signal wire and set the multimeter to AC volts. Lightly tap the engine block near the sensor with a wrench. You should see a small AC voltage reading, indicating the sensor is detecting the vibrations.
- If the wiring is good and the sensor fails testing, replace the knock sensor.
- If the sensor tests good, perform a continuity test on the wiring between the sensor connector and the PCM connector to rule out an open or short in the harness.
- After repairs, clear the code and perform a test drive to ensure the Check Engine Light does not return.
Parts You'll Likely Need
- Knock Sensor
(OEM #12623730 (supersedes 12570125))— This is the most frequent point of failure for the P0325 code due to constant exposure to engine heat and vibration.
Trusted brands: ACDelco, Delphi, NGK/NTK
OEM price range: $70-$110
Aftermarket price range: $40-$80 - Knock Sensor Connector Pigtail — The plastic connector can become brittle and fail, causing a poor connection. Replacing the pigtail is often necessary if the lock tab breaks or pins are corroded. Dorman 645-207 is a commonly available 2-wire pigtail of this style, though it is marketed for Ford applications.
Trusted brands: ACDelco, Dorman
OEM price range: $25-$40
Aftermarket price range: $15-$30
Related Codes That Often Appear With This One
- P0327 — P0327 indicates 'Knock Sensor 1 Circuit Low Input.' Both P0325 and P0327 point to a problem in the same circuit, often with the same root causes like a failed sensor or bad wiring.
Platform-Specific Known Issues
- Vulnerability to Debris and Moisture: Due to the sensor's location on the lower driver's side of the engine block, it is somewhat exposed to road spray, mud, and debris kicked up by the front tire. Over time, this can lead to corrosion of the connector pins or physical damage to the sensor or its wiring, contributing to the P0325 code.
Mechanic-Grade Diagnostic Values
- Knock Sensor Internal Resistance — expected: 93k Ohms to 107k Ohms. Failure: A reading that is open (infinite resistance) or significantly outside the specified range indicates a failed sensor.
- Knock Sensor Signal (Tapping Test) — expected: A small, fluctuating AC voltage signal should be generated.. Failure: No AC voltage when tapping the block near the sensor suggests the sensor's piezoelectric element is dead.
- Harness Connector Reference Voltage — expected: ~5 Volts DC. Failure: No voltage with the key on, engine off, indicates a problem in the wiring or the PCM, not the sensor itself.
Wiring & Ground Locations
- Knock Sensor 1 Signal at PCM — On many common GM truck PCMs of this era, this is Pin 51 (Dark Blue wire) on the C1 (Blue) connector.. This is the terminal at the PCM where the signal from the knock sensor arrives. It's the final destination for testing wire continuity from the sensor connector.
- G103 — Lower left side of the engine block.. This is a primary engine block ground. A loose or corroded connection at G103 can create electrical noise or an unstable ground reference for sensors, potentially causing false or intermittent circuit codes like P0325.
Real Owner Repair Stories
- Reddit user Character-Food-3732 in r/chevycolorado (2005 Chevrolet Colorado with I5 engine) — Persistent P0325 code, bad MPG, and lack of power.
❌ Tried (didn't work) Replaced the knock sensor twice with no change.
✅ What actually fixed it The root cause was suspected to be an ECU and BCM swapped from a 2004 model into the 2005 truck following flood damage. The user noted that some 2004 models may have used two knock sensors, while their 2005 only had one. The mismatched ECU was likely looking for a second sensor that didn't exist, causing the persistent code. The fix would require obtaining the correct model-year ECU/BCM or having the current one reprogrammed. - NHTSA ODI #11384952 — An owner of a similar GM vehicle reported that the engine retards itself and throws a P0325 code; despite the wiring being checked and the knock sensor being replaced twice, the issue persisted.
- NHTSA ODI #11680315 — A driver noted that the MIL illuminated with a P0325 fault accompanied by a slight metallic rattle sound that would occasionally disappear after restarting the vehicle.
Documented NHTSA Reports
- NHTSA ODI #11669525 — Multiple occurrences of sluggish performance were reported, creating a safety risk when entering traffic due to the P0325 knock sensor fault.
- NHTSA ODI #11469699 — An owner experienced a loss of speed followed by a P0325 code, noting that improper detonation regulation is dangerous.
- NHTSA ODI #11721239 — A report describes a vehicle that stopped moving forward and started reversing while driving up an incline, with P0325 appearing alongside several transmission and engine codes.
OEM Part Supersession History
12570125→12623730— Standard part revision and consolidation by GM.
Heads up: These parts are directly interchangeable. The ACDelco equivalent for 12623730 is often 213-1576.12623730→12739206— Further part revision by GM.
Heads up: This is a newer supersession noted by some GM parts dealers. Be aware of similarly numbered parts like ACDelco 213-3521; this part is for different GM engines (like older Vortec V8s) and has a completely different resistance (~100 ohms vs ~100k ohms), and will not work.
Model Year Variations Within This Range
- 2004-2006 vs 2007-2012: The primary engines changed from the 2.8L I4 / 3.5L I5 to the 2.9L I4 / 3.7L I5 in 2007. However, for the P0325 code, the diagnosis remains largely the same as they all use a single, side-mounted knock sensor. The main variation to be aware of is potential ECU differences between years, as an ECU from a 2004 model might have different sensor expectations than a 2005+ model.
Diagnostic Flowchart
Other Known Issues on This Vehicle
Issues unrelated to this code that are worth knowing about as an owner of this generation:
- Passlock Anti-Theft System Failure 🔴 High — Very common across all years. Causes a 'crank, no-start' condition where the engine turns over but won't fire. The security light will typically flash. Often requires a 10-minute relearn procedure to start the vehicle.
- Cylinder Head / Valve Seat Wear (3.5L I5) 🔴 High — A well-documented problem, particularly on earlier 3.5L engines, where premature valve seat wear leads to a loss of compression, causing rough running and persistent misfire codes (P0300, P0301, etc.). The typical fix is a cylinder head replacement. (Ref: While no specific recall, this is a widely known issue discussed in dealer service departments.)
- Failed Fan Clutch 🟠 Medium — The mechanical fan clutch is prone to failure, either by seizing (causing a loud, constant roaring noise) or by not engaging (causing the engine to overheat in low-speed traffic).
- Faulty Blower Motor Resistor 🟡 Low — A very common failure causing the HVAC fan to only work on certain speeds (often only the highest setting) or not at all. It's a relatively easy and inexpensive part to replace.
- Inaccurate Fuel Level Sensor 🟠 Medium — The sensor inside the fuel tank can fail, causing the fuel gauge to read incorrectly, often showing more fuel (e.g., 1/4 tank) than is actually present, leading to unexpected stalling.
- EVAP Vent Valve Failure 🟡 Low — The EVAP canister vent valve, located near the spare tire, can get stuck open due to dust and debris, triggering an EVAP-related check engine light. It typically does not cause any drivability issues.
Used vs. New Parts: Buying Guide for This Vehicle
When a used part is the smart pick: For this specific repair, using a used knock sensor is NOT recommended. It is a sensitive piezoelectric sensor that degrades with heat cycles and vibration. The cost of a new, high-quality sensor is low enough that the labor to potentially replace a faulty used part makes it a poor economic choice.
What to inspect on the donor part:
- Not applicable as used parts are not recommended.
OEM-only on this vehicle (don't cheap out):
- While not strictly 'OEM-only', it is highly advised to use either the genuine GM/ACDelco part or a top-tier OE supplier like Delphi. The sensor's sensitivity and the computer's reliance on its specific output make it a poor candidate for budget aftermarket brands.
Aftermarket brands forum-validated for this vehicle:
- ACDelco (Original Equipment)
- Delphi
- NGK/NTK
Brands owners have reported issues with on this vehicle:
- Unnamed, low-cost 'white-box' brands from online marketplaces are frequently reported on forums to fail quickly or be dead-on-arrival, causing the code to return immediately.
Real Owner Stories
Aggregated from forums and TSBs cited above. Mileages and costs reflect what owners reported in those sources.
2005 Chevrolet Colorado
Symptoms: Check Engine Light with code P0325.
What fixed it: Replaced the knock sensor and ensured it was torqued to the critical specification for proper function.
Source hint: A thread on 355nation.net titled 'P0325 Knock Sensor'
Related OBD-II Codes
Frequently Asked Questions
Where is the knock sensor located on my 2004-2012 Chevrolet Colorado?
What is the correct torque specification for the knock sensor on the Atlas engine?
What resistance reading should I see when testing the knock sensor with a multimeter?
Are there specific brands of knock sensors recommended for the Colorado?
Why is the knock sensor on my Colorado prone to wiring damage?
Can I use a used knock sensor from a salvage yard to fix P0325?
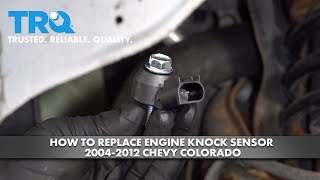
Helpful Videos
We Have This Part in Stock


The information in this article is provided for general reference and educational purposes only. Vehicle specifications, procedures, and part compatibility can vary by production date, trim level, and region. Always consult your vehicle's factory service manual and verify part numbers before purchasing or performing repairs. Safety-critical components such as airbags, seat belts, and braking systems should be installed by a qualified professional.
- Chevrolet Colorado:
- 🧭 Diagnostic Flowchart
- 🎬 Helpful Videos
- 🛍️ Shop This Part
- What's Unique About the 2004-2012 Chevrolet Colorado
- Symptoms You May Notice
- Most Likely Causes
- Rare But Worth Checking
- Diagnosis Steps
- Parts You'll Likely Need
- Related Codes That Often Appear With This One
- Platform-Specific Known Issues
- Mechanic-Grade Diagnostic Values
- Wiring & Ground Locations
- Real Owner Repair Stories
- Documented NHTSA Reports
- OEM Part Supersession History
- Model Year Variations Within This Range
- Other Known Issues on This Vehicle
- Used vs. New Parts: Buying Guide for This Vehicle
- Real Owner Stories
- 2005 Chevrolet Colorado
- Related OBD-II Codes
- Frequently Asked Questions
- 🎟️ Get 5% Off