
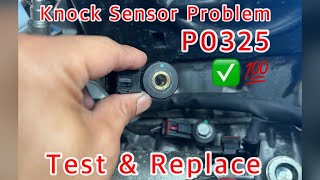
P0325 on 2011-2016 Chevrolet Cruze 1.8L: Knock Sensor Circuit Causes and Fixes
On a 2011-2016 Cruze with the 1.8L engine, code P0325 is most often a failed knock sensor. The part is inexpensive, but replacement is difficult due to its location on the back of the engine block, behind the intake manifold. Always use a high-quality OEM (ACDelco) sensor and torque it correctly to 15 lb-ft to avoid repeat failure.
- P0325 on the 1.8L Cruze points to an electrical fault in the knock sensor circuit, not necessarily active engine knock.
- The most likely cause is a failed knock sensor, but always inspect the wiring first.
- The sensor is extremely difficult to access; budget significant time for the repair or consider a professional.
- Using an OEM ACDelco sensor (part #213-3827) and torquing it to exactly 15 lb-ft is critical for a successful repair.
What's Unique About the 2011-2016 Chevrolet Cruze
The 1.8L engine in the first-generation Cruze has a single, straightforward knock sensor. The primary challenge on this platform is the sensor's physical location; it's mounted on the rear of the engine block, tucked behind the intake manifold and above the starter motor. This makes access extremely difficult for what would otherwise be a simple repair. Forum and video evidence strongly suggest that using non-OEM sensors often fails to resolve the code, making an ACDelco part a wise investment to avoid repeat repairs. Some owners have successfully avoided full intake manifold removal by unbolting it and carefully prying it back to gain clearance.
Generation note: The 2011-2016 year range primarily covers the first generation of the Chevrolet Cruze. However, in 2016, Chevrolet sold both the all-new second-generation Cruze and a carryover model from the first generation, branded as the 'Cruze Limited.' This guide applies to all first-generation models within this year range, including the 2016 Cruze Limited with the 1.8L engine.
Symptoms You May Notice
- Check Engine Light is on
- Reduced engine power and sluggish acceleration
- Decreased fuel economy
- Hesitation during acceleration
- Audible engine pinging or knocking (in some cases)
- Engine running rough
- Brief interruption of acceleration when the throttle is pressed all the way down
- Engine shaking and power loss for over 50 miles following an incident
- Replacing the knock sensor with a cheap, low-quality aftermarket part. Many owners report that these parts either don't work out of the box or fail quickly, causing the code to return.
- Replacing the knock sensor without first inspecting the wiring harness for damage, especially where it routes near the starter and intake manifold brackets.
- Failing to properly torque the new sensor, which can prevent it from detecting vibrations correctly.
Most Likely Causes
- Faulty Knock Sensor 🔴 High Probability → Shop Ignition Knock (Detonation) Sensor The sensor is located in a high-heat, high-vibration environment on the engine block, leading to internal failure of its piezoelectric element over time.
How to confirm: After confirming the wiring circuit is good (has proper voltage and no shorts/opens), the sensor itself is the culprit. Testing resistance against specs or replacing it with a known-good OEM part are the confirmation methods.
Typical fix: Replace the knock sensor. It is critical to use a high-quality OEM part (like ACDelco) and torque the new sensor's mounting bolt to the correct specification of 20 Nm (15 lb-ft).
Est. part cost: $50-$120 - Damaged Wiring or Connector 🟡 Medium Probability The wiring harness is routed in a tight space near hot engine and exhaust components and is also near the starter, which can create a harsh environment prone to chafing or melting.
How to confirm: Visually inspect the wiring harness and connector for signs of melting, chafing, corrosion, or loose pins. A user on the CarKiller forum for a Chevy Sonic with the same engine and code was advised to check for a short in the wiring after replacing the sensor didn't fix the issue.
Typical fix: Repair the damaged section of the wiring harness or replace the connector pigtail.
Est. part cost: $15-$40 - Improper Sensor Installation ⚪ Low Probability This typically occurs after a previous repair attempt. The sensor is a piezoelectric microphone and is very sensitive to mounting torque.
How to confirm: Check the torque on the knock sensor mounting bolt. The sensor must be properly coupled to the engine block to function correctly.
Typical fix: Loosen and re-torque the knock sensor bolt to exactly 20 Nm (15 lb-ft).
Est. part cost: $0
Rare But Worth Checking
- Extremely Low Engine Oil Level: There are some owner reports that an extremely low oil level can cause internal engine noises that may trigger knock sensor system faults. While P0325 is a circuit code, it's a simple and critical check to perform first.
- Faulty Engine Control Module (ECM) or Software Anomaly: → Shop Engine Control Module (ECM) This is extremely rare. The ECM should only be considered after all other possibilities have been exhaustively ruled out. GM has issued TSBs for other vehicles (e.g., TSB 19-NA-202 for the Trax) where a software update was needed to correct false P0325 codes, indicating it's a possibility.
- Internal Engine Component Failure: In severe cases, improper detonation regulation can be linked to mechanical issues; for instance, NHTSA ODI #11469699 describes a P0325 code on a well-maintained vehicle that eventually required the replacement of all four pistons.
Diagnosis Steps
- Verify the code with an OBD-II scanner.
- Check the engine oil level. If it is extremely low, top it off, clear the code, and see if it returns.
- Disconnect the negative battery terminal. This is a critical safety step as you will be working near the starter motor's main power lead.
- Safely raise and support the vehicle on jack stands to access the sensor from underneath.
- Locate the knock sensor on the rear of the engine block, above the starter.
- Visually inspect the knock sensor's wiring and connector for any signs of melting, chafing, corrosion, or loose connections.
- If the wiring looks good, perform a voltage test on the connector with the key on. If voltage is present but the code persists, the sensor is likely bad. If no voltage is present, the wiring from the ECM is faulty.
- If the sensor is deemed faulty, replace it. An E12 external Torx socket is required, though some owners report success with a 10mm offset wrench.
- An alternative to full intake removal is to remove the 7 intake manifold bolts and use a pry bar to gently hold the manifold away from the block, creating enough clearance to access the sensor from above.
- Ensure the new sensor is torqued to exactly 20 Nm (15 lb-ft).
- Reconnect the battery, clear the code, and perform a test drive to ensure the code does not return.
Parts You'll Likely Need
- Ignition Knock (Detonation) Sensor
(OEM #12623732 (GM), 213-3827 (ACDelco))— This is the most common failure point for code P0325 due to the harsh heat and vibration environment on the engine block.
Trusted brands: ACDelco (OEM/Recommended), Delphi
OEM price range: $80-$120
Aftermarket price range: $25-$70
Related Codes That Often Appear With This One
- P0326 — P0326 indicates the knock sensor signal is out of the expected performance range, while P0325 is a circuit fault. They can appear together if the sensor is failing intermittently or the wiring is compromised.
Technical Service Bulletins (TSBs) & Recalls
- TSB 19-NA-202: While for the Chevy Trax, this TSB addresses a software anomaly causing P0325 and other knock sensor codes, indicating that GM has recognized software as a potential cause for this code on similar Ecotec engines.
Platform-Specific Known Issues
- The location of the knock sensor on the rear of the 1.8L engine block is extremely difficult to access, making the labor the most significant part of the repair cost and challenge.
- A popular DIY method to ease the repair involves unbolting the plastic intake manifold and prying it back with a crowbar or extension to create working space, rather than fully removing it.
- Persistent P0325 codes can lead to the engine "retarding itself," as noted in NHTSA ODI #11384952, where the code remained even after the knock sensor was replaced twice and the wiring was verified as functional.
Mechanic-Grade Diagnostic Values
- Knock Sensor Signal Circuit Voltage — expected: ~2.3 V. Failure: Voltage is missing or significantly different.
- Knock Sensor Low Reference Circuit Voltage — expected: Less than 0.3 V. Failure: Voltage is greater than 0.3V, indicating a short to voltage.
- Knock Sensor Signal Circuit to Ground Resistance — expected: Greater than 500 kOhms (OL). Failure: A reading less than 500 kOhms indicates a short to ground.
- Knock Sensor Internal Resistance (GM) — expected: 93 kOhms to 110 kOhms. Failure: An open reading (OL) or resistance outside this range indicates a faulty sensor.
Wiring & Ground Locations
- K20 ECM Connector X2, Pin 14 — At the Engine Control Module (ECM).. This is the Knock Sensor Signal circuit pin. Testing here verifies continuity from the sensor to the ECM.
- K20 ECM Connector X2, Pin 36 — At the Engine Control Module (ECM).. This is the Knock Sensor Low Reference (ground) circuit pin provided by the ECM.
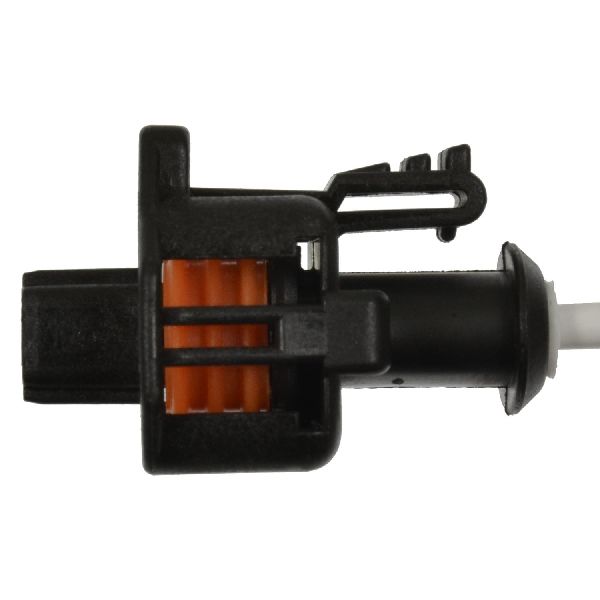
- B68 Knock Sensor Connector — On the rear of the engine block, above the starter.. This is the main connection point for the sensor. The wires are typically Violet/Gray (Signal) and Black/Yellow. Checking for voltage and physical damage here is the first step.
- G102 — Lower right rear of the engine block.. This is a primary engine block ground. While the knock sensor has a dedicated low-reference circuit from the ECM, a poor main engine ground can introduce electrical noise and cause a variety of sensor issues. Ensuring this ground is clean and tight is good practice when diagnosing any engine sensor code.
Real Owner Repair Stories
- Reddit user on r/Chevy (2014 Chevrolet Cruze LS 1.8L with 103,000 miles) — Check Engine Light with codes P0324 and P0325, appeared two weeks after a timing belt replacement.
❌ Tried (didn't work) Re-checking engine timing., Checking crankshaft pulley torque., Planning to replace the knock sensor.
✅ What actually fixed it The owner discovered the engine only had 2 quarts of oil. Performing an oil change to bring the level to full resolved the codes. - NHTSA ODI #11669525 — An owner reported multiple occurrences of P0325 causing sluggish performance, which created a safety risk when attempting to enter into traffic.
- NHTSA ODI #11268351 — A driver experienced a brief interruption of acceleration when the throttle was fully depressed, followed by the check engine light reporting P0325 and the engine knocking or shaking.
OEM Part Supersession History
55563372→25201064— Part number consolidation and potential design update by GM.55567128→25201065— Part number consolidation and potential design update by GM.
Diagnostic Flowchart
Other Known Issues on This Vehicle
Issues unrelated to this code that are worth knowing about as an owner of this generation:
- PCV System Failure (Valve Cover & Intake Manifold) 🔴 High — Very common, often occurs between 60k-100k miles. The PCV diaphragm in the valve cover tears, and a check valve in the intake manifold can fail, causing high crankcase pressure, oil leaks, and rough running.
- Cracked Plastic Thermostat Housing / Water Outlet 🔴 High — Extremely common failure point. The plastic becomes brittle from heat cycles and cracks, causing significant coolant leaks and overheating, which can lead to codes like P0116 or P0217.
- Leaking Valve Cover Gasket 🟠 Medium — Common oil leak source, often noticed after 50k miles. Oil leaks onto the exhaust manifold, causing a burning smell, and can also leak into the spark plug wells, causing misfires.
- Timing Belt Replacement (Maintenance Item) 🔴 High — This is a required maintenance item, typically recommended around 100,000 miles. Failure to replace the belt will result in catastrophic engine damage as it is an interference engine.
- Failing Ignition Coil Pack 🟠 Medium — A common cause of engine misfires (P0300-P0304 codes). Often fails between 60k-120k miles.
Used vs. New Parts: Buying Guide for This Vehicle
When a used part is the smart pick: For this repair, a used part is almost never a smart choice. The knock sensor is a sensitive electronic component located in a high-heat, high-vibration area, and its failure is common. The labor to access the sensor is significant, making the risk of installing a used part with limited remaining life unwise. A used wiring pigtail could be a viable option if the original connector is damaged and a new pigtail is unavailable.
Donor-vehicle mileage cap: roughly under 50000 miles for the part to have meaningful remaining life.
What to inspect on the donor part:
- For a wiring pigtail, ensure the connector body is not cracked or brittle.
- Check that the locking tab is intact and functional.
- Inspect for any signs of melted plastic or corrosion on the pins.
- Ensure there is at least 4-6 inches of wire attached to allow for proper splicing.
OEM-only on this vehicle (don't cheap out):
- Ignition Knock (Detonation) Sensor
Aftermarket brands forum-validated for this vehicle:
- Delphi (Often an OE supplier to GM)
Brands owners have reported issues with on this vehicle:
- Unbranded/generic 'white box' parts from online marketplaces.
- Store brands have been reported by owners on forums to fail or not work out of the box.
Real Owner Stories
Aggregated from forums and TSBs cited above. Mileages and costs reflect what owners reported in those sources.
2014 Chevrolet Cruze LS 1.8L — 103000 miles
Symptoms: Check Engine Light (MIL Indicator) came on and stayed on. Codes P0324 and P0325 present. A slight ticking noise was present since the car was new.
What fixed it: Owner discovered the engine oil was very low (only 2 quarts) and an oil change resolved the issue.
Source hint: reddit r/Cartalk
2012 Chevrolet Sonic 1.8L
Symptoms: P0325 code persisted even after the knock sensor was replaced.
What fixed it: The owner was advised to check for a short in the wiring harness after a new sensor did not resolve the issue.
Source hint: CarKiller.com Forums
2011-2016 Chevrolet Cruze 1.8L
Symptoms: P0325 code; difficulty accessing the sensor due to its location on the rear of the engine block.
What fixed it: Unbolting the 7 intake manifold bolts and prying the manifold back with a crowbar to create enough space to reach the sensor without full removal.
Source hint: YouTube - 'Easy way to replace Chevy Cruze knock sensor.' by user 'Self Made'
NHTSA ODI #11384952
Symptoms: Within the first week of purchase, the engine retards itself and throws a check engine light with code P0325.
What fixed it: Despite the wiring being checked and the knock sensor being replaced twice, the issue persisted, highlighting the complexity of this circuit fault.
Related OBD-II Codes
Frequently Asked Questions
Does TSB 19-NA-202 apply to my Chevrolet Cruze if I have a P0325 code?
Can I use an aftermarket knock sensor from a local auto parts store for my 1.8L Cruze?
Is there a way to replace the knock sensor without fully removing the intake manifold?
What is the specific torque specification for the knock sensor on the 1.8L LUW/LWE engine?
Why is the labor for this repair so difficult on the Cruze 1.8L?
Could my low oil level be causing the P0325 knock sensor code?
Helpful Videos
We Have This Part in Stock


The information in this article is provided for general reference and educational purposes only. Vehicle specifications, procedures, and part compatibility can vary by production date, trim level, and region. Always consult your vehicle's factory service manual and verify part numbers before purchasing or performing repairs. Safety-critical components such as airbags, seat belts, and braking systems should be installed by a qualified professional.
- Chevrolet Cruze:
- 🧭 Diagnostic Flowchart
- 🎬 Helpful Videos
- 🛍️ Shop This Part
- What's Unique About the 2011-2016 Chevrolet Cruze
- Symptoms You May Notice
- Most Likely Causes
- Rare But Worth Checking
- Diagnosis Steps
- Parts You'll Likely Need
- Related Codes That Often Appear With This One
- Technical Service Bulletins (TSBs) & Recalls
- Platform-Specific Known Issues
- Mechanic-Grade Diagnostic Values
- Wiring & Ground Locations
- Real Owner Repair Stories
- OEM Part Supersession History
- Other Known Issues on This Vehicle
- Used vs. New Parts: Buying Guide for This Vehicle
- Real Owner Stories
- 2014 Chevrolet Cruze LS 1.8L — 103000 miles
- 2012 Chevrolet Sonic 1.8L
- 2011-2016 Chevrolet Cruze 1.8L
- NHTSA ODI #11384952
- Related OBD-II Codes
- Frequently Asked Questions
- 🎟️ Get 5% Off