
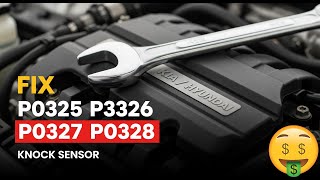
P0325 on 2017-2020 Genesis G80: Knock Sensor Circuit Causes and Fixes
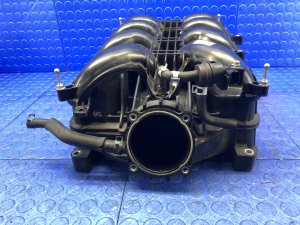
P0325 indicates a fault in the Bank 1 (passenger side) knock sensor circuit. Before replacing the sensor, thoroughly inspect the wiring harness for rodent damage, a common issue on these engines due to soy-based wire insulation. If the wiring is intact, the sensor itself has likely failed. The sensor is located under the intake manifold, making replacement a labor-intensive repair typically costing $450-$600.
- P0325 refers to the knock sensor circuit on the passenger side (Bank 1).
- ALWAYS inspect the wiring harness for rodent damage before buying parts. This is a known issue and could save you hundreds of dollars.
- Replacing the sensor is a difficult, high-labor job (DIY Difficulty: 5/5) as it is located under the intake manifold.
- Due to the high labor cost, consider replacing both knock sensors (Bank 1 and Bank 2) at the same time.
- The OEM part number for the 3.8L V6 Bank 1 sensor is likely 39320-3L200. Confirm any part numbers with a dealer before purchasing.
What's Unique About the 2017-2020 Genesis G80
For the Genesis G80, particularly with the Lambda V6 and Tau V8 engines, a leading cause of knock sensor circuit codes is not sensor failure, but rodent damage to the wiring harness. The soy-based insulation on the wires can attract animals who chew through them, causing an open or short circuit. This makes a thorough visual inspection of the harness the most critical first step. Forum and YouTube discussions confirm this is a recurring problem, with some technicians seeing it on multiple Genesis vehicles. This precedes attempting the difficult and costly sensor replacement, which requires removing the intake manifold.
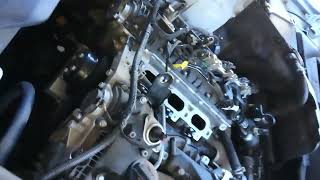
🎬 Watch: Genesis G80 knock sensor replacement walkthroughSymptoms You May Notice
- Check Engine Light illuminated
- Reduced engine power and sluggish acceleration
- Decreased fuel efficiency
- Engine hesitation or stumbling
- Audible engine pinging or knocking noises (in some cases, though often the fault prevents the noise from being detected)
- Vehicle may enter a 'limp mode' with severely restricted RPMs.
- Replacing the knock sensor without first thoroughly inspecting the wiring harness. Given the high probability of rodent damage and the high labor cost of replacement, this can be a very expensive and unnecessary repair.
- Replacing the knock sensor without using a torque wrench. Incorrect torque on the mounting bolt can cause the code to return immediately.
Most Likely Causes
- Damaged Knock Sensor Wiring Harness 🔴 High Probability → Shop Engine Wiring Harness The soy-based wire insulation used in many modern vehicles is known to attract rodents. There are multiple documented cases and videos showing this specific failure on Genesis models, where critters nest in the warm engine valley and chew the accessible knock sensor wires.
How to confirm: Visually inspect the entire length of the knock sensor wiring harness for chew marks, fraying, or breaks. The harness is located in the engine valley, running from the sensors up towards the intake manifold. A borescope may be needed for a clear view without disassembly.
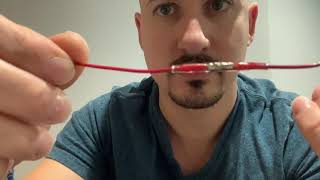
Typical fix: Repair the damaged section of the wire with solder and heat-shrink tubing. It is highly recommended to wrap the repaired harness in rodent-deterrent tape (e.g., Honda's capsaicin-infused tape) to prevent recurrence. If damage is near the connector, a new pigtail may be required.
Est. part cost: $10-$40 for repair materials and deterrent tape, $150+ for a new harness section - Faulty Knock Sensor 🟡 Medium Probability → Shop Ignition Knock (Detonation) Sensor The sensor is a piezoelectric microphone located in a high-heat area of the engine valley. It can fail over time from extreme heat cycles and constant vibration.
How to confirm: If the wiring is confirmed to be intact, the sensor itself must be tested. This requires removing the intake manifold to gain access. Once accessible, measure its internal resistance with a multimeter and compare it to the manufacturer's specification (typically a high resistance value, not an open circuit). A more definitive test is to check for a small AC voltage signal in millivolts (mV) while lightly tapping the engine block near the sensor with a wrench. No voltage signal indicates a dead sensor. 🎬 Watch: How to test and fix Hyundai/Kia knock sensors
Typical fix: Replace the knock sensor. It is critical to torque the new sensor's mounting bolt to the correct specification (11.6 - 17.3 lb-ft / 15.7 - 23.5 Nm) as over or under-tightening will affect its sensitivity. Due to the high labor cost, it is strongly recommended to replace both sensors (Bank 1 and Bank 2) and the sub-harness at the same time.
Est. part cost: $70-$150 per sensor - Corroded or Loose Connector ⚪ Low Probability
How to confirm: Inspect the electrical connector at the sensor (if accessible) and at the main engine harness for corrosion, moisture, or loose pins. Water intrusion has been noted as a cause for knock sensor codes on other Hyundai models.
Typical fix: Clean the connector terminals with an electrical contact cleaner and apply dielectric grease before reconnecting. Replace the connector pigtail if it is damaged.
Est. part cost: $5-$25
Rare But Worth Checking
- Faulty Engine Control Module (ECM): → Shop Engine Control Module (ECM) This is very rare. The ECM should only be considered after all other possibilities, including wiring, connectors, and the sensor itself, have been exhaustively tested and ruled out.
- ECM Software Anomaly: Hyundai/Genesis has issued TSBs for other models to update knock sensor detection logic (KSDS - Knock Sensor Detection System) to better identify bearing noise vs. detonation. While not directly for P0325, it shows the system is actively updated. A dealer can check for applicable software updates for your VIN.
Diagnosis Steps
- Read the code with an OBD-II scanner to confirm P0325 is present.
- Perform a thorough visual inspection of the knock sensor wiring harness where it is visible in the engine bay, especially around the back of the intake manifold. Look for any signs of chewing, fraying, or heat damage. A borescope can be invaluable here.
- If damage is found, repair the wiring. 🎬 Watch: Easy step-by-step rodent damage harness repair Use solder and heat-shrink tubing, then wrap the harness in rodent-deterrent tape. Clear the codes and test drive.
- If the wiring appears intact, the next step requires accessing the sensor itself. This involves removing the upper and lower intake manifolds. New gaskets will be required for reassembly.
- Once the sensor is accessible, disconnect it and measure its resistance with a multimeter. An open circuit (infinite resistance) confirms a bad sensor.
- As a secondary check, set the multimeter to AC millivolts (mV) and test for a small voltage signal from the sensor while tapping the engine block near its location. No voltage signal indicates a dead sensor.
- If the sensor tests good, check for voltage and ground at the sensor connector to test the integrity of the circuit back to the ECM.
- When installing a new sensor, it is critical to torque the mounting bolt to 15.7 - 23.5 Nm (11.6 - 17.3 lb-ft) to ensure correct operation.
- If the circuit and sensor are good, have a dealership check for any available ECM software updates related to the Knock Sensor Detection System (KSDS).
- If all else fails, the problem may lie with the ECM, which is a rare failure.
Parts You'll Likely Need
- Knock Sensor (Bank 1 / Right / Passenger Side)
(OEM #3.8L V6: 39320-3L200 | 5.0L V8: 39320-5T000)— This is the sensor that has failed or whose circuit is malfunctioning. Bank 1 is the right/passenger side.
Trusted brands: Hyundai/Genesis (OEM), Standard Motor Products (SMP), Bosch, GPD
OEM price range: $100-$150
Aftermarket price range: $60-$90 - Intake Manifold Gasket Set
(OEM #3.8L V6 (Lower): 28411-3L100 (Requires 2) | 5.0L V8 (Lower): 28411-5T000 (Requires 2) | Upper/Plenum Gasket: 29215-3L100 (3.8L/5.0L))— The upper and lower intake manifolds must be removed to access the knock sensors. The gaskets are considered single-use and must be replaced to prevent vacuum leaks upon reassembly.
Trusted brands: Hyundai/Genesis (OEM), Fel-Pro, Mahle, Beck Arnley
OEM price range: $50-$80
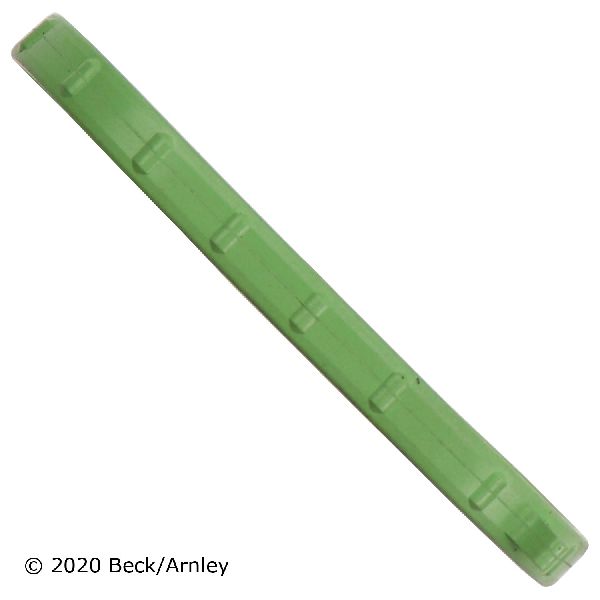
Aftermarket price range: $30-$50 - Rodent-Deterrent Tape
(OEM #Honda Part No. 4019-2317 (Capsaicin Tape))— If the cause is rodent damage, wrapping the repaired harness in this spicy tape is a proven method to deter future chewing.
Trusted brands: Honda (OEM), Aftermarket brands on Amazon
OEM price range: $20-$40
Aftermarket price range: $10-$20
Related Codes That Often Appear With This One
- P0330 — This is the code for the Bank 2 (driver's side) knock sensor circuit. If the cause is rodent damage to the harness, it's very common for both sensor wires to be chewed, triggering both codes. Similarly, if one sensor fails due to age and heat, the other is likely near the end of its service life.
- P1326 — This is a manufacturer-specific code for the Knock Sensor Detection System (KSDS) indicating vibrations consistent with engine bearing wear. A P0325 circuit fault will disable the KSDS. If P1326 is present, it points to a serious mechanical issue, whereas P0325 points to a fault in the sensor's circuit that is preventing the KSDS from working.
Technical Service Bulletins (TSBs) & Recalls
- Hyundai TSB 22-01-028H-1: While not a direct fix for P0325, this TSB involves a knock sensor software update (KSDS) to enhance detection of engine bearing noise, indicating active manufacturer updates to this system's logic. This is part of a broader campaign (966) across many Hyundai/Kia models.
- Hyundai TSB 24-EM-010H: Describes a similar issue on other models where water intrusion into the knock sensor connector causes DTCs, leading to a revised connector and wiring repair kit. This highlights the sensitivity of the circuit to environmental factors.
Platform-Specific Known Issues
- A recurring and well-documented issue on the G80 platform (and related Hyundai/Genesis vehicles) is rodent damage to the knock sensor wiring harness, which can trigger a P0325 or P0330 code without actual sensor failure.
Mechanic-Grade Diagnostic Values
- Knock Sensor Mounting Bolt Torque — expected: 15.7 - 23.5 Nm (11.6 - 17.3 lb-ft). Failure: Over-torquing can make the sensor overly sensitive, causing false signals. Under-torquing can prevent it from detecting real engine knock.
- Knock Sensor AC Voltage Output — expected: A small AC voltage spike (e.g., 5-10+ mV) when the engine block is tapped near the sensor.. Failure: No voltage reading (0 mV) when tapping the block indicates a dead piezoelectric element in the sensor.
- Knock Sensor Internal Resistance — expected: A specific resistance value in the mega-ohm (MΩ) range. The exact value is not published, but a reading should be present.. Failure: An open circuit (OL or infinite resistance) indicates an internal failure of the sensor.
Hidden / Shadow Codes Worth Checking
- P1326: Indicates the Knock Sensor Detection System (KSDS) has detected vibrations consistent with internal engine bearing wear. This is not a sensor circuit fault, but a mechanical fault warning. (see via Standard OBD-II scanner. A flashing check engine light is the primary symptom. A P0325 fault will prevent the KSDS from functioning, so these codes are typically not seen together.)
Scan Tool Commands That Help
- Hyundai GDS (Global Diagnostic System): ECU Software Update / Check for Latest Version — Use this function at a dealership if the sensor and wiring test good. Hyundai has released multiple software updates (Campaigns 953, 966) to improve the knock sensor's logic for detecting bearing failure vs. other vibrations. An outdated ECU may misinterpret data.
Wiring & Ground Locations
- Knock Sensor Harness Connector (Bank 2 reference) — In the engine valley, under the intake manifold. The main harness connector for the driver's side (Bank 2) is located near the oil filler cap.. The harness for Bank 1 (P0325) is in a similar location on the passenger side. Knowing the general area is key to performing a visual inspection for rodent damage before disassembly.
- Engine Compartment Grounds (General) — Various points on the fenders and firewall, often designated with codes like G01, G02, etc.. A poor ground connection for the engine harness could introduce electrical noise or cause incorrect readings from the knock sensor circuit. Verifying main engine grounds are clean and tight is a valid diagnostic step.
Real Owner Repair Stories
- YouTube - 'MechanixContent' / 'Genesis G80 3.8L Knock Sensor 2017 - 2020 P0331 code' (2017-2020 Genesis G80 3.8L V6) — Check Engine Light with code P0331 (Bank 2).
❌ Tried (didn't work) The video warns against the common mistake of immediately ordering a new sensor without inspection.
✅ What actually fixed it A wire in the knock sensor harness was found to be chewed completely through by a rodent. The fix was to solder the broken wire and cover the repair with protective conduit. The technician noted this was the second Genesis he had seen with the exact same failure.
OEM Part Supersession History
39320-3L200 (for 3.8L V6)→No supersession found within the 2017-2020 model years.— N/A39320-5T000 (for 5.0L V8)→No supersession found within the 2017-2020 model years.— N/A
Model Year Variations Within This Range
- 2017-2020: The primary variation is not in the physical parts, but in the ECM software. Throughout this period, Hyundai/Genesis rolled out Knock Sensor Detection System (KSDS) updates via campaigns like 966. A 2017 vehicle that has been regularly serviced at a dealer will have different knock detection logic than one that has not. This can affect the system's sensitivity and diagnostic outcomes.
Diagnostic Flowchart
Other Known Issues on This Vehicle
Issues unrelated to this code that are worth knowing about as an owner of this generation:
- ABS Module Electrical Short (Fire Risk) 🔴 High — Widespread enough to trigger a major safety recall (NHTSA Campaign 20V746000). Affects a large number of 2015-2020 G80 models. (Ref: NHTSA Recall 20V746000, 21V-160)
- Carbon Buildup on Intake Valves 🟠 Medium — A common long-term issue for all GDI engines, including the 3.8L and 5.0L. Typically becomes noticeable after 60,000-80,000 miles, causing rough idle, hesitation, or misfires.
- Starter Solenoid Water Intrusion (Fire Risk) 🔴 High — Affects 2015-2019 G80 models. Water can enter the starter solenoid, causing an electrical short and potential fire. (Ref: NHTSA Recall 18V-907)
- Excessive Oil Consumption (5.0L V8) 🟠 Medium — More prevalent on earlier Tau V8s (pre-2014) due to piston ring design, but can still occur on 2017+ models, especially if maintenance is deferred. Some owners report consumption of 1 quart per 1000-2000 miles. (Ref: Hyundai TSB 23-EM-008H (Provides diagnostic guidelines))
- Left Turbocharger Oil Feed Pipe Leak (3.3T Engine) 🟠 Medium — Affects G80 models with the 3.3L twin-turbo V6. The oil feed pipe can deteriorate and leak oil onto hot exhaust components, creating a fire risk. (Ref: NHTSA Recall 22V-612)
Used vs. New Parts: Buying Guide for This Vehicle
When a used part is the smart pick: A used wiring harness pigtail from a junkyard is a reasonable choice if the original is damaged by rodents and a new harness is cost-prohibitive. The sensor itself should not be purchased used.
Donor-vehicle mileage cap: roughly under 80000 miles for the part to have meaningful remaining life.
What to inspect on the donor part:
- For wiring: Check for flexibility; avoid any harness that is brittle, cracked, or shows signs of previous repairs or heat damage.
- Ensure connectors are intact with no broken tabs or corroded pins.
OEM-only on this vehicle (don't cheap out):
- Intake Manifold Gaskets: Always replace with new OEM or high-quality aftermarket (Fel-Pro, Mahle) to prevent vacuum leaks, which can cause other issues.
- Knock Sensor: Due to the high labor cost of access and the sensitivity of the KSDS software, using a new OEM sensor is strongly recommended to ensure compatibility and longevity.
Aftermarket brands forum-validated for this vehicle:
- Bosch
- Standard Motor Products (SMP)
- NTK
Brands owners have reported issues with on this vehicle:
- A technician reported an aftermarket sensor from a brand named 'Deli' did not work and caused the code to return, requiring a second repair with a different brand.
Real Owner Stories
Aggregated from forums and TSBs cited above. Mileages and costs reflect what owners reported in those sources.
2017-2020 Genesis G80 3.8L
Symptoms: P0331 code (Bank 2) present; mechanic found wiring issues in the engine valley.
What fixed it: Repaired a chewed wire and wrapped the harness in protective tape.
Source hint: YouTube - 'Genesis G80 3.8L Knock Sensor 2017 - 2020 P0331 code'
2015 Genesis Sedan 5.0L V8 — ~150000 miles
Symptoms: High mileage vehicle requiring maintenance; owner noted overall reliability but had replaced AC compressor and alternator.
What fixed it: Diligent maintenance and component replacement as needed for the Tau V8 platform.
Source hint: Reddit r/GenesisMotors - 'Gen sedan 5.0 2015 question (high miles)'
2017-2020 Genesis G80
Symptoms: Rodent damage on a knock sensor harness located in the engine valley.
What fixed it: Repair of the soy-based wiring that had been chewed by mice.
Source hint: Reddit r/Justrolledintotheshop - 'Rodent damage on a knock sensor harness.'
Related OBD-II Codes
Frequently Asked Questions
Is there a specific TSB for the Knock Sensor Detection System (KSDS) on my Genesis?
Why is the wiring harness on the 2017-2020 G80 so prone to rodent damage?
What is the correct torque specification for a new knock sensor on the 3.8L or 5.0L engine?
Can I inspect the knock sensor wiring without removing the intake manifold?
Is there a way to prevent rodents from chewing my G80's knock sensor wires again?
Does the P0325 code mean my engine is actually knocking?
Helpful Videos
Used OEM Parts in Stock
New Aftermarket Parts Available


The information in this article is provided for general reference and educational purposes only. Vehicle specifications, procedures, and part compatibility can vary by production date, trim level, and region. Always consult your vehicle's factory service manual and verify part numbers before purchasing or performing repairs. Safety-critical components such as airbags, seat belts, and braking systems should be installed by a qualified professional.
- Genesis G80:
- 🧭 Diagnostic Flowchart
- 🎬 Helpful Videos
- 🛍️ Shop This Part
- What's Unique About the 2017-2020 Genesis G80
- Symptoms You May Notice
- Most Likely Causes
- Rare But Worth Checking
- Diagnosis Steps
- Parts You'll Likely Need
- Related Codes That Often Appear With This One
- Technical Service Bulletins (TSBs) & Recalls
- Platform-Specific Known Issues
- Mechanic-Grade Diagnostic Values
- Hidden / Shadow Codes Worth Checking
- Scan Tool Commands That Help
- Wiring & Ground Locations
- Real Owner Repair Stories
- OEM Part Supersession History
- Model Year Variations Within This Range
- Other Known Issues on This Vehicle
- Used vs. New Parts: Buying Guide for This Vehicle
- Real Owner Stories
- 2017-2020 Genesis G80 3.8L
- 2015 Genesis Sedan 5.0L V8 — ~150000 miles
- 2017-2020 Genesis G80
- Related OBD-II Codes
- Frequently Asked Questions
- 🎟️ Get 5% Off