
P0325 on 2002-2007 Mitsubishi Lancer: Knock Sensor Circuit Malfunction Causes and Fixes
This code indicates a problem with the knock sensor circuit. Most often, the knock sensor itself has failed due to age and heat. It's located on the back of the engine block under the intake manifold, making replacement a labor-intensive job. Expect to pay $40-$90 for an aftermarket sensor or around $190 for an OEM part. Before replacing, thoroughly check the wiring for shorts or breaks, as this is a common point of failure.
- P0325 on a 2002-2007 Lancer means there's a fault in the knock sensor circuit, which the ECU checks when the engine is over 2500 RPM.
- The most common cause is a failed knock sensor, followed by damaged wiring (specifically shorts or breaks in the signal wire).
- The sensor is located under the intake manifold, making replacement a labor-intensive job with a DIY difficulty of 4 out of 5.
- Always test the wiring for continuity and shorts before replacing the sensor to avoid unnecessary labor. A loose sensor bolt can also be a rare cause.
- Driving with this code will result in reduced power and fuel economy as the ECU enters a 'safe' mode.
What's Unique About the 2002-2007 Mitsubishi Lancer
For the 2002-2007 Lancer, the primary challenge with a P0325 code is the physical location of the knock sensor. It is bolted to the back of the engine block, underneath the intake manifold assembly. This difficult-to-access location means that what is often a simple sensor swap on other vehicles becomes a more involved repair, requiring several hours of labor to reach the part. Because of this, thoroughly testing the wiring before replacing the sensor is highly recommended. Some owners have successfully replaced it without removing the intake manifold by working from below the car, but it is a tight squeeze and results in scraped hands.
Generation note: The 2002-2007 year range in the US covers the eighth generation of the Mitsubishi Lancer. This guide applies to the standard models with the 2.0L (4G94) and 2.4L (4G69) engines, such as the ES, LS, OZ Rally, and Ralliart. The high-performance Lancer Evolution (Evo) models have a different engine (4G63T) but share the same fundamental P0325 code definition and diagnostic principles, including the difficult sensor location.
Symptoms You May Notice
- Check Engine Light is on.
- Noticeably poor or sluggish acceleration.
- Reduced fuel economy.
- Engine may make a pinging or knocking sound, especially under load.
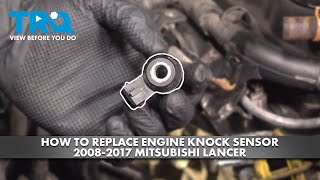
- Engine may run rough or hesitate during acceleration. 🎬 Watch: Learn how to identify bad knock sensor symptoms.
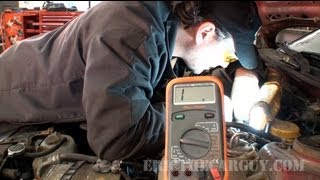
- Replacing the knock sensor without testing the wiring first. Due to the high labor involved in accessing the sensor, it's crucial to confirm the wiring is good before undertaking the replacement. 🎬 See this expert guide on diagnosing P0325 circuit faults.
- Mistaking another engine noise for knock. Other mechanical issues can sometimes create vibrations that the knock sensor might interpret incorrectly, though P0325 specifically points to a circuit fault, not just detected knock.
Most Likely Causes
- Failed Knock Sensor 🔴 High Probability → Shop Ignition Knock (Detonation) Sensor The sensor is exposed to constant extreme engine heat and vibration, leading to internal failure of the piezoelectric crystal over time. Corrosion can also compromise the sensor's function.
How to confirm: After confirming the wiring is intact, the sensor itself is the most likely culprit. It can be tested with a multimeter for resistance, but replacement is often the definitive test due to its inaccessible location. A Reddit user with a 2003 Evo 8 confirmed that testing the sensor connector showed an "open line" and replacing the sensor resolved the P0325 code.
Typical fix: Replace the knock sensor. This often requires removing the intake manifold for access, though some mechanics create a custom slotted deep socket to work around the wire and replace it from underneath the car.
Est. part cost: $40-$200 - Wiring or Connector Damage 🟡 Medium Probability The wiring harness runs in a hot, tight space behind the engine, making it susceptible to becoming brittle, chafed, or corroded over time. The shielded signal wire can develop a slight short to the ground shield, which is enough to trigger the code.
How to confirm: Visually inspect the wiring harness leading to the knock sensor for any signs of damage. Use a multimeter to check for continuity from the sensor connector (B-108, terminal 1) back to the ECM/PCM plug (C-115, terminal 78 for M/T; C-116, terminal 90 for A/T). Also check for a short to ground on the signal wire. An EvolutionM forum user found a slight short to the shielding wire was the root cause after unnecessarily replacing the sensor.
Typical fix: Repair the damaged section of wire or replace the connector pigtail. In the case of a short to the shielding, separating the wires or repairing the harness is necessary.
Est. part cost: $5-$50 for repairs, much higher for harness replacement.
Rare But Worth Checking
- Engine Control Module (ECM/PCM) Failure: → Shop Engine Control Module (ECM) This is a rare cause. The ECM should only be considered after the sensor and wiring have been definitively ruled out as the problem.
- Loose Knock Sensor Bolt: → Shop Ignition Knock (Detonation) Sensor The sensor must be torqued correctly to the engine block to properly detect vibrations. If the bolt is loose, it cannot function correctly. The specified torque is typically around 15 ft-lbf (20 N·m).
Diagnosis Steps
- Read the code: Use an OBD-II scanner to confirm P0325 is present and check for any other codes.
- Visual Inspection: Inspect the knock sensor wiring harness as much as possible. It is on the back of the engine, below the intake manifold. Look for obvious damage, melting, or corrosion at the connector (B-108).
- Check Sensor Torque: If accessible, ensure the knock sensor bolt is tight. A loose sensor cannot read vibrations correctly. Torque spec is approximately 15 ft-lbf (20 N·m).
- Test the Circuit: Disconnect the knock sensor connector and the ECM/PCM connector. Use a multimeter to check for continuity on the signal wire between the sensor connector (terminal 1) and the ECM/PCM connector (terminal 78 for M/T, 90 for A/T). Check for any shorts to ground or power on the signal wire. A resistance reading to ground should be very high (megaohms); a low reading indicates a short.
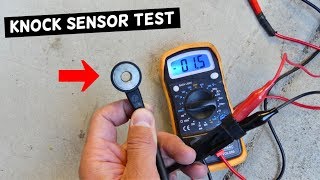
- Test the Sensor: With the connector disconnected, you can test the sensor's internal resistance. While specific values for this model are not widely published, a reading of 'open line' or infinite resistance indicates a failed sensor. 🎬 Watch: How to test a knock sensor with a multimeter. A generic range for knock sensors is often between 93-100 ohms, but this can vary.
- Replace the Knock Sensor: If the wiring and connections are confirmed to be good, the sensor itself is the likely cause. This typically involves removing the intake manifold to gain access.
- Clear Code and Test Drive: After replacement, clear the trouble code and perform a test drive, ensuring engine speed exceeds 2,500 rpm to allow the ECM to run its diagnostic check on the circuit.
Parts You'll Likely Need
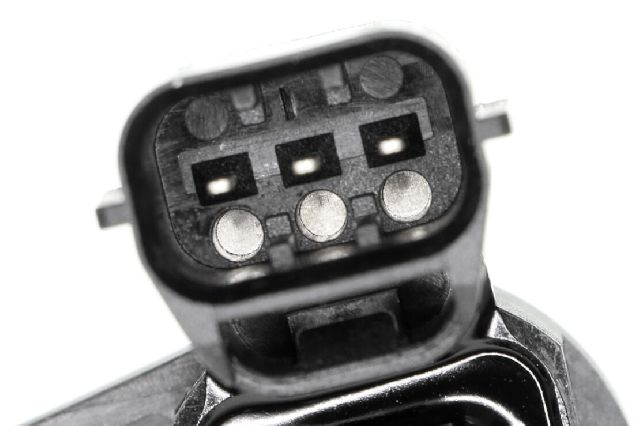
- Knock Sensor
(OEM #MN137468)— This is the most common failure point for the P0325 code. The sensor fails internally from years of heat cycles and vibration. This part number is applicable to the 2.4L Lancer, Outlander, Galant, and Eclipse of the era.
Trusted brands: Mitsubishi (OEM), NGK/NTK, Standard Motor Products (Standard Ignition), Delphi, Beck Arnley
OEM price range: $190-$275
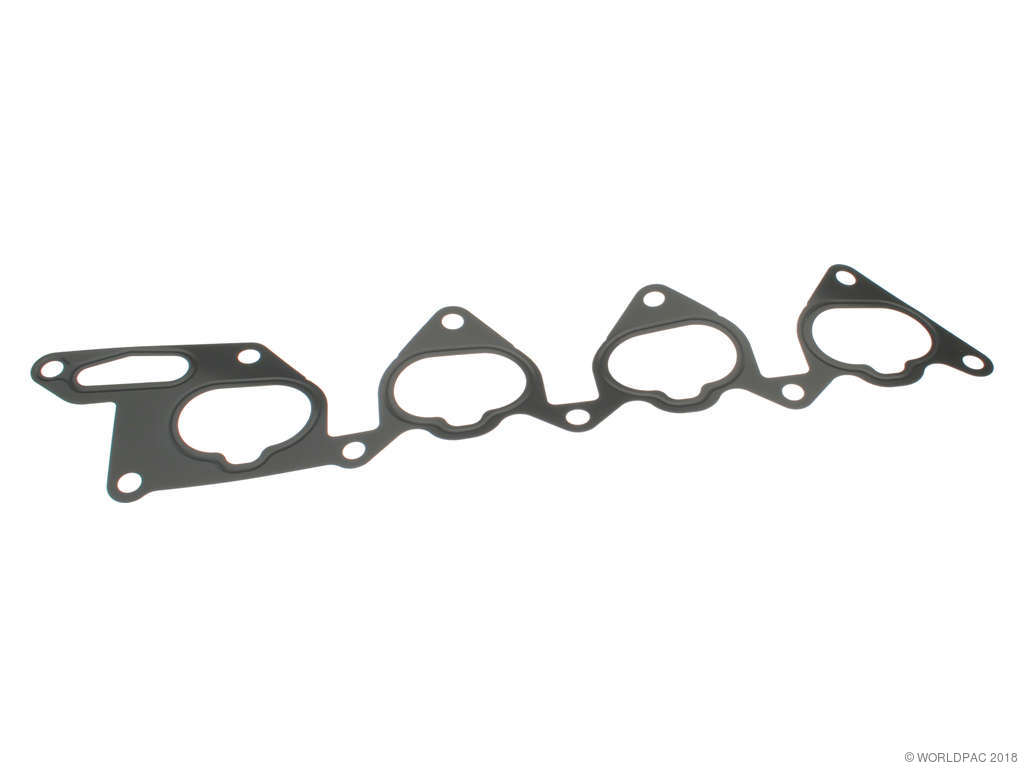
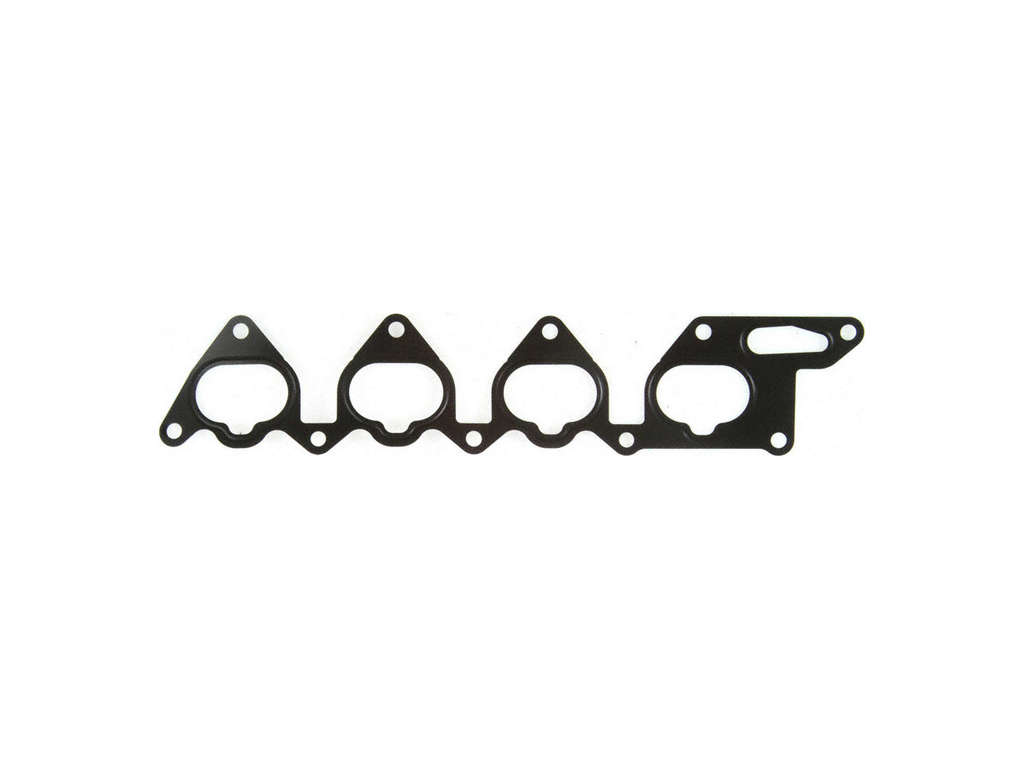
Aftermarket price range: $40-$90 - Intake Manifold Gasket — If the intake manifold must be removed to access the knock sensor, the gasket should always be replaced to prevent vacuum leaks.
Trusted brands: Fel-Pro, Mahle, Victor Reinz
OEM price range: $20-$40
Aftermarket price range: $10-$25
Technical Service Bulletins (TSBs) & Recalls
- No specific TSBs were found for P0325 on this vehicle. Recalls for this generation primarily concern Takata airbags and front subframe corrosion in salt-belt states.
Platform-Specific Known Issues
- Wiring Harness Short: A user on the EvolutionM forums detailed a lengthy battle with P0325 that was ultimately caused by the signal wire shorting to its own ground shield within the harness. This was only detectable with a sensitive ohmmeter and highlights the importance of meticulous wiring checks before replacing the sensor.
- DIY Replacement without Manifold Removal: Multiple forum users confirm that replacing the sensor without removing the intake manifold is possible, but very difficult. It requires working from underneath the car with long extensions and sometimes a custom-modified (slotted) deep socket to fit over the sensor's wire pigtail. Expect scraped hands and frustration.
Mechanic-Grade Diagnostic Values
- Knock Sensor Ground Circuit Continuity — expected: Less than 2 ohms. Failure: A reading higher than 2 ohms indicates an open circuit or damaged harness between the knock sensor connector and the chassis ground.
- Knock Sensor Signal Circuit Resistance to Ground — expected: 1 MΩ or higher. Failure: A low resistance reading indicates a short to ground in the harness between the ECM and the knock sensor.
- Knock Sensor DTC Set Parameter — expected: Voltage must change more than 0.06V within 200 crankshaft rotations. Failure: If the voltage is static (changes less than 0.06V) while engine speed is above 2,500 rpm, the ECM will set code P0325.
Scan Tool Commands That Help
- Mitsubishi MUT-II / MUT-III: Data List Item 44: Ignition Coils and Ignition Power Transistor — Used to verify the ECM's reaction to the knock sensor circuit. The service manual states that with the knock sensor disconnected, the ignition timing should retard more than when it is connected. This confirms the ECM is attempting to enter its fail-safe mode.
- Mitsubishi MUT-III: Data List Item 32: Knock Retard — This live data parameter allows a technician to monitor the amount of ignition timing retard the ECM is applying based on the knock sensor's input. If a P0325 is present, this value will likely be at a fixed maximum as part of the fail-safe strategy.
Wiring & Ground Locations
- B-108 — The knock sensor's own electrical connector, on the pigtail coming from the sensor itself, located on the back of the engine block under the intake manifold.. This is the primary connection point to test the sensor and the harness. Terminal 1 is the signal wire, and Terminal 2 is the ground.
- G11 — At the rear of the engine, below the cylinder head.. This is a primary engine ground point. A corroded or loose connection here can cause various sensor issues, including problems with the knock sensor's ground reference.
- C-115 / C-116 — The main connectors for the Engine Control Module (ECM) or Powertrain Control Module (PCM), located behind the glove box.. This is the termination point for the knock sensor circuit. Pin 78 (on C-115 for M/T) or Pin 90 (on C-116 for A/T) is the knock sensor signal input, used for continuity testing from connector B-108.
Real Owner Repair Stories
- EvolutionM.net user (Mitsubishi Lancer Evolution (shares engine architecture and P0325 code logic)) — Check Engine Light with code P0325 came on after a track day and would return immediately after clearing, even with no engine load.
❌ Tried (didn't work) Checking for loose exhaust components or rattles., Replacing the knock sensor.
✅ What actually fixed it The user followed the Factory Service Manual (FSM) diagnostic steps and found a slight short circuit between the signal wire (Pin 91 on Evo ECU) and its own shielding wire within the harness. Using a sensitive ohmmeter revealed the slight grounding fault. Ungrounding the shield wire temporarily resolved the code, proving the wiring harness was the issue.
OEM Part Supersession History
MR514405→MN137468— Part number consolidation and potential minor revision by the manufacturer.
Diagnostic Flowchart
Other Known Issues on This Vehicle
Issues unrelated to this code that are worth knowing about as an owner of this generation:
- Clear Coat / Paint Peeling 🟠 Medium — Very common, especially on horizontal surfaces like the roof, hood, and trunk. Tends to appear as white spots before peeling, often after 5-10 years of sun exposure.
- Front Subframe Corrosion 🔴 High — Common enough to trigger a recall (NHTSA 16V245000) for vehicles in salt-belt states. The subframe can rust severely, potentially leading to component failure. (Ref: NHTSA Recall 16V245000)
- Automatic Transmission Problems 🟠 Medium — Owners report issues like hesitant shifting, slipping, or premature failure. These are sometimes linked to the Transmission Control Module (TCM) or the fact that some units are sealed and not easily serviced.
- Engine Stalling at Idle 🟡 Low — Some older Lancers are prone to stalling when idling or slowing down. This can have various causes, from sensors to vacuum leaks.
- Air Conditioning Compressor Failure 🟠 Medium — Compressor failures are reported to occur, sometimes as early as 60,000-80,000 km (approx. 37k-50k miles), particularly in 2006-2007 models.
Used vs. New Parts: Buying Guide for This Vehicle
When a used part is the smart pick: A used OEM knock sensor from a low-mileage donor vehicle can be a viable option if on a tight budget, but it carries risk. Given the high labor cost to access the sensor, the savings might not be worth the risk of premature failure. A used part is primarily for getting a car through an emissions test cheaply, not for long-term reliability.
Donor-vehicle mileage cap: roughly under 80000 miles for the part to have meaningful remaining life.
What to inspect on the donor part:
- Check for any cracks in the plastic housing of the sensor.
- Ensure the connector pins are clean, straight, and free of corrosion.
- Avoid sensors from engines that show signs of severe overheating or oil leaks.
- Verify the part number on the used sensor matches the required OEM number.
OEM-only on this vehicle (don't cheap out):
- While not strictly 'OEM-only', using a very cheap, unbranded aftermarket knock sensor is highly discouraged. Forum members and mechanics report that some cheap sensors can be dead on arrival or have incorrect frequency responses, leading to persistent codes or poor performance.
Aftermarket brands forum-validated for this vehicle:
- NTK (a division of NGK)
- Bosch
- Standard Motor Products (Standard Ignition)
- Beck/Arnley
- Mitsubishi Electric (often the OEM supplier)
Brands owners have reported issues with on this vehicle:
- Unbranded, generic sensors sold on marketplaces like eBay or Amazon without a reputable brand name attached.
Real Owner Stories
Aggregated from forums and TSBs cited above. Mileages and costs reflect what owners reported in those sources.
2003 Mitsubishi Lancer Evolution 8
Symptoms: The Check Engine Light was on for code P0325. A multimeter test at the sensor connector showed an 'open line', indicating an internal failure.
What fixed it: Replacing the knock sensor resolved the code.
Source hint: Reddit user with a 2003 Evo 8 cited in article context
Mitsubishi Lancer
Symptoms: A persistent P0325 code that did not go away even after replacing the knock sensor.
What fixed it: A detailed inspection of the wiring harness found that the signal wire was slightly shorting to its own ground shield. Repairing the damaged section of the harness finally cleared the code.
Source hint: EvolutionM.net - P0325 Knock Sensor (Thread)
Mitsubishi Lancer
Symptoms: Needed to replace a failed knock sensor causing a P0325 code, but wanted to avoid the labor-intensive process of removing the intake manifold.
What fixed it: The owner successfully replaced the sensor by working from underneath the car using a custom-slotted deep socket and long extensions. The process was described as very difficult.
Source hint: EvolutionM.net - What's the easiest way to replace your knock sensor? (Thread)
Related OBD-II Codes
Frequently Asked Questions
Where is the knock sensor located on my 2002-2007 Mitsubishi Lancer?
Is it possible to replace the knock sensor without removing the intake manifold?
I replaced the knock sensor, but the P0325 code is still on. What should I check next?
What is the correct torque for the knock sensor bolt?
How can I test the knock sensor circuit on my Lancer?
Are there any recalls or TSBs for the P0325 code on this Lancer?
Helpful Videos

We Have This Part in Stock


The information in this article is provided for general reference and educational purposes only. Vehicle specifications, procedures, and part compatibility can vary by production date, trim level, and region. Always consult your vehicle's factory service manual and verify part numbers before purchasing or performing repairs. Safety-critical components such as airbags, seat belts, and braking systems should be installed by a qualified professional.
- Mitsubishi Lancer:
- 🧭 Diagnostic Flowchart
- 🎬 Helpful Videos
- 🛍️ Shop This Part
- What's Unique About the 2002-2007 Mitsubishi Lancer
- Symptoms You May Notice
- Most Likely Causes
- Rare But Worth Checking
- Diagnosis Steps
- Parts You'll Likely Need
- Technical Service Bulletins (TSBs) & Recalls
- Platform-Specific Known Issues
- Mechanic-Grade Diagnostic Values
- Scan Tool Commands That Help
- Wiring & Ground Locations
- Real Owner Repair Stories
- OEM Part Supersession History
- Other Known Issues on This Vehicle
- Used vs. New Parts: Buying Guide for This Vehicle
- Real Owner Stories
- 2003 Mitsubishi Lancer Evolution 8
- Mitsubishi Lancer
- Mitsubishi Lancer
- Related OBD-II Codes
- Frequently Asked Questions
- 🎟️ Get 5% Off