
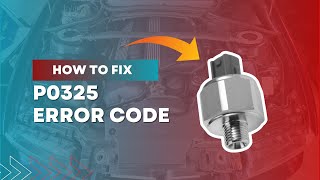
P0325 on 2008-2015 Scion xB 2.4L: Knock Sensor Circuit Malfunction Causes and Fixes
On a 2008-2015 Scion xB, code P0325 is almost always a failed knock sensor or its wiring. The repair is labor-intensive because the sensor is located under the intake manifold, so expect a higher repair cost. Using a quality OEM (Toyota) or Denso replacement part is highly recommended to avoid repeat labor. Rodent damage to the wiring harness is a very common cause for this specific issue.
- P0325 on a 2008-2015 Scion xB points to a malfunction in the knock sensor circuit, most often the sensor itself or its wiring harness.
- The repair is difficult and time-consuming (DIY Difficulty 4/5) because the sensor is located under the intake manifold.
- Due to the high labor cost, it is strongly recommended to use a high-quality OEM (Toyota) or OEM-supplier (Denso) knock sensor and to replace the short wiring harness at the same time.
- Always check for rodent damage on the wiring harness, as this is a very common cause of P0325 on this engine.
- The new knock sensor must be torqued to exactly 15 ft-lbs (20 N*m) to function correctly.
What's Unique About the 2008-2015 Scion xB
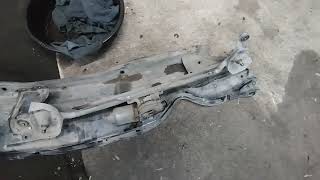
The key issue for the second-generation Scion xB with the 2.4L 2AZ-FE engine is the knock sensor's location. It is buried deep under the intake manifold, making what would be a simple sensor swap on many other vehicles a significantly more labor-intensive and expensive job. This high labor cost makes it critical to use a high-quality replacement part to avoid doing the job twice. Rodent damage to the wiring harness in this hard-to-see, warm, and protected area is also a very well-documented possibility, with owners on forums for related Toyota models reporting it as a primary cause.
Symptoms You May Notice
- Check Engine Light is on
- Noticeable loss of engine power and sluggish acceleration
- Decreased fuel economy
- Engine hesitation or stumbling, especially from a stop
- Audible 'pinging' or 'knocking' sound from the engine, especially under load (though often the computer prevents this by retarding timing)
- In some cases, the transmission may be prevented from shifting into overdrive.
- Replacing spark plugs or ignition coils without diagnosing the knock sensor circuit first. While these can cause performance issues, P0325 specifically points to the knock sensor circuit.
- Assuming the sensor is bad when the actual fault is a chewed or damaged wiring harness, which is very common on this platform.
Most Likely Causes
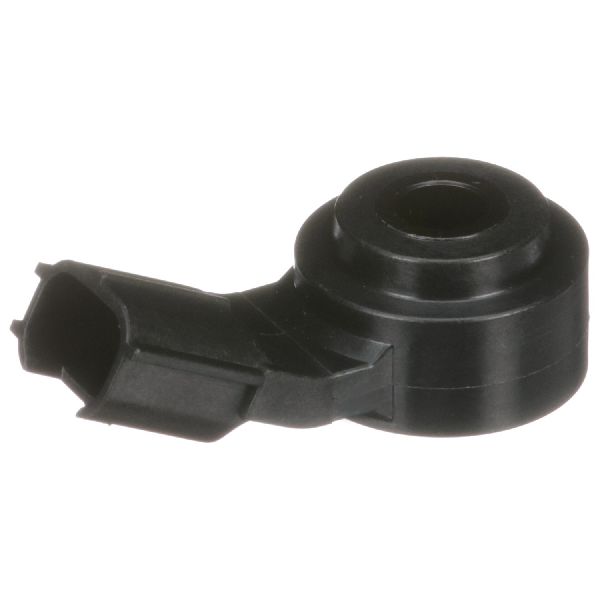
- Failed Knock Sensor 🔴 High Probability → Shop Ignition Knock (Detonation) Sensor The sensor is subjected to constant heat cycles and vibration under the intake manifold, leading to internal failure of the piezoelectric element over time. This is a very common reason for P0325.
How to confirm: After confirming wiring is intact, the sensor itself is the likely culprit. It can be tested with a multimeter for resistance, but given the significant labor to access it, most technicians and DIYers replace it preventatively once the intake manifold is removed.
Typical fix: Replace the knock sensor. It is highly recommended to also replace the intake manifold gaskets and the short knock sensor wire harness at the same time.
Est. part cost: $40-$150 - Damaged Wiring or Connector 🔴 High Probability The wiring harness is located in a hot, hard-to-reach area under the intake manifold. This warm, secluded spot is an ideal nesting place for rodents, who are known to chew on soy-based wiring insulation, causing shorts or open circuits. A Reddit user with a 2014 xB was told by the dealer that rodents were the cause. The connector itself can also become brittle from heat and break.
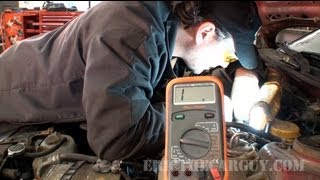
How to confirm: A visual inspection is key. Once the intake manifold is removed, carefully inspect the wiring harness leading to the knock sensor for signs of chewing, fraying, or heat damage. Use a multimeter to check for continuity between the sensor connector and the ECM connector. 🎬 Watch: EricTheCarGuy shows how to diagnose knock sensor circuits.
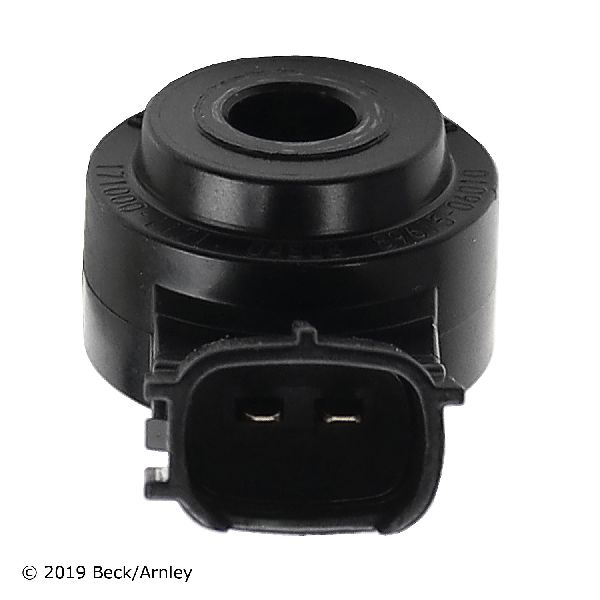
Typical fix: Repair the damaged section of the wire or replace the connector pigtail. If the damage is close to the sensor, replacing the short knock sensor sub-harness (Part No. 82219-0H010) is the best practice.
Est. part cost: $10-$50 for a pigtail, $40-$60 for the sub-harness
Rare But Worth Checking
- Engine Control Module (ECM) Failure: → Shop Engine Control Module (ECM) This is very uncommon. The ECM should only be considered after the sensor and wiring have been definitively ruled out as the cause.
- Loose Knock Sensor: → Shop Ignition Knock (Detonation) Sensor If the sensor is not torqued correctly to the engine block, it cannot detect vibrations properly. This is more likely to occur after a previous repair. The correct torque is critical.
- Internal Short in Wiring Harness: Even without visible rodent damage, wires within the harness can degrade from heat and short against each other, causing the P0325 code. A user on a Tacoma forum experienced this exact issue.
Diagnosis Steps
- Read the code with an OBD-II scanner to confirm P0325 is present.
- Clear the code and test drive the vehicle to see if the code returns immediately. This helps confirm a hard fault.
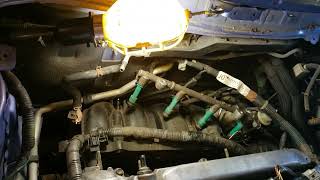
- Begin disassembly to access the intake manifold. This is a labor-intensive process.
- Once the intake manifold is removed, visually inspect the knock sensor and its wiring harness for any obvious damage, such as chewed or frayed wires, or corrosion on the connector. This is a critical step due to the high probability of rodent damage.
- Disconnect the sensor. Test the sensor's internal resistance with a multimeter. While specs can vary, a reading that is open or shorted indicates a failed sensor.
- Test the wiring harness for continuity from the sensor connector back to the ECM. Check for shorts to ground or power.
- If the wiring and sensor test good, the issue may be with the ECM, but this is extremely rare.
- Assuming a bad sensor or harness is found, replace the necessary parts. It is critical to torque the new sensor to the manufacturer's specification, which is 20 N*m or 15 ft-lbs for the 2AZ-FE engine.
- Always replace the intake manifold gaskets before reinstalling the manifold to prevent vacuum leaks. 🎬 See this walkthrough for removing the intake and sensor.
- Reassemble all components, clear the code, and perform a final test drive to ensure the repair was successful.
Parts You'll Likely Need
- Knock Sensor
(OEM #89615-20090)— This is the most common failure point for code P0325. Due to the high labor cost to access it, using a quality part is crucial.
Trusted brands: Denso, Toyota Genuine
OEM price range: $140-$200
Aftermarket price range: $30-$90 - Intake Manifold Gasket Set
(OEM #Fel-Pro MS 96734 / Mahle MS19528)— The intake manifold must be removed to access the knock sensor. The gaskets are single-use and must be replaced to prevent vacuum leaks.
Trusted brands: Mahle, Fel-Pro, Toyota Genuine
OEM price range: $30-$50
Aftermarket price range: $15-$30 - Knock Sensor Wire Harness
(OEM #82219-0H010)— This short sub-harness connects the sensor to the main engine harness and is a frequent point of failure due to rodent damage or heat degradation. It is highly recommended to replace it along with the sensor.
Trusted brands: Toyota Genuine, Dorman 917-034
OEM price range: $40-$60
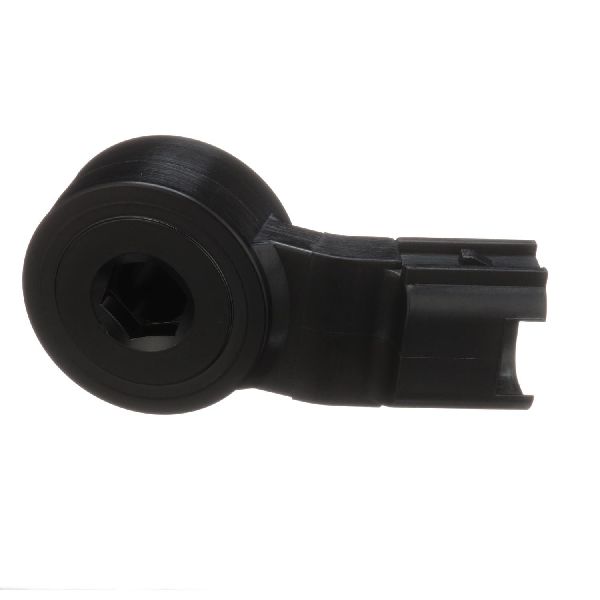
Aftermarket price range: $20-$40 - Knock Sensor Connector Pigtail
(OEM #Standard Motor Products S2545 / AutoZone CONB11240)— If only the connector is broken or corroded, a pigtail can be spliced in, avoiding the need to replace the entire harness.
Trusted brands: Standard Motor Products, Dorman
OEM price range: N/A
Aftermarket price range: $15-$30
Technical Service Bulletins (TSBs) & Recalls
- No specific Technical Service Bulletins (TSBs) were found for P0325 on the 2008-2015 Scion xB. The issue is typically addressed as a standard diagnostic and repair procedure.
Platform-Specific Known Issues
- The primary issue for this platform is the difficult-to-access location of the knock sensor under the intake manifold, which significantly increases labor time and cost for replacement.
- The warm, protected space under the intake manifold makes the knock sensor wiring harness a common target for rodents seeking shelter and food, frequently causing a P0325 code.
Mechanic-Grade Diagnostic Values
- Knock Sensor Internal Resistance — expected: 120 to 280 kΩ at 20°C (68°F). Failure: An open circuit (infinite resistance) or a reading outside the specified range indicates a faulty sensor.
- Knock Sensor Circuit to Ground Resistance at ECM — expected: 1 MΩ or higher. Failure: A resistance lower than 1 MΩ indicates a short to ground in the wiring harness or the sensor itself.
- Live Data Scan Tool Parameter 'KNOCK FB VAL' — expected: The value should change during a test drive or when revving the engine.. Failure: A static or unchanging value suggests the ECM is not receiving a valid signal from the knock sensor.
Scan Tool Commands That Help
- Toyota Techstream / Professional Scan Tool: Read Freeze Frame Data — This is the first step to understand the engine conditions (speed, temperature, etc.) at the exact moment the P0325 fault was triggered. This can help differentiate between a hard failure and an intermittent one.
- Toyota Techstream / Professional Scan Tool: Live Data > KNOCK FB VAL — After warming up the engine, monitor this value while driving or revving the engine. It reflects the feedback value for knocking. If the value is static, it confirms the ECM is not receiving a usable signal, pointing to a circuit or sensor fault.
Wiring & Ground Locations
- ECM Connector E6, Terminal KNK1 — The ECM is located behind the glove box. Connector E6 is one of the main connectors. Pin KNK1 is the signal wire from the knock sensor.. This is the primary test point for diagnosing the entire knock sensor circuit from the ECM side. Testing for continuity and shorts to ground at this pin can confirm if the wiring harness is intact without first removing the intake manifold.
- Knock Sensor Connector — Bolted to the engine block, underneath the intake manifold.. This is the connection point for the sensor and the sub-harness. It is a common failure point due to heat, vibration, and potential rodent damage. A visual inspection here is critical once the manifold is off.
Real Owner Repair Stories
- YouTube video by 'ThePartsGuys' (1996 Honda Prelude (H23A1 engine, similar diagnostic principle)) — P0325 code preventing the car from passing emissions.
❌ Tried (didn't work) The narrator strongly advises against immediately replacing the expensive knock sensor without testing the circuit first.
✅ What actually fixed it The narrator found a de-pinned wire at the ECU connector. After confirming continuity from the sensor connector to the wire at the ECU-side of the harness, he determined the wire simply needed to be re-pinned into the ECU connector to restore the connection and fix the code.
OEM Part Supersession History
89615-20090→89615-06010— Standard part number consolidation and update by Toyota.
Heads up: The parts are interchangeable and the new number is the correct replacement for the original.82219-33030→82219-07010— Standard part number update by Toyota for the knock sensor wire harness.
Heads up: The parts are interchangeable.
Diagnostic Flowchart
Used vs. New Parts: Buying Guide for This Vehicle
When a used part is the smart pick: For this repair, using a used part is generally not recommended for the sensor itself due to the high labor cost involved. However, obtaining a used knock sensor wire harness (82219-0H010) from a low-mileage donor vehicle can be a cost-effective option if the part is thoroughly inspected for any signs of rodent damage, brittleness, or corrosion at the connector.
Donor-vehicle mileage cap: roughly under 80000 miles for the part to have meaningful remaining life.
What to inspect on the donor part:
- For the wire harness, check that the plastic connector is not brittle or cracked.
- Inspect the full length of the wire for any signs of chewing, abrasion, or previous repairs.
- Ensure the locking tab on the connector is intact and functional.
OEM-only on this vehicle (don't cheap out):
- Knock Sensor
Aftermarket brands forum-validated for this vehicle:
- Denso (for the knock sensor, as they are the OEM supplier)
- Dorman (for the wire harness or connector pigtail)
Brands owners have reported issues with on this vehicle:
- No-name, unbranded knock sensors from online marketplaces are a significant risk. A failed aftermarket sensor will require repeating the entire labor-intensive intake manifold removal, making the upfront savings not worthwhile.
Real Owner Stories
Aggregated from forums and TSBs cited above. Mileages and costs reflect what owners reported in those sources.
2014 Scion xB — 19000 miles
Symptoms: check engine light went on.
What fixed it: The owner was quoted a repair but had not yet completed it. The dealer claimed the issue was rodent damage to the wiring, which would not be a warranty repair.
Cost: $800-$1000
Source hint: Reddit r/MechanicAdvice: 'Should I replace my Scion XB knock Sensor-Pt 2'
Toyota with 2AZ-FE engine
Symptoms: The P0325 code would appear when the engine reached a specific temperature.
What fixed it: The owner discovered the knock sensor pigtail had been routed incorrectly after an engine rebuild, putting stress on the wire. Replacing the pigtail and intake gaskets resolved the issue.
Source hint: YotaTech Forums: 'finally-fixing-p0325-252918/'
Related OBD-II Codes
Frequently Asked Questions
Why is the repair for a P0325 code so expensive on my 2008-2015 Scion xB?
The dealer says rodents chewed my knock sensor wires and it's not covered by warranty. Is this a common problem on the xB?
I'm replacing the knock sensor myself. What is the correct torque specification for the 2AZ-FE engine?
What other parts should I replace while I have the intake manifold off for the knock sensor?
Are there any official recalls or Technical Service Bulletins (TSBs) for the P0325 code on this Scion xB?
My Scion xB is hesitating and has lost power. Could this be related to the P0325 code?
Helpful Videos
We Have This Part in Stock


The information in this article is provided for general reference and educational purposes only. Vehicle specifications, procedures, and part compatibility can vary by production date, trim level, and region. Always consult your vehicle's factory service manual and verify part numbers before purchasing or performing repairs. Safety-critical components such as airbags, seat belts, and braking systems should be installed by a qualified professional.
- Scion xB:
- 🧭 Diagnostic Flowchart
- 🎬 Helpful Videos
- 🛍️ Shop This Part
- What's Unique About the 2008-2015 Scion xB
- Symptoms You May Notice
- Most Likely Causes
- Rare But Worth Checking
- Diagnosis Steps
- Parts You'll Likely Need
- Technical Service Bulletins (TSBs) & Recalls
- Platform-Specific Known Issues
- Mechanic-Grade Diagnostic Values
- Scan Tool Commands That Help
- Wiring & Ground Locations
- Real Owner Repair Stories
- OEM Part Supersession History
- Used vs. New Parts: Buying Guide for This Vehicle
- Real Owner Stories
- 2014 Scion xB — 19000 miles
- Toyota with 2AZ-FE engine
- Related OBD-II Codes
- Frequently Asked Questions
- 🎟️ Get 5% Off