
P0325 on 2010-2015 Toyota Prius: Knock Sensor Circuit Malfunction Causes and Fixes
This code indicates a fault in the knock sensor circuit. The most likely causes are a failed knock sensor or damaged wiring, often from rodents. Expect to pay $120-$260 for the part and $270-$400 for labor if you don't do it yourself. A popular DIY shortcut avoids removing the intake manifold.
- P0325 on a 2010-2015 Prius points to a problem with the knock sensor circuit, not necessarily the sensor itself.
- Always inspect the wiring harness for rodent damage before replacing the sensor, as Toyota's soy-based wire insulation is a known attractant.
- The sensor is located under the intake manifold, but a popular shortcut exists that can save significant time and money on labor.
- Driving with this code will result in reduced power and fuel economy; it should be addressed to prevent potential long-term engine strain.
- Using a high-quality OEM (89615-06010 / 89615-20090) or Denso brand replacement sensor torqued to 15 ft-lbf is critical for a lasting repair.
What's Unique About the 2010-2015 Toyota Prius
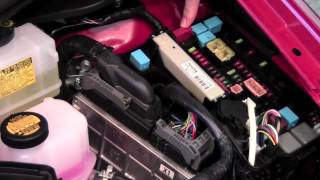
On the 2ZR-FXE engine in the Gen 3 Prius, the knock sensor is notoriously difficult to access, as it's located on the engine block, underneath the intake manifold. The official Toyota repair procedure requires removing the entire intake manifold and draining engine coolant, a labor-intensive job. However, many owners have successfully replaced it using a well-documented shortcut. This involves removing the air filter housing and the single 12mm bolt holding the oil dipstick tube, then moving the tube aside to create just enough room to reach the sensor with a 12mm wrench. This significantly reduces repair time and complexity.
Symptoms You May Notice
- Check Engine Light is on
- Sluggish or hesitant acceleration
- Reduced engine power (limp mode)
- Decreased fuel economy
- Audible engine knocking or pinging in some cases
- Replacing the knock sensor without first checking the wiring. Rodent damage to the harness is a very common cause for this code on Priuses and should always be inspected before buying parts.
Most Likely Causes
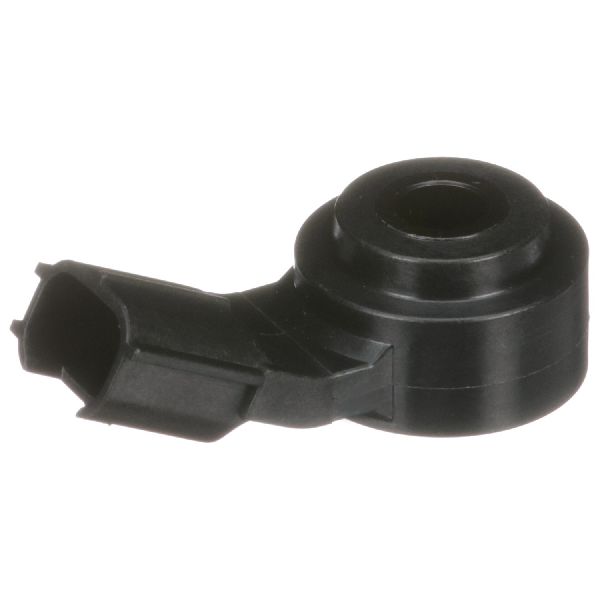
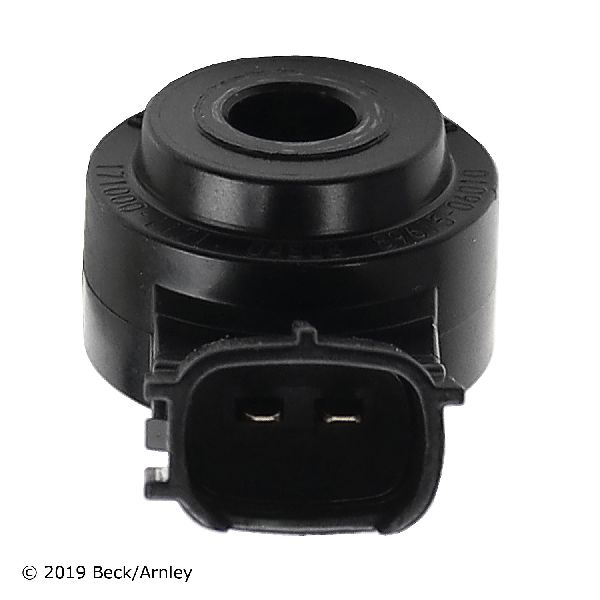
- Faulty Knock Sensor 🔴 High Probability → Shop Ignition Knock (Detonation) Sensor The sensor is a sensitive piezoelectric component that can fail over time due to constant heat cycles and engine vibration. It is a common failure point across many Toyota models.
How to confirm: Test the sensor's internal resistance with a multimeter. The specification is 120 to 280 kΩ at 20°C (68°F). An out-of-spec or open reading indicates a failed sensor. An oscilloscope can also be used to check for a proper voltage signal when tapping on the engine block near the sensor.
Typical fix: Replace the knock sensor. It is highly recommended to use an OEM or Denso-branded sensor for reliability.
Est. part cost: $50-$200 - Damaged Wiring or Connector 🟡 Medium Probability Toyota, like many manufacturers, began using soy-based wire insulation which is more environmentally friendly but has been found to attract rodents. The knock sensor harness is in a sheltered location on the engine block, making it a target for nesting rodents who chew through the wires, causing an open or short circuit. This has been the subject of class-action lawsuits.
How to confirm: Visually inspect the entire length of the knock sensor wiring harness for breaks, fraying, melting, or obvious signs of rodent damage (chew marks, droppings). Check the connector for corrosion, moisture, or loose pins. If two knock-sensor related codes appear at once (e.g., P0325 and P0330 on a V6), a harness issue is highly probable.
Typical fix: Repair the damaged section of wire or replace the knock sensor sub-harness if available. In cases of rodent damage, some owners wrap the new harness in capsaicin-infused rodent-repellent tape (e.g., Honda part 4019-2317).
Est. part cost: $20-$60 for a sub-harness or repair materials. - Loose Knock Sensor ⚪ Low Probability → Shop Ignition Knock (Detonation) Sensor This is uncommon but can happen if the sensor was improperly installed or torqued during a previous repair.
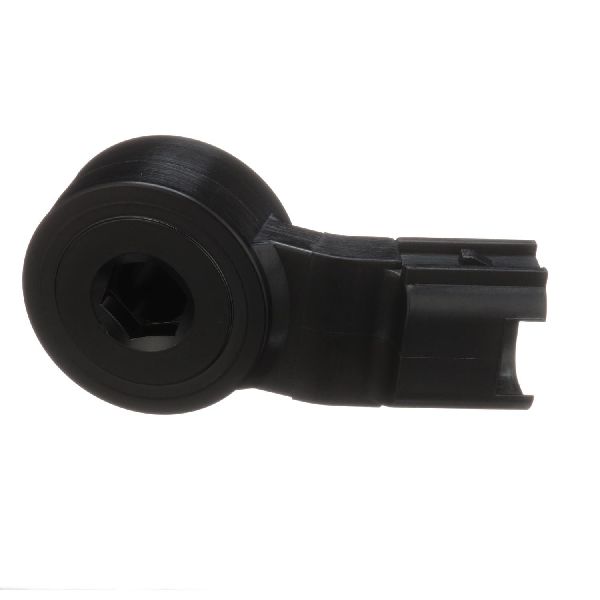
How to confirm: Attempt to physically move the sensor. It should be completely tight against the engine block. The bolt must be torqued correctly to function. Over-torquing can make the sensor overly sensitive and cause false signals, while under-torquing can prevent it from detecting knock.
Typical fix: Tighten the knock sensor mounting bolt to the manufacturer's specified torque of 15 ft-lbf (20 N·m).
Est. part cost: $0
Rare But Worth Checking
- Engine Control Module (ECM) Failure: → Shop Engine Control Module (ECM) This is very uncommon. The ECM should only be considered after all other possibilities, including the sensor and its entire circuit, have been thoroughly tested and ruled out.
Diagnosis Steps
- Read the trouble codes with an OBD-II scanner to confirm P0325 is present.
- Perform a thorough visual inspection of the knock sensor's wiring harness and connector. Look for any signs of damage, such as breaks, corrosion, or rodent activity. The harness runs under the intake manifold.
- If the wiring looks good, test the circuit. Disconnect the ECM and knock sensor connectors and check for continuity and for shorts to ground between them.
- If the circuit is intact, test the knock sensor itself. Measure its internal resistance between the two pins. It should be between 120 kΩ and 280 kΩ at room temperature.
- If the sensor bolt is accessible, verify it is tightened to the correct torque specification of 15 ft-lbf (20 N·m).
- If the sensor and wiring test good, the fault may lie with the ECM, but this is extremely rare.
Parts You'll Likely Need
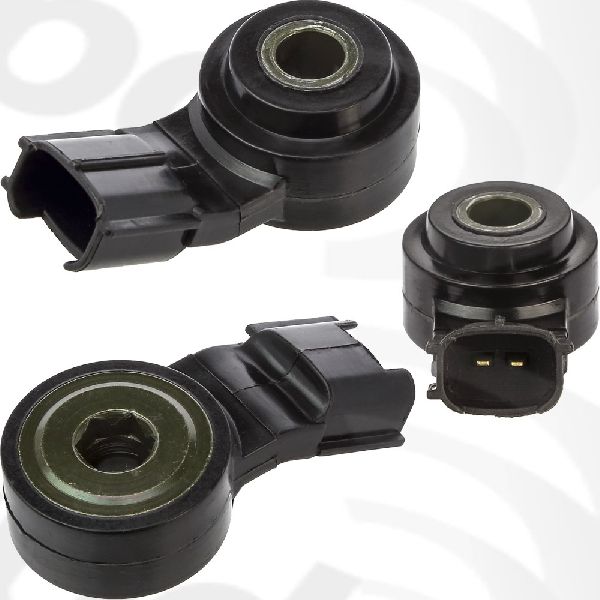
- Knock Sensor
(OEM #89615-06010 (superseded by 89615-20090))— This sensor is the most common part to fail, triggering the P0325 code.
Trusted brands: Denso (OEM manufacturer), NGK, Bosch
OEM price range: $140-$205
Aftermarket price range: $50-$150 - Knock Sensor Wire Harness
(OEM #82219-47010 (example, verify by VIN))— Often damaged by rodents chewing on the soy-based insulation. It's wise to replace the harness when replacing the sensor, especially if any damage is visible.
Trusted brands: Toyota (OEM)
OEM price range: $40-$60
Aftermarket price range: $20-$40
Platform-Specific Known Issues
- The official Toyota repair procedure requires removing the intake manifold, which is labor-intensive. A well-documented shortcut exists among owners that avoids this step, making DIY replacement more feasible.
- The soy-based wiring insulation used on the harness is a known attractant for rodents, making wire damage a frequent cause of this code.
Mechanic-Grade Diagnostic Values
- Knock Sensor Internal Resistance — expected: 120 to 280 kΩ at 20°C (68°F). Failure: A reading outside this range or an open circuit (infinite resistance) indicates a faulty sensor.
- Knock Sensor Circuit Continuity to Ground at ECM — expected: 1 MΩ or higher. Failure: A resistance lower than 1 MΩ indicates a short to ground in the wiring harness.
- Knock Sensor Waveform (Oscilloscope) — expected: A consistent AC waveform should be present between terminals KNK1 and EKNK at the ECM when the engine is running at 2,500-4,000 RPM. The frequency should be in the 6-15 kHz range.. Failure: A flat line (no signal) or a signal that does not change with engine RPM points to a faulty sensor or circuit.
- ECM Reference Voltage to Sensor — expected: 4.5 to 5.5 V between terminals KNK1 and EKNK with the sensor connected and ignition ON.. Failure: Voltage below 0.5V (P0327) or above 4.5V (P0328, with different conditions) can indicate a short or open circuit respectively.
Scan Tool Commands That Help
- Toyota Techstream: Freeze Frame Data — Always check the Freeze Frame Data for P0325. It records the engine conditions (speed, coolant temp, etc.) at the exact moment the fault was triggered, which is crucial for diagnosis.
- Toyota Techstream: Active Test — While there isn't a direct 'Active Test' to trigger the knock sensor itself, Techstream's active tests for other components (like injectors or ignition) can be used while monitoring the knock sensor live data to see if it responds, helping to verify its function indirectly.
Wiring & Ground Locations
- Knock Sensor Connector (K1) — On the engine block, below the intake manifold, near the oil dipstick tube.. This is the primary connection point for the sensor. It is a common site for corrosion or damage, and its sub-harness is what rodents often chew.
- ECM Connector E5 (2ZR-FXE) — Located in the engine bay, typically near the firewall.. The knock sensor wires (KNK1 and EKNK) terminate here. Testing for voltage and continuity at these pins is a key diagnostic step to isolate a wiring fault from a sensor fault.
- Engine Ground Strap — There are multiple ground points. A key one for sensors is often a brown wire providing a 'quiet ground' to shield from electrical noise. A main chassis ground is located on the strut tower behind the fuse box on the driver's side. Another is on the engine block itself.. A poor ground connection can introduce electrical noise or cause incorrect voltage readings, potentially triggering a false P0325 code. Toyota specifically uses shielded, quiet grounds for sensitive sensors like this one.
Real Owner Repair Stories
- PriusChat user 'saak' (2010 Prius Touring) — Check Engine Light with P0325.
✅ What actually fixed it The user successfully replaced the knock sensor without following the official procedure of removing the intake manifold. They removed the air filter housing and the 12mm bolt for the oil dipstick tube, moved the tube aside, and used a 12mm wrench to access and replace the sensor. This resolved the code. - Reddit user r/AskMechanics (2015 Toyota Highlander 3.5L V6 (Similar rodent issue)) — Check Engine Light with knock sensor code (P0328).
✅ What actually fixed it The cause was confirmed to be rodent-damaged wiring on the knock sensor harness, located under the intake manifold. The final repair involved removing the intake manifold, soldering the chewed wires, and re-sealing the harness. The repair cost was $1,135, which was covered by comprehensive insurance.
OEM Part Supersession History
89615-20090→89615-06010— Standard part revision and consolidation. The part is used across a wide range of Toyota and Scion models from 2002 to 2020.
Heads up: The parts are interchangeable. However, some sources incorrectly state the supersession is the other way around. 89615-06010 is the current, correct part number.
Diagnostic Flowchart
Other Known Issues on This Vehicle
Issues unrelated to this code that are worth knowing about as an owner of this generation:
- Excessive Oil Consumption 🔴 High — Common on 2010-2014 models, especially over 100k miles. Attributed to piston ring design that gets clogged with carbon. The issue was reportedly improved with a piston/ring redesign in mid-2014 for the 2015 model year. (Ref: Toyota had a warranty enhancement program for this issue, but it has since expired.)
- Clogged EGR System (Valve, Cooler, and Intake Manifold Passages) 🔴 High — Very common, typically requires cleaning every 75k-100k miles to prevent issues. Carbon buildup restricts exhaust gas flow, which can lead to engine knocking, rough idle, and eventually a blown head gasket if ignored.
- Brake Actuator / Booster Pump Failure 🔴 High — A well-documented issue, particularly in 2010 models, leading to a loss of braking assist, numerous dashboard warning lights, and a loud, frequent buzzing noise from the pump. Multiple recalls and warranty extensions have been issued. (Ref: Recalls 13V-235 (DOH) and 19V-544 (KOL), and Customer Support Program ZJB.)
- Hybrid Inverter Failure 🔴 High — A significant issue that can cause the hybrid system to shut down while driving. This was the subject of a major recall. (Ref: Recalls 14V-053 and 18V-684. The IPM (Intelligent Power Module) within the inverter can overheat and fail.)
- Premature Headlight Burnout 🟡 Low — Common on 2010-2012 models due to a faulty wiring harness that causes bulbs to short out frequently. (Ref: A recall was issued in 2017 to replace the wiring harness.)
Used vs. New Parts: Buying Guide for This Vehicle
When a used part is the smart pick: For the wire harness (pigtail), a used part from a junkyard can be a cost-effective solution, provided it is in excellent condition with no signs of brittleness, corrosion, or prior rodent damage. For the sensor itself, buying used is not recommended.
Donor-vehicle mileage cap: roughly under 80000 miles for the part to have meaningful remaining life.
What to inspect on the donor part:
- For a used harness, inspect the full length for any chew marks, no matter how small.
- Check that the connector clicks firmly into place and that the pins are clean and straight.
- Ensure the plastic is not brittle and the wire insulation is flexible, not cracked.
OEM-only on this vehicle (don't cheap out):
- Knock Sensor
Aftermarket brands forum-validated for this vehicle:
- Denso (This is the Original Equipment Manufacturer, so a Denso-branded part is equivalent to the Toyota genuine part).
Brands owners have reported issues with on this vehicle:
- Unnamed or generic 'white box' sensors from online marketplaces. Forum users frequently report that cheap aftermarket sensors either fail quickly or are dead on arrival, forcing them to do the difficult repair job twice.
Real Owner Stories
Aggregated from forums and TSBs cited above. Mileages and costs reflect what owners reported in those sources.
2010-2015 Toyota Prius 1.8L
Symptoms: The user detailed a method to replace the sensor because the official repair was too labor-intensive.
What fixed it: Replaced the knock sensor using a shortcut method involving the removal of the air filter housing and dipstick tube bolt to gain access without pulling the intake manifold.
Source hint: PriusChat thread titled 'Easy Knock Sensor Replacement'
Toyota V6 (referenced for diagnostic pattern)
Symptoms: Two knock-sensor related codes appeared at the same time.
What fixed it: Identified as a wiring harness issue, often caused by rodents, rather than multiple sensors failing simultaneously.
Source hint: ClubLexus thread titled 'P0330 & p0325'
Related OBD-II Codes
Frequently Asked Questions
Is there a way to replace the knock sensor on my 2010-2015 Prius without removing the entire intake manifold?
Why is my Prius wiring harness specifically targeted by rodents, leading to the P0325 code?
What is the specific resistance specification I should look for when testing the knock sensor on a 1.8L Prius?
Could my P0325 code be related to the frequent oil consumption issues on my 2012 Prius?
What is the correct torque for the knock sensor bolt on the 2ZR-FXE engine?
Should I use an aftermarket knock sensor for my Prius repair?
Helpful Videos

We Have This Part in Stock


The information in this article is provided for general reference and educational purposes only. Vehicle specifications, procedures, and part compatibility can vary by production date, trim level, and region. Always consult your vehicle's factory service manual and verify part numbers before purchasing or performing repairs. Safety-critical components such as airbags, seat belts, and braking systems should be installed by a qualified professional.
- Toyota Prius:
- 🧭 Diagnostic Flowchart
- 🎬 Helpful Videos
- 🛍️ Shop This Part
- What's Unique About the 2010-2015 Toyota Prius
- Symptoms You May Notice
- Most Likely Causes
- Rare But Worth Checking
- Diagnosis Steps
- Parts You'll Likely Need
- Platform-Specific Known Issues
- Mechanic-Grade Diagnostic Values
- Scan Tool Commands That Help
- Wiring & Ground Locations
- Real Owner Repair Stories
- OEM Part Supersession History
- Other Known Issues on This Vehicle
- Used vs. New Parts: Buying Guide for This Vehicle
- Real Owner Stories
- 2010-2015 Toyota Prius 1.8L
- Toyota V6 (referenced for diagnostic pattern)
- Related OBD-II Codes
- Frequently Asked Questions
- 🎟️ Get 5% Off