
P0325 on 2004-2012 Toyota RAV4 2.4L: Knock Sensor Circuit Malfunction Causes and Fixes
On a 2004-2012 RAV4 with the 2.4L engine, code P0325 is almost always a failed knock sensor or its wiring harness. The repair is labor-intensive because the sensor is located under the intake manifold. Expect a shop repair to cost between $500 and $1000, primarily due to labor. Using a quality Denso or NGK/NTK sensor is highly recommended, and the new sensor must be torqued to exactly 15 ft-lbs.
- P0325 on this RAV4 points to a problem with the knock sensor or its wiring.
- The repair is labor-intensive (3-5 hours) because the sensor is located under the intake manifold.
- Rodent damage to the wiring harness is a very common cause on this specific vehicle.
- Using a high-quality OEM or Denso sensor and replacing the intake manifold gaskets is critical for a successful DIY repair.
- The correct torque for the knock sensor bolt is 15 ft-lbs; incorrect torque will lead to faulty readings.
What's Unique About the 2004-2012 Toyota RAV4
The primary challenge with the P0325 code on the RAV4 with the 2AZ-FE engine is the physical location of the knock sensor. It is buried on the back of the engine block, underneath the plastic intake manifold. This design makes accessing the sensor and its wiring difficult, turning what would be a simple sensor swap into a labor-intensive repair. A very common cause of this code on this platform is rodent damage to the wiring harness. The sheltered area under the intake manifold provides an ideal nesting spot, and the soy-based wire insulation used in this era can attract them.
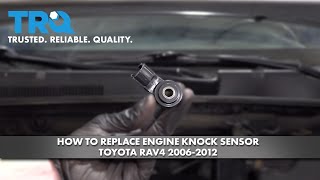
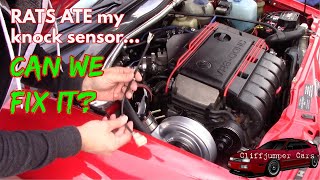
🎬 Watch a mechanic repair knock sensor wiring damaged by rodents.Generation note: This range covers the end of the second generation (XA20, 2004-2005) and the majority of the third generation (XA30, 2006-2012) RAV4. Both generations used the 2.4L 2AZ-FE engine, and the knock sensor's location and the repair procedure are fundamentally the same across these years.
Symptoms You May Notice
- Check Engine Light is illuminated
- Reduced engine power and sluggish acceleration ('limp mode')
- Noticeably worse fuel economy
- In some cases, the transmission may not shift into overdrive, causing high RPM at highway speeds
- Engine may make a pinging or knocking sound, though this is less common than the other symptoms
- Replacing spark plugs or ignition coils to fix poor performance without first addressing the P0325 code. The performance issues are a symptom of the ECM's fail-safe mode, not the root cause.
- Assuming the code means the engine has a mechanical knock. P0325 specifically points to an electrical fault in the sensor's circuit, not necessarily the presence of actual engine knock.
Most Likely Causes
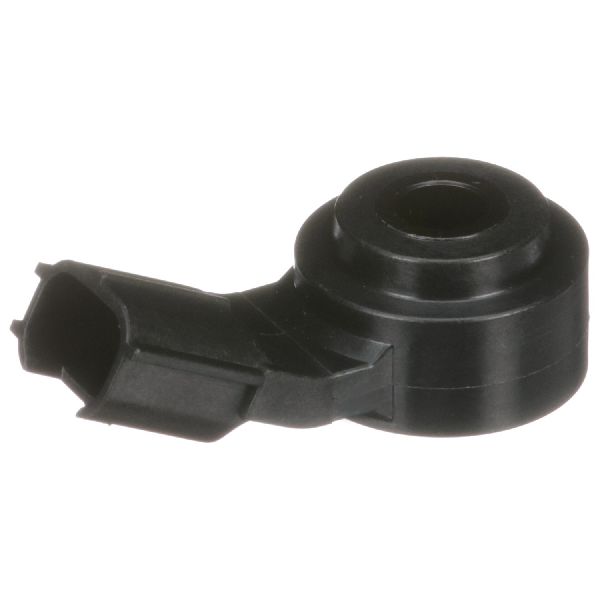
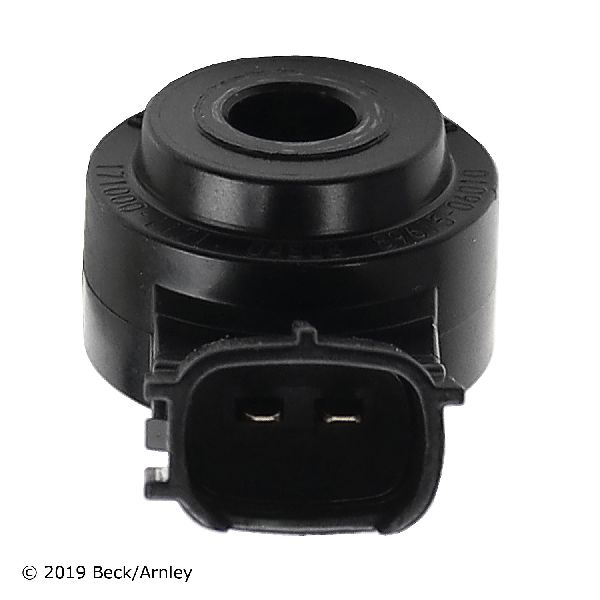
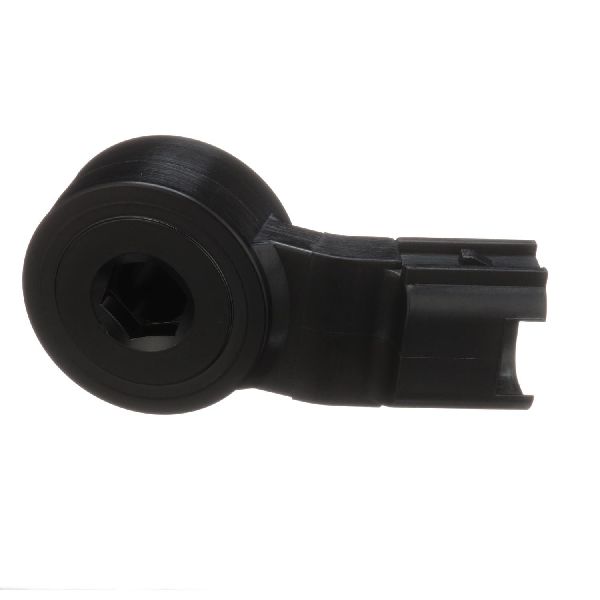
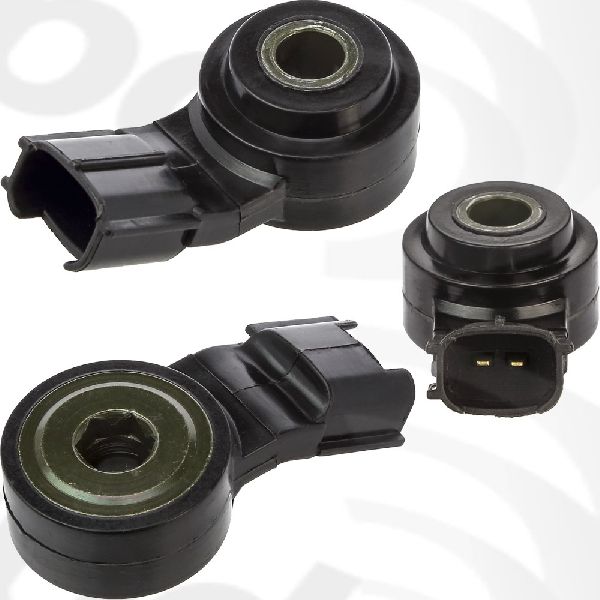
- Failed Knock Sensor 🔴 High Probability → Shop Ignition Knock (Detonation) Sensor The sensor lives in a high-heat environment under the intake manifold, leading to eventual failure from heat cycles and vibration.
How to confirm: After removing the intake manifold, test the sensor's resistance with a multimeter. An open circuit (infinite resistance) or a reading outside the manufacturer's specification confirms failure. A more advanced check is to use an oscilloscope to verify a normal mode vibration frequency of ~7.1-7.6 kHz with the engine running.
Typical fix: Replace the knock sensor. The new sensor must be torqued to exactly 15 ft-lbs (20 N*m). Over or under-tightening can cause incorrect readings. Due to the high labor cost, it is critical to use a high-quality OEM or OEM-supplier part.
Est. part cost: $50-$250 - Damaged Wiring Harness (Rodent Damage) 🔴 High Probability The wiring harness for the knock sensor runs in a protected area under the intake manifold that is a common nesting spot for rodents, who often chew through the soy-based wires.
How to confirm: After removing the intake manifold, visually inspect the wiring harness leading to the knock sensor for signs of chewing, frayed wires, or missing insulation. This is the most common cause after the sensor itself.
Typical fix: Repair the damaged section of the harness or replace the knock sensor pigtail connector. In severe cases, a new engine wiring harness may be needed.
Est. part cost: $15-$50 for a pigtail, significantly more for a full harness. - Loose or Corroded Connector ⚪ Low Probability Vibrations and heat can cause the connector to loosen over time, and moisture can lead to corrosion, though this is less common than sensor failure or wire damage.
How to confirm: Visually inspect the connector at the knock sensor and any intermediate connectors for looseness, corrosion, or pushed-out pins.
Typical fix: Clean the connector terminals and apply dielectric grease. If the connector is damaged, replace it.
Est. part cost: $0-$25
Rare But Worth Checking
- Loose Knock Sensor Bolt: → Shop Ignition Knock (Detonation) Sensor If the bolt securing the knock sensor to the engine block is loose, it cannot properly detect engine vibrations, which can trigger a P0325 code. This should be checked during sensor replacement. The correct torque is 15 ft-lbs (20 N*m).
- Faulty Engine Control Module (ECM): → Shop Engine Control Module (ECM) This is extremely rare. The ECM should only be considered as the cause after the sensor, wiring, and connectors have been thoroughly tested and confirmed to be good.
Diagnosis Steps
- Read the trouble code with an OBD-II scanner to confirm P0325 is present.
- Visually inspect the area around the intake manifold for any signs of rodent activity (droppings, nesting material).
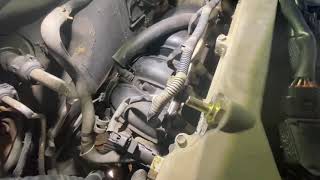
- Due to the sensor's location, direct testing requires removing the airbox, throttle body, and intake manifold. 🎬 See how to properly remove the intake manifold for access. This is a significant job.
- Once the intake manifold is removed, perform a close visual inspection of the knock sensor wiring harness for any signs of damage, especially from chewing.
- Disconnect the sensor and test its internal resistance using a multimeter. An open circuit (infinite resistance) indicates a failed sensor.
- If the sensor tests good, check for continuity and shorts in the wiring harness between the sensor connector and the ECM. Check for resistance of 1 MΩ or higher between the signal wire (KNK1 at ECM) and body ground to rule out a short.
- Check that the knock sensor mounting bolt is torqued correctly to 15 ft-lbs (20 N*m).
- If the wiring and sensor are confirmed to be good, the problem may lie with the ECM, but this is highly unlikely.
Parts You'll Likely Need
- Knock Sensor
(OEM #89615-20090 (may be superseded by 89615-06010 or 89615-BZ030))— This is the most common point of failure for this code. The sensor fails internally from heat and vibration over time.
Trusted brands: Denso (OEM supplier), NGK/NTK
OEM price range: $150-$250
Aftermarket price range: $50-$120 - Intake Manifold Gasket Set
(OEM #17171-28030 (Manifold to Head Gasket))— The intake manifold must be removed to access the knock sensor. The gaskets are single-use and must be replaced to prevent vacuum leaks.
Trusted brands: Fel-Pro, Mahle, Denso
OEM price range: $30-$50
Aftermarket price range: $15-$30 - Knock Sensor Wire Harness Pigtail — Often the original connector is brittle from heat, or the wires have been damaged by rodents. Replacing the pigtail is often easier than repairing individual wires.
Trusted brands: Dorman 645-925, Standard Motor Products S2328
OEM price range: $30-$50
Aftermarket price range: $15-$25
Related Codes That Often Appear With This One
- P0328 - Knock Sensor 1 Circuit High Input: This can be caused by the same wiring issues (like chewed wires shorting together) that trigger P0325.
Technical Service Bulletins (TSBs) & Recalls
- T-SB-0094-11: While not for P0325, this is a critical TSB for the 2AZ-FE engine concerning excessive oil consumption due to piston design. It applies to 2006-2008 RAV4 models.
Mechanic-Grade Diagnostic Values
- Resistance between knock sensor signal wire at ECM and body ground. — expected: 1 MΩ or higher. Failure: Resistance lower than 1 MΩ indicates a short to ground in the harness or sensor.
- Knock Sensor Waveform Frequency (using oscilloscope) — expected: Approx. 7.1 - 7.6 kHz. Failure: If the normal mode vibration frequency is not within this range, the sensor is likely malfunctioning.
- Live Data PID (using Techstream) — expected: The value for 'KNOCK FB VAL' should change during engine operation.. Failure: A static or unresponsive value suggests a problem in the circuit.
Hidden / Shadow Codes Worth Checking
- N/A (Enhanced Diagnostic Mode): While there are no specific hidden codes, Toyota's Techstream software has a 'Check Mode' that uses more sensitive 1-trip detection logic. This is more effective at finding intermittent faults in the knock sensor circuit than the standard 2-trip logic used in normal operation. (see via Toyota Techstream diagnostic software)
Wiring & Ground Locations
- KNK1 — Pin at the Engine Control Module (ECM) connector. The specific pin number can vary slightly by year/harness, but it is the primary signal wire from the knock sensor.. This is the terminal where the ECM receives the knock signal. Testing here confirms the integrity of the entire circuit from the sensor to the computer.
- EKNK / E1 — Pin at the Engine Control Module (ECM) connector that serves as the ground return for the knock sensor.. This is the ground reference for the knock sensor signal. A fault in this wire can cause an incorrect signal reading, triggering P0325.
- Knock Sensor Connector — On the back of the engine block, underneath the intake manifold, connected directly to the knock sensor.. This connector and its pigtail are the most common failure points due to extreme heat causing brittleness and rodent damage from nesting.
Real Owner Repair Stories
- Camry Forums user with 2AZ-FE engine (Toyota Camry with 2.4L 2AZ-FE engine) — Check Engine Light with P0325 and P0328, car sat for a period of time.
✅ What actually fixed it Upon removing the intake manifold, the owner found that rodents had completely chewed through the knock sensor wires. The final fix was soldering in a new pigtail harness and replacing the sensor as a precaution. - YotaTech Forums user (Toyota with 5VZ-FE engine (different engine, but same P0325 code and principle)) — P0325 code appeared only after the engine coolant temperature reached 207°F, causing loss of power and a rich running condition.
❌ Tried (didn't work) Initial diagnosis was uncertain due to the temperature-dependent nature of the fault.
✅ What actually fixed it The owner discovered the knock sensor pigtail harness had been routed incorrectly out the back of the engine valley, putting stress on the wiring. Replacing both knock sensors and the pigtail harness, and routing it correctly out the front of the engine, permanently fixed the code.
OEM Part Supersession History
89615-20090→89615-06010— Standard part number consolidation and design revision by Toyota.
Heads up: None noted. 89615-06010 is the direct, correct replacement. Part number 89615-BZ030 is also cited as a compatible replacement.
Diagnostic Flowchart
Other Known Issues on This Vehicle
Issues unrelated to this code that are worth knowing about as an owner of this generation:
- Excessive Oil Consumption 🔴 High — Very common, particularly in 2006-2009 models. Can start after 60,000 miles. Caused by faulty piston ring design. (Ref: Toyota issued TSB T-SB-0094-11 and a warranty enhancement program (ZE7) to address this by replacing pistons and rings.)
- Stripped Cylinder Head Bolt Threads 🔴 High — A significant design flaw, especially in earlier 2AZ-FE engines. Overheating can cause the aluminum block threads for the head bolts to strip, leading to head gasket failure. (Ref: No recall, but repair often involves installing thread inserts like Time-Serts.)
- Faulty Engine Control Module (ECM) Causing Transmission Problems 🟠 Medium → Shop Engine Control Module (ECM) — Primarily affects 2001-2005 models. A faulty ECM can cause harsh shifting, hesitation, or failure to shift. Owners report this issue can damage the transmission if not addressed. (Ref: Toyota extended the warranty on the ECM for this issue.)
- Throttle Body Failure / Carbon Buildup 🟡 Low — Carbon can build up in the electronic throttle body, causing a rough idle, stalling, and poor acceleration. (Ref: TSB-0064-10 was issued for 2006-2008 models regarding an updated throttle body design.)
Used vs. New Parts: Buying Guide for This Vehicle
When a used part is the smart pick: For this specific repair, using a used part is NEVER recommended. The knock sensor is an electronic component subjected to intense heat and vibration, and its remaining lifespan is impossible to determine. The high labor cost of accessing the sensor far outweighs any potential savings from buying a used part.
What to inspect on the donor part:
- Not applicable as used parts are not recommended.
OEM-only on this vehicle (don't cheap out):
- Knock Sensor: Due to the high labor cost involved in replacement, using an OEM (Toyota) or OEM-supplier (Denso) sensor is critical to avoid premature failure and having to do the job a second time.
Aftermarket brands forum-validated for this vehicle:
- Denso (OEM supplier for Toyota)
- NGK / NTK
- Standard Motor Products (SMP) - for pigtail connector, avoid their budget 'T-Series' line.
Brands owners have reported issues with on this vehicle:
- Unnamed, low-cost generic brands from online marketplaces. The risk of premature failure is too high given the 3-5 hours of labor required for installation.
Real Owner Stories
Aggregated from forums and TSBs cited above. Mileages and costs reflect what owners reported in those sources.
Toyota Camry 2AZ-FE 2.4L
Symptoms: The car sat for a while, then triggered a P0325/P0328 code.
What fixed it: Soldering in a new pigtail harness after discovering rodents had completely chewed through the knock sensor wires under the intake manifold.
Source hint: Camry Forums - P0325 from Rodent Damage
Toyota RAV4 2AZ-FE 2.4L
Symptoms: Check engine light for P0325.
What fixed it: DIY replacement of the knock sensor and the intake manifold gasket while checking for chewed wires.
Source hint: Toyota Nation - DIY P0325 Knock Sensor Replacement
Toyota Tacoma V6
Symptoms: Knock sensor code (P0333).
What fixed it: Repair of soy-based wiring harness chewed by rodents under the intake manifold.
Cost: $1200-$1500
Source hint: Tacoma World - Rodents Chewing Knock Sensor Wires
Related OBD-II Codes
Frequently Asked Questions
Does TSB-0094-11 for the 2AZ-FE engine address my P0325 knock sensor code?
Why is my 2004-2012 RAV4 sluggish and refusing to shift into overdrive with this code?
Is it true that rodents are a common cause for P0325 on the RAV4?
Can I just tighten the knock sensor if it's loose, or is there a specific torque?
I have a 2005 RAV4; could my transmission shifting issues be related to the ECM instead of the knock sensor?
How can I confirm the knock sensor has failed before I pay for the expensive labor to remove the intake manifold?
Helpful Videos

We Have This Part in Stock


The information in this article is provided for general reference and educational purposes only. Vehicle specifications, procedures, and part compatibility can vary by production date, trim level, and region. Always consult your vehicle's factory service manual and verify part numbers before purchasing or performing repairs. Safety-critical components such as airbags, seat belts, and braking systems should be installed by a qualified professional.
- Toyota RAV4:
- 🧭 Diagnostic Flowchart
- 🎬 Helpful Videos
- 🛍️ Shop This Part
- What's Unique About the 2004-2012 Toyota RAV4
- Symptoms You May Notice
- Most Likely Causes
- Rare But Worth Checking
- Diagnosis Steps
- Parts You'll Likely Need
- Related Codes That Often Appear With This One
- Technical Service Bulletins (TSBs) & Recalls
- Mechanic-Grade Diagnostic Values
- Hidden / Shadow Codes Worth Checking
- Wiring & Ground Locations
- Real Owner Repair Stories
- OEM Part Supersession History
- Other Known Issues on This Vehicle
- Used vs. New Parts: Buying Guide for This Vehicle
- Real Owner Stories
- Toyota Camry 2AZ-FE 2.4L
- Toyota RAV4 2AZ-FE 2.4L
- Toyota Tacoma V6
- Related OBD-II Codes
- Frequently Asked Questions
- 🎟️ Get 5% Off