
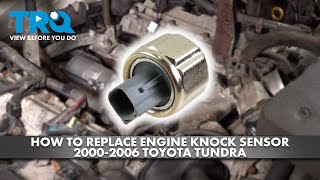
P0325 on 2000-2006 Toyota Tundra 4.7L V8: Knock Sensor Causes and Fixes
On a first-generation Toyota Tundra, code P0325 is almost always caused by rodents chewing the knock sensor wiring harness located under the intake manifold. Due to the very high labor cost to access it, the standard fix is to replace both knock sensors and the harness at the same time using OEM parts. Expect a shop repair to cost between $700 and $1,200.
- P0325 on a 2000-2006 Tundra is most likely caused by rodent-chewed wires under the intake manifold, not a bad sensor.
- This is a difficult, labor-intensive repair (4-6 hours) that requires removing the entire intake manifold.
- Due to the high labor cost, always replace both knock sensors AND the wiring harness at the same time.
- Using high-quality OEM parts (Denso is the original supplier) is critical to avoid having to do this expensive job a second time.
- While the intake is off, consider replacing other hard-to-reach parts like the starter motor and coolant bypass hoses.
What's Unique About the 2000-2006 Toyota Tundra
The defining issue for the P0325 code on the 1st Gen Tundra's 4.7L V8 is the location of the components. The two knock sensors and their sub-harness are buried deep in the engine valley, underneath the entire intake manifold. This warm, protected area is a common nesting spot for rodents, who are notoriously for chewing the soy-based insulation on the wiring harness, making this the number one cause of the code. 🎬 Watch: Why these sensors fail so often on the Tundra. The repair is therefore not about a faulty sensor as often as it is about a difficult-to-access, damaged wire, leading to a surprisingly expensive and labor-intensive job for what seems like a simple sensor code.
Symptoms You May Notice
- Check Engine Light is on
- VSC and/or TRAC warning lights may also be illuminated
- Noticeable loss of engine power and sluggish acceleration (limp mode)
- Transmission will not shift into overdrive
- Decreased fuel economy, sometimes dropping to as low as 8-10 MPG
- Engine may hesitate during acceleration
- Audible engine pinging or knocking (less common, as the code often indicates a circuit failure, not a failure to detect actual knock)
- Replacing only one knock sensor. This is a mistake because the labor is the most expensive part of the job, and the second sensor or harness could fail later, requiring the same job to be done again.
- Assuming the sensor is bad without checking for rodent damage. Many owners have replaced sensors only to find the true cause was the wiring harness.
- Using cheap aftermarket sensors or harnesses. Many forum users report that aftermarket electronic parts, particularly for this job, have a high failure rate, sometimes causing the code to return immediately and forcing them to do the entire labor-intensive job a second time with OEM parts.
Most Likely Causes
- Rodent Damage to Knock Sensor Wiring Harness 🔴 High Probability → Shop Engine Wiring Harness The wiring harness is located in the warm, sheltered engine valley under the intake manifold, which is a prime nesting location for rodents. The soy-based wire insulation used during this era is also known to attract them, making this the most common point of failure.
How to confirm: Visually inspect the engine bay for signs of rodents like droppings, nesting material, or chewed plastics. The only definitive way to confirm is to remove the intake manifold and inspect the harness for chew marks or breaks. Often, a nest of debris will be found in the valley.
Typical fix: Replace the knock sensor sub-harness. It is strongly recommended to also replace both knock sensors at the same time using OEM parts to avoid repeating the labor-intensive repair.
Est. part cost: $40-$70 for the OEM harness - Failed Knock Sensor 🟡 Medium Probability → Shop Ignition Knock (Detonation) Sensor Sensors can fail from age, heat cycles, and internal component breakdown. However, this is less common than wiring damage.
How to confirm: After confirming the wiring is intact, the sensor itself can be tested. A resistance test with an ohmmeter is not considered reliable for modern piezoelectric sensors. The correct method is to set a multimeter to a low AC or DC voltage scale, connect it to the sensor's pin and ground, and gently tap on the engine block near the sensor; a healthy sensor will generate a small voltage spike. A definitive test requires an oscilloscope to check for the correct voltage waveform between ECM terminals KNK1 and EKNK while the engine is running.
Typical fix: Replace the knock sensor. It is best practice to replace both sensors (Bank 1 and Bank 2) simultaneously, along with the harness.
Est. part cost: $150-$180 per OEM sensor - Damaged or Corroded Connector ⚪ Low Probability The plastic connectors become extremely brittle from years of heat cycles and may crack or break during removal, even with careful handling.
How to confirm: Upon visual inspection after removing the intake manifold, check for cracks, corrosion, or a loose fit on the sensor. The locking tab is notoriously fragile.
Typical fix: If only the connector is broken, a new pigtail can sometimes be spliced in. One owner on Tundras.com successfully used a pigtail from a 1995 Toyota pickup (Part No. 82219-35010). However, given the labor, replacing the entire sub-harness is the safer repair.
Est. part cost: $10-$20 for a pigtail, or the cost of the full harness
Rare But Worth Checking
- Failed Engine Control Module (ECM): → Shop Engine Control Module (ECM) This is extremely rare. Before condemning the ECM, all other possibilities, including wiring faults in the main engine harness between the sub-harness connector and the ECM, must be exhaustively ruled out.
Diagnosis Steps
- Scan the vehicle with an OBD-II scanner to confirm P0325 and check for any other codes, like P0330.
- Perform a thorough visual inspection of the engine bay for any signs of rodent activity (droppings, nesting materials, chewed plastics). Pay special attention to the area behind the intake manifold.
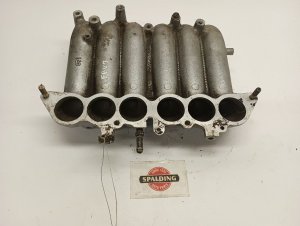
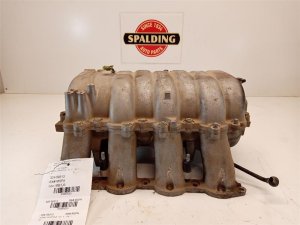
- If rodent activity is suspected (or even if not), the next step is to remove the intake manifold to gain access to the knock sensors and wiring harness in the engine valley. Pro-tip: The flexible fuel lines may allow you to unbolt the manifold and carefully flip it over onto the passenger side fender (on a protective towel) without disconnecting the fuel lines, saving time. 🎬 Watch: How to remove the intake manifold to access the valley.
- Once the manifold is off, carefully vacuum out any debris or nesting material. Be extremely careful not to let any debris fall into the open intake ports. Stuffing clean rags into the ports is recommended.
- Carefully inspect the entire length of the knock sensor sub-harness for any signs of chewing, breaks, or exposed wires.
- Inspect the sensor connectors for cracks, corrosion, or damage. The plastic locking tabs are often brittle and break.
- If wiring is damaged, replace the harness. It is highly recommended to replace both knock sensors at the same time regardless of their condition. Before installing new sensors, test them by tapping near them while monitoring for a voltage signal with a multimeter.
- Install the new knock sensors and torque them to exactly 15 ft-lbs (20 Nm). 🎬 See this step-by-step walkthrough of the sensor replacement process. Incorrect torque can affect sensor performance.
- Connect the new harness and clean the intake manifold and cylinder head mating surfaces before reinstalling with new gaskets.
- If wiring and sensors appear intact, the issue may be in the main engine harness between the sub-harness connector and the ECM. This requires more advanced circuit tracing with a multimeter or oscilloscope from the ECM connector pins (KNK1 for Bank 1).
Parts You'll Likely Need
- Knock Sensor Wire Harness
(OEM #82219-34010)— This is the most common point of failure due to rodent damage in the engine valley. This part number is for 2000-2004 non-VVT-i engines. For 2005-2006 VVT-i models, a separate sub-harness is reportedly not sold by Toyota, requiring repair of the original harness or splicing in pigtails.
Trusted brands: Toyota (OEM)
OEM price range: $50-$70
Aftermarket price range: $25-$50 - Knock Sensor
(OEM #89615-12090)— While less likely to fail than the harness, it is always replaced as a set with the harness due to the extreme labor cost to access it. Using non-OEM sensors is highly discouraged due to high failure rates reported by owners. This part supersedes 89615-12050 and 89615-32010.
Trusted brands: Denso (OEM supplier), Toyota (OEM)
OEM price range: $150-$180
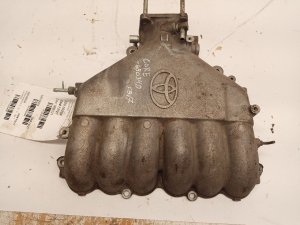
Aftermarket price range: $40-$80 - Intake Manifold Gasket Set
(OEM #17177-AD010 (x2))— These are single-use gaskets that must be replaced anytime the intake manifold is removed for service.
Trusted brands: Toyota (OEM), Fel-Pro, Mahle
OEM price range: $50-$60
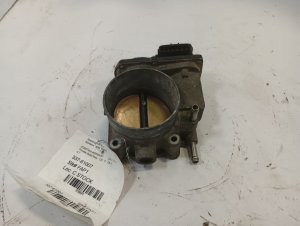
Aftermarket price range: $20-$40 - Throttle Body Gasket — The throttle body must be removed from the intake manifold, and its gasket should be replaced to prevent vacuum leaks.
Trusted brands: Toyota (OEM), Fel-Pro
OEM price range: $10-$15
Aftermarket price range: $5-$10 - Engine Coolant — Coolant lines run to the throttle body and may need to be disconnected, resulting in some coolant loss that needs to be topped off.
Trusted brands: Toyota Red/Pink Long Life
OEM price range: $25-$35 per gallon
Related Codes That Often Appear With This One
- P0330 — P0330 is the identical code for Knock Sensor 2 (Bank 2). Since both sensors share the same sub-harness under the intake manifold, rodent damage often affects the wiring for both, causing both codes to appear together.
Platform-Specific Known Issues
- Rodent Nesting Ground Zero: The location of the knock sensors and harness under the intake manifold makes them highly susceptible to damage from nesting rodents, which is the most prevalent cause of P0325 on this platform.
- A Deceptively Complex Repair: A Reddit user on r/ToyotaTundra chronicled a seven-week battle with code P0330. After replacing both sensors with aftermarket parts, the code remained. He then replaced the harness and swapped the sensors, only for both P0325 and P0330 to appear. A dealership diagnosed a wiring issue in the main harness, which was no longer available from Toyota. The ordeal highlights the risk of using aftermarket sensors and the diagnostic difficulty if the problem extends beyond the sub-harness.
Mechanic-Grade Diagnostic Values
- Knock Sensor Signal Waveform — expected: A distinct AC voltage waveform should be present when the engine is revved or tapped near the sensor. The service manual specifies checking between ECM terminals KNK1 and EKNK.. Failure: A flat line (no signal) indicates a break in the circuit (wiring) or a dead sensor.
- Knock Sensor Resistance — expected: Not a reliable test. Modern piezoelectric sensors do not have a standard resistance value and may read as an open circuit (infinite resistance) even when good.. Failure: This test is inconclusive and not recommended for diagnosis.
- Knock Sensor Voltage Generation (Tap Test) — expected: A small voltage (AC or DC mV) should be generated on a multimeter when the engine block is tapped near the sensor.. Failure: No voltage generated indicates a faulty sensor.
Wiring & Ground Locations
- KNK1 — Pin at the Engine Control Module (ECM) connector. This is the signal wire for the Bank 1 (passenger side) knock sensor.. This is the final test point to verify if a signal from the sensor is reaching the ECM. A good signal here with a persistent code could indicate a rare ECM fault.
- EKNK / EKN2 — Pin at the Engine Control Module (ECM) connector. This is the ground/shield wire for the knock sensor circuit.. This pin is used in conjunction with KNK1 to test the full circuit waveform with an oscilloscope.
- EC / ED — Main engine ground points located on the rear of the left cylinder head.. A poor engine ground can introduce electrical noise and cause various sensor issues. While not a direct cause of a P0325 circuit fault, ensuring these grounds are clean and tight is good practice during any major engine work.
Real Owner Repair Stories
- Tundras.com user 'Chuck W.' (1st Gen Tundra (year not specified)) — Check Engine Light with code P0325.
✅ What actually fixed it Found a rat's nest and a wire chewed right at the connector base. Instead of buying a whole new harness, he spliced in a pigtail connector from a 1995 Toyota pickup, part number 82219-35010, which was a perfect match. - Reddit user 'u/ThatoneguyinAZ' (2004 Tundra) — P0330 (Bank 2), but the principle applies. After a failed splice attempt, he got both P0325 and P0330.
❌ Tried (didn't work) Splicing the new harness wires according to the Toyota wiring diagram.
✅ What actually fixed it He discovered that on his truck, the wiring diagram was effectively backward. The gray wire was for sensor 1 (Bank 1) and the black wire was for sensor 2 (Bank 2), the opposite of what the diagram showed. Correcting the splice to match the physical reality fixed the codes. - Tundras.com user 'Jarrettd' (2008 Toyota Tundra (2nd Gen, but relevant edge case)) — P0325 code would trip when the engine warmed up.
❌ Tried (didn't work) Replacing knock sensors., Replacing the wiring harness.
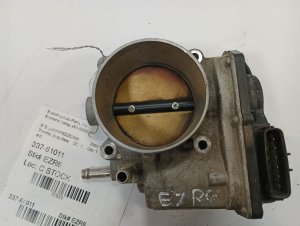
✅ What actually fixed it Cleaning the throttle body. The code did not return after the cleaning.
OEM Part Supersession History
89615-12050, 89615-32010→89615-12090— Standard part revision and consolidation by Toyota.
Heads up: The parts are considered interchangeable, but it is always best practice to replace both sensors with the same part number.
Model Year Variations Within This Range
- 2000-2004 (non-VVT-i): Uses a distinct knock sensor sub-harness, Toyota part number 82219-34010, which is readily available.
- 2005-2006 (VVT-i): The knock sensor sub-harness is different from the earlier models. Forum research indicates this harness is not sold as a separate, standalone part by Toyota. Repair often requires splicing in new connectors (pigtails) or repairing the original damaged wires, as the full harness may be integrated into a much larger, expensive engine wiring loom.
Diagnostic Flowchart
Used vs. New Parts: Buying Guide for This Vehicle
When a used part is the smart pick: For this specific repair, using used parts is strongly discouraged. The labor to access the components under the intake manifold is extensive and expensive. The risk of a used sensor or brittle used harness failing shortly after installation outweighs any potential cost savings.
What to inspect on the donor part:
- Not applicable, as used parts are not recommended.
OEM-only on this vehicle (don't cheap out):
- Knock Sensor
- Knock Sensor Wire Harness
Aftermarket brands forum-validated for this vehicle:
- Denso (Denso is the Original Equipment Manufacturer for Toyota)
Brands owners have reported issues with on this vehicle:
- Generic, unbranded sensors and harnesses from online marketplaces. Multiple owners have reported immediate or premature failure with non-OEM electronic parts for this specific job, forcing them to perform the entire 4-6 hour labor job a second time.
Real Owner Stories
Aggregated from forums and TSBs cited above. Mileages and costs reflect what owners reported in those sources.
2004 Toyota Tundra 2UZ-FE 4.7L V8
Symptoms: Initially had a P0330 code. After replacing sensors with aftermarket parts and then swapping them, both P0325 and P0330 codes appeared.
What fixed it: The issue was not the sensors or sub-harness. A dealership ultimately diagnosed a wiring issue in the main engine harness, which was no longer available from Toyota. The story serves as a caution against using aftermarket sensors.
Source hint: Reddit.com/r/ToyotaTundra: 'P0330 Code Experience and Fix on my 2004 Tundra'
Toyota Sequoia 2UZ-FE 4.7L V8
Symptoms: P0325 knock sensor code was present. Upon inspection, the owner found a chipmunk nest in the engine valley.
What fixed it: The cause was rodent damage from the nest. The owner shared a tip that the repair could be done by flipping the intake manifold over onto the fender without disconnecting the flexible fuel lines to access the damaged harness.
Source hint: Tundras.com: 'P0325 Knock Sensor Code'
2000-2006 Toyota Tundra 2UZ-FE 4.7L V8
Symptoms: P0325 code and a broken wire on the knock sensor. The wire was chewed at the base of the connector.
What fixed it: Instead of replacing the entire harness, the owner performed a splice repair using a pigtail from an older Toyota pickup (Part No. 82219-35010).
Source hint: Tundras.com: 'If You get a P0325 Code, or a Broken Wire on a Knock Sensor....'
Lexus LX470 2UZ-FE 4.7L V8
Symptoms: Owner experienced 'P0325 blues' and noted the extreme brittleness of the plastic sensor connectors.
What fixed it: The cause of the code was confirmed to be rodent damage to the harness located under the intake manifold.
Source hint: IH8MUD.com: 'Starter replacement & P0325 blues. Any other 'while you are in there maintenance?''
Related OBD-II Codes
Frequently Asked Questions
I have a P0325 code on my Tundra. Is it more likely the sensor failed or is it a wiring problem?
Why is rodent damage to the knock sensor wires so common on this specific truck?
If I have to replace the knock sensor harness, what other parts should I replace at the same time?
My connector is broken but the wire seems okay. Can I just replace the connector pigtail?
Is there a shortcut for removing the intake manifold to access the knock sensors?
What is the correct torque specification for the knock sensors on the 2UZ-FE engine?
Are aftermarket knock sensors a good idea for this repair?
Helpful Videos
Used OEM Parts in Stock
New Aftermarket Parts Available


The information in this article is provided for general reference and educational purposes only. Vehicle specifications, procedures, and part compatibility can vary by production date, trim level, and region. Always consult your vehicle's factory service manual and verify part numbers before purchasing or performing repairs. Safety-critical components such as airbags, seat belts, and braking systems should be installed by a qualified professional.
- Toyota Tundra:
- 🧭 Diagnostic Flowchart
- 🎬 Helpful Videos
- 🛍️ Shop This Part
- What's Unique About the 2000-2006 Toyota Tundra
- Symptoms You May Notice
- Most Likely Causes
- Rare But Worth Checking
- Diagnosis Steps
- Parts You'll Likely Need
- Related Codes That Often Appear With This One
- Platform-Specific Known Issues
- Mechanic-Grade Diagnostic Values
- Wiring & Ground Locations
- Real Owner Repair Stories
- OEM Part Supersession History
- Model Year Variations Within This Range
- Used vs. New Parts: Buying Guide for This Vehicle
- Real Owner Stories
- 2004 Toyota Tundra 2UZ-FE 4.7L V8
- Toyota Sequoia 2UZ-FE 4.7L V8
- 2000-2006 Toyota Tundra 2UZ-FE 4.7L V8
- Lexus LX470 2UZ-FE 4.7L V8
- Related OBD-II Codes
- Frequently Asked Questions
- 🎟️ Get 5% Off