
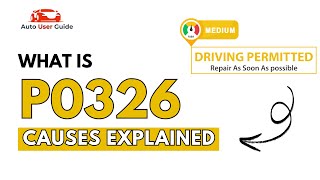
P0326 on 2016-2017 Buick Envision: Knock Sensor Circuit Causes and Fixes
On a 2016-2017 Buick Envision, code P0326 is often a symptom of loose intake manifold bolts causing a vacuum leak, not a bad knock sensor. Before replacing any parts, inspect for other codes and check the intake manifold bolts for tightness, as specified in GM Technical Service Bulletin #PIP5529B. The fix is to apply threadlocker and re-torque the bolts to 10-12 Nm (89-106 lb-in).
- On the 2016-2017 Buick Envision, P0326 is most often caused by loose intake manifold bolts, not a faulty knock sensor. This is confirmed by GM TSB #PIP5529B.
- Always check for associated codes like P0171, P0106, and P0101, as they strongly point to the intake manifold vacuum leak.
- The fix is simple and low-cost: apply medium-strength threadlocker to the intake manifold bolts and torque them to 10-12 Nm (89-106 lb-in).
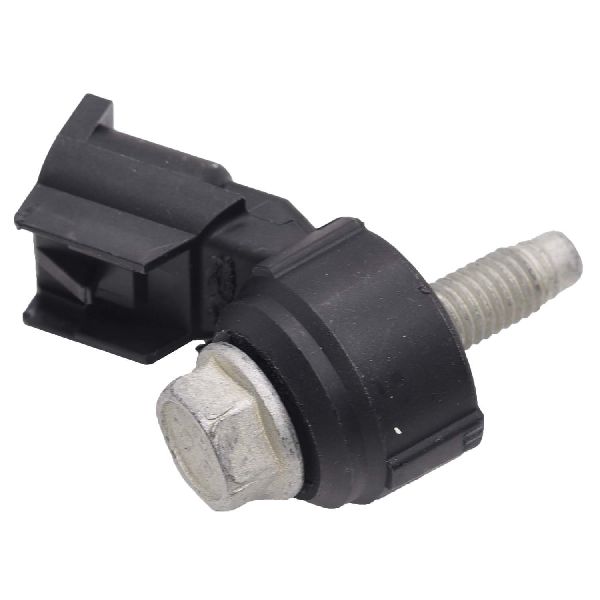
- Only replace the knock sensor (OEM Part #12623095) if the code persists after fixing the potential vacuum leak and verifying the wiring.
What's Unique About the 2016-2017 Buick ENVISION
For the 2016-2017 Buick Envision, P0326 is frequently not an isolated issue with the knock sensor itself. GM issued Technical Service Bulletin #PIP5529B which links this code to a larger pattern of issues caused by loose intake manifold bolts. This creates a vacuum leak that leads to a cascade of seemingly unrelated codes, including those for the MAF sensor, MAP sensor, O2 sensors, and idle control. Owners who only replace the knock sensor often find the problem returns because the root cause was the vacuum leak affecting overall engine performance. The official TSB repair only allocates 0.4 labor hours, indicating it is a well-known and quick fix for technicians.
Diagnostic Flowchart
Tap your situation to follow the diagnostic path that matches what you're seeing on this vehicle.
Symptoms You May Notice
- Check Engine Light is on
- Hesitation or stumbling during acceleration
- Reduced engine power or entering 'limp mode'
- Audible engine knocking or pinging, especially under load
- Poor fuel economy
- Rough idle or stalling
- Unstable RPM at idle
- Replacing the knock sensor without checking for vacuum leaks. Due to TSB #PIP5529B, the most common misdiagnosis is assuming the sensor is bad when the real problem is loose intake manifold bolts causing erratic engine performance that the sensor is detecting.
Most Likely Causes
- Loose Intake Manifold Bolts 🔴 High Probability → Shop Engine Intake Manifold This is a documented issue for this platform, as noted in GM TSB #PIP5529B. The bolts on the 2.0L LTG and 2.5L LCV engines can loosen over time, creating a significant unmetered air (vacuum) leak.
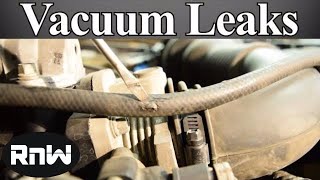
How to confirm: Check for other related trouble codes (see 'Often Seen With Codes'). Physically inspect and test the torque of the intake manifold bolts. A smoke test can also confirm a leak in this area. 🎬 Watch: How to find and fix vacuum leaks fast The correct torque is 10-12 Nm (89-106 lb-in).
Typical fix: Following the procedure in TSB #PIP5529B, remove one bolt at a time, apply medium-strength threadlocker, reinstall, and torque all bolts to the manufacturer's specification in the correct sequence. Do not replace the intake gasket unless a leak persists after torquing.
Est. part cost: $5-$15 for threadlocker - Faulty Knock Sensor 🟡 Medium Probability → Shop Ignition Knock (Detonation) Sensor The sensor operates in a high-heat, high-vibration environment and can fail over time. However, it is often replaced unnecessarily when the root cause is a vacuum leak.
How to confirm: After ruling out vacuum leaks and wiring issues, test the sensor. Use a scan tool to monitor knock sensor data while tapping lightly on the engine block near the sensor; you should see a signal spike. If there is no signal, the sensor has likely failed. It is critical that the sensor bolt is torqued correctly, as being too loose or too tight will cause it to malfunction.
Typical fix: Replace the knock sensor (GM Part #12623095). The new sensor must be torqued to the correct specification, which is 25 Nm (18 lb-ft) for the 2.0L LTG engine.
Est. part cost: $25-$77 - Wiring or Connector Issue ⚪ Low Probability Wiring can become brittle from heat cycles or damaged during other maintenance.
How to confirm: Visually inspect the wiring harness leading to the knock sensor for any signs of damage, chafing, melting, or corrosion. Check the connector for a secure fit and clean contacts. Use a multimeter to check for the correct reference voltage (typically 5V) and continuity to the ECM.
Typical fix: Repair the damaged section of the harness or clean/replace the connector.
Est. part cost: $10-$50 for wiring repair supplies
Rare But Worth Checking
- Internal Engine Problems: If you hear a persistent, heavy knocking sound, it could be a sign of a serious mechanical issue like worn rod bearings or a stretched timing chain. In this case, the knock sensor is working correctly by detecting a real problem.
- Faulty Engine Control Module (ECM): → Shop Engine Control Module (ECM) This is very rare. The ECM should only be considered after all other possibilities, including sensors, wiring, and mechanical issues, have been thoroughly ruled out.
Diagnosis Steps
- Scan for all stored trouble codes. If codes like P0171, P0106, P0101, P0068, or P0506 are present with P0326, immediately suspect a vacuum leak from the intake manifold.
- Carefully inspect the intake manifold bolts to see if they are loose. This is the primary known issue on this vehicle.
- If bolts are loose, follow the procedure in TSB #PIP5529B: Remove one bolt at a time, apply medium-strength threadlocker, reinstall, and torque to 10-12 Nm (89-106 lb-in).
- Clear codes, drive the vehicle, and re-scan. If the code does not return, the repair is complete.
- If bolts were tight or the code returns, perform a smoke test to check for vacuum leaks from gaskets or hoses.
- If no vacuum leaks are found, inspect the knock sensor's wiring and connector for damage, corrosion, or a loose connection.
- Test the knock sensor circuit for the proper 5-volt reference from the ECM.
- Using a scan tool, perform a 'tap test' by lightly tapping the engine block near the sensor and watching for a signal response. If there is no response, the sensor is likely faulty.
- If the knock sensor requires replacement, ensure the new sensor is torqued to the correct specification (25 Nm or 18 lb-ft for the 2.0L LTG). Over or under-torquing will cause incorrect readings.
Parts You'll Likely Need
- Knock Sensor
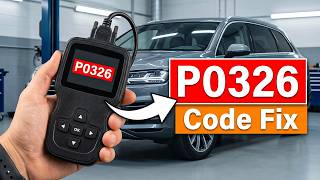
(OEM #12623095)— This is the component directly implicated by the code, 🎬 Watch: A breakdown of P0326 engine error code causes though it may not be the root cause. It should only be replaced after ruling out vacuum leaks 🎬 See this guide on fixing the P0326 knock sensor code and wiring issues. The correct torque on the sensor bolt is critical for proper function.
Trusted brands: ACDelco (GM Genuine), Bosch, NTK, Delphi
OEM price range: $44
Aftermarket price range: $25-$60 - Medium-Strength Threadlocker — Required to fix the common issue of loose intake manifold bolts, as specified by GM TSB #PIP5529B.
Trusted brands: Loctite, Permatex
Aftermarket price range: $5-$15
Related Codes That Often Appear With This One
- P0068 — MAP/MAF - Throttle Position Correlation
- P0101 — Mass Air Flow (MAF) Circuit Performance
- P0106 — Manifold Absolute Pressure (MAP) Sensor Performance
- P0171 — System Too Lean (Bank 1)
- P0506 — Idle Air Control System RPM Lower Than Expected
- P0324 — Knock Control System Error
- P0131 — O2 Sensor Circuit Low Voltage (Bank 1, Sensor 1)
Technical Service Bulletins (TSBs) & Recalls
- PIP5529B: Addresses a combination of DTCs including P0068, P0101, P0106, P0171, P0131, P0137, P0324, P0326, P0331, and P0506 caused by loose intake manifold bolts, leading to hesitation or stalling. Specifies using threadlocker for the repair.
- PIP5529A: An earlier version of the same bulletin, also pointing to loose intake manifold bolts as the cause for multiple DTCs.
Platform-Specific Known Issues
- Loose Intake Manifold Bolts: As detailed in TSB #PIP5529B, the intake manifold bolts on the 2.0L LTG and 2.5L LCV engines can become loose, causing a significant vacuum leak. This is a primary cause for P0326 appearing alongside a host of other performance-related codes. The official fix is to re-torque the bolts to 10-12 Nm (89-106 lb-in) with threadlocker. GM allocates only 0.4 hours of labor for this repair, underscoring how common and straightforward it is for a dealership.
Mechanic-Grade Diagnostic Values
- Knock Sensor Circuit Bias Voltage (KOEO) — expected: Approximately 4.8V-4.9V with sensor connected. Should rise to ~5.0V when sensor is unplugged.. Failure: A reading of 0V or a voltage that does not change when the sensor is unplugged indicates a wiring or ECM issue.
- Knock Sensor Resistance — expected: Approximately 100-104 kΩ (100,000-104,000 Ohms) between the signal pin and engine block ground.. Failure: An open circuit (infinite resistance) or a short (near zero resistance). However, a sensor can have correct resistance and still be functionally bad.
- Knock Sensor AC Voltage (Tap Test) — expected: With the engine idling, the sensor should produce a small AC voltage signal that spikes when the engine block is tapped firmly near the sensor.. Failure: No change in voltage during a tap test indicates a dead sensor.
- Mass Airflow (MAF) Sensor Reading at Idle (2.0L LTG) — expected: Approximately 4-6 g/s on a warm engine.. Failure: A significantly lower reading can indicate a large vacuum leak (like loose intake bolts) is present after the MAF sensor.
Scan Tool Commands That Help
- GM GDS2 / Professional Scan Tool: Fuel Trim Reset — After repairing the primary cause of this code (loose intake manifold bolts), a fuel trim reset forces the ECM to immediately relearn air/fuel corrections. This confirms the fix quickly, rather than waiting for the system to adapt over several drive cycles.
- GM GDS2: Vehicle DTC Information — This is the initial step to scan all vehicle modules. The presence of other codes (P0171, P0106, etc.) alongside P0326 is the strongest indicator that TSB #PIP5529B applies.
Wiring & Ground Locations
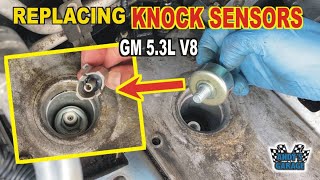
- Knock Sensor (2.5L LCV) — On the back side of the engine block, located underneath the intake manifold.. This is the sensor directly referenced by the trouble code. Its location under the intake makes it labor-intensive to access, reinforcing the need to diagnose other causes first.
- Knock Sensor (2.0L LTG) — In the valley of the engine block, under the intake manifold.. This is the sensor directly referenced by the trouble code. Similar to the 2.5L, its inaccessible location makes it critical to rule out the much easier fix of tightening the intake bolts first.
- G104 — A primary engine ground located on the lower rear of the cylinder head for both the 2.0L and 2.5L engines.. A poor connection at this main ground point can introduce electrical noise and cause erratic voltage readings from multiple sensors, including the knock sensor, leading to a P0326 code even if the sensor and its direct wiring are good.
"I Checked Everything" — The Actual Cause
- A failing water pump or another belt-driven accessory (alternator, tensioner) with a bad bearing can create mechanical noise and vibrations. The knock sensor can misinterpret this noise as engine detonation and set a P0326 code, even though there are no vacuum leaks or true engine knock.
OEM Part Supersession History
12623095→N/A— This is still the current and active part number for this application.
Heads up: Some parts catalogs may show an alternate part number (12647751) for the same engines, but it is not a direct supersession. Always verify the correct part number with the vehicle's VIN.
Model Year Variations Within This Range
- 2016: The 2016 model year Envision was only sold in the US with the 2.0L LTG turbo engine and All-Wheel Drive. Therefore, a P0326 code on a 2016 model specifically applies to the 2.0L engine.
- 2017: For 2017, the 2.5L LCV engine was introduced as the base engine, alongside Front-Wheel Drive options. A P0326 code on a 2017 model could apply to either the 2.5L or 2.0L engine, requiring the technician to first identify the installed engine.
Helpful Videos
![How to Fix P0326 Engine Code in 2 Minutes [1 DIY Method / Only $10.35]](https://img.youtube.com/vi/LQHCLMhVg_I/mqdefault.jpg)
We Have This Part in Stock


The information in this article is provided for general reference and educational purposes only. Vehicle specifications, procedures, and part compatibility can vary by production date, trim level, and region. Always consult your vehicle's factory service manual and verify part numbers before purchasing or performing repairs. Safety-critical components such as airbags, seat belts, and braking systems should be installed by a qualified professional.
- Buick ENVISION:
- 🧭 Diagnostic Flowchart
- 🎬 Helpful Videos
- 🛍️ Shop This Part
- What's Unique About the 2016-2017 Buick ENVISION
- Symptoms You May Notice
- Most Likely Causes
- Rare But Worth Checking
- Diagnosis Steps
- Parts You'll Likely Need
- Related Codes That Often Appear With This One
- Technical Service Bulletins (TSBs) & Recalls
- Platform-Specific Known Issues
- Mechanic-Grade Diagnostic Values
- Scan Tool Commands That Help
- Wiring & Ground Locations
- "I Checked Everything" — The Actual Cause
- OEM Part Supersession History
- Model Year Variations Within This Range
- 🎟️ Get 5% Off