
P0326 on 2014-2017 Buick Regal: Knock Sensor Causes and Fixes
On a 2014-2017 Buick Regal with the 2.0L Turbo engine, code P0326 is often caused by loose intake manifold bolts, not a bad knock sensor. Before buying parts, check for other codes (like P0171, P0106, P0068) and inspect the manifold bolts as per GM TSB PIP5529B. If the sensor is bad, expect a difficult replacement due to its location under the intake manifold.
- For a 2014-2017 Regal with the 2.0L Turbo engine, P0326 is very likely caused by loose intake manifold bolts, not a bad sensor. Check this first.
- Symptoms include a Check Engine Light, sluggish performance, and poor fuel economy.
- The knock sensors on the 2.0L engine are located under the intake manifold, making replacement a difficult and labor-intensive job.
- Always inspect the wiring harness and connector for damage before condemning the sensor itself.
- If you have other codes like P0171 or P0106 alongside P0326, the intake bolt issue is almost certainly the cause.
What's Unique About the 2014-2017 Buick REGAL
For the 2014-2017 Buick Regal, especially those with the 2.0L Turbo (LTG) engine, this code has a very specific and documented cause beyond a simple bad sensor. A General Motors Technical Service Bulletin (TSB PIP5529B) directly links P0326 to loose intake manifold bolts. This creates a vacuum leak that the ECM tries to correct for, leading to conditions that can be misinterpreted as a knock sensor circuit fault. Many owners might mistakenly replace the knock sensors—a difficult and expensive job on this engine—when the real fix is simply re-torquing the intake manifold bolts. 🎬 Watch: Common causes and fixes for the P0326 code. Additionally, the LTG is a high-performance direct-injected engine that requires premium fuel and Dexos-approved oil to prevent low-speed pre-ignition (LSPI), which can cause true knock events.
Diagnostic Flowchart
Tap your situation to follow the diagnostic path that matches what you're seeing on this vehicle.
Symptoms You May Notice
- Check Engine Light is on
- Reduced engine power and sluggish acceleration
- Hesitation or stumbling when accelerating
- Audible engine pinging or knocking noise (less common, but possible if the sensor is failing to report a real knock)
- Decreased fuel economy
- High long-term fuel trims when viewed on a scan tool, indicating a vacuum leak.
- Replacing the knock sensor(s) without first checking for loose intake manifold bolts on a 2.0L Turbo engine. The TSB clearly indicates this is a common cause that can mimic a sensor failure.
Most Likely Causes
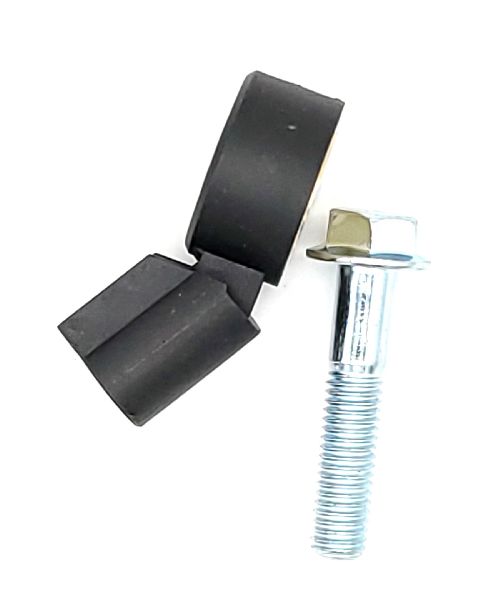
- Loose Intake Manifold Bolts (2.0L LTG Engine) 🔴 High Probability → Shop Engine Intake Manifold A known issue documented in GM Technical Service Bulletin #PIP5529B, which applies directly to the 2014-2017 Regal with the LTG engine. The bolts can back out over time, creating a small, unmetered vacuum leak.
How to confirm: Check for other related trouble codes listed in the TSB (P0068, P0101, P0106, P0171, P0131, P0137, P0324, P0331, P0506). Manually check the torque of the intake manifold bolts. If they are loose, this is the likely cause. A live data scan may show high positive fuel trims.
Typical fix: Remove one intake manifold bolt at a time, apply medium-strength threadlocker, and torque in sequence to the manufacturer's specification. The TSB allocates 0.4 hours for this repair. The torque spec for the 2.4L engine's intake manifold is 18 ft-lbs (25 N·m); the LTG spec should be verified but the procedure is the same.
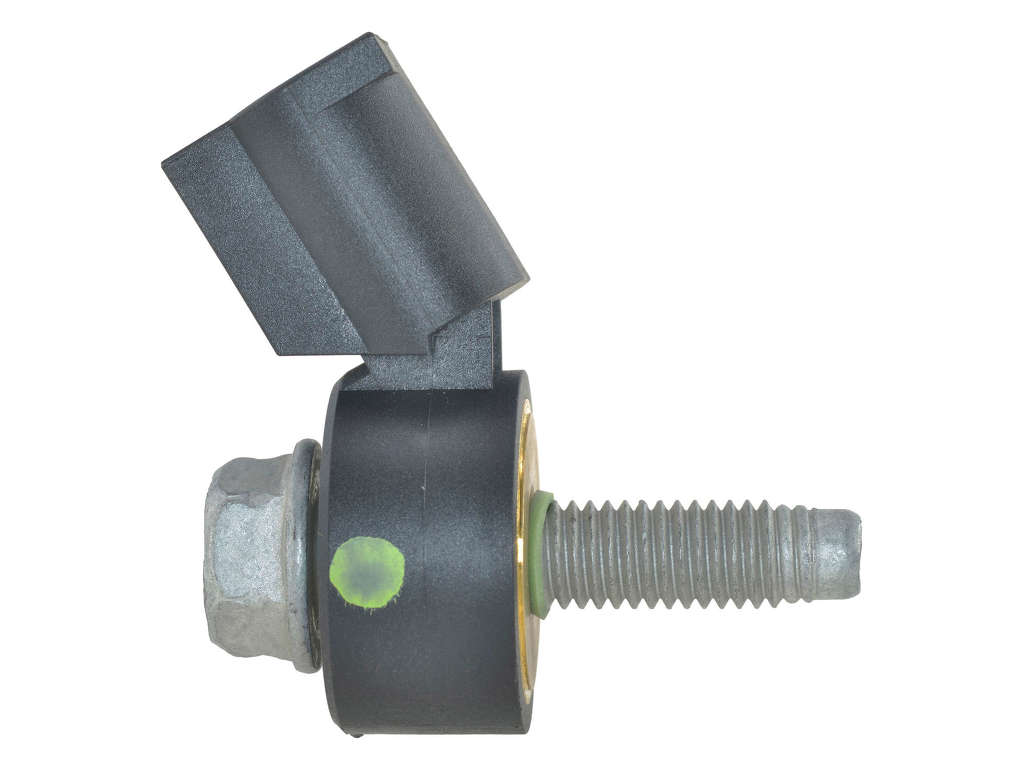
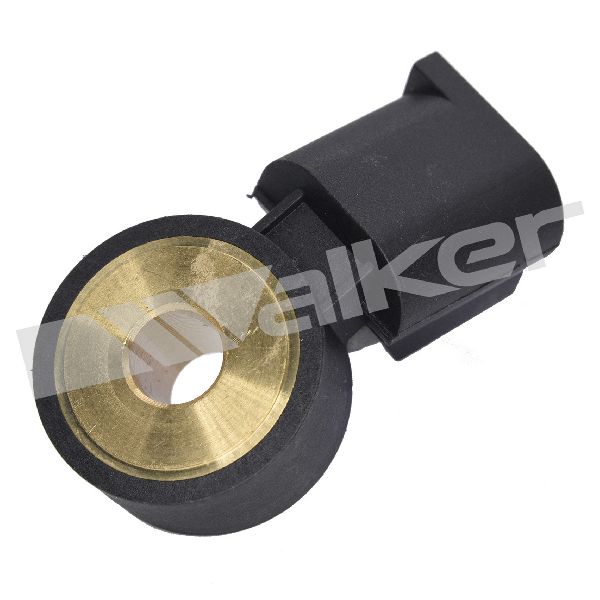
Est. part cost: $5-$15 - Faulty Knock Sensor 🟡 Medium Probability → Shop Ignition Knock (Detonation) Sensor Sensors fail from age and extreme heat cycles. On the 2.0L Turbo, two sensors are located under the intake manifold, a high-heat area that can accelerate wear and makes replacement labor-intensive.
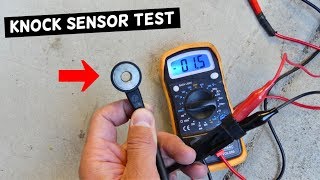
How to confirm: After ruling out intake leaks and wiring issues, use a scan tool to perform a 'tap test'. While monitoring knock sensor data, gently tap the engine block near the sensor with a wrench. A good sensor will show a voltage spike on the scan tool. No reaction indicates a dead sensor or circuit issue.
Typical fix: Replace the faulty knock sensor(s). On the 2.0L engine, this requires removing the intake manifold for access. It is recommended to replace the sensor's wiring pigtail at the same time due to heat exposure.
Est. part cost: $25-$70 per sensor - Damaged Wiring or Corroded Connector 🟡 Medium Probability
How to confirm: Visually inspect the knock sensor wiring harness for any signs of fraying, melting, or rodent damage. Disconnect the sensor and check the connector pins for corrosion, moisture, or oil contamination. Use a multimeter to check for the correct reference voltage (typically 5V) and continuity to the ECM.
Typical fix: Repair the damaged section of the harness or clean the connector terminals with electrical contact cleaner and apply dielectric grease before reconnecting. The harness pigtail itself is often replaced due to becoming brittle from heat.
Est. part cost: $5-$25
Rare But Worth Checking
- Internal Engine Problem: While P0326 usually points to a sensor circuit issue, an actual mechanical problem (like a stretched timing chain or bad rod bearing) causing excessive engine noise can sometimes overwhelm the sensor and set this code. This is rare and would typically be accompanied by other severe symptoms.
- Excessive Carbon Buildup on Intake Valves: The 2.0L LTG is a direct-injection engine, which is prone to carbon deposits on the intake valves over time (typically after 80,000-100,000 miles). Severe buildup can restrict airflow, affecting performance and potentially causing conditions that trigger a knock sensor code.
- Faulty Engine Control Module (ECM): → Shop Engine Control Module (ECM) In very rare cases, the internal driver circuit for the knock sensor within the ECM can fail. This should only be considered after all other possibilities (sensor, wiring, and mechanical issues) have been exhaustively ruled out.
Diagnosis Steps
- Scan for all stored DTCs. If codes like P0068, P0101, P0106, or P0171 are present with P0326 on a 2.0L model, immediately suspect loose intake manifold bolts per TSB PIP5529B.
- Inspect the intake manifold bolts to ensure they are torqued to specification. If loose, this is your most likely problem.
- If no other codes are present, perform a thorough visual inspection of the knock sensor wiring and connector. Look for damage, corrosion, or oil contamination. The connectors can become brittle from heat.
- Use a scan tool to monitor live knock sensor data. Tap the engine block near the sensor. The reading should spike. If it doesn't, the sensor or its circuit is faulty.
- Disconnect the sensor and use a multimeter to verify the presence of a 5-volt reference signal from the ECM.
- If wiring and reference voltage are good, but the tap test fails, the knock sensor itself has likely failed and requires replacement.
- If the sensor is replaced and the code returns, re-check wiring for intermittent faults or consider the rare possibility of an ECM issue.
Parts You'll Likely Need
- Ignition Knock Sensor (2.0L LTG Engine)
(OEM #12623095)— This is the direct replacement for the two sensors used on the 2.0L Turbo engine. Failure is a common cause if intake bolts and wiring are confirmed to be good.
Trusted brands: ACDelco, Delphi
OEM price range: $25-$40
Aftermarket price range: $20-$35 - Ignition Knock Sensor (2.4L Engine)
(OEM #12621820)— The sensor for the 2.4L engine can fail due to age and heat cycles. Part number should be verified with VIN, as multiple numbers may apply.
Trusted brands: ACDelco, Standard Motor Products, NGK/NTK
OEM price range: $30-$50
Aftermarket price range: $15-$30 - Medium-Strength Threadlocker — Required when re-torquing the intake manifold bolts on the 2.0L engine to prevent them from backing out again, as per TSB PIP5529B.
Trusted brands: Loctite, Permatex
OEM price range: $10-$15
Aftermarket price range: $5-$10
Related Codes That Often Appear With This One
- P0068, P0101, P0106, P0171, P0506 — These codes, related to air flow, manifold pressure, and lean conditions, strongly suggest the root cause is a vacuum leak from loose intake manifold bolts, as described in TSB #PIP5529B.
- P0325 — This code indicates a general circuit malfunction (e.g., a complete open or short), while P0326 is for a performance/range issue. They can appear together if the sensor's failure is erratic.
Technical Service Bulletins (TSBs) & Recalls
- PIP5529B: Addresses a stall, hesitation, or MIL with a combination of codes including P0068, P0101, P0106, P0171, P0131, P0137, P0324, P0326, P0331, and P0506. The cause is identified as loose intake manifold bolts on 2.0L LTG engines. The fix is to apply medium-strength threadlocker and re-torque the bolts.
Platform-Specific Known Issues
- On 2.0L LTG engines, loose intake manifold bolts are a known issue that can trigger P0326 along with several other air/fuel-related codes. This is documented in GM TSB #PIP5529B.
Mechanic-Grade Diagnostic Values
- Knock Sensor Signal Voltage (Live Data) — expected: Approximately 0.5V–1.0V at idle. Should show smooth spikes between 1.0V and 4.0V when the engine is tapped or under acceleration.. Failure: Voltage is consistently below 0.3V or above 4.5V, or shows erratic, non-responsive behavior.
- Knock Sensor Resistance — expected: General Motors piezoelectric sensors do not have a standard resistance test like older magnetic sensors. Testing often shows an open circuit (infinite resistance), which is not necessarily an indicator of failure.. Failure: A short to ground (near zero ohms) would indicate a failed sensor. The primary test is the voltage-based 'tap test'.
- Knock Sensor Reference Voltage (at connector) — expected: 5 volts DC on the reference wire with the key on, engine off.. Failure: 0 volts indicates a wiring issue or a problem with the ECM's 5V reference circuit.
- Knock Sensor Ground Circuit Integrity — expected: Less than 1 ohm of resistance between the ground pin on the sensor connector and a known-good chassis ground.. Failure: Resistance greater than 5 ohms indicates a poor ground connection, which can cause erratic sensor readings.
Scan Tool Commands That Help
- GM GDS2 / Professional Scan Tool: Live Data - Knock Sensor Voltage / Knock Retard — Used during a 'tap test'. While monitoring the knock sensor voltage PID, tapping the engine block near the sensor should cause an immediate voltage spike. Simultaneously, the 'Knock Retard' PID should show the ECM commanding timing retard in response. This confirms the entire circuit and the ECM's response are functional.
Wiring & Ground Locations
- K20 ECM Connector X3, Pin 62 (KS 1) — On the main Engine Control Module (K20). Connector X3 is a 73-way connector.. This is the specific pin for the Knock Sensor 1 Signal (VT/GY wire). Testing for continuity from this pin to the sensor connector verifies the signal wire's integrity.
- K20 ECM Connector X3, Pin 61 (KS 1) — On the main Engine Control Module (K20). Connector X3 is a 73-way connector.. This is the pin for the Knock Sensor 1 Low Reference (ground) (BK/YE wire). A bad connection here can cause a range/performance code.
- K20 ECM Connector X3, Pin 60 (KS 2) — On the main Engine Control Module (K20). Connector X3 is a 73-way connector.. This is the pin for the Knock Sensor 2 Signal (WH/GY wire) on the 2.0L LTG engine.
- Engine Block Grounds — The LTG engine harness has multiple ground eyelets that attach to the engine block. One critical location is a bell housing bolt that serves as a primary power ground for the engine.. A loose or corroded main engine ground can introduce electrical noise and voltage offsets, potentially causing the sensitive knock sensor circuit to read out of range.
OEM Part Supersession History
12623095→N/A, still current— This is the current and widely used part number for the 2.0L LTG knock sensor.
Heads up: No known supersession issues. This part is used across a wide range of GM vehicles with the LTG and other Ecotec engines from roughly 2013 to 2020+.
Helpful Videos

We Have This Part in Stock


The information in this article is provided for general reference and educational purposes only. Vehicle specifications, procedures, and part compatibility can vary by production date, trim level, and region. Always consult your vehicle's factory service manual and verify part numbers before purchasing or performing repairs. Safety-critical components such as airbags, seat belts, and braking systems should be installed by a qualified professional.
- Buick REGAL:
- 🧭 Diagnostic Flowchart
- 🎬 Helpful Videos
- 🛍️ Shop This Part
- What's Unique About the 2014-2017 Buick REGAL
- Symptoms You May Notice
- Most Likely Causes
- Rare But Worth Checking
- Diagnosis Steps
- Parts You'll Likely Need
- Related Codes That Often Appear With This One
- Technical Service Bulletins (TSBs) & Recalls
- Platform-Specific Known Issues
- Mechanic-Grade Diagnostic Values
- Scan Tool Commands That Help
- Wiring & Ground Locations
- OEM Part Supersession History
- 🎟️ Get 5% Off