
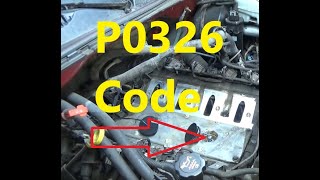
P0326 on 2014-2017 Cadillac CTS: Knock Sensor Circuit Causes and Fixes
On a 2014-2017 Cadillac CTS, code P0326 is often a faulty knock sensor, but for the 2.0L Turbo engine, check for loose intake manifold bolts as per TSB #PIP5529B before replacing parts. A new ACDelco sensor costs about $20-$50. For the 3.6L V6, the sensors are on the side of the block, but for the 2.0L I4, the sensor is harder to access, located under the intake manifold.
- For the 2.0L Turbo engine, always check for loose intake manifold bolts first if P0326 is present, especially with other codes like P0101 or P0171.
- For the 3.6L V6 engine, the knock sensors are on the outside of the block and are relatively easy to access and replace.
- Always torque the new knock sensor to the manufacturer's specification (15-18 ft-lbs) to ensure it functions correctly.
- Inspect the wiring harness carefully for damage, especially near the oil filter housing on the 3.6L V6, as this is a known potential issue.
- Do not immediately assume the sensor is bad; it could be correctly reporting a real knock or there could be a simple wiring fault.
What's Unique About the 2014-2017 Cadillac CTS
For the 2014-2017 CTS, especially those with the 2.0L LTG engine, this code has a very specific documented cause beyond a simple bad sensor. GM issued Technical Service Bulletin #PIP5529B indicating that loose intake manifold bolts can create a vacuum leak, causing a lean condition and a cascade of codes, including P0326. On the 3.6L V6 engines (LFX/LGX), the two knock sensors are conveniently located on the outside of the engine block, making them much easier to service. In contrast, the 2.0L LTG engine has its single knock sensor located under the intake manifold, requiring more labor to access.
Diagnostic Flowchart
Tap your situation to follow the diagnostic path that matches what you're seeing on this vehicle.
Symptoms You May Notice
- Check Engine Light is on
- Reduced engine power and sluggish acceleration
- Audible engine pinging or knocking noise, especially under load
- Worse than normal fuel economy
- Engine hesitation or stumbling, particularly when accelerating or at higher RPMs
- Rough or erratic idle
- Replacing the knock sensor without checking for loose intake manifold bolts on a 2.0L engine, as per TSB #PIP5529B.
- Replacing the knock sensor when the actual problem is a damaged wire or a poor connection.
- Replacing the knock sensor when it is accurately detecting a real engine knock caused by low-octane fuel or another mechanical issue.
- Over-torquing or under-torquing the new knock sensor, which will cause it to send an incorrect signal and trigger the code again.
Most Likely Causes
- Loose Intake Manifold Bolts (2.0L LTG Engine) 🔴 High Probability → Shop Engine Intake Manifold As documented in GM TSB #PIP5529B, the intake manifold bolts on the 2.0L Turbo engine can loosen over time, causing a significant unmetered air leak. This lean condition can cause detonation and other performance issues that trigger a host of codes, including P0326.
How to confirm: Check for other related codes listed in the TSB (P0068, P0101, P0106, P0171, P0324, P0331, etc.). Physically check the torque of the intake manifold bolts. A smoke test can also definitively confirm a leak in this area.
Typical fix: Remove one intake manifold bolt at a time, apply medium-strength threadlocker, and torque all bolts to the manufacturer's specification (typically 18 ft-lbs or 25 Nm for the LTG intake) in the correct sequence. Do not replace the gasket unless it's proven to be leaking after torquing.
Est. part cost: $5-$15 (for threadlocker) - Faulty Knock Sensor 🟡 Medium Probability → Shop Ignition Knock (Detonation) Sensor The sensor is a piezoelectric microphone that lives in a high-heat, high-vibration environment. Internal failure after many miles is common.
How to confirm: After confirming wiring is good, test the sensor's resistance with a multimeter (compare to spec) or use a scan tool to watch its live data while tapping lightly on the engine block near the sensor to see if it registers a signal.
Typical fix: Replace the faulty knock sensor. It is critical to torque the new sensor to the correct specification as over or under-tightening will cause it to malfunction. For the 3.6L LFX, the spec is 17 ft-lbs (23 Nm). For the 2.0L LTG, the spec is 18 lb-ft (25 Nm).
Est. part cost: $20-$50 - Damaged Wiring or Connector 🟡 Medium Probability The wiring harness can become brittle from heat cycles or get damaged during other maintenance. Forum users on platform mates like the Camaro have reported that using butt connectors instead of soldering for wire repairs can cause resistance issues and trigger the code to return. The harness can also be pinched or chafed.
How to confirm: Visually inspect the wiring harness leading to the knock sensor for any signs of fraying, melting, corrosion, or being pinched. Use a multimeter to check for continuity and proper voltage at the connector.
Typical fix: Repair the damaged section of wire, preferably by soldering and using heat-shrink tubing, or replace the connector pigtail.
Est. part cost: $10-$30
Rare But Worth Checking
- Faulty Engine Control Module (ECM): → Shop Engine Control Module (ECM) This is rare. The ECM's internal circuit for the knock sensor can fail, but all other possibilities should be exhausted before condemning the ECM. This would typically require professional diagnosis and potentially a reflash or replacement.
- Internal Engine Problems: In some cases, the knock sensor is working perfectly and reporting a real knock from a mechanical issue like a bad rod bearing, piston slap, or excessive carbon buildup. This would typically be accompanied by other severe symptoms like audible mechanical noises.
- Incorrect Fuel Octane: Using lower-octane fuel than recommended can cause engine knock, which the sensor will detect. If the knock is persistent, the ECM may set a P0326 code because it cannot eliminate the knock through timing adjustments alone.
Diagnosis Steps
- Scan for all DTCs. Note all codes present.
- (2.0L LTG Engine) If codes like P0068, P0101, P0106, or P0171 are present with P0326, immediately suspect loose intake manifold bolts. Proceed to the next step.
- (2.0L LTG Engine) Carefully check the torque of the intake manifold bolts. If loose, remove one bolt at a time, apply medium-strength threadlocker, and re-torque in sequence to 18 ft-lbs (25 Nm). Clear codes and re-test. If the code is gone, the repair is complete.
- For all engines, visually inspect the Bank 1 knock sensor and its wiring harness. On the 3.6L V6, Bank 1 is the passenger side (right side) of the engine. On the 2.0L I4, it is under the intake manifold. Look for any damage, melting, or corrosion.
- Check the electrical connector for a secure fit and clean contacts. Repair as needed.
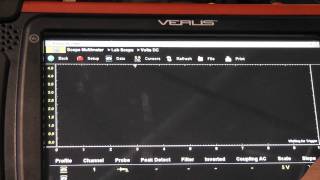
- If wiring looks good, test the sensor. Use a multimeter to check its resistance (compare to factory spec) or use a scan tool to monitor its signal while tapping the engine block nearby with a wrench. A healthy sensor will show a voltage spike. 🎬 Watch this video to see how to test a GM knock sensor.
- If the sensor tests bad or provides no signal, replace it. Ensure you torque the new sensor to the correct specification: 17 ft-lbs (23 Nm) for the 3.6L V6 and 18 ft-lbs (25 Nm) for the 2.0L I4.
- If the sensor and wiring are good, investigate the possibility of a real knock. Check fuel quality (ensure premium fuel is being used if required) and for excessive carbon buildup.
- If all other possibilities are exhausted, the ECM may be the issue, but this is very unlikely and requires professional diagnosis.
Parts You'll Likely Need
- Ignition Knock (Detonation) Sensor (3.6L LFX/LGX)
(OEM #12729597)— This is the most common part to fail on the V6 engines. The part number 12729597 is the updated ACDelco part for the 3.6L V6 engines (LFX, LGX) in this year range.
Trusted brands: ACDelco, Delphi, Bosch, NTK
OEM price range: $20-$40
Aftermarket price range: $15-$30 - Ignition Knock (Detonation) Sensor (2.0L LTG)
(OEM #12623095)— This is the sensor for the 2.0L Turbo engine. It is located under the intake manifold.
Trusted brands: ACDelco GM Genuine, Carquest Premium, NTK
OEM price range: $45-$70
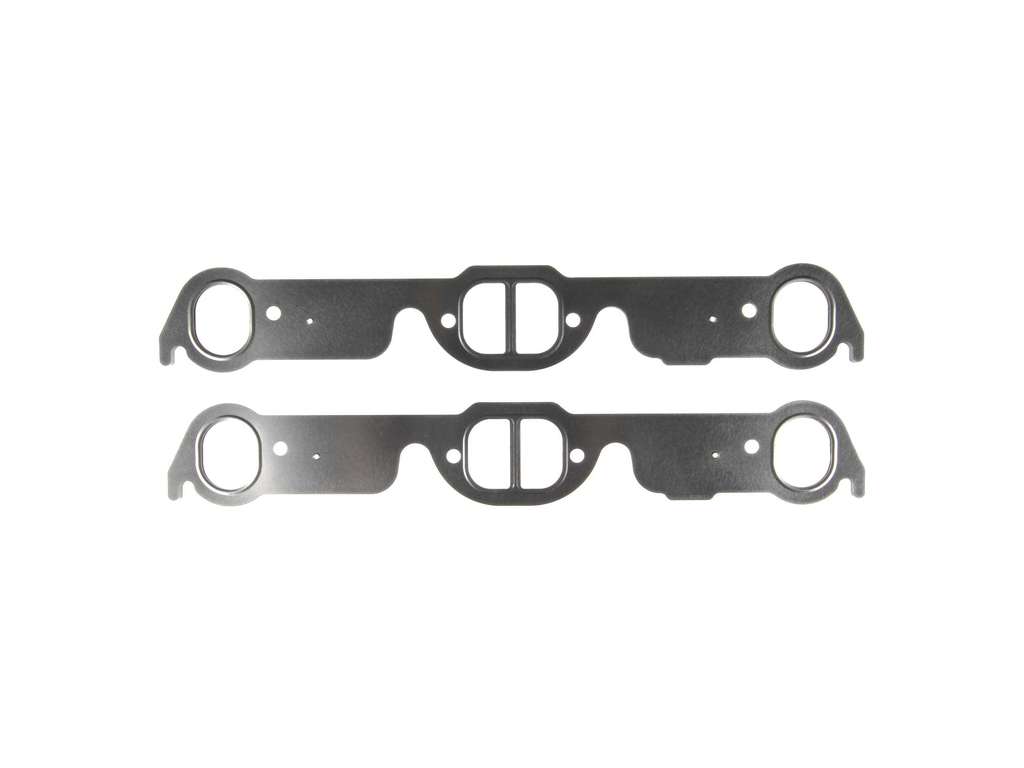
Aftermarket price range: $30-$55 - Intake Manifold Gasket (2.0L LTG) — While TSB #PIP5529B states not to replace the gasket unless it's leaking after torquing the bolts, it is often replaced as a 'while you're in there' part if accessing the knock sensor on the 2.0L engine, which requires intake manifold removal.
Trusted brands: ACDelco, Fel-Pro, Mahle
OEM price range: $25-$40
Aftermarket price range: $15-$30
Related Codes That Often Appear With This One
- P0331 — This is the code for the Bank 2 knock sensor (on V6 engines). If both sensors are failing or there's a common wiring issue, they may appear together. It is also listed as a possible companion code in TSB #PIP5529B for the 2.0L engine.
- P0068, P0101, P0106, P0171, P0324 — On 2.0L LTG engines, the presence of these MAP, MAF, lean condition, and general knock performance codes alongside P0326 strongly points to loose intake manifold bolts as described in TSB #PIP5529B.
- P0325 — P0325 indicates a general circuit malfunction (like an open or short), while P0326 indicates a range/performance problem. They can sometimes appear together if the sensor's failure is complex.
Technical Service Bulletins (TSBs) & Recalls
- PIP5529B: Addresses a potential stall, hesitation, and multiple DTCs (P0068, P0101, P0106, P0171, P0131, P0137, P0324, P0326, P0331, P0506) caused by loose intake manifold bolts on 2.0L LTG engines. The fix is to re-torque the bolts with medium-strength threadlocker.
- PIP5529A: An earlier version of the same bulletin, later superseded by version B which added the instruction to use threadlocker.
Platform-Specific Known Issues
- TSB #PIP5529B: On models with the 2.0L LTG engine, a group of DTCs including P0326 can be caused by loose intake manifold bolts. The fix is to re-torque the bolts with threadlocker.
- Sensor Location Difference: The knock sensors on the 3.6L V6 engines are externally mount
Mechanic-Grade Diagnostic Values
- Knock Sensor Internal Resistance (3.6L V6) — expected: 93 kΩ to 110 kΩ. Failure: An open reading (OL) or a value outside the specified range indicates a faulty sensor.
- Knock Sensor Circuit Bias Voltage (Key On, Engine Off) — expected: ~5V at the connector with sensor unplugged; drops slightly (e.g., to ~4.8V) when plugged in.. Failure: No voltage indicates a problem with the ECM or wiring. No voltage drop when plugging in the sensor suggests a bad sensor or open circuit.
- Knock Sensor AC Voltage Output ('Tap Test') — expected: A small AC voltage spike visible on a multimeter or oscilloscope when the engine block is tapped near the sensor.. Failure: No voltage spike indicates the sensor's piezoelectric crystal is not generating a signal and the sensor is faulty.
- Wiring Harness Continuity Resistance — expected: ~0.1 Ω. Failure: A significantly higher resistance reading points to a fault in the wiring harness between the sensor and the ECM.
Wiring & Ground Locations
- G101 — Located at the front of the engine, on the lower block.. This is a primary ground location for the Engine Control Module (ECM) and Transmission Control Module (TCM). A poor connection here can cause erratic behavior and false codes from any sensor reporting to the ECM, including the knock sensor.
- G105 / G106 — Located on the right side of the engine compartment (G105) and front center of the frame cross rail (G106).. These are major engine compartment and chassis grounds. While not directly for the ECM, poor grounding in these locations can introduce electrical noise that may interfere with sensitive sensor signals like the one from the knock sensor.
- ECM Connector C1, Pin 33 — At the Engine Control Module (ECM).. On similar GM 3.6L platforms, this is the specific pin for the 'Knock Sensor 1 Signal'. This is the terminal point for testing circuit continuity from the sensor connector back to the ECM.
OEM Part Supersession History
12605738, 12636736, 12692505→12729597— Standard part evolution for improved performance, reliability, or manufacturing changes.
Heads up: The older part number 12692505 may require a different mating connector (pigtail #19301207), indicating a potential wiring change. When replacing a sensor, it is critical to verify if the connector style has changed and if a new pigtail is needed.
Helpful Videos
We Have This Part in Stock


The information in this article is provided for general reference and educational purposes only. Vehicle specifications, procedures, and part compatibility can vary by production date, trim level, and region. Always consult your vehicle's factory service manual and verify part numbers before purchasing or performing repairs. Safety-critical components such as airbags, seat belts, and braking systems should be installed by a qualified professional.
- Cadillac CTS:
- 🧭 Diagnostic Flowchart
- 🎬 Helpful Videos
- 🛍️ Shop This Part
- What's Unique About the 2014-2017 Cadillac CTS
- Symptoms You May Notice
- Most Likely Causes
- Rare But Worth Checking
- Diagnosis Steps
- Parts You'll Likely Need
- Related Codes That Often Appear With This One
- Technical Service Bulletins (TSBs) & Recalls
- Platform-Specific Known Issues
- Mechanic-Grade Diagnostic Values
- Wiring & Ground Locations
- OEM Part Supersession History
- 🎟️ Get 5% Off