
P0327 on 2019-2025 Audi A7: Knock Sensor Circuit Low Causes and Fixes
This code indicates a low voltage signal from the Bank 1 knock sensor. On the 3.0L V6 engine, this is often due to a faulty sensor or its wiring. The repair is labor-intensive as the sensor is located under the turbocharger/intake manifold, making professional service recommended. Due to the high labor cost, it's standard practice to replace both knock sensors and the connecting harness at the same time.
- P0327 on a 2019-2025 Audi A7 points to a fault in the Bank 1 knock sensor circuit, most often a low voltage signal.
- The most likely cause is a failed sensor or its connecting harness, degraded by the extreme heat in the engine's 'hot-V'.
- This repair is complex and labor-intensive due to the sensor's location under the turbocharger, making it a job best left to a professional.
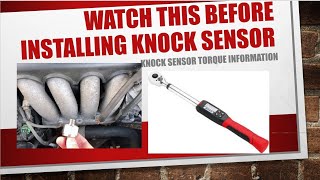
- It is critical to torque the new sensor to exactly 20 Nm (15 ft-lb) and to replace both sensors and the harness at the same time.
- Audi has acknowledged this type of fault in TSB #2081342_1.
- Due to the high labor cost, using high-quality OEM parts is crucial to avoid a repeat failure.
What's Unique About the 2019-2025 Audi A7
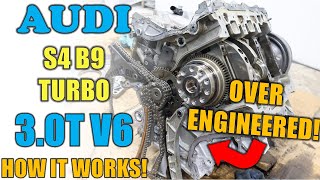
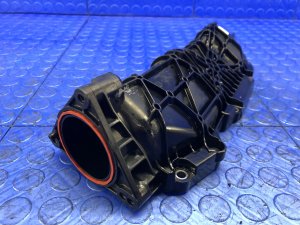
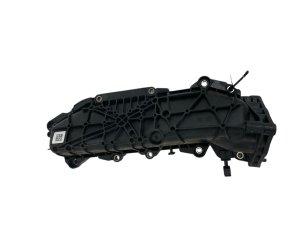
For the Audi A7 (C8 generation) with the 3.0L V6 TFSI (EA839) engine, this code is notable due to the location of the knock sensors. They are situated deep in the 'hot-V' of the engine, underneath the intake manifold and the single twin-scroll turbocharger assembly. 🎬 Watch: See a full teardown of this V6 engine valley. This placement makes accessing them for inspection or replacement a significant job that requires extensive disassembly. Audi has also issued a Technical Service Bulletin (TSB 2081342_1) that includes P0327, indicating a recognized pattern of this fault on their V6 TFSI engines.
Diagnostic Flowchart
Tap your situation to follow the diagnostic path that matches what you're seeing on this vehicle.
Symptoms You May Notice
- Check Engine Light is on
- "Drive System Malfunction" message on the dashboard [TSB_2081342_1]
- Reduced engine power and acceleration (limp mode)
- Audible engine pinging or knocking, especially under load
- Decreased fuel efficiency
- Rough or fluctuating idle
- Hesitation during acceleration
- Replacing spark plugs or ignition coils to fix a perceived knock without diagnosing the P0327 code first.
- Assuming an engine has a mechanical knock issue before verifying the integrity of the knock sensor circuit that is reporting a fault.
- Replacing only the failed knock sensor without also replacing the adjacent sensor and the connecting harness, leading to a repeat repair when the other components fail shortly after.
Most Likely Causes
- Faulty Knock Sensor (Bank 1) 🔴 High Probability → Shop Ignition Knock (Detonation) Sensor Sensors located in the hot 'V' of the engine are subjected to extreme heat cycles from the turbocharger, which can lead to premature failure of the sensor's internal piezoelectric element over time.
How to confirm: After confirming wiring is intact, testing the sensor's resistance with a multimeter or replacing it is the most definitive test. This requires accessing the sensor by removing the intake/turbo. Comparing the resistance between the two sensors can also indicate a failure.
Typical fix: Replace the Bank 1 knock sensor. It is strongly recommended to replace both Bank 1 and Bank 2 sensors, along with the connecting wiring harness, at the same time due to the high labor cost to access them.
Est. part cost: $40-$80 - Wiring or Connector Issue 🟡 Medium Probability The wiring harness runs through the high-heat engine valley. Insulation can become brittle and crack, or connectors can be damaged by heat or oil/coolant contamination. In some cases, water can pool in the valley and corrode the connectors.
How to confirm: Visually inspect the wiring harness leading to the knock sensor for any signs of damage, melting, or corrosion. Check for continuity and shorts between the sensor connector and the ECM. A real-world case on a Q7 showed a pinched wire after a service caused the code.
Typical fix: Repair the damaged section of the wiring harness or replace the entire knock sensor sub-harness (recommended). Some mechanics advise applying RTV sealant where the harness passes through the valley plate to prevent future water intrusion.
Est. part cost: $25-$70 for a new harness. - Loose or Improperly Torqued Knock Sensor ⚪ Low Probability → Shop Ignition Knock (Detonation) Sensor
How to confirm: Check that the sensor is torqued to the manufacturer's specification. An improperly torqued sensor cannot detect engine vibrations correctly. Over-torquing can make the sensor overly sensitive and generate false signals, while under-torquing can prevent it from detecting knock at all.
Typical fix: Torque the knock sensor mounting bolt to the correct specification, which is typically 20 Nm (15 ft-lb) for these engines. Ensure the mounting surface on the engine block is perfectly clean before installation.
Est. part cost: $0
Rare But Worth Checking
- Faulty Engine Control Module (ECM): This is extremely rare. The ECM should only be considered after all other possibilities, including the sensor, its entire circuit, and the connecting harness, have been exhaustively tested and ruled out.
- Underlying Mechanical Issue Causing Excessive Vibration: In very rare cases, especially on modified or high-mileage engines, a separate mechanical issue could create vibrations that the knock sensor system flags as a fault. The EA839 is known for potential piston skirt wear, which can cause piston rocking and noise. While this would typically cause actual knock, severe vibration could also be misinterpreted by the system.
Diagnosis Steps
- Read the fault codes with an OBD-II scanner to confirm P0327 and note any other codes.
- Use a scan tool like VCDS to view live data in Measuring Value Blocks (MVB) for knock control, typically in groups 020-029. A constant low or zero voltage reading points towards a circuit fault.
- Gain access to the engine valley by removing the turbocharger and intake manifold assembly. This is a multi-hour job.
- Visually inspect the knock sensors, their connectors, and the sub-harness for any signs of physical damage, melting, corrosion, or contamination from oil or coolant.
- Disconnect the sensor and test its internal resistance with a multimeter. While specific values for the EA839 are not widely published, an open circuit (infinite resistance) or a short to ground (near zero ohms) indicates a failed sensor. Compare readings between the Bank 1 and Bank 2 sensors; they should be similar.
- Check the wiring harness for continuity from the sensor connector back to the ECM. Test for shorts to ground or power.
- If the wiring and sensor test good, verify the sensor mounting bolt is torqued correctly to 20 Nm (15 ft-lb).
- If the sensor or harness is faulty, replace both knock sensors and the sub-harness as a set.
- Ensure the mounting surface on the block is perfectly clean before installing the new sensors.
- When reassembling, consider applying RTV sealant to the valley plate where the harness passes through to prevent water intrusion.
- Reassemble the intake manifold and turbocharger using new gaskets and seals.
- Clear the fault codes and perform a test drive, monitoring live data to ensure the code does not return.
Parts You'll Likely Need
- Knock Sensor
(OEM #06E905377A)— This is the most common failure point for this code, especially given the high-heat environment it operates in. It's a wear item that degrades over time. It is best practice to replace both at once.
Trusted brands: Bosch (OEM), Genuine Audi
OEM price range: $60-$90
Aftermarket price range: $30-$70 - Knock Sensor Wiring Harness
(OEM #06E971822D (or similar, verify by VIN))— This sub-harness connects both knock sensors and is exposed to the same extreme heat. Its insulation often becomes brittle and fails, causing shorts. It is always recommended to replace with the sensors.
Trusted brands: Genuine Audi
OEM price range: $50-$80
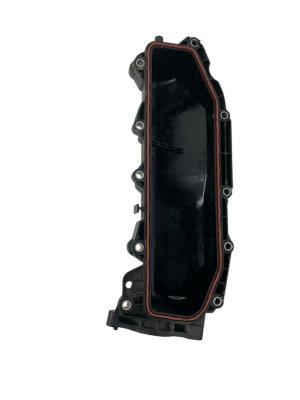
Aftermarket price range: $25-$50 - Intake Manifold Gaskets — These are single-use gaskets that must be replaced anytime the intake manifold or turbocharger is removed to access the knock sensors.
Trusted brands: Victor Reinz, Elring
OEM price range: $50-$80
Aftermarket price range: $30-$60
Related Codes That Often Appear With This One
- P0332 — This is the corresponding code for 'Knock Sensor 2 Circuit Low (Bank 2)'. The TSB lists them together, and it's common for both sensors to be replaced simultaneously due to their shared location and similar service life. [TSB_2081342_1]
- P0328 — This code for 'Knock Sensor 1 Circuit High' is also mentioned in the same TSB, indicating a related failure mode (e.g., an open circuit). [TSB_2081342_1]
- P0333 — This code for 'Knock Sensor 2 Circuit High' is also mentioned in the same TSB, indicating a related failure mode for the second bank. [TSB_2081342_1]
Technical Service Bulletins (TSBs) & Recalls
- TSB_2081342_1: Provides information for Drive System Malfunction warnings related to knock sensor DTCs P0327, P0332, P0328, and P0333 on V6 TFSI engines.
Platform-Specific Known Issues
- Audi TSB #2081342_1 was issued for 'Drive System Malfunction' warnings related to a group of knock sensor codes, including P0327, on V6 TFSI engines, confirming this is a recognized issue by the manufacturer.
Mechanic-Grade Diagnostic Values
- Knock Sensor Mounting Bolt Torque — expected: 20 Nm (15 ft-lb). Failure: Over-torquing can make the sensor hyper-sensitive, leading to false knock readings and retarded timing. Under-torquing can prevent it from detecting knock at all.
- ECM Fault Trigger Condition (Voltage) — expected: Signal voltage should fluctuate. A P0327 is set if the voltage is less than 0.5V for more than 1-2 seconds.. Failure: A constant voltage reading near 0V on a live data scan tool points to a short circuit or faulty sensor.
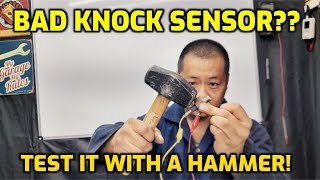
- Knock Sensor AC Voltage Output (Dynamic Test) — expected: A small fluctuating AC millivolt (mV) signal when the engine block is tapped near the sensor.. Failure: No AC voltage signal when tapping indicates a dead sensor.
Scan Tool Commands That Help
- VCDS (VAG-COM): Engine -> Measuring Value Blocks (MVB) -> Groups 020-029 — Use this to monitor the live output voltage and timing retard values for each individual cylinder's knock control. A static low voltage on Bank 1's sensor while others are active confirms a localized circuit issue.
Wiring & Ground Locations
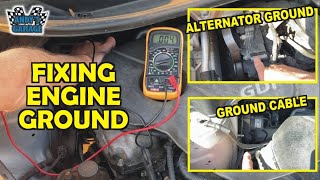
- Engine Block Ground Strap — A primary ground strap typically connects the engine block to the chassis frame rail in the engine compartment.. The knock sensor circuit relies on a clean and solid ground path through the engine block. A corroded or loose main engine ground can introduce electrical noise and resistance, potentially causing erratic sensor readings, including a low voltage fault.
- Ground Connection (Right Engine Compartment) — On the C7 platform (predecessor to C8), a key ground point is located in the right side of the engine compartment, near the alternator. The C8 has a similar layout.. This is a common grounding point for multiple engine sensors. Verifying its integrity is a crucial step when diagnosing any electrical fault code, as a single loose ground can cause multiple, seemingly unrelated issues.
- ECM Connector Pins — At the Engine Control Module (ECM) connector.. Technicians need to test for continuity between the knock sensor harness connector in the engine valley and the corresponding pins at the ECM to rule out a break in the wiring harness. A wiring diagram is required to identify the specific pin numbers for KNK1 (knock sensor signal) and EKNK (sensor ground).
Real Owner Repair Stories
- 1A Auto YouTube Channel (General GM V-engine, but directly applicable principle) — Check Engine Light with P0327/P0332 codes.
❌ Tried (didn't work) Initial assumption was a bad sensor.
✅ What actually fixed it The root cause was water intrusion into the engine valley, which caused heavy corrosion on the knock sensor connector and wiring harness. The fix required replacing both the sensor and the harness due to the extensive corrosion.
OEM Part Supersession History
06E905377→06E905377A— Revision for improved reliability or manufacturing process. The 'A' revision is widely used across many Audi/VW/Porsche engines from 2.0T to 3.0T, indicating it is a standardized, reliable part.
Helpful Videos

![How to Fix P0327 Engine Code in 2 Minutes [1 DIY Method / Only $10.67]](https://img.youtube.com/vi/csdOAGy20u0/mqdefault.jpg)
We Have This Part in Stock

The information in this article is provided for general reference and educational purposes only. Vehicle specifications, procedures, and part compatibility can vary by production date, trim level, and region. Always consult your vehicle's factory service manual and verify part numbers before purchasing or performing repairs. Safety-critical components such as airbags, seat belts, and braking systems should be installed by a qualified professional.
- Audi A7:
- 🧭 Diagnostic Flowchart
- 🎬 Helpful Videos
- 🛍️ Shop This Part
- What's Unique About the 2019-2025 Audi A7
- Symptoms You May Notice
- Most Likely Causes
- Rare But Worth Checking
- Diagnosis Steps
- Parts You'll Likely Need
- Related Codes That Often Appear With This One
- Technical Service Bulletins (TSBs) & Recalls
- Platform-Specific Known Issues
- Mechanic-Grade Diagnostic Values
- Scan Tool Commands That Help
- Wiring & Ground Locations
- Real Owner Repair Stories
- OEM Part Supersession History
- 🎟️ Get 5% Off