
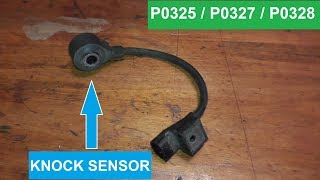
P0327 on 2019-2025 Audi A8: Knock Sensor Circuit Low Causes and Fixes
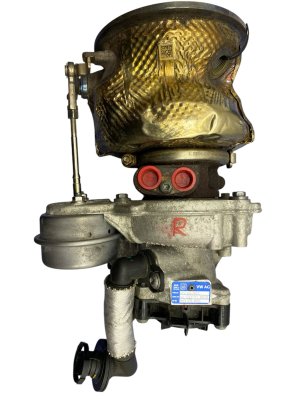
P0327 on a 2019-2025 Audi A8 with the 3.0L V6 TFSI (EA839) engine indicates a fault with the Bank 1 knock sensor. The ECM has detected a signal voltage below the specified range. The most common fix is replacing the sensor itself, which is a complex job as it's located in the engine 'V' under the turbocharger and intake manifold. This repair is labor-intensive and best left to a professional.
- P0327 on a 2019-2025 Audi A8 points directly to a problem with the Bank 1 knock sensor or its circuit, with the ECM reading a signal voltage that is too low.
- The most likely cause is a failed knock sensor due to the high-heat 'hot-V' engine design.
- Due to the sensor's location under the turbocharger, this is a labor-intensive and expensive repair that is not recommended for most DIY mechanics.
- It is standard practice and highly recommended to replace both knock sensors (Bank 1 and Bank 2) and all associated gaskets at the same time to avoid a repeat of the costly labor.
- Driving with this code can lead to reduced performance, poor fuel economy, and potential long-term engine damage if the engine is allowed to knock.
What's Unique About the 2019-2025 Audi A8
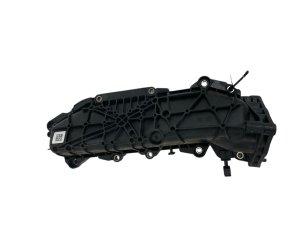
On the Audi EA839 3.0L V6 TFSI engine used in the D5 generation A8, the two knock sensors are located deep in the 'V' of the engine, underneath the large turbocharger and intake manifold assembly. This 'hot-V' design places the sensors and their wiring in an extremely high-heat area. Accessing them requires complete removal of the turbo and intake systems, making replacement significantly more labor-intensive than on engines where the sensors are on the exterior of the block. Additionally, Audi has issued a Technical Service Bulletin (TSB 2081342) that includes P0327, indicating it's a recognized issue on this engine platform.
Diagnostic Flowchart
Tap your situation to follow the diagnostic path that matches what you're seeing on this vehicle.
Symptoms You May Notice
- Check Engine Light is on 🎬 Watch: Understanding low input codes P0327 and P0332
- Reduced engine power and acceleration (limp mode)
- Hesitation or sluggishness during acceleration
- Decreased fuel economy
- Audible engine pinging or knocking, especially under load
- Fluctuating engine RPM
- Replacing spark plugs or ignition coils to fix a perceived misfire when the issue is the engine's inability to properly adjust timing due to the faulty knock sensor.
- Mistaking the code for a fuel quality issue. While poor fuel can cause knock, it will not typically cause a circuit-low fault code.
Most Likely Causes
- Failed Knock Sensor (Bank 1) 🔴 High Probability → Shop Ignition Knock (Detonation) Sensor The sensor operates in a high-heat, high-vibration environment within the engine's 'hot-V', leading to premature failure. A manufacturer TSB (#TSB_2081342_1) exists acknowledging potential failures on this engine family.
How to confirm: After confirming wiring is intact, the sensor is the most likely failure point. It can be tested for resistance with a multimeter, but due to its location, replacement is often performed based on the code and symptoms alone after disassembly.
Typical fix: Replace the Bank 1 knock sensor. It is highly recommended to replace both knock sensors (Bank 1 and Bank 2) and the wiring sub-harness at the same time due to the high labor cost to access them.
Est. part cost: $80-$160 - Wiring or Connector Issue 🟡 Medium Probability The wiring harness is routed in the hot 'V' of the engine, making it susceptible to heat-induced brittleness, melting, or damage over time. Rodents are also known to chew on wiring in this area.
How to confirm: Visually inspect the wiring harness and the connector pigtail leading to the knock sensor for any signs of melting, fraying, breaks, or oil contamination. Check the connector for corrosion or a loose fit. This inspection requires removal of the intake/turbocharger assembly.
Typical fix: Repair the damaged section of the wiring harness or replace the connector pigtail. Often, a new knock sensor sub-harness is installed as a preventative measure during sensor replacement.
Est. part cost: $20-$50 - Faulty Engine Control Module (ECM) ⚪ Low Probability
How to confirm: This is a diagnosis of exclusion after both the sensor and wiring have been tested and confirmed to be in good working order. Requires specialized diagnostic tools to check the ECM's driver circuit for the knock sensor.
Typical fix: Replace and reprogram the ECM. This is very rare.
Est. part cost: $1000-$2000+
Rare But Worth Checking
- Loose Knock Sensor: → Shop Ignition Knock (Detonation) Sensor If the sensor's mounting bolt is not torqued correctly to the engine block, it cannot properly detect vibrations. The correct torque is critical. For many Audi V6 engines, the specification is 20 Nm (~15 ft-lbs). This is a crucial step to verify during installation.
- Coolant or Oil Contamination: Leaks from other components in the engine valley (like the PCV valve, oil filter housing, or coolant pipes) are common on this platform and can saturate the sensor and its connector, causing a short or signal degradation. During disassembly, the area should be inspected for signs of old leaks.
Diagnosis Steps
- Use an OBD-II scanner (like VCDS for VW/Audi) to confirm P0327 is the primary code and check for any other related codes, such as P0332 for the other bank.
- Due to the sensor's location, direct visual inspection and testing is not possible without significant disassembly. The next step involves the removal of the turbocharger and intake manifold assembly.
- Once access is gained, visually inspect the knock sensor, its connector, and the surrounding wiring harness for any signs of damage, melting, oil saturation, or corrosion.
- Disconnect the sensor and use a multimeter to test its internal resistance. Compare the reading to the manufacturer's specifications (many sensors read between 500-600 kOhms, but always verify for the specific part). 🎬 Watch: How to test and replace a knock sensor
- Check the wiring harness for continuity from the ECM connector to the sensor connector. Ensure there are no shorts to ground or power.
- If the wiring is good, the sensor is the culprit. Replace the knock sensor. It is highly recommended to replace both sensors and the connecting wire harness at this time.
- Ensure the new sensor is torqued to the engine block to the manufacturer's specification, which is typically 20 Nm (~15 ft-lbs). Do not over-tighten, as it can damage the sensor or cause incorrect readings.
- Reassemble all components using new gaskets, clear the trouble codes, and perform a test drive to ensure the fault does not return.
Parts You'll Likely Need
- Knock Sensor
(OEM #06E905377M)— This is the most common cause of code P0327. The sensor fails internally due to extreme heat and vibration in the engine's 'V'.
Trusted brands: Audi Genuine, Bosch
OEM price range: $120-$160
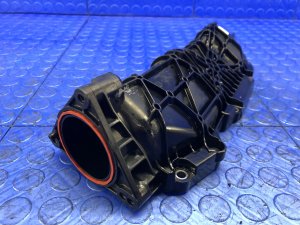
Aftermarket price range: $70-$110 - Supercharger / Turbo Gasket Kit
(OEM #06E198012B)— A comprehensive set of gaskets and seals must be replaced anytime the turbo/intake assembly is removed to access the knock sensors. This prevents vacuum and coolant leaks upon reassembly.
Trusted brands: Audi Genuine, Victor Reinz, Elring
OEM price range: $100-$200
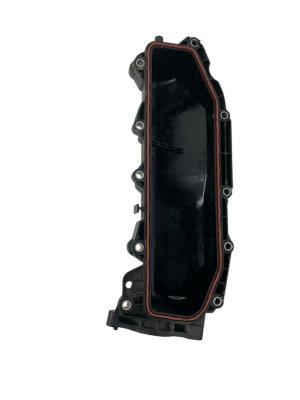
Aftermarket price range: $70-$120 - Upper Intake Manifold Gaskets
(OEM #079129717D)— These specific gaskets seal the intake runners to the supercharger/turbo assembly and are a critical replacement item.
Trusted brands: Audi Genuine, Elring
OEM price range: $8-$15 each (6 required)
Aftermarket price range: $5-$10 each (6 required)
Related Codes That Often Appear With This One
- P0332 — This is the 'Knock Sensor 2 Circuit Low (Bank 2)' code. Since both sensors are in the same difficult-to-access location and subject to the same conditions, they often fail around the same time. It is standard practice to replace both together.
- P0328 — This is the 'Knock Sensor 1 Circuit High' code. It points to a different type of electrical fault (an open or short to power) in the same circuit and can sometimes appear with or be related to the P0327 fault, especially if wiring is intermittently failing.
Technical Service Bulletins (TSBs) & Recalls
- TSB_2081342_1: Provides information for Drive System Malfunction DTCs related to Knock Sensor P0327, P0332, P0328, P0333 on V6 TFSI engines.
Platform-Specific Known Issues
- A known issue is documented in Audi Technical Service Bulletin #TSB_2081342_1, which addresses drive system malfunctions and DTCs P0327, P0332, P0328, and P0333 related to the knock sensors on V6 TFSI engines. The bulletin guides technicians through diagnosis, confirming the commonality of this fault.
Mechanic-Grade Diagnostic Values
- Knock Sensor Mounting Bolt Torque — expected: 20 Nm (~15 ft-lbs). Failure: Over-torquing can make the sensor overly sensitive and trigger false codes; under-torquing can prevent it from detecting real knock. The torque is critical to function.
- Knock Sensor Wiring Harness Check — expected: Infinite resistance (∞ Ω) between any two of the three terminals in the sensor's connector.. Failure: Any continuity reading indicates a short circuit within the sensor, requiring replacement.
- Knock Sensor Functional Test (Oscilloscope) — expected: A clear AC sine wave should be generated on the scope when the engine block is tapped near the sensor.. Failure: No signal or a flat line when tapping the block indicates a dead sensor or an open circuit in the wiring.
- ECM Fault-Setting Threshold — expected: Signal voltage should vary.. Failure: A P0327 code is stored if the ECM sees the knock sensor output voltage is 0.50 V or less for at least 2.0 seconds.
Wiring & Ground Locations
- Sensor Ground (Pin in Harness) — The knock sensor does not use a chassis ground. It uses a dedicated ground return wire that is part of the engine sub-harness and runs directly back to a specific pin on the Engine Control Module (ECM).. A 'Circuit Low' code can be caused by this ground return wire being shorted to the main chassis/engine block ground. Technicians must test continuity from the sensor connector pin back to the corresponding ECM pin, not just to the nearest ground point.
- Ground Point 220 (example) — In some Audi wiring diagrams, a common ground connection point for multiple sensors within the engine wiring harness is designated with a number, such as '220'.. While the specific number for the D5 A8 may differ, it illustrates that a single bad connection at an internal harness ground splice could affect multiple sensors. However, a P0327 code alone usually points to an issue specific to the Bank 1 sensor circuit.
Real Owner Repair Stories
- LS1Tech forum user 'horist' (GM vehicle with LS engine (procedure is analogous due to intake manifold covering knock sensors)) — P0327 code returned almost immediately after replacing both knock sensors and the sub-harness.
❌ Tried (didn't work) Replacing the knock sensor (Bank 1)., Replacing the knock sensor wiring sub-harness.
✅ What actually fixed it After removing the intake manifold a second time, the owner discovered the 'new' wiring harness had been pinched between the intake and the engine block during reinstallation, causing a short. The final fix was to replace the harness again and carefully route it, using tape to hold it in place during reassembly to prevent it from being crushed.
When the Usual Fixes Don't Work
- In many documented cases on forums, replacing the Bank 1 knock sensor (G61) and its sub-harness does not resolve a persistent P0327 code. The most common culprit for the recurring code is not a faulty ECM, but rather the new sub-harness getting pinched or crushed during the re-installation of the complex intake manifold and turbocharger assembly. This creates a new short-to-ground, immediately recreating the 'Circuit Low' condition. Mechanics should pay extreme attention to harness routing during reassembly, as this is the highest-leverage point of failure in the repair.
Model Year Variations Within This Range
- 2017-2019 (Early EA839 Engines): Early production EA839 engines had a higher incidence of rocker arm bearing failure. While this typically leads to catastrophic engine damage and multiple codes, severe engine vibrations from such a mechanical issue could theoretically precede total failure and cause erratic knock sensor readings, though it would not directly cause a 'circuit low' fault.
Helpful Videos


We Have This Part in Stock

The information in this article is provided for general reference and educational purposes only. Vehicle specifications, procedures, and part compatibility can vary by production date, trim level, and region. Always consult your vehicle's factory service manual and verify part numbers before purchasing or performing repairs. Safety-critical components such as airbags, seat belts, and braking systems should be installed by a qualified professional.
- Audi A8:
- 🧭 Diagnostic Flowchart
- 🎬 Helpful Videos
- 🛍️ Shop This Part
- What's Unique About the 2019-2025 Audi A8
- Symptoms You May Notice
- Most Likely Causes
- Rare But Worth Checking
- Diagnosis Steps
- Parts You'll Likely Need
- Related Codes That Often Appear With This One
- Technical Service Bulletins (TSBs) & Recalls
- Platform-Specific Known Issues
- Mechanic-Grade Diagnostic Values
- Wiring & Ground Locations
- Real Owner Repair Stories
- When the Usual Fixes Don't Work
- Model Year Variations Within This Range
- 🎟️ Get 5% Off