
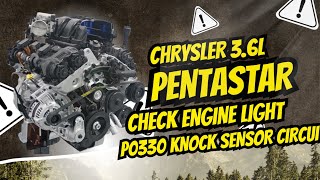
P0330 on 2019-2025 Jeep Wrangler 3.6L: Knock Sensor 2 Circuit Causes and Fixes
On a 2019-2025 Wrangler with the 3.6L V6, code P0330 almost always points to a failed knock sensor or its wiring harness on Bank 2 (driver's side). The sensors are buried under the intake manifold, making replacement a labor-intensive job. Contamination from oil or coolant leaks from the oil filter housing is a frequent cause of harness failure. Expect a shop bill of $450-$700, with most of the cost being labor. Always replace both sensors and the harness simultaneously.
- P0330 on a 3.6L Wrangler points to a circuit failure for the driver's side knock sensor.
- The most common causes are a bad knock sensor or a damaged wiring harness.
- The repair is very labor-intensive (2.5-4 hours) because the parts are located under the intake manifolds.
- It is critical to replace both knock sensors, the wiring harness, and the intake gaskets at the same time to avoid repeat labor costs.
- While you can drive with the code, performance and fuel economy will suffer, and you should seek repair to prevent potential long-term issues.
What's Unique About the 2019-2025 Jeep WRANGLER
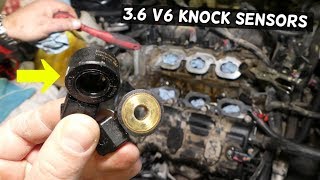
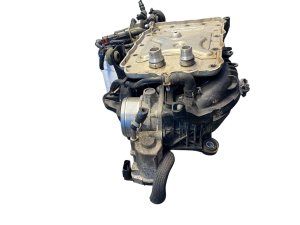
On the 3.6L Pentastar V6 engine used in the Wrangler and many other Stellantis vehicles, the two knock sensors are located deep in the engine valley, underneath the upper and lower intake manifolds and the oil cooler/filter housing assembly. This design protects the sensors but makes accessing them for diagnosis or replacement a significant job requiring several hours of labor. Because of the high labor cost and the tendency for the wiring harness to fail from heat and oil contamination, the standard professional practice is to replace both sensors and the wiring harness at the same time.
Diagnostic Flowchart
Tap your situation to follow the diagnostic path that matches what you're seeing on this vehicle.
Symptoms You May Notice
- Check Engine Light is on
- Reduced engine power and sluggish acceleration
- Noticeable decrease in fuel economy
- Engine may hesitate or run rough
- Transmission may not shift as smoothly, as the PCM adjusts its strategy based on the limp mode.
- Audible engine pinging or knocking, especially under load (this is less common than the other symptoms)
- Replacing only one knock sensor. Given the 3-4 hours of labor to access the sensors, replacing only the failed one is a false economy. If the other original sensor or the harness fails later, you will have to pay for the same labor all over again.
- Replacing the sensor when the true fault is oil contamination and corrosion in the wiring harness connector.
Most Likely Causes
- Damaged Knock Sensor Wiring Harness 🔴 High Probability → Shop Engine Wiring Harness The harness sits in the high-heat engine valley, directly under the oil filter housing, which is a known source of oil and coolant leaks on the 3.6L Pentastar. This contamination, combined with heat, degrades the wiring insulation and connector seals, leading to corrosion, shorts, or open circuits. Often, the connector itself is visibly corroded or the wires are brittle.
How to confirm: After removing the intake manifolds and oil cooler, visually inspect the harness for cracks, melting, oil saturation, or corrosion inside the connectors. Perform a continuity test on each wire from the sensor connector to the main engine harness connector.
Typical fix: Replace the knock sensor wiring harness. This is considered standard procedure whenever the sensors are accessed and is often the true root cause of the P0330 code.
Est. part cost: $50-$100 - Faulty Knock Sensor 2 🔴 High Probability → Shop Ignition Knock (Detonation) Sensor The sensors are subjected to intense heat cycles deep within the engine valley, which can lead to internal failure over time. Bank 2 is on the driver's side of the engine valley.
How to confirm: After accessing the sensor, test its internal resistance with a multimeter. A common specification for these sensors is between 93 and 100 kOhms, but always verify with the service manual. An out-of-spec or infinite resistance reading indicates a failed sensor.
Typical fix: Replace the knock sensor. It is highly recommended to replace both sensors (Bank 1 and Bank 2) and the wiring harness at the same time due to the labor-intensive location.
Est. part cost: $50-$150
Rare But Worth Checking
- Powertrain Control Module (PCM) Fault: → Shop Engine Control Module (ECM) Extremely rare. This should only be considered after sensors and the full wiring harness (both the sub-harness in the valley and the main engine harness) have been replaced and the code still returns. A Jeep Gladiator owner experienced this on a new 2023 model, where the issue persisted after the dealer replaced the sensors and sub-harness, eventually tracing it to the main engine harness and then the PCM. This is a last-resort diagnosis.
Diagnosis Steps
- Confirm the code P0330 is present using an OBD-II scanner. Use the scanner's live data function to observe the voltage from Knock Sensor 1 and Knock Sensor 2. A significant discrepancy (e.g., one sensor reading 0.5V and the other 0.14V) points towards the faulty circuit. 🎬 See how to diagnose the P0330 code using live data.
- Acknowledge that physical inspection requires significant disassembly. The following steps assume the upper and lower intake manifolds and the oil cooler housing have been removed to access the engine valley.
- Visually inspect the knock sensors and the wiring harness for any signs of physical damage, melting, or corrosion. Pay close attention to oil or coolant residue, as this is a primary cause of harness failure.
- Disconnect the harness from Knock Sensor 2 (Bank 2, driver's side). Test the sensor's resistance with a multimeter. It should be within manufacturer specs (often around 93-100 kOhms). An open circuit (infinite resistance) confirms a bad sensor.
- Thoroughly inspect and test the wiring harness for continuity from the sensor connector back to the main engine harness connector. Check for any shorts to ground or shorts between the two wires for the sensor.
- If the sensor and harness test good, the fault may lie further up the main engine harness or with the PCM, but this is highly unlikely and should be confirmed by a professional.
- Due to the difficult access, the standard professional repair is to replace both knock sensors, the wiring harness, and the intake manifold gaskets regardless of which component tested bad.
Parts You'll Likely Need
- Ignition Knock Sensor
(OEM #68166540AA)— This is the sensor that detects engine knock. It is the most common part to fail, triggering code P0330. It is recommended to replace both at the same time.
Trusted brands: Mopar, NGK, Delphi, Bosch
OEM price range: $140-$205
Aftermarket price range: $40-$90 - Knock Sensor Wiring Harness
(OEM #68085202AD)— This harness connects both knock sensors and the oil pressure/temp sensors to the main engine harness. Its location in the hot, oil-soaked engine valley makes it extremely prone to failure. It is always recommended to replace this with the sensors.
Trusted brands: Mopar, Standard Motor Products
OEM price range: $70-$100
Aftermarket price range: $40-$60 - Upper and Lower Intake Manifold Gaskets
(OEM #Mopar MS97204 (Fel-Pro Kit))— These gaskets are single-use and must be replaced anytime the intake manifolds are removed to access the knock sensors. Reusing old gaskets will cause vacuum leaks and other performance issues.
Trusted brands: Mopar, Fel-Pro, Mahle
OEM price range: $40-$60
Aftermarket price range: $20-$40
Related Codes That Often Appear With This One
- P0325 — P0325 is the corresponding code for the Knock Sensor 1 Circuit on Bank 1. If the wiring harness that serves both sensors is damaged, or if an oil leak has contaminated the entire engine valley, both codes may appear together.
Technical Service Bulletins (TSBs) & Recalls
- S1908000159: Mentions P0330 as a cause for the MIL lamp being on for the 2021 Wrangler.
- 23-019-25 REV. B: Lists P0330 among several other potential trouble codes that can trigger a MIL.
Platform-Specific Known Issues
- The primary issue for the Wrangler JL with the 3.6L engine is the location of the knock sensors. They are buried under the intake manifold and oil cooler assembly, making a simple sensor replacement a multi-hour job.
- Failure is frequently caused by collateral damage from a leaking oil filter housing assembly, which is a very common problem on the 3.6L Pentastar. The leaking oil saturates the knock sensor harness, causing it to degrade and fail.
- TSB S1908000159 and 23-019-25 REV. B both list P0330 as a potential Diagnostic Trouble Code (DTC) that can illuminate the Malfunction Indicator Lamp (MIL), confirming it's a known issue on this platform.
Mechanic-Grade Diagnostic Values
- Knock Sensor Internal Resistance — expected: 93 to 100 kOhms (general spec, verify with service manual). Failure: Resistance is out of specification, or reads as an open circuit (infinite resistance).
- Knock Sensor Signal Voltage (Live Data) — expected: 0.2V - 0.6V at idle; 0.8V - 1.5V during light throttle.. Failure: Voltage is outside these ranges, flatlined, or erratic.
- Wiring Harness Continuity Test — expected: Less than 1.0 Ω. Failure: Resistance is higher than 1.0 Ω, indicating excessive resistance in the wire.
Wiring & Ground Locations
- G901A / G902A — Engine bay, near the battery.. These are primary chassis and engine ground points. A poor connection here can introduce electrical noise and cause faults in sensitive circuits like the knock sensors.
- G903A — Transmission housing area.. Provides a ground path for the powertrain. A loose or corroded ground here can affect engine sensor readings.
- Driver's Side Ground — Engine bay, on the driver's side near the brake booster.. A convenient and known ground point for testing or ensuring good ground continuity for harnesses on the driver's side (Bank 2) of the engine.
- XY220A — Connector linking the knock sensor sub-harness to the main engine harness.. This is a critical point of failure. When a P0330 code persists after replacing the valley sub-harness, the fault is likely in the wiring between this connector and the PCM.
Real Owner Repair Stories
- YouTube user on a Dodge Durango with 3.6L Pentastar (2019 Dodge Durango 3.6L V6 (same engine and likely failure mode)) — Persistent P0330 code that would return 10-15 minutes after being cleared.
❌ Tried (didn't work) Initially thought it was just the sensor.
✅ What actually fixed it Upon disassembly, the owner found the connector on the original wiring sub-harness was severely corroded. Replacing the entire sub-harness (part number ending in 'AD') permanently resolved the code. The sensors themselves were likely still good.
When the Usual Fixes Don't Work
- While replacing the knock sensors and the valley sub-harness fixes the P0330 code in the vast majority of cases, it is not a guaranteed solution. In a documented case on a 2023 Jeep Gladiator with only 7,000 miles, a dealer performed this exact repair, but the P0330 code returned. This points to a more complex and much rarer failure in the main engine harness (between the sub-harness connector and the PCM) or the PCM itself, requiring diagnostics beyond the engine valley.
OEM Part Supersession History
68166540AB→68166540AA— Standard part revision by the manufacturer.68085202AB, 68085202AC→68085202AD— Iterative design improvement to the knock sensor wiring sub-harness, likely to improve durability against heat and oil contamination.
Heads up: The latest revision 'AD' is the recommended replacement part to ensure the most robust design.
Model Year Variations Within This Range
- 2019-2025: No significant variations related to the P0330 code are documented for the 3.6L Pentastar Upgrade engine within this model year range. The engine design, sensor locations, and common failure points are consistent.
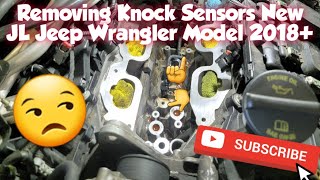
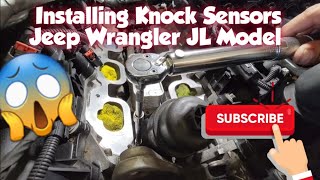
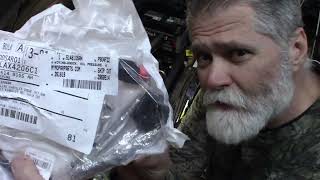
Helpful Videos
We Have This Part in Stock

The information in this article is provided for general reference and educational purposes only. Vehicle specifications, procedures, and part compatibility can vary by production date, trim level, and region. Always consult your vehicle's factory service manual and verify part numbers before purchasing or performing repairs. Safety-critical components such as airbags, seat belts, and braking systems should be installed by a qualified professional.
- Jeep WRANGLER:
- 🧭 Diagnostic Flowchart
- 🎬 Helpful Videos
- 🛍️ Shop This Part
- What's Unique About the 2019-2025 Jeep WRANGLER
- Symptoms You May Notice
- Most Likely Causes
- Rare But Worth Checking
- Diagnosis Steps
- Parts You'll Likely Need
- Related Codes That Often Appear With This One
- Technical Service Bulletins (TSBs) & Recalls
- Platform-Specific Known Issues
- Mechanic-Grade Diagnostic Values
- Wiring & Ground Locations
- Real Owner Repair Stories
- When the Usual Fixes Don't Work
- OEM Part Supersession History
- Model Year Variations Within This Range
- 🎟️ Get 5% Off