
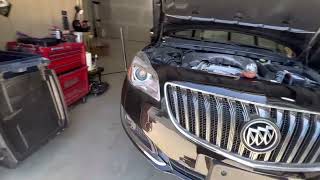
P0331 on 2014-2017 Buick Regal 2.0L Turbo: Causes and Fixes for Knock Sensor Faults
For a 2014-2017 Buick Regal with the 2.0L Turbo, code P0331 is most often caused by loose intake manifold bolts, not a bad knock sensor. Before buying parts, check the bolt torque as specified in GM TSB #PIP5529B. The fix may only cost a few dollars for threadlocker and an hour of your time.
- For a P0331 code on this Buick Regal, ALWAYS check for loose intake manifold bolts before considering any other repair. This is the most common cause.
- The fix may be as simple as tightening the manifold bolts to 12 N.m (106 lb-in) with some threadlocker.
- If the knock sensor does need replacement, it is a labor-intensive job as it is located under the intake manifold.
- Ignoring this code can lead to reduced performance and puts the engine at risk of damage from detonation, so it should be addressed promptly.
What's Unique About the 2014-2017 Buick Regal
On the 2.0L LTG turbo engine used in the Buick Regal and its platform mates, P0331 is frequently a 'ghost code' triggered by a separate mechanical issue. A widely known General Motors Technical Service Bulletin (TSB #PIP5529B) reveals that loose intake manifold bolts are a common culprit. The different thermal expansion rates of the plastic intake manifold and the aluminum cylinder head can cause the bolts to back out over time. The resulting vibration or, more commonly, a vacuum leak is misinterpreted by the highly sensitive knock sensor, setting the code even though the sensor itself is likely working correctly. This makes checking the manifold bolt torque the critical first step, saving owners from a costly and unnecessary sensor replacement.
Symptoms You May Notice
- Check Engine Light is on
- Reduced engine power and acceleration
- Engine hesitation or stumbling
- Audible engine pinging or knocking, especially under load
- Decreased fuel economy
- Rough or fluctuating idle
- Replacing the knock sensor without first checking the intake manifold bolt torque. This is the most common mistake and leads to an expensive, unnecessary repair.
Most Likely Causes
- Loose Intake Manifold Bolts 🔴 High Probability → Shop Engine Intake Manifold This is a widely documented issue on the 2.0L LTG engine, as noted in GM TSB #PIP5529B. The bolts can back out over time due to thermal cycling, creating vibrations and/or a vacuum leak that the knock sensor picks up as a fault.
How to confirm: Check the torque of the intake manifold bolts. They should be tightened to 12 N.m (106 lb-in). If they are loose (often only finger-tight), this is almost certainly the cause. This issue often appears with other codes like P0171, P0106, or P0326.
Typical fix: Remove each intake manifold bolt one at a time, apply medium-strength (blue) threadlocker, and re-torque to specification (12 N.m / 106 lb-in) following the correct sequence. A video guide shows there are five bolts on top and one underneath.
Est. part cost: $5-$15 - Faulty Knock Sensor 🟡 Medium Probability → Shop Ignition Knock (Detonation) Sensor
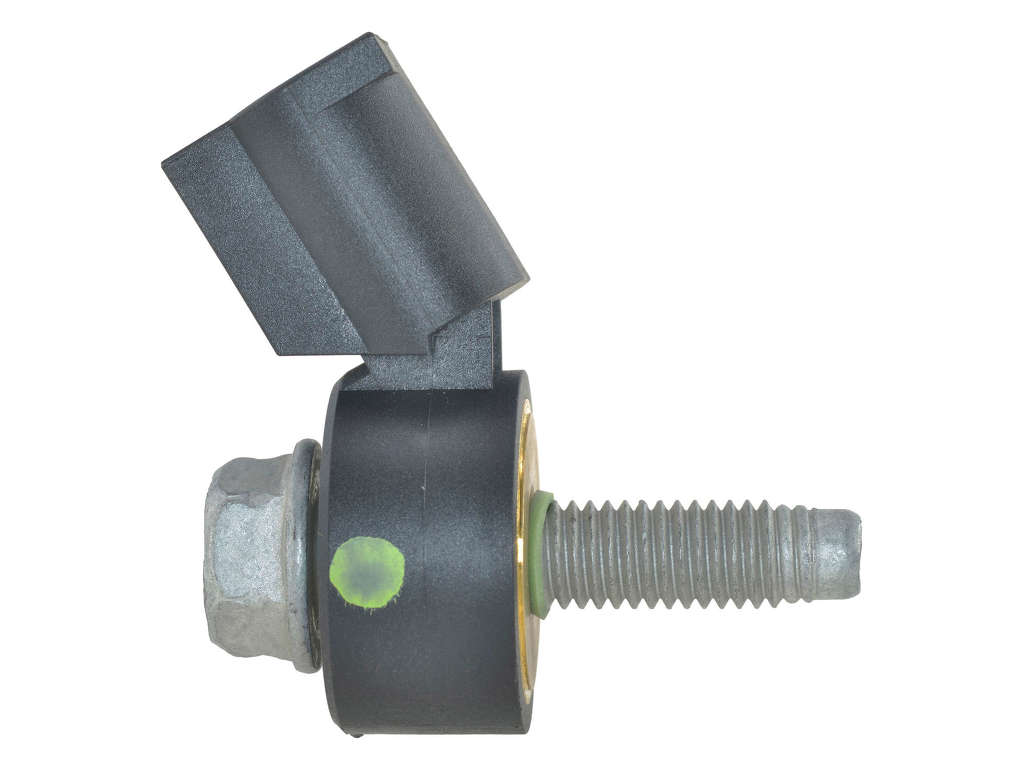
How to confirm: If the intake bolts are tight, the sensor itself may have failed. This requires testing the sensor's resistance (typically 93k-110k Ohms) and signal output with a multimeter or oscilloscope against factory specifications. The sensors are located under the intake manifold 🎬 Watch: See exactly where the knock sensors are located., making access difficult.
Typical fix: Replace the faulty knock sensor. Since accessing them requires removing the intake manifold, it is wise to replace the intake manifold gasket at the same time. Some technicians recommend replacing both knock sensors while the manifold is off.
Est. part cost: $25-$75 - Damaged Wiring or Connector ⚪ Low Probability The engine harness can be susceptible to rubbing against sharp metal edges, such as brackets, leading to chafing and short circuits.
How to confirm: Visually inspect the wiring harness leading to the knock sensor for any signs of melting, chafing, or breaks. Check the connector for corrosion, moisture, or bent pins.
Typical fix: Repair the damaged section of wire or clean/replace the connector.
Est. part cost: $10-$50
Rare But Worth Checking
- Powertrain Control Module (PCM) Fault: → Shop Engine Control Module (ECM) This is very rare. The PCM should only be considered after all other possibilities, including sensors and wiring, have been exhaustively tested and ruled out.
- Excessive Carbon Buildup: As a direct-injection engine, the 2.0L LTG can be prone to carbon deposits on intake valves over many miles (80k+). Severe buildup can affect combustion and potentially trigger knock-related codes.
- Other Mechanical Noise: In some cases, other failing components can create vibrations that the knock sensor misinterprets as engine knock. On related GM engines, a failing water pump (TSB #21-NA-030) or even a loose motor mount have been known to trigger false knock codes.
Diagnosis Steps
- Read the trouble codes with an OBD-II scanner and note all present codes. The presence of codes like P0171 or P0106 strongly points to the TSB issue.
- CRITICAL FIRST STEP: Inspect the intake manifold bolts. Using a torque wrench, verify they are tightened to 12 N.m (106 lb-in). If loose, this is the most likely cause. Remove bolts one by one, apply blue threadlocker, and re-torque. Clear codes and test drive.
- If the bolts are tight, proceed with a visual inspection of the knock sensor wiring harness and connector. The harness runs under the intake manifold; look for any damage, melting, or corrosion, especially where it might chafe against the block.
- If the wiring appears intact, test the knock sensor circuit. Using a multimeter, check for proper resistance at the sensor connector, which should be between 93k and 110k Ohms.
- If the circuit tests good, the sensor itself is the likely suspect. Replacing the sensor is the next step. Remember to replace the intake manifold gasket.
- If the problem persists after replacing the sensor, consider rare causes like a PCM fault or another source of mechanical noise (e.g., water pump, engine mounts) that could be creating false knock readings.
Parts You'll Likely Need
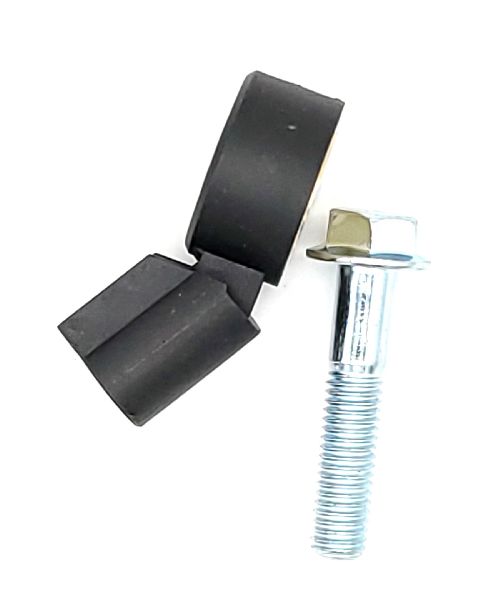
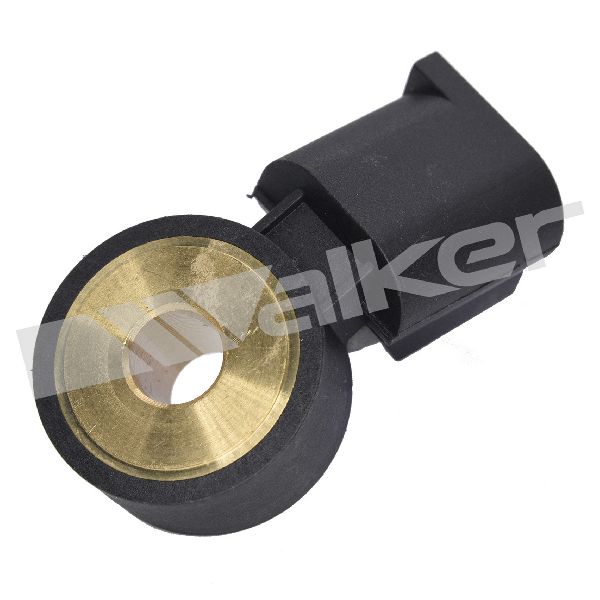
- Ignition Knock Sensor
(OEM #12623095)— This is the part that fails if the cause is not loose intake bolts. There are two sensors under the intake manifold.
Trusted brands: ACDelco, Delphi, Bosch
OEM price range: $35-$55
Aftermarket price range: $20-$40 - Intake Manifold Gasket
(OEM #12657401)— This must be replaced whenever the intake manifold is removed to access the knock sensors to prevent vacuum leaks.
Trusted brands: ACDelco, Fel-Pro, Mahle
OEM price range: $30-$50
Aftermarket price range: $15-$30 - Medium-Strength Threadlocker — Required for the most common fix: securing the loose intake manifold bolts to prevent them from backing out again.
Trusted brands: Loctite, Permatex
OEM price range: $5-$15
Aftermarket price range: $5-$15
Related Codes That Often Appear With This One
- P0326 — This is the code for Knock Sensor 1. Both codes often appear together when the root cause, like loose intake manifold bolts, affects the entire engine.
- P0171, P0106, P0068, P0101, P0506 — These codes relate to lean conditions, manifold absolute pressure, MAF, and idle air control. They are all specifically listed in TSB #PIP5529B as codes that can be triggered by the same loose intake manifold bolt issue, which causes a significant vacuum leak.
Technical Service Bulletins (TSBs) & Recalls
- PIP5529B: Addresses a stall, hesitation, or Check Engine Light with a combination of codes (P0331, P0326, P0171, P0106, etc.). The cause is identified as loose intake manifold bolts on 2.0L LTG engines, and the fix is to apply threadlocker and re-torque the bolts to 12 N.m (106 lb-in).
- Bulletin #PIP5529A: This earlier manufacturer bulletin also focuses on resolving malfunction indicator lamp illumination due to any combination of diagnostic trouble codes including P0068, P0101, P0106, P0171, P0131, P0137, P0324, P0326, P0331, and P0506.
Platform-Specific Known Issues
- The 2.0L LTG engine has a documented history of intake manifold bolts loosening over time, triggering a variety of diagnostic trouble codes, including P0331. This is covered in GM Technical Service Bulletin #PIP5529B.
Mechanic-Grade Diagnostic Values
- Knock Sensor Internal Resistance — expected: 93k to 110k Ohms. Failure: An open circuit (OL) or a reading significantly outside this range.
- Knock Sensor Circuit Bias Voltage (Key On, Engine Off) — expected: ~2.5V DC. Failure: Voltage is 0V or significantly different, suggesting a wiring or ECM issue.
- Knock Sensor Mounting Bolt Torque — expected: 25 N.m (18 lb-ft). Failure: An over or under-torqued sensor can have incorrect sensitivity, causing false signals even if the sensor is new.
- Intake Manifold Bolt Torque — expected: 12 N.m (106 lb-in). Failure: Bolts are loose, often only finger-tight. This is the primary indicator for TSB PIP5529B.
- Scan Tool Live Data: Knock Retard — expected: 0 degrees at idle and steady cruise.. Failure: Significant degrees of timing retard shown on the scan tool even under light load or when no audible knock is present, indicating the ECM is reacting to a perceived (real or false) knock signal.
Scan Tool Commands That Help
- GDS2 (GM Dealer Scan Tool): Data Display > Engine Control Module > Knock Sensor Data — To monitor the live 'Knock Retard' PID. This allows a technician to see if the ECM is actively pulling timing in response to the signal from the knock sensor, which helps differentiate a sensor circuit fault from a mechanical noise issue.
Wiring & Ground Locations
- Knock Sensors (x2) — On the side of the engine block, underneath the intake manifold.. Their location makes them difficult to access, which is why checking the easier-to-reach intake manifold bolts first is critical. It also means the wiring harness is in a high-heat area and susceptible to damage.
- G103 — Located at the rear of the driver's side of the engine compartment, on the cowl above the brake booster.. This is a primary ground point for the Engine Control Module (ECM) and various other modules. A poor or corroded connection here can cause erratic sensor readings across the system, including false knock sensor codes.
- G101 / G106 — G101 is on the lower front of the engine block, with a jumper to G106 on the frame cross rail under the crank pulley.. This is another primary ground for the ECM and Transmission Control Module. A fault here can directly impact the ECM's ability to correctly interpret sensor signals.
Real Owner Repair Stories
- CadillacForums user report (2014 Cadillac ATS 2.0L Turbo (same engine and platform)) — Check Engine Light with code P0331.
❌ Tried (didn't work) Initial diagnosis from a shop suggested replacing the knock sensor.
✅ What actually fixed it Owner found and followed GM TSB #PIP5529B. The intake manifold bolts were found to be loose. The owner tightened the bolts to the correct torque specification, which permanently resolved the P0331 code without replacing any parts.
Model Year Variations Within This Range
- 2013-2015: Early production 2.0L LTG engines (2013-2015) had known issues with faulty piston castings and incorrect ring gaps from the factory, which could lead to piston failure. While not a direct cause of a P0331 circuit code, a failing piston would create severe mechanical noise that could be interpreted as knock. This issue was reportedly fixed for the 2016 model year.
Diagnostic Flowchart
Other Known Issues on This Vehicle
Issues unrelated to this code that are worth knowing about as an owner of this generation:
- Cracked Pistons 🔴 High — Most common on early 2014-2015 models, often before 50,000 miles. Can be exacerbated by low-octane fuel or aggressive tuning.
- Premature Timing Chain Stretch/Guide Failure 🔴 High — Can occur between 70,000 and 95,000 miles. Often caused by extended oil change intervals or low oil levels. Leads to rattling noises on startup and can cause catastrophic engine failure if the chain jumps time.
- High-Pressure Fuel Pump (HPFP) Failure 🟠 Medium — A common failure point on GM GDI engines. The internal seal can fail, leaking fuel into the crankcase. A definitive symptom is the smell of gasoline on the oil dipstick. (Ref: Customer Satisfaction Program N182199610 for some models.)
- Intake Valve Carbon Buildup 🟠 Medium — An inherent issue with all direct-injection (GDI) engines, as fuel does not wash over the intake valves. Becomes noticeable after 60,000-80,000 miles, causing reduced performance and potential misfires.
Used vs. New Parts: Buying Guide for This Vehicle
When a used part is the smart pick: For this specific repair, using used parts is generally not recommended. The primary fixes involve either re-torquing existing bolts with new threadlocker or replacing low-cost electronic sensors and gaskets.
Donor-vehicle mileage cap: roughly under 80000 miles for the part to have meaningful remaining life.
What to inspect on the donor part:
- If considering a used intake manifold (e.g., if yours is cracked), ensure all threaded inserts are intact and the gasket surfaces are not warped or damaged.
- Verify the donor vehicle did not suffer from a fire or major front-end collision that could have damaged the plastic manifold.
OEM-only on this vehicle (don't cheap out):
- Ignition Knock Sensor: While aftermarket sensors exist, forum and technician consensus often leans toward using OEM (ACDelco) sensors to avoid incompatibility or premature failure issues that can sometimes occur with aftermarket electronics.
Aftermarket brands forum-validated for this vehicle:
- Fel-Pro (for Intake Manifold Gasket)
- Bosch (often an OEM supplier, can be a reliable alternative for sensors)
Brands owners have reported issues with on this vehicle:
- No-name, unbranded electronic sensors from online marketplaces should be avoided, as their quality control and specifications may not match OEM requirements, leading to the code returning.
Real Owner Stories
Aggregated from forums and TSBs cited above. Mileages and costs reflect what owners reported in those sources.
2014 Cadillac ATS 2.0L Turbo
Symptoms: The vehicle had a Check Engine Light with a P0331 code. The initial diagnosis from a mechanic suggested a bad knock sensor.
What fixed it: The owner found TSB PIP5529B and discovered the intake manifold bolts were loose. Tightening the bolts to the correct specification resolved the code permanently.
Source hint: CadillacForums P0331 Repair Story
Related OBD-II Codes
Frequently Asked Questions
I have a P0331 code on my 2016 Buick Regal. Is this related to a known TSB?
What is the absolute first thing I should check for a P0331 code on my 2.0L Turbo Regal?
My mechanic wants to replace the knock sensor for P0331. Is this the correct fix?
I have codes P0331 and P0171 at the same time. Are they related?
What parts should I use for this repair?
My 2014 Cadillac ATS has a P0331 code. Does the same information for the Buick Regal apply?
Helpful Videos
We Have This Part in Stock


The information in this article is provided for general reference and educational purposes only. Vehicle specifications, procedures, and part compatibility can vary by production date, trim level, and region. Always consult your vehicle's factory service manual and verify part numbers before purchasing or performing repairs. Safety-critical components such as airbags, seat belts, and braking systems should be installed by a qualified professional.
- Buick Regal:
- 🧭 Diagnostic Flowchart
- 🎬 Helpful Videos
- 🛍️ Shop This Part
- What's Unique About the 2014-2017 Buick Regal
- Symptoms You May Notice
- Most Likely Causes
- Rare But Worth Checking
- Diagnosis Steps
- Parts You'll Likely Need
- Related Codes That Often Appear With This One
- Technical Service Bulletins (TSBs) & Recalls
- Platform-Specific Known Issues
- Mechanic-Grade Diagnostic Values
- Scan Tool Commands That Help
- Wiring & Ground Locations
- Real Owner Repair Stories
- Model Year Variations Within This Range
- Other Known Issues on This Vehicle
- Used vs. New Parts: Buying Guide for This Vehicle
- Real Owner Stories
- 2014 Cadillac ATS 2.0L Turbo
- Related OBD-II Codes
- Frequently Asked Questions
- 🎟️ Get 5% Off