
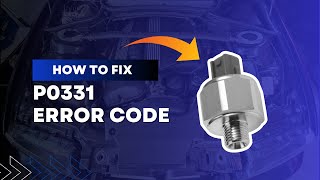
P0331 on 2013-2017 Cadillac ATS: Knock Sensor Range/Performance Causes and Fixes
This code indicates a problem with the knock sensor's circuit. The sensor's signal is outside its expected range. The most common causes are a faulty knock sensor, damaged wiring, or using the wrong fuel octane. On the ATS, particularly with the 2.0L Turbo engine, this code is frequently caused by loose intake manifold bolts as described in a GM Technical Service Bulletin. Replacing the sensor is a common fix, but checking for loose bolts and wiring chafe is critical.
- P0331 on a Cadillac ATS means there's a performance problem with the knock sensor circuit.
- Before replacing any parts, check for loose intake manifold bolts, especially on the 2.0T engine, as per TSB PIP5529B.
- The most likely culprits are loose intake bolts, a bad knock sensor, or damaged/chafed wiring.
- Always use the correct premium fuel octane, as low-grade gas can cause real knock and trigger this code.
- If replacing the sensor, use a quality OEM part (ACDelco) and tighten the bolt to the exact torque specification (20 N·m or 15 ft-lbs) to ensure correct operation.
What's Unique About the 2013-2017 Cadillac ATS
For the 2013-2017 Cadillac ATS, which uses engines like the 2.0L Turbo (LTG), 2.5L (LCV), and 3.6L (LFX), the knock sensor is a critical input. While standard sensor failure is possible, this platform has two highly specific and documented issues. First, GM Technical Service Bulletin (TSB) #PIP5529B directly links P0331 on the ATS (and platform mates) to loose intake manifold bolts. This can create a vacuum leak, leading to unstable combustion that the ECM flags as a sensor performance issue, often setting multiple codes at once. Second, like many modern GM vehicles, the engine wiring harness can be prone to chafing against sharp edges on brackets (like the ECM bracket), the shock tower, or control arms, causing shorts or open circuits that trigger this code.
Diagnostic Flowchart
Tap your situation to follow the diagnostic path that matches what you're seeing on this vehicle.
Symptoms You May Notice
- Check Engine Light is on
- Audible engine knocking or pinging, especially during acceleration
- Reduced engine power and performance
- Hesitation during acceleration
- Worse-than-normal fuel economy
- Rough or fluctuating idle
- Replacing spark plugs or ignition coils without first diagnosing the knock sensor circuit. While these can cause misfires, they don't typically cause a P0331 code directly unless the misfire is severe enough to cause excessive vibration.
- Replacing the knock sensor without checking for loose intake manifold bolts (per TSB PIP5529B) or inspecting the wiring harness for chafing. The sensor itself is often not the root cause on this platform.
Most Likely Causes
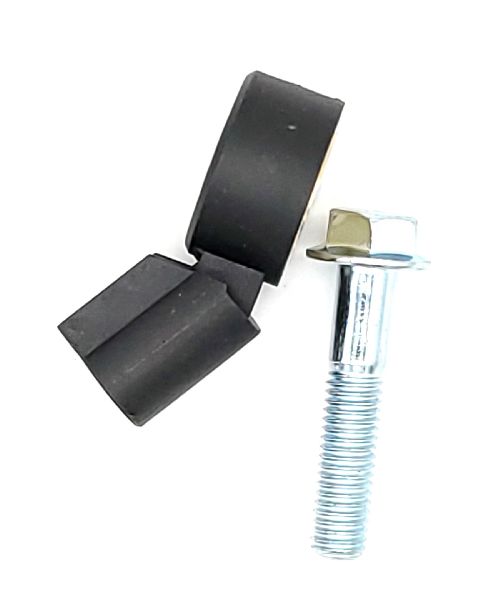
- Loose Intake Manifold Bolts 🔴 High Probability → Shop Engine Intake Manifold As documented in GM TSB PIP5529B, the intake manifold bolts on the 2.0L LTG and 2.5L LCV engines can become loose over time. This creates a vacuum leak, causing a lean condition and unstable combustion that can trigger P0331 along with many other codes.
How to confirm: Check for other codes listed in TSB PIP5529 (e.g., P0068, P0101, P0171, P0506). Physically check the torque on the intake manifold bolts. They are often found to be significantly looser than the specification.
Typical fix: Re-torque the intake manifold bolts to the factory specification, which is 22 N·m (16 lb ft). According to the TSB, replacing the intake manifold gasket is typically not necessary for this specific issue.
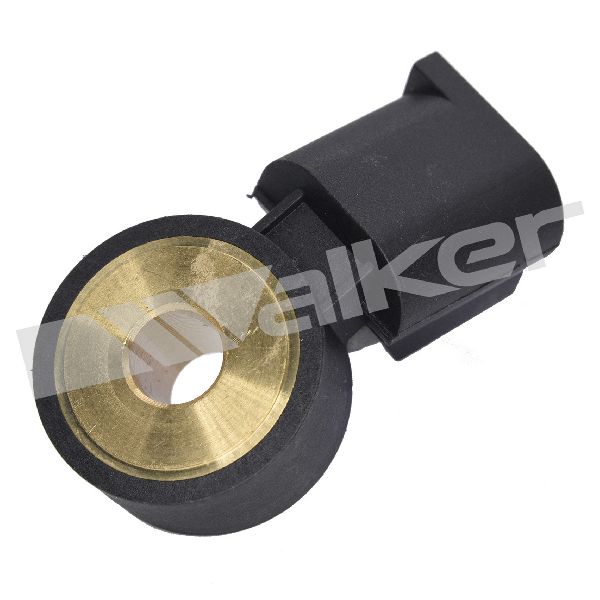
Est. part cost: $0 - Faulty Knock Sensor 🔴 High Probability → Shop Ignition Knock (Detonation) Sensor Sensors fail from heat cycles and vibration. On the 3.6L LFX engine, the two knock sensors are located under the intake manifold, a high-heat area that requires significant labor to access. Owners on related forums report that GM engines can be sensitive, and using OEM ACDelco sensors is highly recommended over aftermarket alternatives to avoid repeat failures.
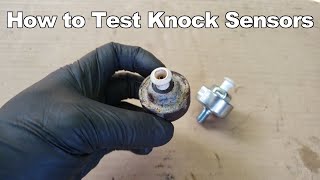
How to confirm: Test the sensor's internal resistance with a multimeter; it should be within the GM specification (typically 95-105 kOhms). A better test is to monitor AC millivolts while lightly tapping the engine block near the sensor; a good sensor will produce a small voltage spike. An open circuit (OL) or out-of-spec resistance indicates a bad sensor.
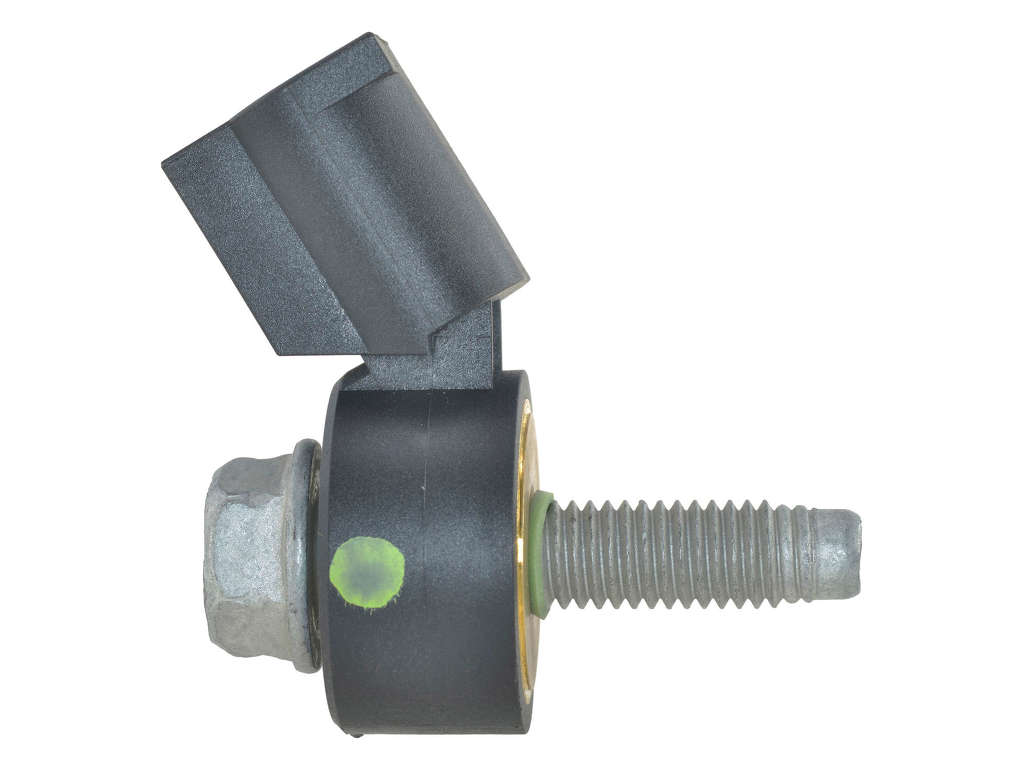
Typical fix: Replace the knock sensor. On the 3.6L V6, this requires removing the upper and lower intake manifolds. It is critical that the new sensor's mounting bolt is torqued to exactly 20 N·m (15 ft-lbs). Over or under-torquing will alter the sensor's sensitivity and can cause the code to return.
Est. part cost: $40-$100 - Wiring or Connector Issue 🟡 Medium Probability GM has issued multiple TSBs for similar platforms regarding engine wiring harnesses chafing on sharp metal edges. The harness for the knock sensor can rub against the ECM bracket, shock tower, or other components, eventually wearing through the insulation and causing a short or open circuit.
How to confirm: Visually inspect the entire wiring harness leading from the knock sensor back to the ECM. Pay close attention to areas where the harness makes contact with metal brackets or engine components. Check for continuity and proper voltage at the connector using a multimeter.
Typical fix: Repair the damaged section of wire using approved methods (solder and heat shrink). Secure the harness away from the sharp edge using zip ties, clips, or by wrapping it with anti-abrasion tape to prevent future damage. Clean any corrosion from the connector pins.
Est. part cost: $15-$50 - Incorrect Fuel Octane ⚪ Low Probability Using lower octane fuel than recommended (premium 91+ octane is required for the 2.0L Turbo and recommended for the 3.6L V6) can cause real engine knock, which the sensor will detect. If the knock is severe or persistent, the ECM may interpret the signal as out of range and set a performance code.
How to confirm: Check the owner's manual for the recommended fuel octane rating. The code may appear shortly after filling up with a lower grade of fuel. A user on a related forum noted the code appeared after getting bad gas and was temporarily resolved with an octane booster.
Typical fix: Fill the tank with the correct, higher-octane fuel. Adding an octane booster can also help in the short term. The code may clear on its own after the fuel mixture is corrected.
Est. part cost: $0-$20
Rare But Worth Checking
- Faulty Engine Control Module (ECM): → Shop Engine Control Module (ECM) This is very rare. The ECM should only be considered after all other possibilities, including the sensor, its entire circuit, and TSB-related issues like loose intake bolts, have been thoroughly tested and ruled out.
- Excessive Engine Vibration: Mechanical issues like worn engine mounts, a severe misfire, or internal engine problems can cause vibrations that the knock sensor might misinterpret as engine knock, setting a performance code.
- Incorrect Spark Plugs (Tuned Vehicles): For tuned engines running higher-than-stock boost, the stock heat range spark plugs may not be adequate, leading to minor detonation. A Cobalt SS owner with a tuned LNF (related turbo engine) resolved a recurring P0331 by switching to one-step-colder spark plugs.
Diagnosis Steps
- Read all codes from the ECM using an OBD-II scanner. If multiple codes from the PIP5529B list are present (P0068, P0101, P0171, etc.), immediately suspect loose intake manifold bolts.
- Check intake manifold bolt torque. Using a torque wrench, verify the bolts are tightened to the specification of 22 N·m (16 lb ft). If they are loose, tighten them, clear the codes, and re-test. This may resolve the issue immediately.
- Listen for audible engine knock. If present, investigate the cause (e.g., fuel quality, cooling system issues) before proceeding.
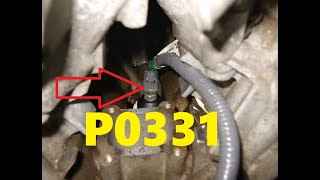
- If no knock is heard and intake bolts are tight, locate the knock sensor. On the 3.6L V6, there are two sensors under the intake manifold. On the 2.0T, it is on the side of the engine block, potentially under the intake.
- Thoroughly inspect the sensor's wiring harness for any visible damage, corrosion, or loose connections. Pay special attention to points where the harness may chafe against the ECM bracket, engine, or chassis components.
- Disconnect the sensor and test its internal resistance with a multimeter. Compare the reading to the manufacturer's specification (typically 95-105 kOhms). An out-of-spec reading indicates a bad sensor.
- With the sensor still connected, set a multimeter to AC millivolts and back-probe the signal wire. Lightly tap the engine block near the sensor with a wrench. A healthy sensor will show a small voltage reading on the meter. No reading indicates a faulty sensor or wiring issue.
- If the sensor and wiring test good, the issue may be an intermittent connection. If all else fails, the problem may lie within the ECM, but this is extremely unlikely and should be the last resort.
Parts You'll Likely Need
- Ignition Knock (Detonation) Sensor
(OEM #ACDelco 12644211 (Verify by VIN))— This sensor is the most common failure point for code P0331 when the cause is not loose intake bolts or wiring. It is responsible for detecting engine knock and can fail internally over time. Using an OEM part is highly recommended.
Trusted brands: ACDelco (OEM), Bosch, Walker Products
OEM price range: $60-$90
Aftermarket price range: $25-$50
Related Codes That Often Appear With This One
- P0326 — This is the equivalent code for Knock Sensor 1, but for a Range/Performance issue. They can appear together if there is a shared wiring problem or a systemic issue causing knock.
- P0068, P0101, P0106, P0171, P0131, P0137, P0324, P0506 — As cited in GM Technical Service Bulletin #PIP5529B, P0331 can appear with a wide variety of other codes. This strongly points to a single root cause: loose intake manifold bolts creating a vacuum leak that affects multiple sensors and systems.
Technical Service Bulletins (TSBs) & Recalls
- PIP5529B: Mentions P0331 in a list of codes that can illuminate the malfunction indicator lamp. The bulletin identifies the cause as potentially loose intake manifold bolts and instructs technicians to re-torque them to specification if found loose.
- PIP5529A: An earlier version of the same bulletin, also listing P0331 among many other codes related to the same underlying issue of loose intake manifold bolts.
Platform-Specific Known Issues
- TSB #PIP5529B: This is the most significant vehicle-specific issue. A collection of seemingly unrelated codes, including P0331, can be triggered by loose intake manifold bolts on the 2.0L and 2.5L engines. The fix is simply to re-torque the bolts to 22 N·m (16 lb ft).
- Wiring Harness Chafing: In line with other GM platforms of the era, the engine harness on the ATS can be susceptible to rubbing against sharp metal edges, such as the ECM mounting bracket. This can wear away insulation and cause shorts/opens in the knock sensor circuit.
- Sensor Location on 3.6L V6: On the LFX V6 engine, the two knock sensors are located in the engine valley, underneath the upper and lower intake manifolds. This makes replacement a much more labor-intensive job compared to engines where the sensor is on the exterior of the block.
Mechanic-Grade Diagnostic Values
- Knock Sensor Internal Resistance — expected: 93,000 - 110,000 Ohms (93-110 kΩ). Failure: An open circuit (O.L. on multimeter) or a reading significantly outside this range indicates a failed sensor.
- Knock Sensor AC Voltage (Tap Test) — expected: A voltage spike between 1.0V and 4.0V AC when the engine block is tapped firmly near the sensor (engine off).. Failure: No voltage spike, or a very low spike (in the millivolt range), indicates the sensor is not producing a signal.
- Knock Sensor Mounting Bolt Torque — expected: 15 lb-ft (20 N·m). Failure: Incorrect torque alters sensor sensitivity. Over-torquing can make it hyper-sensitive, causing false knock readings. Under-torquing can make it insensitive, preventing it from detecting real knock.
- Intake Manifold Bolt Torque (3.6L LFX/LGX V6) — expected: 18 lb-ft (24 N·m), tightened in sequence.. Failure: Bolts found to be looser than this specification can cause vacuum leaks leading to this and other codes.
- Intake Manifold Bolt Torque (2.0L LTG / 2.5L LCV) — expected: 16 lb-ft (22 N·m), as per TSB PIP5529B.. Failure: This is the specific torque value related to the TSB addressing multiple DTCs, including P0331.
Wiring & Ground Locations
- Knock Sensor 1 (2.0L LTG) — On the side of the engine block, to the right of the oil filter housing.. This is the physical location of the sensor generating the code on the 2.0L Turbo engine.
- G107 (3.6L LFX Engine) — On the front of the right cylinder head.. A poor engine ground can cause erratic signals from various sensors, including the knock sensor. TSBs point to ground issues as a potential root cause for a cluster of codes including P0331.
- G103 — At the left rear of the engine compartment on the cowl, above the brake booster.. This ground serves the BCM and other modules. While not a direct engine block ground, poor connections here can cause a variety of difficult-to-diagnose electrical issues that could manifest as sensor performance codes.
- G104 (2013 4-Cylinder Models) — Location changed mid-year. On early production (before mid-Dec 2012), it's at the front of the engine. On later production, it's at the rear of the engine.. This is a critical ground for the engine. A technician may look in the wrong location depending on the vehicle's production date, leading to a missed diagnosis of a bad ground connection.
"I Checked Everything" — The Actual Cause
- A common diagnostic step for multiple engine codes is a smoke test to find vacuum leaks. However, the issue described in TSB PIP5529B (loose intake manifold bolts) may not present as a typical leak during a smoke test. The bolts may be just loose enough to allow unmetered air to enter under specific engine load and vacuum conditions, but remain sealed enough at idle or during a low-pressure smoke test, leading a technician to incorrectly rule out a vacuum leak.
Model Year Variations Within This Range
- 2016-2017: For the 3.6L V6, the engine was updated from the LFX to the LGX starting in the 2016 model year. The LGX is a significant redesign with a new block, rotating assembly, and heads. While functionally similar, part numbers and some diagnostic procedures may differ from the earlier LFX.
- 2013: On 2.0L and 2.5L models with automatic transmissions, the location of engine ground G104 was moved from the front of the engine to the rear of the engine starting in mid-December 2012. This affects vehicles produced in the 2013 model year and is a critical detail for diagnosing electrical faults.
Helpful Videos
![How to Fix P0331 Engine Code in 2 Minutes [1 DIY Method / Only $10.58]](https://img.youtube.com/vi/Sy2Zyg1B1E4/mqdefault.jpg)

We Have This Part in Stock


The information in this article is provided for general reference and educational purposes only. Vehicle specifications, procedures, and part compatibility can vary by production date, trim level, and region. Always consult your vehicle's factory service manual and verify part numbers before purchasing or performing repairs. Safety-critical components such as airbags, seat belts, and braking systems should be installed by a qualified professional.
- Cadillac ATS:
- 🧭 Diagnostic Flowchart
- 🎬 Helpful Videos
- 🛍️ Shop This Part
- What's Unique About the 2013-2017 Cadillac ATS
- Symptoms You May Notice
- Most Likely Causes
- Rare But Worth Checking
- Diagnosis Steps
- Parts You'll Likely Need
- Related Codes That Often Appear With This One
- Technical Service Bulletins (TSBs) & Recalls
- Platform-Specific Known Issues
- Mechanic-Grade Diagnostic Values
- Wiring & Ground Locations
- "I Checked Everything" — The Actual Cause
- Model Year Variations Within This Range
- 🎟️ Get 5% Off