
P0331 on 2016-2022 Chevrolet Camaro: Knock Sensor 2 Performance Causes and Fixes
On a 2016-2022 Camaro, code P0331 often indicates a complex issue, not just a bad sensor. GM has issued multiple technical service bulletins (TSBs) advising that the cause was under engineering investigation. TSB PIP5836A points to manufacturing debris ('block ashing') interfering with the sensor, requiring inspection and cleaning. Before replacing the knock sensor, check for TSBs, inspect wiring carefully, and check the sensor mounting surface.
- Do not immediately replace the knock sensor. The most critical first step is to check for TSBs and potential software updates for your Camaro.
- A faulty sensor is a less likely cause on this platform; software and wiring issues are more common.
- Thoroughly inspect the wiring and connector for Knock Sensor 2 (driver's side) for any damage before buying parts.
- If the sensor must be replaced, ensure it is torqued to the exact factory specification to guarantee accurate readings.
What's Unique About the 2016-2022 Chevrolet CAMARO
For this specific generation of Camaro, P0331 is a known and tricky issue. GM released several Technical Service Bulletins (TSBs) acknowledging the problem. Notably, TSB #PIP5773B for 2019-2020 models specifically instructed technicians *not* to replace any parts for this code because the root cause was under investigation by GM engineering. Later, TSB #PIP5836A for 2022 models identified a potential cause as 'block ashing' (excess material from manufacturing) on the engine block interfering with the sensor's contact, requiring removal, cleaning, and re-installation before considering replacement. This history strongly suggests the problem often isn't the sensor itself.
Diagnostic Flowchart
Tap your situation to follow the diagnostic path that matches what you're seeing on this vehicle.
Symptoms You May Notice
- Check Engine Light is on
- Reduced engine power and acceleration
- Audible engine pinging or knocking, especially under load
- Hesitation during acceleration
- Poor fuel economy
- Rough or uneven idle
- Immediately replacing the knock sensor without checking for TSBs, inspecting the wiring, or checking the sensor mounting surface. TSB #PIP5773B specifically advised against this, and TSB #PIP5836A provides a specific inspection procedure to perform before replacement.
Most Likely Causes
- ECM Software Calibration or Sensor Seating Issue 🔴 High Probability GM has issued multiple TSBs (e.g., #PIP5836A, #PIP5773B) related to P0331. TSB #PIP5836A for 2022 models suggests the issue can be caused by 'block ashing' (excess material) near the sensor boss, which prevents proper seating. The fix is to remove the sensor, clean the area, and reinstall it. This, combined with earlier TSBs telling techs not to replace parts, points to a non-hardware root cause.
How to confirm: A GM dealer or a qualified shop with access to GM's service information system can check for TSBs. The procedure in TSB #PIP5836A involves removing the sensor to inspect the mounting surface for debris.
Typical fix: Following TSB #PIP5836A: Disconnect the connector, remove the sensor, inspect for and remove any 'block ashing', then reinstall the sensor and torque to 25 +/- 4 Nm. If no ashing is found, simply reinstalling the sensor may resolve the issue. In other cases, a software update may be required.
Est. part cost: $0 - Wiring Harness or Connector Issue 🟡 Medium Probability The knock sensor wiring is routed in a hot, high-vibration environment near the exhaust. Aftermarket modifications, like headers, are a common cause of wiring damage due to contact or heat. General Motors has also issued broad bulletins about engine wiring harness chafing on various models.
How to confirm: Visually inspect the wiring harness and connector for Knock Sensor 2 for any signs of damage, melting, chafing, or corrosion. Pay close attention to where the harness passes near exhaust manifolds/headers. Perform a continuity and voltage drop test on the circuit. 🎬 Watch: How to diagnose and repair the knock sensor circuit.
Typical fix: Repairing the damaged section of the wiring harness or cleaning/replacing the connector. Rerouting the harness to provide more clearance from heat sources.
Est. part cost: $5-$50 - Faulty Knock Sensor 2 ⚪ Low Probability → Shop Ignition Knock (Detonation) Sensor While the sensor can fail, GM's own TSBs suggest it's often not the root cause, stating that replaced sensors have not tested bad. However, it is exposed to extreme heat and vibration, which can lead to eventual failure. Some owners on forums have reported a bad sensor being the ultimate fix after other steps failed.
How to confirm: After confirming wiring, software, and sensor seating are not the issue, test the sensor's internal resistance with a multimeter. It should be within the manufacturer's specified range (typically 93k-110k Ohms for GM sensors).
Typical fix: Replace the Knock Sensor 2. Ensure the new sensor is torqued to the correct specification (25 +/- 4 Nm, or approx. 18 ft-lbs), as improper torque can cause incorrect readings.
Est. part cost: $40-$90
Rare But Worth Checking
- Loose Intake Manifold Bolts: → Shop Engine Intake Manifold TSB #PIP5529B mentions this as a cause for a cluster of codes including P0331 on other GM vehicles. The resulting vibration or vacuum leak can be misinterpreted by the knock sensor. It's worth checking the torque on the intake manifold bolts.
- Aftermarket Modifications (e.g., Headers): Forum discussions on Camaro6 and CorvetteForum frequently mention P0331 appearing after installing aftermarket headers. The new header pipes can physically contact the knock sensor or its wiring, creating false signals or damage.
- Internal Engine Noise: In rare cases, excessive mechanical noise from worn components like rod bearings can be picked up by the knock sensor, triggering the code. This would typically be accompanied by audible, heavy knocking sounds and likely other engine codes.
- Powertrain Control Module (PCM) Failure: → Shop Engine Control Module (ECM) A faulty PCM is the least likely cause but remains a possibility 🎬 See this breakdown of common causes and potential fixes. if all other diagnostic steps fail to find a problem.
Diagnosis Steps
- Check for Technical Service Bulletins (TSBs) for your Camaro's specific year and engine. This is the most critical first step. Key TSBs are #PIP5836A, #PIP5773B, and #PIP5529B.
- Use an OBD-II scanner to confirm P0331 is the active code and check for any other stored codes. Address other codes first.
- Contact a GM dealer or qualified repair shop to check for available ECM software updates related to this code.
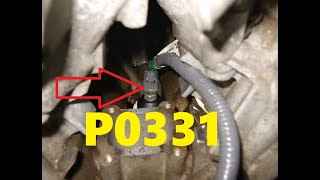
- Follow the procedure in TSB #PIP5836A: Disconnect the Knock Sensor 2 electrical connector (cycling the connection is a required step). On V8 models (LT1/LT4), Sensor 2 is on the driver's side of the engine block, below the exhaust manifold. 🎬 Watch: LT1 knock sensor removal and installation walkthrough. On V6 (LGX) and I4 (LTG) models, it is also on the side of the block.
- Remove the sensor and inspect the mounting boss on the engine block for 'block ashing' or any debris that would prevent the sensor from sitting perfectly flat.
- If debris is found, clean the surface, reinstall the sensor, and torque the bolt to 25 +/- 4 Nm (approx. 18 ft-lbs). If no debris is found, simply reinstall and torque the sensor.
- If the code returns, perform a thorough visual inspection of the Knock Sensor 2 wiring harness and connector. Look for signs of melting, chafing, or corrosion, especially near the exhaust or aftermarket headers.
- Test the sensor circuit for proper voltage, ground, and continuity back to the ECM.
- If the circuit and sensor seating are good, test the knock sensor's resistance with a multimeter. Compare the reading to the manufacturer's specification (e.g., 93k-110k Ohms).
- Check the torque of the intake manifold bolts to rule out vibrations causing false signals, as suggested by related TSBs.
Parts You'll Likely Need
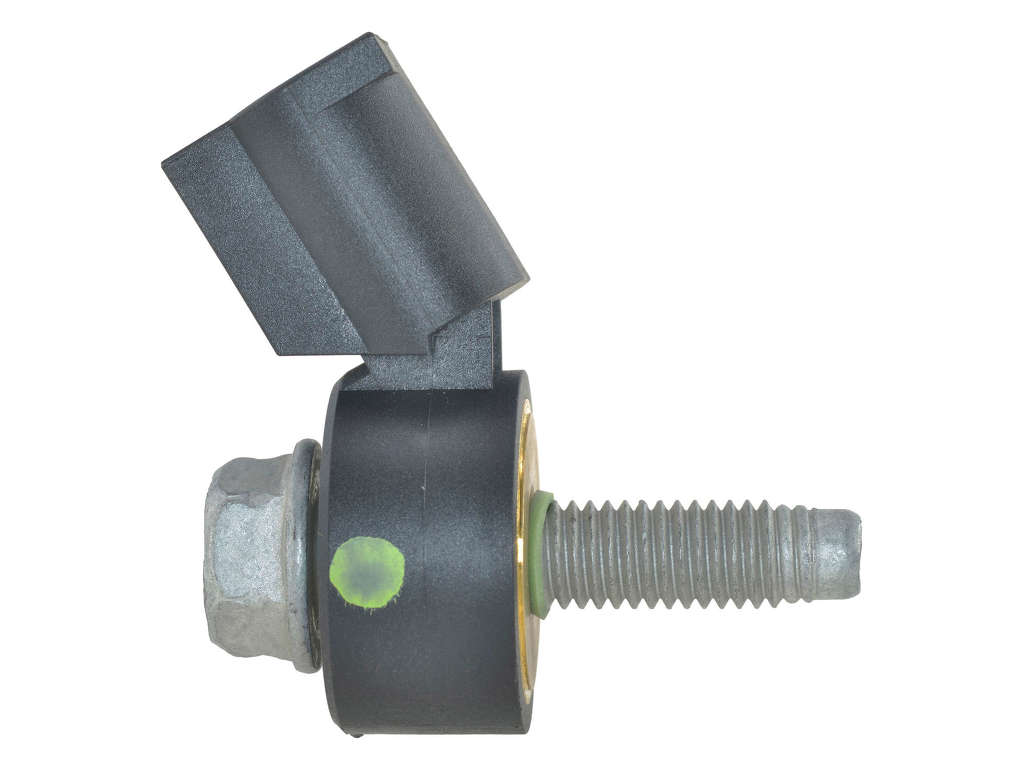
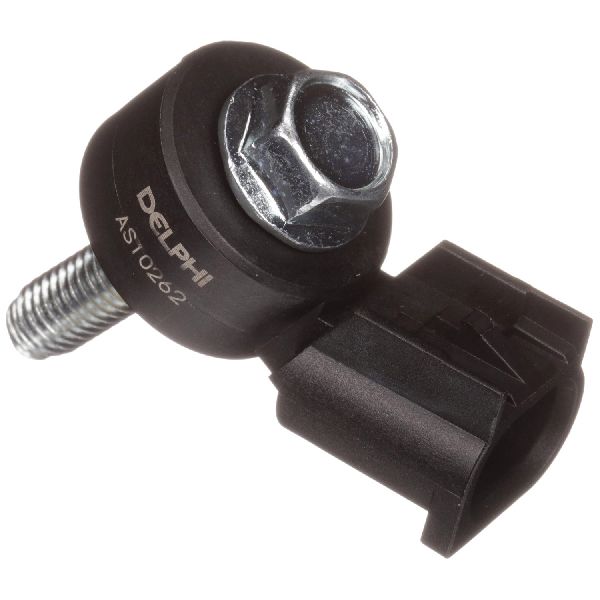
- Knock Sensor (Bank 2)
(OEM #12694343)— This is the part to replace if it has been tested and confirmed faulty, after ruling out more common software, wiring, and sensor seating issues per TSBs.
Trusted brands: ACDelco, Delphi
OEM price range: $60-$90
Aftermarket price range: $40-$70
Related Codes That Often Appear With This One
- P0326 — This is the corresponding code for Knock Sensor 1. Seeing both codes together could point to a systemic issue affecting both sensors, like a software problem or loose intake manifold bolts as described in TSB #PIP5529B.
- P0068, P0101, P0106, P0171 — These are MAP/MAF, throttle, and fuel system codes. TSB #PIP5529A/B lists these alongside P0331, suggesting a common cause like a significant vacuum leak (e.g., from loose intake bolts) or a wiring issue affecting multiple systems.
- P0300 — A random misfire code. If the knock sensor issue is severe or caused by a mechanical problem, it can lead to misfires. One owner reported this code appearing alongside the knock sensor codes when a major internal issue was discovered.
Technical Service Bulletins (TSBs) & Recalls
- PIP5836A: This Preliminary information communicates a possible emerging issue and recommendations to correct for a DTC P0331 and updated to change recommendations.
- PIP5773B: ...communicates to the technican an inspection and do not replace any compponents as engineering is investigating the cause for knock senso
Platform-Specific Known Issues
- TSB #PIP5836A (May 2022): For 2022 models, instructs technicians to check for 'block ashing' (excess material) on the sensor mounting surface before replacing the part. Recommends cleaning the surface and reinstalling, torqued to 25 +/- 4 Nm.
- TSB #PIP5773B (April 2021): Specifically for 2019-2020 models, this bulletin advised technicians to NOT replace components for P0331 as the cause was under engineering investigation, highlighting that the sensor itself was often not the problem.
- TSB #PIP5529B / #PIP5529A: Lists P0331 as one of many codes that can be caused by issues like loose intake manifold bolts on various GM vehicles.
Mechanic-Grade Diagnostic Values
- Knock Sensor Internal Resistance — expected: 93,000 to 110,000 Ohms (93-110 kΩ) when measured across the sensor's two pins.. Failure: A reading of OL (over-limit/open circuit) or a value significantly outside the specified range indicates a faulty sensor.
- Knock Sensor Live Data Voltage (Scan Tool) — expected: Should fluctuate between approximately 0.2V (no knock) and 4.5V (severe knock) while driving under various loads.. Failure: A voltage value that is stuck at 0V, 5V, or does not change with engine load suggests a problem with the sensor, wiring, or ECM.
- Knock Sensor Circuit Reference Voltage — expected: Approximately 5 Volts should be present at the connector with the key on, engine off.. Failure: No voltage or significantly low voltage points to a wiring issue or a problem with the ECM's 5V reference circuit.
- Knock Sensor AC Voltage (Tapping Test) — expected: The sensor should generate a fluctuating AC voltage signal, often above 1 volt, when the engine block is tapped firmly near the sensor with a wrench (engine off).. Failure: Very low or no AC voltage (e.g., less than 10 millivolts) when tapping indicates a dead or unresponsive sensor.
Scan Tool Commands That Help
- GM GDS2 (Global Diagnostic System 2): Module Diagnostics -> Engine Control Module -> Data Display — To monitor the live voltage output of Knock Sensor 2. This allows a technician to see if the sensor's signal is stuck, erratic, or responding correctly to changes in engine load and RPM.
- GM GDS2 (Global Diagnostic System 2): Vehicle DTC Information -> Display DTCs / Clear DTCs — Used to perform a full vehicle scan to see if other modules have stored related codes and to clear the P0331 code after a repair has been completed to verify the fix.
Wiring & Ground Locations
- Knock Sensor Location (All 2016-2022 Engines) — For the 6th generation Camaro (LTG, LGX, LT1, LT4 engines), the knock sensors were moved to the exterior sides of the engine block, making them much more accessible than on previous generation V8s.. Knowing the sensor is on the side of the block (Bank 2/driver's side for V8s) allows for easier visual inspection of the sensor and its connector without removing the intake manifold.
- Engine Block Grounds — Key grounding points are located on the engine block and connect to the chassis. One common area is a grounding point on the front of the engine, and there may be another on or near the transmission bell housing.. A poor engine ground can introduce electrical noise into sensitive circuits like the knock sensor's, potentially causing false signals and triggering a P0331 code. Verifying engine grounds are clean and tight is a crucial step in diagnosing elusive electrical issues.
Real Owner Repair Stories
- GM Technical Service Bulletin #PIP5836A (2022 Chevrolet Camaro (also applies to other GM models)) — Malfunction Indicator Lamp with DTC P0331 set.
❌ Tried (didn't work) Replacing the knock sensor without performing further inspection.
✅ What actually fixed it Removing the knock sensor, inspecting the mounting boss on the engine block for 'block ashing' (excess material from manufacturing), cleaning the surface thoroughly, and reinstalling the sensor to the correct torque (25 +/- 4 Nm). - GM Technical Service Bulletin #PIP5529B (2016 Chevrolet Camaro (and other GM models)) — Malfunction Indicator Lamp with a combination of codes, including P0331.
❌ Tried (didn't work) Diagnosing individual sensors for the various codes present.
✅ What actually fixed it Finding and re-torquing loose intake manifold bolts, sometimes with the addition of threadlocker. The vibration from the loose manifold was inducing false signals in the knock sensor.
"I Checked Everything" — The Actual Cause
- A common scenario for P0331 on this platform is that the knock sensor and its wiring test perfectly fine with a multimeter, yet the code persists. The actual cause, as identified in TSB #PIP5836A, was found to be 'block ashing'—excess material from the engine block casting process left on the sensor's mounting surface. This debris prevents the sensor from sitting perfectly flat, altering its vibration readings and triggering the performance code, even though the sensor and circuit are electrically sound.
When the Usual Fixes Don't Work
- The existence of multiple Technical Service Bulletins (TSBs) serves as strong counter-evidence to the common misdiagnosis of simply replacing the knock sensor. TSB #PIP5773B explicitly advised against replacing the sensor, indicating that early replacements were not solving the issue. Later, TSB #PIP5836A provided a fix that required no new parts at all—just cleaning the mounting surface. Furthermore, TSB #PIP5529B pointed to a completely unrelated component (loose intake manifold bolts) as a potential cause. This body of evidence strongly refutes a 'parts-swapping' approach and confirms that P0331 on these Camaros is a complex code requiring careful diagnosis beyond the sensor itself.
OEM Part Supersession History
12694343→12694343 (current as of search)— N/A
Heads up: Be cautious of universal parts catalogs cross-referencing this part number with others like ACDelco 213-4775. While 213-4775 is a valid GM knock sensor, fitment guides show it for older, different engines like those in the Chevrolet Aveo. Using a part not specifically designed for the Gen V LT-series engines can result in incorrect readings. Always verify the part number against the vehicle's VIN.
Model Year Variations Within This Range
- 2019-2020: TSB #PIP5773B was active for these model years, specifically instructing technicians *not* to replace any components for P0331 as the root cause was under central engineering investigation. This highlights a period where the issue was known but the fix was not yet published.
- 2022: TSB #PIP5836A was released, identifying 'block ashing' on the sensor mounting surface as a likely cause for P0331 and providing a specific clean-and-reinstall procedure. This suggests a manufacturing process issue that was formally identified around this model year.
- 2019+: For automatic models, the transmission was updated from the 8-speed A8 to the 10-speed A10. While not a direct cause, major powertrain hardware and software changes can sometimes introduce new diagnostic variables.
Helpful Videos

We Have This Part in Stock


The information in this article is provided for general reference and educational purposes only. Vehicle specifications, procedures, and part compatibility can vary by production date, trim level, and region. Always consult your vehicle's factory service manual and verify part numbers before purchasing or performing repairs. Safety-critical components such as airbags, seat belts, and braking systems should be installed by a qualified professional.
- Chevrolet CAMARO:
- 🧭 Diagnostic Flowchart
- 🎬 Helpful Videos
- 🛍️ Shop This Part
- What's Unique About the 2016-2022 Chevrolet CAMARO
- Symptoms You May Notice
- Most Likely Causes
- Rare But Worth Checking
- Diagnosis Steps
- Parts You'll Likely Need
- Related Codes That Often Appear With This One
- Technical Service Bulletins (TSBs) & Recalls
- Platform-Specific Known Issues
- Mechanic-Grade Diagnostic Values
- Scan Tool Commands That Help
- Wiring & Ground Locations
- Real Owner Repair Stories
- "I Checked Everything" — The Actual Cause
- When the Usual Fixes Don't Work
- OEM Part Supersession History
- Model Year Variations Within This Range
- 🎟️ Get 5% Off