
P0331 on 2009-2016 Hyundai Genesis 3.8L: Knock Sensor 2 Circuit Causes and Fixes
P0331 on a Genesis 3.8L V6 most often means the knock sensor wiring on the driver's side has been chewed by rodents. Before buying a new sensor, carefully inspect the harness for damage. A wire repair is very cheap, while a new OEM-quality sensor costs around $70-$120. The issue is so common it's documented in multiple owner videos and forum posts.
- P0331 refers to the knock sensor circuit on the driver's side (Bank 2).
- The most likely cause on this specific vehicle is a wiring harness chewed by rodents. Always inspect the wires before replacing the sensor.
- If the wiring is intact, the sensor itself is the next most likely cause. It is an accessible part on the side of the engine block, not under the intake manifold.
- When replacing the sensor, proper torque is critical for correct operation.
- Ignoring the code disables the engine's ability to protect itself from harmful detonation, which can lead to severe damage over time.
What's Unique About the 2009-2016 Hyundai Genesis
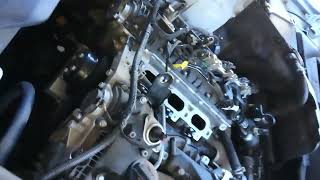
For the Hyundai Genesis with the 3.8L Lambda V6, the P0331 code has a very common and specific quirk: rodent damage. The wiring harness for the Bank 2 (driver's side) knock sensor seems to be a frequent target for critters, who are reportedly attracted to the soy-based wire insulation. Mechanics and owners report finding chewed wires as the root cause far more often than a failed sensor. Unlike many other V6 engines where knock sensors are buried under the intake manifold, the sensor on this engine is accessible on the side of the block, making inspection and repair much easier.
Generation note: The 2009-2016 range covers the first generation (BK/BH, 2009-2014) and the second generation (DH, 2015-2016). The 3.8L Lambda engine also transitioned from Multi-Point Injection (MPI) to Gasoline Direct Injection (GDI) around 2012. While the core issue of wiring and sensor failure remains consistent, GDI models are also prone to carbon buildup which can cause actual engine knock. Always verify part numbers with your vehicle's VIN.
Symptoms You May Notice
- Check Engine Light is on
- Audible engine pinging or knocking, especially under acceleration
- Reduced engine power and acceleration
- Hesitation from the engine
- Worse-than-usual fuel economy
- Replacing the knock sensor without first inspecting the wiring harness. The wiring is the most common point of failure on this vehicle.
- Replacing the wrong sensor. P0331 is for Bank 2, which is the DRIVER'S side. Bank 1 (P0326) is the passenger side.
Most Likely Causes
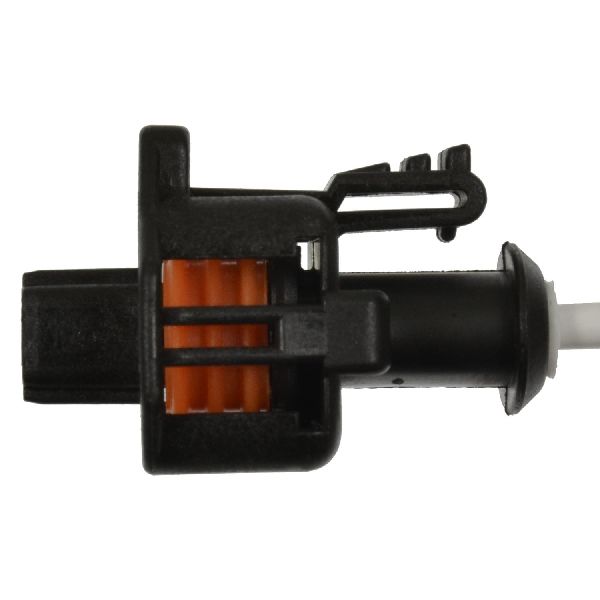
- Damaged Wiring Harness or Connector 🔴 High Probability The soy-based insulation on the wiring harness is known to attract rodents, and the location of the Bank 2 harness on the driver's side of the engine block appears to be a common nesting/chewing spot.
How to confirm: Visually inspect the wiring leading to the knock sensor on the driver's side of the engine block, below and forward of the oil filler cap. Look for chew marks, frayed wires, or a damaged connector. A YouTube video by 'MechanixContent' shows the exact location and a chewed-through wire on a G80, which is identical to the Genesis. 🎬 Watch: Genesis G80 knock sensor location and repair
Typical fix: Repair the damaged section of wire using solder and heat-shrink tubing. Wrap the repaired area in automotive-grade, rodent-repellent tape (e.g., Honda's capsaicin-infused tape). If the connector is damaged, the sub-harness (OEM #91400-C2100-QQH) may need to be replaced.
Est. part cost: $5-$40 - Failed Knock Sensor (Bank 2) 🟡 Medium Probability → Shop Ignition Knock (Detonation) Sensor The sensor is a sensitive piezoelectric device that operates in a high-heat environment and can fail over time.
How to confirm: If the wiring is confirmed to be intact, test the sensor. Disconnect it and check its internal resistance with a multimeter (compare to spec, often 93-100 ohms for this type). You can also tap the engine block near the sensor while checking for a small AC voltage signal.
Typical fix: Replace the Bank 2 knock sensor. Ensure the new sensor is torqued to the manufacturer's specification (15.7 - 23.5 Nm or 11.6 - 17.3 lb-ft), as incorrect torque can affect its sensitivity.
Est. part cost: $70-$120 - Poor Connection or Corrosion ⚪ Low Probability
How to confirm: Disconnect the knock sensor connector and inspect the pins and terminals for moisture, green or white corrosion, or bent pins.
Typical fix: Clean the connector terminals with an electrical contact cleaner. Apply a small amount of dielectric grease to the seal before reconnecting to prevent future moisture intrusion.
Est. part cost: $5-$10
Rare But Worth Checking
- Faulty Powertrain Control Module (PCM): → Shop Engine Control Module (ECM) This is very rare. All other possibilities, especially wiring and the sensor itself, should be exhaustively ruled out before considering the PCM.
- Excessive Engine Noise: A severe mechanical issue, such as a very loose timing chain, could theoretically create enough vibration to trigger the sensor, but this is unlikely and would typically be accompanied by other severe symptoms and codes.
Diagnosis Steps
- Confirm the code P0331 is present using an OBD-II scanner.
- Locate the Bank 2 knock sensor area on the driver's side of the engine, generally below and forward of the oil filler cap.
- Perform a thorough visual inspection of the knock sensor's wiring harness. Look closely for any signs of chewing, chafing, breaks, or melting. This is the most critical step.
- If wiring damage is found, repair the wires. Clear the code and test drive to see if it returns.
- If the wiring is intact, inspect the electrical connector for a secure fit, corrosion, or damaged pins.
- If wiring and connector are good, test the sensor itself. Disconnect the sensor and use a multimeter to check its resistance, comparing the reading to the manufacturer's specification (typically 93-100 ohms).
- If the sensor fails the test, replace it. 🎬 See: Knock sensor circuit diagnosis and repair walkthrough Ensure the mounting bolt is torqued correctly to 15.7 - 23.5 Nm (11.6 - 17.3 lb-ft).
- If the sensor tests good but the code persists, check for 5V reference and ground at the connector to rule out an issue further up the harness or with the PCM.
- Clear the DTC and perform a thorough test drive to ensure the code does not return.
Parts You'll Likely Need
- Ignition Knock (Detonation) Sensor
(OEM #39320-3L210)— This is the part to replace if the wiring is confirmed to be good but the sensor itself has failed. This part number is confirmed for the G80 3.8L and is the correct replacement.
Trusted brands: Hyundai (OEM), NTK, Standard Motor Products (SMP)
OEM price range: $100-$150
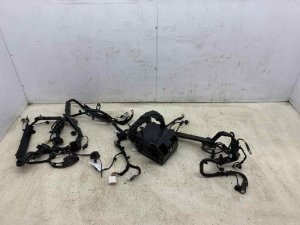
Aftermarket price range: $70-$120 - Engine Wiring Harness (Sub-harness)
(OEM #91400-C2100-QQH)— If the rodent damage is severe or the connector is destroyed, replacing the small sub-harness may be easier than extensive wire repair.
Trusted brands: Hyundai (OEM)
OEM price range: $25-$40 - Rodent-Repellent Electrical Tape — Highly recommended for wrapping the repaired wiring harness to deter future rodent damage, which is a common cause of this code on this vehicle.
Trusted brands: Honda (Capsaicin Tape), 3M
OEM price range: $15-$30
Aftermarket price range: $10-$20
Related Codes That Often Appear With This One
- P0326 — This is the code for the Bank 1 (passenger side) knock sensor. If both P0326 and P0331 are present, it strongly points to widespread rodent damage affecting both sensor harnesses.
Platform-Specific Known Issues
- The wiring harness for the knock sensors on the Lambda V6 engine is a known target for rodents, often leading to chewed wires that trigger P0331 (Bank 2) or P0326 (Bank 1).
Mechanic-Grade Diagnostic Values
- Knock Sensor Mounting Bolt Torque — expected: 15.7 - 23.5 Nm (11.6 - 17.3 lb-ft). Failure: Incorrect torque can make the sensor too sensitive (over-torqued) or not sensitive enough (under-torqued), leading to a persistent or new code.
- Knock Sensor Live Data Voltage (Scan Tool) — expected: Fluctuating between 0.2V (no knock) and 4.5V (severe knock) depending on engine load.. Failure: Voltage is stuck at 0V, stuck at reference voltage (e.g., 5V), or does not change with engine RPM and load.
- Knock Sensor AC Voltage Output (Dynamic Test) — expected: A small AC voltage spike (in millivolts) appears on a multimeter when the engine block is tapped near the sensor.. Failure: No voltage signal is produced when tapping, indicating a dead piezoelectric element inside the sensor.
- Knock Sensor Internal Resistance (Test 1) — expected: 93 to 110 kOhms (kilo-ohms). Failure: An open circuit (infinite resistance) or a reading significantly outside this range.
- Knock Sensor Internal Resistance (Test 2) — expected: 93 to 100 ohms. Failure: A reading significantly outside this range.
- Knock Sensor Connector Reference Voltage — expected: Approximately 5 Volts at one of the connector pins with the key on, engine off.. Failure: No voltage indicates a problem in the wiring harness or the PCM's 5V reference circuit.
Scan Tool Commands That Help
- Hyundai GDS (Global Diagnostic System): Data Analysis / Live Data — To monitor the 'Knock Sensor Bank 2' voltage in real-time while the engine is running. This helps verify if the sensor is sending a plausible signal or is stuck at a fixed value.
- Hyundai GDS (Global Diagnostic System): Flight Record (Trigger Module) — For diagnosing intermittent faults. This function records sensor data over a drive cycle, allowing a technician to capture and analyze the exact conditions under which the P0331 fault occurs.
- Hyundai GDS (Global Diagnostic System): Vehicle S/W Management (Special Function) — After a repair, functions like 'Resetting Adaptive Values' may be necessary to force the ECM to relearn engine parameters with the new, functioning sensor circuit.
Wiring & Ground Locations
- Bank 2 Knock Sensor Connector — On the driver's side of the engine block, below and forward of the oil filler cap.. This is the primary connection point for the sensor. It is where rodent damage is most often found and where voltage/resistance tests are performed.
- ECM (Engine Control Module) — Typically located in the engine bay at the left rear.. The knock sensor wiring terminates at the ECM. A poor connection at the ECM or an internal ECM fault (rare) could cause this code.
- Engine Block / Chassis Grounds — Multiple locations, including a ground strap on the engine mount and grounds on the intake manifold and near the starter bell housing.. A poor engine or sensor ground can cause stray voltage or an unstable signal, leading to an erroneous range/performance code like P0331.
Real Owner Repair Stories
- YouTube video from 'MechanixContent' (Genesis G80 3.8L (similar platform)) — Check Engine Light with code P0331.
❌ Tried (didn't work) Simply replacing the sensor without inspection.
✅ What actually fixed it The mechanic located the Bank 2 knock sensor wiring and found it had been chewed through by rodents. The fix was to solder the broken wire, cover it with heat-shrink tubing, and wrap the harness in protective tape. The sensor itself was not faulty. - NHTSA ODI #11587348 (Hyundai vehicle with similar Lambda engine) — An owner reported that while driving at approximately 35 mph, the Check Engine Light came on for P0331. After the light was cleared, it returned within 14 miles of driving.
Model Year Variations Within This Range
- 2009-2016: The knock sensor part number can differ between the Genesis Coupe (BK) and the Genesis Sedan (BH/DH). For example, the 2013-2016 Genesis Coupe 3.8L may use part number 39320-3C750, while the later sedans use 39320-3L210 for the same Bank 2 position. Always verify the part number with the vehicle's VIN before ordering.
Diagnostic Flowchart
Other Known Issues on This Vehicle
Issues unrelated to this code that are worth knowing about as an owner of this generation:
- Intake Valve Carbon Buildup (GDI Models) 🟠 Medium — Becomes problematic around 60,000-100,000 miles on 2012+ GDI engines. Leads to rough idle, misfires, and power loss.
- Excessive Oil Consumption 🟠 Medium — More common on GDI engines. Some owners report consuming over 1 quart between oil changes. A class-action lawsuit includes Lambda engines for this issue. (Ref: Part of a wider class-action lawsuit concerning oil consumption in Hyundai engines.)
- Timing Chain Rattle on Cold Start 🟠 Medium — Can develop around 80,000-100,000 miles, indicating wear in the timing chain tensioners.
- Leaky Tail Light Assemblies (2015 DH) 🟡 Low — Specific to the 2015 model year, water intrusion into the tail lights could cause electrical issues, such as incorrect gear display. (Ref: Hyundai Recall 126 (NHTSA Campaign 15V139000). Dealers install waterproofing pads.)
Used vs. New Parts: Buying Guide for This Vehicle
When a used part is the smart pick: A used wiring sub-harness from a salvage yard is a smart choice if your connector is destroyed or damage is too extensive for a simple wire repair. It's a non-wear item and significantly cheaper than new.
Donor-vehicle mileage cap: roughly under 150000 miles for the part to have meaningful remaining life.
What to inspect on the donor part:
- For a wiring harness, inspect for intact connector clips, flexible (not brittle) wires, and zero signs of prior rodent damage or melting.
- For a used sensor, it's a gamble as it cannot be easily tested off the vehicle. Only consider from a very low-mileage donor vehicle.
OEM-only on this vehicle (don't cheap out):
- Ignition Knock (Detonation) Sensor
Aftermarket brands forum-validated for this vehicle:
- NTK (often the OEM supplier)
- Standard Motor Products (SMP)
Brands owners have reported issues with on this vehicle:
- Unnamed, white-box brands from online marketplaces are a high risk for being out-of-spec and not resolving the code.
Real Owner Stories
Aggregated from forums and TSBs cited above. Mileages and costs reflect what owners reported in those sources.
2012 Hyundai Genesis 3.8 sedan
Symptoms: Check engine light with code P0331 appeared after changing valve cover gaskets and spark plugs. The car also makes a rattling sound every time it is turned on.
What fixed it: The owner was investigating if the timing chain rattle or accidental harness damage during the valve cover service caused the code.
Source hint: Reddit (r/MechanicAdvice) - 'Code p0331 Hyundai Genesis 3.8 sedan 2012'
2017-2020 Genesis G80 3.8L
Symptoms: P0331 code triggered by a chewed-through wire on the Bank 2 knock sensor harness.
What fixed it: Soldering the damaged section of the wire and wrapping it in protective tape.
Source hint: YouTube - 'Genesis G80 3.8L Knock Sensor 2017 - 2020 P0331 code'
2016 Hyundai Genesis Coupe 3.8L
Symptoms: Owner reported a P0331 code for Knock Sensor 2 and required a service manual diagram to locate the sensor on the engine block.
What fixed it: Locating the sensor on the block via service manual diagrams to inspect for circuit issues.
Source hint: Reddit (r/genesiscoupe) - 'Knock Sensor 2 P0331'
Related OBD-II Codes
Frequently Asked Questions
Where is the Bank 2 knock sensor located on my 3.8L Genesis engine?
Is there a specific replacement harness for the knock sensor if rodents chewed mine?
What is the correct torque specification for the knock sensor on the Lambda V6?
Why is my 2012 Genesis 3.8L showing P0331 after I changed my valve cover gaskets?
Is there a recall for the electrical issues on my 2015 Genesis DH?
What resistance should I look for when testing the knock sensor with a multimeter?
Helpful Videos
Used OEM Parts in Stock
New Aftermarket Parts Available


The information in this article is provided for general reference and educational purposes only. Vehicle specifications, procedures, and part compatibility can vary by production date, trim level, and region. Always consult your vehicle's factory service manual and verify part numbers before purchasing or performing repairs. Safety-critical components such as airbags, seat belts, and braking systems should be installed by a qualified professional.
- Hyundai Genesis:
- 🧭 Diagnostic Flowchart
- 🎬 Helpful Videos
- 🛍️ Shop This Part
- What's Unique About the 2009-2016 Hyundai Genesis
- Symptoms You May Notice
- Most Likely Causes
- Rare But Worth Checking
- Diagnosis Steps
- Parts You'll Likely Need
- Related Codes That Often Appear With This One
- Platform-Specific Known Issues
- Mechanic-Grade Diagnostic Values
- Scan Tool Commands That Help
- Wiring & Ground Locations
- Real Owner Repair Stories
- Model Year Variations Within This Range
- Other Known Issues on This Vehicle
- Used vs. New Parts: Buying Guide for This Vehicle
- Real Owner Stories
- 2012 Hyundai Genesis 3.8 sedan
- 2017-2020 Genesis G80 3.8L
- 2016 Hyundai Genesis Coupe 3.8L
- Related OBD-II Codes
- Frequently Asked Questions
- 🎟️ Get 5% Off