
P0333 on 2019-2025 Audi A7: Knock Sensor Circuit High Causes and Fixes
P0333 on a 2019-2025 Audi A7 indicates a 'Knock Sensor 2 Circuit High Input' for Bank 2. This is most often caused by a faulty knock sensor or its wiring harness. Replacing the sensor is a moderately difficult DIY job as it is located under the intake manifold. On this specific engine platform (EA839), a knock code should be investigated promptly as it can, in some cases, be an early warning of more serious mechanical engine problems.
- P0333 specifically points to an electrical fault ('Circuit High') with Knock Sensor 2 on the driver's side of the engine (Bank 2).
- The most likely cause is a failed knock sensor (OEM Part #: 06M-905-377), but the wiring harness should always be inspected and is often replaced as a precaution.
- This repair requires removing the intake manifold, making it a complex job for a novice.
- On the EA839 engine in this A7, a knock sensor code accompanied by any audible ticking should be investigated with high urgency, as it could be an early sign of a known mechanical issue like rocker arm failure.
What's Unique About the 2019-2025 Audi A7
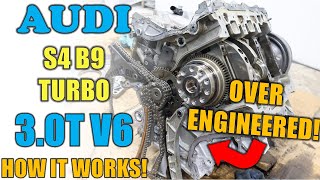
For the V6 TFSI engines (EA839 family) in the C8 generation Audi A7, knock sensor issues are a documented concern, as highlighted by Audi's own Technical Service Bulletins. [TSB_2081342_1] The code P0333 specifically points to the sensor designated 'G66' in Audi's system. While the sensors themselves are generally reliable, the wiring harnesses can become brittle from engine heat, leading to electrical faults. It is also critical that the sensor be torqued to the exact specification (typically 20 Nm or 15 ft-lbs), as improper torque can cause false readings. Importantly, the EA839 engine has known issues with rocker arm failure (especially 2018 models) and piston skirt wear. Therefore, 🎬 Watch: A full teardown of the EA839 V6 engine internals while P0333 is an electrical fault, if it is accompanied by any audible engine ticking or rattling, 🎬 See: How to diagnose Audi V6 rocker arm failure noise it should be treated with high urgency as it could be an early symptom of a more severe mechanical failure.
Diagnostic Flowchart
Tap your situation to follow the diagnostic path that matches what you're seeing on this vehicle.
Symptoms You May Notice
- Check Engine Light is on
- Reduced engine power and acceleration
- Hesitation during acceleration
- Increased fuel consumption
- Audible engine knocking or pinging
- Car enters 'limp mode' or 'restricted performance' mode.
- Replacing spark plugs or ignition coils, assuming the hesitation is a misfire without checking codes first.
- Using the wrong octane fuel. While low octane fuel can cause real engine knock, it typically won't cause a 'circuit high' fault code, which points to an electrical issue. However, bad fuel in a tuned car has been anecdotally linked to triggering the code and limp mode.
Most Likely Causes
- Faulty Knock Sensor 2 (Bank 2) 🔴 High Probability → Shop Ignition Knock (Detonation) Sensor While the sensors are generally robust, they are subject to failure from heat and vibration over time. The 'circuit high' error often points directly to an internal sensor fault.
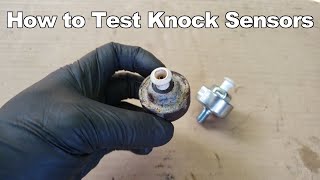
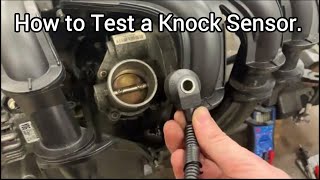
How to confirm: After checking wiring, test the sensor's resistance with a multimeter. Compare the reading 🎬 Watch: How to test a knock sensor with a multimeter to the other knock sensor on Bank 1; they should be very similar. If the resistance is out of spec or shows an open circuit (OL), the sensor is bad. The sensor for this vehicle is typically part number 06M-905-377.
Typical fix: Replace the knock sensor on Bank 2. It is highly recommended to also replace the wiring harness pigtail at the same time, as it is a common point of failure. Ensure the new sensor is torqued to exactly 20 Nm (15 ft-lbs).
Est. part cost: $70-$160 - Wiring or Connector Issue 🟡 Medium Probability Engine bay heat can make wiring and plastic connectors brittle over time. Rodent damage to wiring harnesses is also a known issue. A forum user on an older Audi model found their knock sensor codes were caused by a broken vacuum line near the sensor harness, highlighting the importance of inspecting the entire area.
How to confirm: Visually inspect the wiring harness leading to the knock sensor for any signs of damage, melting, corrosion, or rodent chews. Check the connector for corrosion or bent pins. A 'circuit high' code can be caused by a wire shorting to a voltage source. Use a multimeter to check for continuity and shorts in the harness between the sensor connector and the PCM.
Typical fix: Repair the damaged section of the wire or replace the knock sensor wiring harness. Clean any corrosion from the connector with electrical contact cleaner.
Est. part cost: $20-$70 - Improperly Torqued Knock Sensor ⚪ Low Probability → Shop Ignition Knock (Detonation) Sensor This is more likely if the sensor has been recently replaced. The sensor is a microphone tuned to a specific frequency, and incorrect mounting torque will alter its sensitivity and cause false signals.
How to confirm: Using a torque wrench, verify that the knock sensor bolt is tightened to the manufacturer's specification (typically 20 Nm / 15 ft-lbs for Audis).
Typical fix: Loosen and re-torque the knock sensor bolt to the correct specification.
Est. part cost: $0
Rare But Worth Checking
- Powertrain Control Module (PCM) Fault: → Shop Engine Control Module (ECM) This is very rare and should only be considered after all other possibilities (sensor, wiring) have been exhaustively ruled out. A faulty PCM can misinterpret a good sensor signal.
- Overly Sensitive ECM Diagnostics: On some older Audi platforms, TSB 2048391/4 was issued because the factory OBD diagnostics were too sensitive and would trigger knock sensor circuit high codes erroneously. The fix was a software update, not a hardware replacement. While less likely on this newer platform, it's a known possibility in the VAG ecosystem.
Diagnosis Steps
- Read the fault codes with an OBD-II scanner to confirm P0333 is present and note any other codes.
- Identify Bank 2 on your Audi's V6 engine. Bank 1 (cylinders 1-3) is the passenger side in North America; Bank 2 (cylinders 4-6) is the driver's side.
- Locate Knock Sensor 2 (also known as G66). This will require removing the intake manifold for access.
- Visually inspect the sensor's connector and wiring for damage, corrosion, or loose connections. Pay attention to the entire harness path.
- If wiring looks good, disconnect the sensor. Use a multimeter to check for voltage at the connector. A 'circuit high' code can be caused by a short to voltage in the harness.
- Check the sensor's internal resistance by placing multimeter probes on its pins. Compare this reading to the sensor on Bank 1. If the readings are drastically different, or if Sensor 2 shows an open circuit (OL), it has failed.
- Check that the sensor is torqued correctly to its mounting bolt (20 Nm / 15 ft-lbs).
- If the wiring and sensor test good, the fault may lie within the PCM, which requires professional diagnosis. Consider the possibility of a software issue as noted in historical TSBs.
Parts You'll Likely Need
- Knock Sensor (G66)
(OEM #06M-905-377)— This is the most common failure point for a P0333 code, indicating an internal fault in the sensor.
Trusted brands: Bosch, NTK, Genuine Audi
OEM price range: $90-$160
Aftermarket price range: $70-$110 - Knock Sensor Wiring Harness — The harness is located in a high-heat area and can become brittle and fail, causing an electrical fault. It is best practice to replace it when replacing the sensor.
Trusted brands: Genuine Audi
OEM price range: $40-$70
Aftermarket price range: $20-$40 - Intake Manifold Gaskets — These must be replaced when the intake manifold is removed to access the knock sensors.
Trusted brands: Victor Reinz, Elring, Genuine Audi
OEM price range: $50-$80
Aftermarket price range: $30-$60
Related Codes That Often Appear With This One
- P0328 — This is the equivalent 'Circuit High' code for Knock Sensor 1 on Bank 1. Seeing both may indicate a shared wiring problem or a more significant issue.
- P0332 — This is a 'Circuit Low' code for the same sensor (Knock Sensor 2, Bank 2). If codes are intermittent, you might see both, suggesting a loose connection or failing sensor.
Technical Service Bulletins (TSBs) & Recalls
- TSB_2081342_1: Provides information for Drive System Malfunctions related to various knock sensor DTCs, including P0333, on V6 TFSI engines.
- TSB 2048391/4: While for older models, this TSB shows a history of Audi vehicles having overly sensitive diagnostics for knock sensor circuit high codes, where a software update was the correct fix, not sensor replacement.
Platform-Specific Known Issues
- Audi has issued Technical Service Bulletin #TSB_2081342_1 for 2019 V6 TFSI engines regarding Drive System Malfunctions that can trigger knock sensor codes, including P0333.
- Potential Precursor to Major Engine Failure: On the related EA839 engine in a 2018 Audi S4, an owner reported a P0333 code along with a ticking noise. This was later diagnosed as a catastrophic rocker arm failure requiring a full engine replacement. This highlights the importance of investigating any associated mechanical noises immediately.
Mechanic-Grade Diagnostic Values
- Knock Sensor (G66) Connector Pin-to-Pin Resistance — expected: ∞ Ω (no continuity). Failure: Any continuity reading between any of the three terminals (1-2, 1-3, 2-3) indicates an internal short in the sensor, requiring replacement.
- Knock Sensor (G66) Wiring Continuity (Sensor to ECU) — expected: Max. 1.5 Ω. Failure: An open circuit (OL) or high resistance reading indicates a break in the wiring harness between the sensor connector and the ECU connector that must be repaired.
- Knock Sensor (G66) AC Voltage Output (Dynamic Test) — expected: >1V AC when tapping on engine block near sensor. Failure: Significantly lower voltage (e.g., <10mV) compared to the sensor on the other bank when performing the same test suggests a faulty sensor.
Scan Tool Commands That Help
- VCDS (VAG-COM) or ODIS: Basic Settings: Knock Sensor Test — This is a functional test to confirm if the ECU is able to communicate with and receive a plausible signal from the knock sensors. The procedure typically involves holding the brake and applying full throttle (in Park/Neutral), while the ECU limits RPM and runs a self-test.
- VCDS (VAG-COM) or ODIS: Measuring Value Blocks (MVB) 015 & 016 — To monitor the live output and adjustments related to the knock sensors while the engine is running. This can help determine if the sensor is sending any signal at all.
Wiring & Ground Locations
- Main Engine Bay Ground Point — Under the battery and battery tray.. This is a primary grounding point for many engine sensors. Corrosion or a loose connection here can cause a variety of difficult-to-diagnose electrical faults, including sensor circuit high/low codes.
- Knock Sensor 2 (G66) ECU Pin — On the main ECU (J623) connector, the shielded signal wire for Knock Sensor 2 often runs to pin T94/61.. This is the final destination for the sensor's signal. When diagnosing a wiring issue, checking for continuity and integrity at this specific pin is the definitive test. A wire can become loose or broken at the connector itself.
- Engine Block Ground Strap — A braided metal strap connecting the engine block directly to the vehicle's chassis/frame.. The knock sensor circuit relies on a solid engine ground. A frayed, corroded, or missing ground strap can create a floating ground, leading to erratic voltage readings and fault codes like P0333.
Real Owner Repair Stories
- Ross-Tech Forums user 'vdubdezl' (2001 VW Jetta 1.8T (similar VAG knock sensor logic)) — Code 16711 (Knock Sensor 1: Signal too Low) and severe sputtering under load.
❌ Tried (didn't work) Re-torquing the sensor, Replacing the knock sensor, Replacing spark plugs, Replacing fuel filter
✅ What actually fixed it After getting no continuity on a wiring test, the user inspected the ECU connector itself. The two wires for the knock sensor had pulled out of their pins inside the connector housing, even though they felt secure when tugged. Soldering the wires back into the pins resolved the code. - Reddit user 'RudyCantReddit' (2018 Audi S5 (EA839 engine)) — Classic 'loud ticking' noise, followed by engine warning lights and limp mode. A cam position sensor fault was also present on Bank 2.
❌ Tried (didn't work) Initially hoping the ticking was the normal High-Pressure Fuel Pump (HPFP) sound.
✅ What actually fixed it The issue was diagnosed as a catastrophic rocker arm failure. The user noted that the cam position sensor fault was a 'major tell' because the magnetic sensor picks up the metal debris from the disintegrating rocker arm bearings, causing a fault on the same bank as the failure.
"I Checked Everything" — The Actual Cause
- In a case related to a knock sensor fault on a similar VAG vehicle, standard diagnostics like replacing the sensor and checking its torque failed to resolve the issue. The root cause was found to be the signal wires having backed out of their pins within the main ECU connector housing, which is not a fault that can be found with a visual inspection of the harness or a smoke test.
When the Usual Fixes Don't Work
- While P0333 is most commonly an electrical fault with the sensor or its wiring, on the EA839 engine platform it must not be treated in isolation. Multiple owner accounts confirm that a knock sensor code, particularly when paired with an audible ticking from the corresponding engine bank, can be an early warning of a severe rocker arm failure. In one documented case, a user replaced the sensor and performed other standard checks for a similar knock sensor code, only to find the true cause was broken wiring hidden inside the ECU connector itself, demonstrating that the fault can be far from the sensor location.
OEM Part Supersession History
Varies (Early EA839 Rocker Arms)→0P2 series (e.g., 0P2109417B)— The original rocker arms used needle bearings that were prone to disintegration, sending metal through the engine. Later revisions use more robust bearings.
Heads up: This is for the rocker arms, not the knock sensor itself, but is critical information if P0333 is accompanied by engine ticking.
Model Year Variations Within This Range
- 2019 (early production): Early 2019 models are more likely to have the original, weaker rocker arm design which was prone to failure. While later revisions improved the part, the issue was most prominent in 2017-2019 models.
Helpful Videos

We Have This Part in Stock

The information in this article is provided for general reference and educational purposes only. Vehicle specifications, procedures, and part compatibility can vary by production date, trim level, and region. Always consult your vehicle's factory service manual and verify part numbers before purchasing or performing repairs. Safety-critical components such as airbags, seat belts, and braking systems should be installed by a qualified professional.
- Audi A7:
- 🧭 Diagnostic Flowchart
- 🎬 Helpful Videos
- 🛍️ Shop This Part
- What's Unique About the 2019-2025 Audi A7
- Symptoms You May Notice
- Most Likely Causes
- Rare But Worth Checking
- Diagnosis Steps
- Parts You'll Likely Need
- Related Codes That Often Appear With This One
- Technical Service Bulletins (TSBs) & Recalls
- Platform-Specific Known Issues
- Mechanic-Grade Diagnostic Values
- Scan Tool Commands That Help
- Wiring & Ground Locations
- Real Owner Repair Stories
- "I Checked Everything" — The Actual Cause
- When the Usual Fixes Don't Work
- OEM Part Supersession History
- Model Year Variations Within This Range
- 🎟️ Get 5% Off