
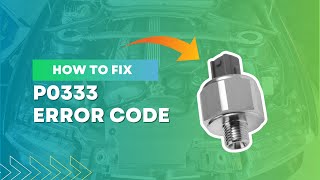
P0333 on 2015-2020 Cadillac Escalade: Knock Sensor Circuit High Causes & Fixes
Code P0333 on a 2015-2020 Escalade usually indicates a wiring issue or a bad Bank 2 (passenger side) knock sensor. Before replacing the sensor, it is critical to investigate known wiring problems described in GM Technical Service Bulletins. A new OEM-quality sensor costs approximately $25-$50.
- P0333 on a 2015-2020 Escalade is most often a wiring issue, not a bad sensor.
- Always check GM TSBs #20-NA-207 and #PIP5576 before starting repairs.
- Inspect the wiring harness near the transmission and the main ECM connector (X2) for damage or loose pins.
- The code frequently sets when shifting out of Park, which is a key symptom pointing to the TSB-documented wiring fault.
- Do not replace the knock sensor until all wiring-related causes have been thoroughly ruled out to avoid a common misdiagnosis.
What's Unique About the 2015-2020 Cadillac ESCALADE
On this generation of Escalade with the 6.2L L86 engine, P0333 is frequently caused by specific wiring problems rather than a failed sensor. General Motors issued technical service bulletins that are crucial for diagnosis. These bulletins highlight that voltage from the transmission's 'park/neutral signal 1 circuit' can bleed into the knock sensor circuit, and that poor connections or debris at the main engine computer's (ECM) X2 connector can also trigger the code. This makes a thorough wiring inspection a mandatory first step before replacing any parts.
Diagnostic Flowchart
Tap your situation to follow the diagnostic path that matches what you're seeing on this vehicle.
Symptoms You May Notice
- Check Engine Light (Malfunction Indicator Lamp) is on
- Code may appear specifically when shifting the transmission out of Park.
- Reduced engine power or acceleration
- Audible engine pinging or knocking (in some cases)
- Replacing the knock sensor without first investigating the known wiring issues described in GM's Technical Service Bulletins. The problem often returns if the root cause is a harness fault, leading to wasted time and money. 🎬 See this breakdown of common P0333 causes and wiring fixes. A user on TahoeYukonForum reported this exact scenario with a 2011 model, where a new ACDelco sensor did not fix the P0333 code.
Most Likely Causes
- Wiring Harness Interference or Damage 🔴 High Probability As documented in TSBs, the knock sensor wiring is susceptible to electrical interference from the adjacent 'transmission park/neutral signal 1 circuit'. The harness routing near the transmission bellhousing and starter can lead to chafing or melting, causing the voltage to bleed over or wires to short together, creating a false high signal.
How to confirm: Follow the diagnostic procedures outlined in GM TSB #20-NA-207 and the original #PIP5576. Inspect the wiring harness where it runs near the transmission and starter for any signs of chafing, melting, or improper routing. Also, inspect the K20 ECM X2 connector for backed-out terminals, debris, or corrosion.
Typical fix: Repairing, re-routing, or shielding the affected section of the wiring harness. This may involve separating the affected wires and securing them away from each other. Cleaning and securing the ECM connector terminals is the other primary fix.
Est. part cost: $0-$50 - Failed Knock Sensor (Bank 2) 🟡 Medium Probability → Shop Ignition Knock (Detonation) Sensor Sensors can fail over time due to heat and vibration, though it's less common than the wiring issue on this platform. Owners on forums have reported replacing the sensor only for the code to return, pointing back to the wiring as the root cause.
How to confirm: After ruling out wiring issues, test the sensor. One method is to swap the Bank 2 (passenger side) and Bank 1 (driver side) sensors. If the code changes to P0328 (Knock Sensor 1 Circuit High), the sensor is faulty. Resistance can also be checked with a multimeter, with a reading typically expected between 93 and 100 ohms for many GM vehicles.
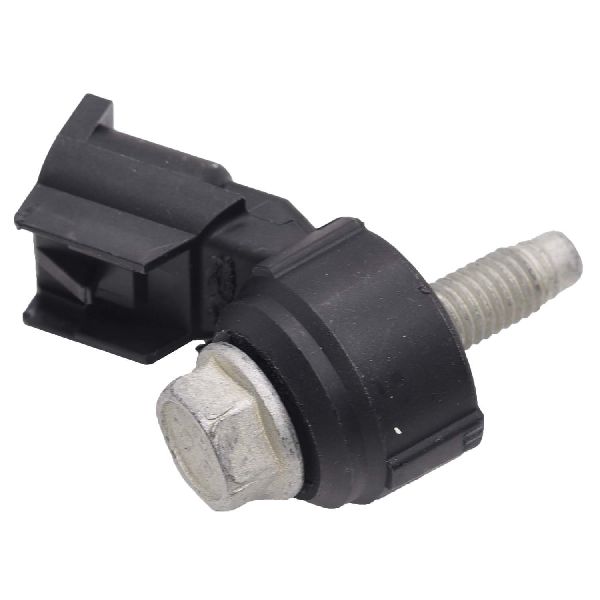
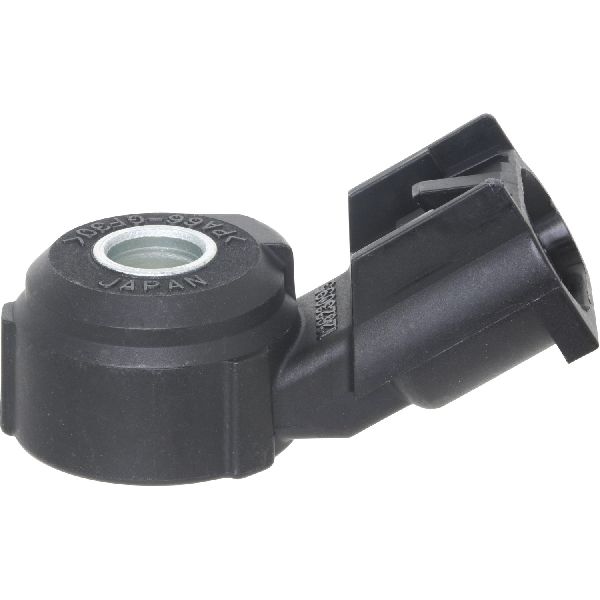
Typical fix: Replace the Bank 2 knock sensor. The sensor is secured by a single bolt.
Est. part cost: $25-$70 - Damaged Knock Sensor Connector ⚪ Low Probability → Shop Ignition Knock (Detonation) Sensor The connector is exposed to engine heat and weather, which can cause the plastic to become brittle and the pins to corrode. The locking tab is especially prone to breaking.
How to confirm: Visually inspect the knock sensor connector for cracks, corrosion, or bent/loose pins. Ensure the red safety lock tab is present and functional.
Typical fix: Replace the connector pigtail, which involves cutting the old connector off and splicing a new one in. Ensure connections are sealed against moisture.
Est. part cost: $15-$30
Rare But Worth Checking
- Faulty Engine Control Module (ECM): → Shop Engine Control Module (ECM) This is extremely rare and should only be considered after all other possibilities, including extensive wiring diagnostics, have been exhausted. An internal ECM fault can cause it to misinterpret the sensor's signal.
Diagnosis Steps
- Scan the vehicle's computer for stored trouble codes.
- Review the details of TSB #20-NA-207 (revised March 2022) and the original TSB #PIP5576. Note the two primary causes: wiring bleed-over and the ECM X2 connector.
- Inspect the engine wiring harness, focusing on the area near the transmission bellhousing and starter motor. Look for chafing, melting, or bare wires that could cause the park/neutral signal wire to interfere with the knock sensor circuit or cause a short.
- Inspect the K20 ECM X2 electrical connector for any debris, corrosion, or terminals that may have backed out.
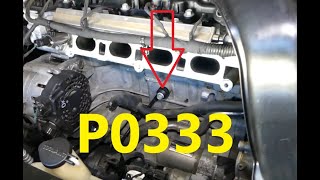
- If wiring appears okay, locate the Bank 2 knock sensor on the lower passenger side of the engine block, often situated behind a small heat shield and above the starter motor.
- Access is from underneath the vehicle. The starter motor may need to be removed for access.
- Inspect the sensor's electrical connector for damage or corrosion. Disengage the red safety lock tab before attempting to unplug the connector.
- With the key on and engine off (KOEO), test the sensor connector voltage. A reading significantly above 5V can indicate a short to power. A normal reference voltage is much lower, around 1.5V.
- With the sensor disconnected, measure the resistance across the two pins of the knock sensor. A typical reading for a good sensor is between 93-100 ohms. An open circuit (infinite resistance) or a reading far outside this range indicates a failed sensor.
- If the sensor is confirmed to be faulty, replace it. The sensor is held by one bolt. 🎬 Watch: Step-by-step guide to replacing the Bank 2 knock sensor. Torque the new sensor's bolt to 18 lb-ft (25 Nm).
- Clear the DTCs and perform a road test, paying special attention to shifting out of Park, to confirm the repair.
Parts You'll Likely Need
- Ignition Knock (Detonation) Sensor
(OEM #12623095)— This is the sensor that provides the reading for the P0333 code. It is the most commonly replaced part, often incorrectly, before wiring issues have been ruled out.
Trusted brands: ACDelco, GM Genuine Parts, Delphi, Bosch
OEM price range: $30-$50
Aftermarket price range: $20-$40
Technical Service Bulletins (TSBs) & Recalls
- 20-NA-207: Information on Malfunction Indicator Lamp (MIL) Illuminated - DTC P0333 Set. This bulletin points to potential issues at the ECM X2 connector and supersedes PIP5576. The latest revision from March 2022 updates the affected model years to include 2019 and 2020 models.
- PIP5576: This preliminary bulletin first identified the issue of voltage from the transmission park/neutral signal circuit bleeding into the knock sensor circuit. It has been superseded by 20-NA-207.
Platform-Specific Known Issues
- A known issue, documented in TSB #PIP5576 and its replacement #20-NA-207, is voltage from the transmission park/neutral signal circuit bleeding into the knock sensor circuit, causing a false high voltage reading when shifting from Park.
- TSB #20-NA-207 also points to a possible electrical concern at the ECM X2 electrical connector as a cause for DTC P0333.
- Owner experiences confirm that replacing the sensor alone often fails to resolve the code, strongly suggesting the wiring harness or ECM connector is the true root cause. 🎬 Watch: How to diagnose and fix high circuit input codes.
Mechanic-Grade Diagnostic Values
- Knock Sensor Internal Resistance — expected: 93 - 100 Ohms. Failure: An open circuit (infinite resistance) or a reading significantly outside this range.
- Knock Sensor Circuit Voltage (KOEO) — expected: ~1.5V (Reference Voltage). Failure: A reading above 5V at the sensor connector suggests a short to power in the harness.
- ECM Reference Voltage (KOEO, sensor disconnected) — expected: ~1.5V. Failure: If the voltage at the ECM pin remains high (≥5V) with the sensor disconnected, it points to an internal ECM fault.
Wiring & Ground Locations
- K20 ECM Connector X2 — The Engine Control Module (ECM) is typically located in the engine bay. X2 is one of the main multi-pin connectors plugging into it.. TSB #20-NA-207 specifically calls out this connector as a potential source of the P0333 code due to debris, corrosion, or backed-out terminals causing a poor connection for the knock sensor circuit.
- ECM X2 Pins 50 & 51 (Likely) — At the K20 ECM X2 connector.. Based on wiring diagrams for similar GM engines, the Knock Sensor 2 (Bank 2) circuit uses two pins: a signal and a low reference. Pin 51 is often the Signal and Pin 50 is the Low Reference. These specific pins should be tested for continuity back to the sensor and checked for proper voltage.
- G101 / G104 Engine Block Grounds — Bolted directly to the engine block, often on the front or rear of the cylinder heads.. The ECM and its sensors rely on clean engine ground connections. A corroded or loose engine ground can create floating voltages and signal noise, potentially triggering a false high voltage code like P0333.
Real Owner Repair Stories
- 2CarPros Forum User (2012 Cadillac CTS 3.6L V6 (similar principle)) — P0333 code appeared immediately after replacing the starter, which required removing the knock sensor.
❌ Tried (didn't work) Replacing the knock sensor with a new part.
✅ What actually fixed it Upon closer inspection of the harness near the sensor plug, the user found two bare wires that were twisted together, creating a short. Repairing and separating these wires resolved the code. - IH8MUD Forum User (2006 Toyota Land Cruiser (similar principle)) — P0333 code, CEL, and VSC lights.
❌ Tried (didn't work) Replacing both knock sensors with new parts.
✅ What actually fixed it The problem was solved by cutting out the old Bank 2 knock sensor connector and soldering in a new pigtail harness. This confirmed the fault was in the wiring/connector, not the sensor itself.
Model Year Variations Within This Range
- 2019-2020: The original TSB for this issue (PIP5576) covered model years up to 2018/2019. The superseding TSB (20-NA-207) was revised in March 2022 to explicitly extend coverage to include 2019 and 2020 models, confirming the potential for this issue exists across the entire generation.
Helpful Videos

We Have This Part in Stock


The information in this article is provided for general reference and educational purposes only. Vehicle specifications, procedures, and part compatibility can vary by production date, trim level, and region. Always consult your vehicle's factory service manual and verify part numbers before purchasing or performing repairs. Safety-critical components such as airbags, seat belts, and braking systems should be installed by a qualified professional.
- Cadillac ESCALADE:
- 🧭 Diagnostic Flowchart
- 🎬 Helpful Videos
- 🛍️ Shop This Part
- What's Unique About the 2015-2020 Cadillac ESCALADE
- Symptoms You May Notice
- Most Likely Causes
- Rare But Worth Checking
- Diagnosis Steps
- Parts You'll Likely Need
- Technical Service Bulletins (TSBs) & Recalls
- Platform-Specific Known Issues
- Mechanic-Grade Diagnostic Values
- Wiring & Ground Locations
- Real Owner Repair Stories
- Model Year Variations Within This Range
- 🎟️ Get 5% Off