
P0333 on 2014-2019 GMC Sierra 1500: Knock Sensor Circuit High Fixes
On 2014-2019 GMC Sierra trucks, code P0333 is most often caused by a wiring issue at the Engine Control Module (ECM) X2 connector, not a bad knock sensor. Inspecting and cleaning this connector is the most likely fix. This issue is documented in GM Technical Service Bulletin #20-NA-207, which notes the code often appears when shifting out of Park.
- Do NOT immediately replace the knock sensor. The most probable cause of a P0333 code on this truck is a wiring issue at the ECM X2 connector.
- Reference GM Technical Service Bulletin #20-NA-207. If the Check Engine Light appears when shifting out of Park, this is a strong indicator of the TSB-related issue.
- Start by inspecting and cleaning the ECM X2 connector. This is a low-cost first step that often resolves the issue.
What's Unique About the 2014-2019 GMC Sierra 1500
Unlike many vehicles where a knock sensor code points to a bad sensor, on these specific GM K2XX platform trucks, the cause is very frequently an electrical issue outlined in a factory service bulletin. GM TSB #20-NA-207 (which supersedes PIP5576) describes how voltage from the transmission's park/neutral signal circuit can 'bleed' into the knock sensor circuit at the main ECM X2 connector. This often triggers the Check Engine Light right when the driver shifts out of Park. This known issue makes it critical to check the wiring before replacing the sensor itself, which is a common misdiagnosis.
Symptoms You May Notice
- Check Engine Light is on
- Check Engine Light illuminates specifically when shifting from Park.
- Reduced engine power and sluggish acceleration.
- Noticeable decrease in fuel economy.
- Engine may hesitate or stumble under load.
- In some cases, an audible pinging or knocking noise from the engine.
- Replacing the knock sensor without first inspecting the ECM X2 connector. The TSB-related wiring issue is a very common cause, and skipping this diagnostic step can lead to an unnecessary and difficult repair.
Most Likely Causes
- Wiring/Terminal Issue at ECM X2 Connector 🔴 High Probability As documented in GM TSB #20-NA-207, the ECM's X2 connector is susceptible to contamination, moisture, or poor terminal contact, allowing voltage from the transmission park/neutral circuit to interfere with the knock sensor circuit (Pin 52 on some models).
How to confirm: Inspect the ECM X2 connector for any signs of moisture, corrosion (green/white powder), or backed-out terminals. The code often appears immediately after shifting the vehicle out of Park, which is a strong indicator of this specific issue.
Typical fix: Disconnect the battery, then disconnect, clean, and apply dielectric grease to the ECM X2 connector. Ensure all terminals are fully seated. A user on gm-trucks.com with a 2015 Sierra fixed a persistent P0333 this way after replacing the sensor twice.
Est. part cost: $5-$20 - Faulty Knock Sensor (Bank 2) 🟡 Medium Probability → Shop Ignition Knock (Detonation) Sensor The sensor is located on the side of the engine block, where it is exposed to heat, moisture, and road debris, which can lead to failure over time.
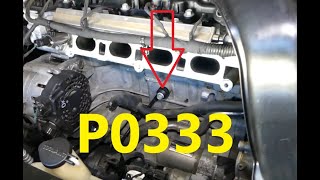
How to confirm: After confirming the wiring is good, test the sensor. With the key on and engine off, back-probe the sensor connector to check for the correct reference voltage (typically ~2.5V). A reading stuck high (near 5V) confirms the circuit fault. 🎬 See this breakdown of P0333 causes and circuit fixes. The sensor's internal resistance should be between 93k-110k Ohms. A dynamic 'tap test' can also be performed: while monitoring the sensor's AC voltage output, tap the engine block near the sensor; a healthy sensor will produce a small AC voltage signal of 50mV or more.
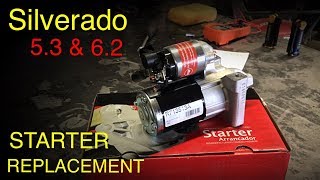
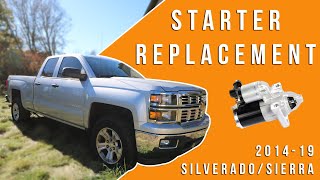
Typical fix: Replace the Bank 2 (passenger side) knock sensor. 🎬 Watch: Step-by-step tutorial for replacing the knock sensor. This requires removing the starter motor for access. 🎬 Watch: How to remove the starter to reach the sensor. Ensure the new sensor is torqued to specification, typically 15-18 ft-lbs (20-25 Nm).
Est. part cost: $30-$80 - Damaged Knock Sensor Wiring Harness ⚪ Low Probability → Shop Engine Wiring Harness
How to confirm: Visually inspect the wiring harness leading to the Bank 2 knock sensor for any signs of melting (especially near exhaust components), chafing (near the starter), or rodent damage. Perform a continuity test on the signal and ground wires from the sensor connector to the ECM connector.
Typical fix: Repair the damaged section of the harness or replace the harness pigtail. One owner found that splicing in a new pigtail connector was the ultimate fix after a new sensor didn't solve the problem.
Est. part cost: $15-$40
Rare But Worth Checking
- Faulty Engine Control Module (ECM): → Shop Engine Control Module (ECM) This is very rare. The ECM should only be considered after all other possibilities, including the TSB-related connector issue, wiring, and the sensor itself, have been definitively ruled out.
Diagnosis Steps
- Scan the vehicle for any other stored trouble codes. Address other codes first if present.
- Note when the Check Engine Light illuminates. If it appears specifically when shifting out of Park, immediately suspect the ECM connector issue described in TSB #20-NA-207.
- Disconnect the battery. Locate the ECM (typically in the engine bay on the driver's side) and carefully disconnect the X2 connector (often black). Inspect it thoroughly for corrosion, moisture, or any damaged/backed-out pins, paying close attention to the knock sensor 2 signal wire (Pin 52, typically a Dark Blue wire).
- Clean the connector with electrical contact cleaner, allow it to dry completely, and apply a small amount of dielectric grease to the connector seal before reconnecting securely.
- Clear the codes and drive the vehicle to see if P0333 returns. If it does not, the issue is resolved.
- If the code returns, locate the Bank 2 (passenger side) knock sensor. It is on the side of the engine block, above the oil pan rail and often obscured by the starter motor.
- Inspect the sensor's wiring harness for any visible damage, such as melting or chafing, especially near the starter motor.
- If wiring appears intact, test the sensor circuit. Check for reference voltage (approx. 2.5V) at the connector with the key on, engine off. If voltage is stuck high (near 5V), it confirms the fault condition. Test the sensor's resistance (should be 93k-110k Ohms).
- If the circuit is good, the knock sensor itself is the likely culprit. Replace the Bank 2 knock sensor, which will require removing the starter motor.
- When replacing the sensor, ensure it is torqued to the manufacturer's specification (typically 15-18 ft-lbs), as over or under-tightening can affect its performance.
Parts You'll Likely Need
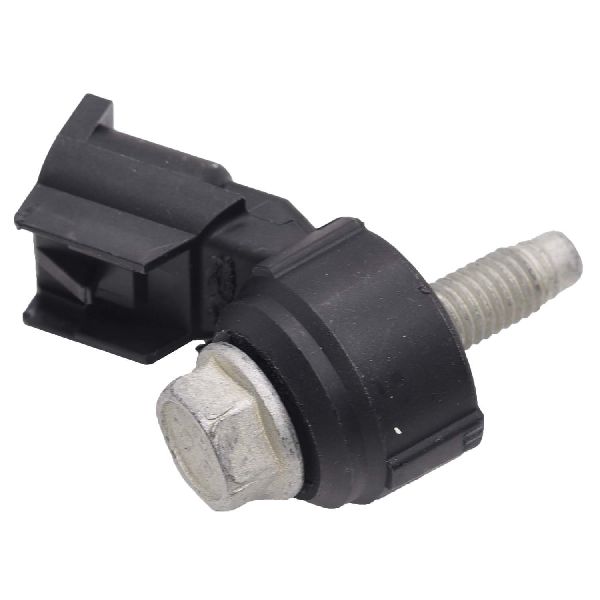
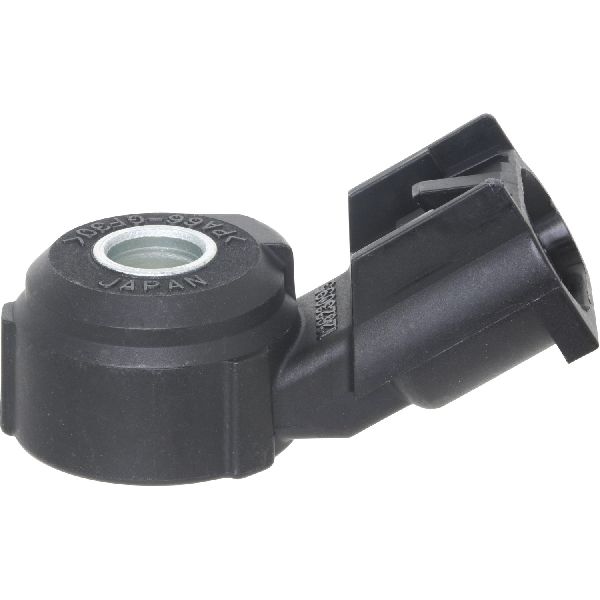
- Knock Sensor (Bank 2)
(OEM #12623734)— If the wiring and ECM connector are confirmed to be good, the sensor itself is the next most likely point of failure.
Trusted brands: ACDelco, Delphi, Bosch
OEM price range: $50-$90
Aftermarket price range: $30-$60 - Electrical Contact Cleaner and Dielectric Grease — Needed for the most common fix, which involves cleaning the ECM X2 connector to resolve the issue described in TSB #20-NA-207.
Trusted brands: CRC, Permatex
OEM price range: $10-$20
Aftermarket price range: $10-$20 - Knock Sensor Connector Pigtail — If the wiring harness connector at the sensor is brittle, corroded, or damaged, it will need to be cut out and replaced with a new pigtail.
Trusted brands: Dorman, ACDelco
OEM price range: $20-$40
Aftermarket price range: $15-$30
Technical Service Bulletins (TSBs) & Recalls
- TSB Bulletin #20-NA-207: Describes a possible electrical concern at the ECM X2 electrical connector to correct a customer concern of Malfunction Indicator Lamp (MIL) Illuminated - DTC P0333 Set.
- TSB Bulletin #PIP5576: Notes that DTC P0333 can set due to voltage from the Transmission park/neutral signal 1 circuit bleeding into the knock sensor circuit when shifting the transmission from park.
Platform-Specific Known Issues
- TSB #20-NA-207 (supersedes PIP5576): Documents that a P0333 code can be falsely triggered by voltage from the transmission park/neutral signal circuit bleeding into the knock sensor circuit at the ECM X2 connector. This is a primary diagnostic path for this code on these trucks.
- Real Owner Experience: A user on gm-trucks.com with a 2015 Sierra 5.3L confirmed this TSB fix. After replacing the sensor twice with no luck, he found the TSB, cleaned the ECM connectors with contact cleaner and dielectric grease, and the code was resolved permanently.
Mechanic-Grade Diagnostic Values
- Knock Sensor Internal Resistance — expected: 93k - 110k Ohms. Failure: An open circuit (OL) or a reading significantly outside this range indicates a failed sensor.
- Knock Sensor Signal Circuit Voltage (Key-On, Engine-Off) — expected: ~2.5V DC. Failure: A voltage stuck high, near 5.0V, indicates an open in the circuit or a disconnected sensor, which sets P0333.
- Knock Sensor AC Voltage (Dynamic Tap Test) — expected: >50mV AC when tapping the engine block near the sensor.. Failure: No AC voltage, or a very low signal (<20mV), indicates the sensor's internal piezoelectric element is dead.
- Knock Sensor Mounting Bolt Torque — expected: 15-18 ft-lbs (20-25 Nm). Failure: This is an installation spec, not a diagnostic value. However, incorrect torque can alter sensor sensitivity and cause false signals or a failure to detect knock.
Scan Tool Commands That Help
- GDS2 / Professional Scan Tool: Live Data Monitoring: 'Knock Retard' and 'Knock Sensor Active Counter' PIDs — When a P0333 is active, the 'Knock Retard' value for Bank 2 will likely be zero, as the ECM has invalidated the faulty signal and is ignoring it. This confirms the ECM has entered a protective mode due to the circuit fault.
Wiring & Ground Locations
- K20 ECM Connector X2, Pin 52 — The Engine Control Module (ECM) is in the engine bay on the driver's side. X2 is the black connector. Pin 52 is the Knock Sensor 2 Signal circuit.. This is the specific pin identified in TSB #20-NA-207 where voltage from the transmission park/neutral circuit can bleed in, causing a false P0333. The wire is typically Dark Blue.
- K20 ECM Connector X2, Pin 51 — In the same ECM X2 connector as Pin 52.. This is the Low Reference (ground) circuit for Knock Sensor 2. A problem at this pin can also cause circuit faults. The wire is typically Light Blue.
- G103 / G104 — Bolted to the rear of the cylinder heads (G103 on passenger side, G104 on driver side on some GMT900-based diagrams, locations may vary slightly on K2XX).. These are primary engine-to-chassis grounds. A loose or corroded ground at these points can create a floating ground for sensors, causing erratic voltage readings and codes like P0333.
- Knock Sensor Harness Routing — The harness for the Bank 2 sensor runs down the passenger side of the engine block, near the starter motor.. This harness is prone to chafing or melting damage, especially if it was not properly secured after a starter motor replacement.
Real Owner Repair Stories
- gm-trucks.com user report (2015 GMC Sierra 5.3L) — Persistent P0333 Check Engine Light.
❌ Tried (didn't work) Replacing the knock sensor twice.
✅ What actually fixed it Found TSB #20-NA-207, disconnected the ECM connectors, cleaned them with electrical contact cleaner, applied dielectric grease, and reconnected them. The code did not return. - Aggregated forum reports (2015+ GM Truck/SUV with 5.3L or 6.2L V8) — Intermittent or persistent P0333 code.
❌ Tried (didn't work) Replacing the knock sensor., Clearing the code, only for it to return.
✅ What actually fixed it The wiring harness for the knock sensor was found to be chafed and damaged near the starter motor. This often happens after a starter replacement if the harness isn't re-secured properly. Repairing the damaged wire resolved the code.
OEM Part Supersession History
12570125→12623730, then 12623734— Standard part evolution and supplier changes. No specific design flaw is noted for the supersession.
Heads up: While physically similar, using older generation sensors on a Gen V engine is not recommended as the internal piezoelectric crystals may be tuned to different frequencies. Always use the part number specified for the vehicle's VIN.
Model Year Variations Within This Range
- 2019: 2019 was a split production year. The 'Sierra 1500 Limited' (and Silverado LD) are carry-overs of the 2014-2018 K2XX platform and this guide applies directly. The all-new 2019 T1XX platform Sierra uses a different ECM (L84/L87 engines) and wiring architecture, though the P0333 diagnostic principles are similar.
Diagnostic Flowchart
Other Known Issues on This Vehicle
Issues unrelated to this code that are worth knowing about as an owner of this generation:
- Active Fuel Management (AFM) Lifter Failure 🔴 High — Common issue, can occur as early as 55,000 miles. Affects L83 and L86 engines. Symptoms include ticking/chirping noise and misfire codes (e.g., P0300). (Ref: Multiple TSBs exist. A class-action lawsuit was filed regarding this issue.)
- 8-Speed (8L90/8L45) Transmission Shudder / Harsh Shifting 🔴 High — Widespread problem affecting many 2015-2019 models, often described as feeling like driving over rumble strips. Can cause hesitation and clunking. (Ref: Multiple TSBs issued, including 18-NA-355 which specifies a fluid flush with Mobil 1 Synthetic LV ATF HP fluid. Subject of a major class-action lawsuit.)
- Driveline Vibration ('Chevy Shake') 🟠 Medium — Affects many 2014-2019 trucks, causing a persistent vibration at highway speeds (45-70 mph). Often traced to an out-of-balance aluminum driveshaft. (Ref: TSB PI1354C addresses diagnosis and notes that dented driveshafts have been found in many cases.)
- Brake Vacuum Pump Failure 🔴 High — A recall was issued for 2014-2018 models due to a potential decrease in power brake assist, leading to increased stopping distance and a hard brake pedal. (Ref: NHTSA Recall #19V645000)
- Excessive Oil Consumption 🟠 Medium — Some V8 engines with Active Fuel Management (AFM) can consume excessive amounts of oil between changes, potentially related to the AFM system's operation.
Used vs. New Parts: Buying Guide for This Vehicle
When a used part is the smart pick: For this repair, using used parts is generally not recommended for the sensor itself. However, a used ECM connector pigtail or a section of wiring harness from a low-mileage, non-wrecked donor vehicle can be a cost-effective solution if the original wiring is damaged.
Donor-vehicle mileage cap: roughly under 60000 miles for the part to have meaningful remaining life.
What to inspect on the donor part:
- For a wiring harness/pigtail, inspect for any signs of brittleness, cracking, or previous repairs (splices).
- Ensure connector locking tabs are intact and not broken.
- Verify the donor vehicle is from a dry climate to minimize the risk of corrosion within the connector pins.
- Check the donor vehicle's history to ensure it wasn't in a front-end collision that could have stressed the engine harness.
OEM-only on this vehicle (don't cheap out):
- Knock Sensor: Due to the sensor's sensitivity and the critical role it plays, using an OEM ACDelco or a reputable OE supplier like Delphi is strongly recommended. Cheaper aftermarket sensors have a higher failure rate and may not be tuned to the correct frequency for the L83/L86 engine.
Aftermarket brands forum-validated for this vehicle:
- Delphi
- Bosch
- NTK
Brands owners have reported issues with on this vehicle:
- Unbranded, 'white-box' sensors from online marketplaces are frequently cited in forums as being dead-on-arrival or failing shortly after installation.
Real Owner Stories
Aggregated from forums and TSBs cited above. Mileages and costs reflect what owners reported in those sources.
2015 GMC Sierra 1500 5.3L
Symptoms: A persistent P0333 code that would not go away even after replacing the sensor.
What fixed it: After replacing the knock sensor twice with no success, the owner found TSB #20-NA-207. The final fix was to disconnect the ECM connectors, clean them with contact cleaner, apply dielectric grease, and reconnect them securely. The code was resolved permanently.
Source hint: GM-Trucks.com Thread
2017 GMC Sierra 1500 — ~75000 miles
Symptoms: A shuddering or vibration feeling, often compared to driving over rumble strips, accompanied by hesitation and clunking shifts.
What fixed it: The issue was resolved by performing the procedure in TSB 18-NA-355, which involves a transmission fluid flush and replacement with Mobil 1 Synthetic LV ATF HP fluid.
Source hint: TSB 18-NA-355
Related OBD-II Codes
Frequently Asked Questions
My Check Engine Light only comes on when I shift my Sierra out of Park. Is this a known problem?
Where is the Bank 2 knock sensor located on my 5.3L V8?
I replaced the knock sensor, but the P0333 code came back. What should I do now?
Is there a specific torque specification for the knock sensor on this engine?
What is GM Technical Service Bulletin #20-NA-207?
Does this P0333 issue also affect the Chevrolet Silverado?
Helpful Videos
We Have This Part in Stock


The information in this article is provided for general reference and educational purposes only. Vehicle specifications, procedures, and part compatibility can vary by production date, trim level, and region. Always consult your vehicle's factory service manual and verify part numbers before purchasing or performing repairs. Safety-critical components such as airbags, seat belts, and braking systems should be installed by a qualified professional.
- GMC Sierra 1500:
- 🧭 Diagnostic Flowchart
- 🎬 Helpful Videos
- 🛍️ Shop This Part
- What's Unique About the 2014-2019 GMC Sierra 1500
- Symptoms You May Notice
- Most Likely Causes
- Rare But Worth Checking
- Diagnosis Steps
- Parts You'll Likely Need
- Technical Service Bulletins (TSBs) & Recalls
- Platform-Specific Known Issues
- Mechanic-Grade Diagnostic Values
- Scan Tool Commands That Help
- Wiring & Ground Locations
- Real Owner Repair Stories
- OEM Part Supersession History
- Model Year Variations Within This Range
- Other Known Issues on This Vehicle
- Used vs. New Parts: Buying Guide for This Vehicle
- Real Owner Stories
- 2015 GMC Sierra 1500 5.3L
- 2017 GMC Sierra 1500 — ~75000 miles
- Related OBD-II Codes
- Frequently Asked Questions
- 🎟️ Get 5% Off