
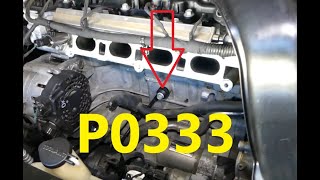
P0333 on 2014-2020 GMC Sierra 1500: Knock Sensor Circuit Fixes
This code often points to a wiring issue, not a bad sensor. GM issued service bulletins (PIP5576, 20-NA-207) indicating that voltage from other circuits can bleed into the knock sensor wiring or that a bad connection at the ECM can cause this code. Always inspect wiring and connectors before replacing the sensor.
- Do not immediately replace the knock sensor. The most likely cause for a P0333 on this truck is a specific wiring issue.
- Reference GM Technical Service Bulletins PIP5576 and 20-NA-207, which point to electrical interference or a bad ECM connection.
- A thorough inspection of the wiring harness and the ECM X2 connector is the most important first step in diagnosis.
- If the sensor does need replacement, the passenger side (Bank 2) sensor is difficult to access and may require removing the starter.
- Driving with this code will result in reduced engine performance and poor fuel economy.
What's Unique About the 2014-2020 Gmc SIERRA 1500
On these Gen V Ecotec3-powered GMC Sierra models (2014+), the knock sensors are located on the lower sides of the engine block, not under the intake manifold like older GM V8s. This makes them more exposed to road debris and moisture but easier to access. More importantly, a P0333 code is frequently caused by specific electrical issues rather than a failed sensor. GM has identified that voltage from the transmission park/neutral signal circuit can 'bleed' into the knock sensor circuit, falsely triggering the code, especially when shifting from park. There is also a well-documented issue with poor terminal connections at the ECM's X2 connector that can set this code. These known issues make it critical to diagnose electrical faults before assuming the sensor itself is bad.
Diagnostic Flowchart
Tap your situation to follow the diagnostic path that matches what you're seeing on this vehicle.
Generation note: The 2014-2020 year range covers two generations of the GMC Sierra 1500: the 3rd Gen (K2XX, 2014-2018/19) and the 4th Gen (T1XX, 2019-2020). The cited TSBs (PIP5576, 20-NA-207) were originally for the K2XX platform but TSB 20-NA-207 was later updated in March 2022 to include 2019 and 2020 models, indicating the underlying electrical issues persist across these generations.
Symptoms You May Notice
- Check Engine Light is on
- Reduced engine power and sluggish acceleration
- Noticeable decrease in fuel economy
- Engine may run rough or hesitate
- Audible engine pinging or knocking in some cases
- Code may appear specifically when shifting out of Park
- Replacing the knock sensor immediately without checking the wiring. The TSBs for this platform strongly suggest a wiring or connector issue is a very common cause, and replacing the sensor will not fix the problem. Many owners replace the sensor only to have the code return.
Most Likely Causes
- Wiring Harness Issues (Signal Bleed or Poor ECM Connection) 🔴 High Probability A known issue documented in GM TSBs PIP5576 and 20-NA-207 (which supersedes the former). Voltage from the transmission park/neutral signal circuit can interfere with the knock sensor circuit, or a poor connection/debris at the ECM X2 connector can cause a high voltage reading. The harness routing can also lead to chafing against the engine or other components.
How to confirm: Inspect the wiring harness between the knock sensor and the ECM, paying close attention to where it runs near other harnesses. Disconnect the battery and inspect the ECM X2 electrical connector for any signs of corrosion, debris, moisture, or loose/backed-out terminals. Forum users report success by simply cleaning this connector with contact cleaner 🎬 Watch: How to fix computer connection issues with spray cleaner. and applying dielectric grease.
Typical fix: Repair the wiring harness to isolate it from interference or clean/repair the terminals in the ECM connector. This may involve rerouting wires or using new connector pins. In many cases, simply cleaning the ECM connector and ensuring a secure connection is sufficient.
Est. part cost: $10-$50 - Faulty Knock Sensor 🟡 Medium Probability → Shop Ignition Knock (Detonation) Sensor Sensors can fail over time due to heat cycles and vibration. On the 2014+ GM V8s, the sensors are located on the lower sides of the engine block, making them more exposed to the elements than previous under-intake designs. The Bank 2 (passenger side) sensor is often located near the starter motor.
How to confirm: After ruling out wiring issues, the sensor itself can be tested. A visual inspection for physical damage is recommended. Using a multimeter, check the sensor's resistance; a reading outside the manufacturer's spec (typically 93k-110k ohms for GM sensors) indicates a bad sensor.
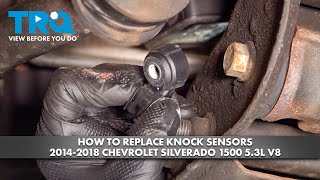
Typical fix: Replace the knock sensor. The Bank 2 sensor is on the passenger side of the block. Access may require removing the starter or wheel well liner. 🎬 See this walkthrough for replacing the sensor on a 5.3L V8. It is often recommended to replace the harness pigtail at the same time. Torque for the sensor bolt is critical (typically 15-18 ft-lbs) as it affects the sensor's sensitivity.
Est. part cost: $30-$80 - Damaged or Corroded Connector at the Sensor 🟡 Medium Probability The sensor's location on the lower engine block makes its connector susceptible to moisture, oil, road salt, and debris, which can lead to corrosion and a poor connection, causing a high resistance/voltage reading.
How to confirm: Visually inspect the knock sensor connector for corrosion (green or white powder), bent pins, or a loose fit. Check for moisture intrusion. Tug gently on the wires to ensure they are secure in the connector.
Typical fix: Clean the connector with electrical contact cleaner and a small brush. Apply dielectric grease to prevent future moisture intrusion. If the connector or pigtail is damaged, it will need to be replaced by splicing in a new one.
Est. part cost: $15-$40
Rare But Worth Checking
- Faulty Engine Control Module (ECM): → Shop Engine Control Module (ECM) This is rare. The ECM should only be considered after all other possibilities, including sensors and all wiring, have been thoroughly tested and ruled out.
- Rodent Damage: In some cases, rodents can chew on the wiring harness for the knock sensors, especially if the vehicle is parked for extended periods. The soy-based wire insulation used in some modern vehicles can attract them. A visual inspection may reveal nests or chewed wires.
Diagnosis Steps
- Scan for other DTCs. Address any other codes first, as they may be the root cause.
- Check for TSBs. Specifically look for 20-NA-207, which directly addresses P0333 on this vehicle and its platform mates.
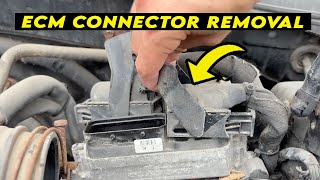
- Inspect the ECM X2 Connector. Following TSB 20-NA-207, disconnect the battery and inspect the ECM's X2 connector for any debris, moisture, corrosion, or damaged pins. Many owners have fixed the issue at this step.
- Inspect the Wiring Harness. Visually trace the knock sensor harness from the sensor to the ECM. Look for any signs of damage, chafing (especially near the starter, exhaust manifold, and front of the cylinder head), or areas where it is routed too close to other high-voltage wires.
- Inspect the Sensor Connector. Locate the Bank 2 knock sensor connector (passenger side, often near the starter) and inspect it for corrosion or damage.
- Test the Sensor Circuit. If wiring and connectors appear good, test the knock sensor circuit with a multimeter for correct resistance according to the service manual. A high reading points to an open or high-resistance fault.
- Replace the Knock Sensor. If all circuit tests pass and the wiring is intact, the knock sensor itself is the likely culprit.
Parts You'll Likely Need
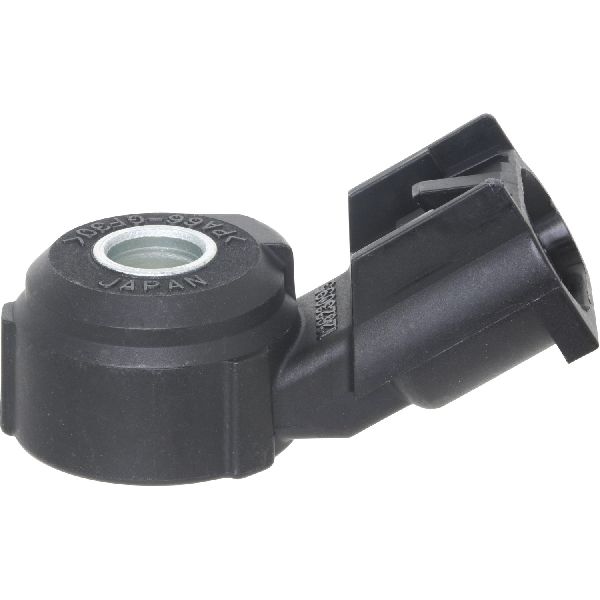
- Knock Sensor (Bank 2)
(OEM #12623744)— This is the sensor that reports engine knock for Bank 2. It may fail and cause the high circuit voltage reading, but should only be replaced after checking for the more common wiring issues.
Trusted brands: ACDelco, Delphi, Standard Motor Products
OEM price range: $40-$70
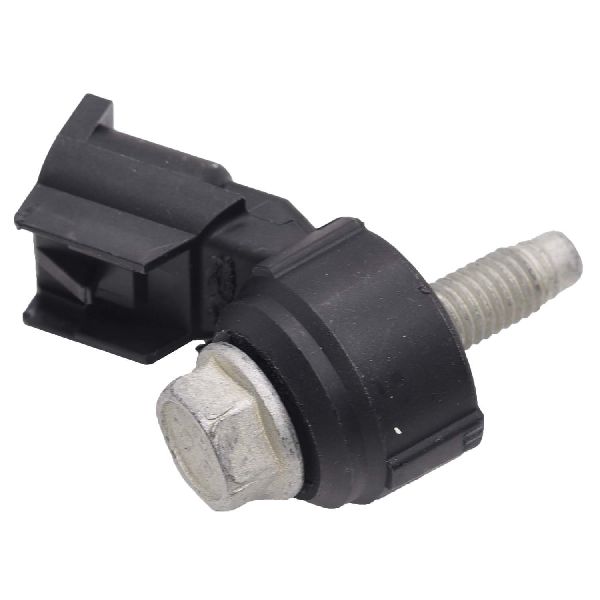
Aftermarket price range: $25-$50 - Knock Sensor Connector Pigtail
(OEM #Dorman 645-923 (example))— If the connector at the sensor is corroded or damaged, it will need to be cut out and a new pigtail spliced in to ensure a good connection.
Trusted brands: ACDelco, Dorman
OEM price range: $20-$40
Aftermarket price range: $10-$25
Technical Service Bulletins (TSBs) & Recalls
- PIP5576: "SES lamp, setting DTC P0333 when shifting the Transmissionfrom park.DTC P0333 cansetdue to voltage from the Transmission park/neutral signal 1circuit bleeding into the knock sen…"
- 20-NA-207: "…a possible electrical concern at the ECM X2 electrical connector to correct a customer concern of Malfunction Indicator Lamp (MIL) Illuminated - DTC P0333 Set." This TSB supersedes PIP5576.
Platform-Specific Known Issues
- TSB 20-NA-207 (Supersedes PIP5576): Notes that DTC P0333 can set when shifting from Park due to voltage from the transmission park/neutral signal circuit bleeding into the knock sensor circuit. The primary recommended fix is to inspect, clean, and secure the ECM X2 electrical connector before performing more invasive wiring repairs.
Mechanic-Grade Diagnostic Values
- Knock Sensor Internal Resistance — expected: 93,000 to 110,000 ohms (93k-110k Ω). Failure: A reading of OL (open loop) or a value significantly outside the expected range indicates a faulty sensor.
- Knock Sensor AC Voltage Output (Dynamic Test) — expected: Small AC voltage signal (e.g., > 1 Volt) when the engine block near the sensor is tapped with a wrench (engine off).. Failure: Very low or no AC voltage produced when tapping (e.g., less than 10 millivolts) suggests the sensor's piezoelectric element is dead.
- Knock Sensor Circuit Voltage (Key On, Engine Off) — expected: The circuit typically uses a 5-volt reference from the ECM.. Failure: A P0333 'Circuit High' code is set when the voltage reading exceeds the normal range (e.g., stays above 4.5-5V), which can be caused by a short to voltage or high resistance in the circuit.
Wiring & Ground Locations
- K20 ECM Connector X2 — This is one of the main electrical connectors plugging into the Engine Control Module (ECM).. GM TSB 20-NA-207 explicitly identifies this connector as a common source of the P0333 code due to debris, moisture, or poor terminal connection causing voltage bleed-over from other circuits.
- Knock Sensor Ground Path — The knock sensor body itself grounds directly to the engine block when it is bolted in.. A clean, tight mounting surface is critical for a proper ground. Rust or contamination on the block or sensor mounting surface could potentially create resistance and contribute to a circuit fault, although this is less common than wiring issues.
- Bank 2 Knock Sensor — On the passenger side of the engine block. Access often requires removing the starter motor, as the sensor is located above it.. This is the physical location of the sensor and its pigtail connector, which are frequent points of failure due to exposure to heat and the elements.
Real Owner Repair Stories
- IH8MUD.com Forum User (Toyota (principle applies), specific year not mentioned.) — Check Engine Light with knock sensor codes.
❌ Tried (didn't work) Replacing both knock sensors with new parts.
✅ What actually fixed it The code returned after replacing the sensors. The actual fix was cutting out the old, brittle Bank 2 knock sensor connector and splicing in a new pigtail harness. The problem was the wiring/connector, not the sensor itself.
Model Year Variations Within This Range
- 2014-2020: TSB 20-NA-207 was initially released for models up to 2018/2019. It was officially revised on March 03, 2022, to expand its coverage to include 2019 and 2020 models. This confirms the ECM X2 connector issue is a known problem on both the 3rd Gen (K2XX) and early 4th Gen (T1XX) platforms.
Helpful Videos
![How to Fix P0333 Engine Code in 2 Minutes [1 DIY Method / Only $10.92]](https://img.youtube.com/vi/VxK0OXMG2Bg/mqdefault.jpg)
We Have This Part in Stock


The information in this article is provided for general reference and educational purposes only. Vehicle specifications, procedures, and part compatibility can vary by production date, trim level, and region. Always consult your vehicle's factory service manual and verify part numbers before purchasing or performing repairs. Safety-critical components such as airbags, seat belts, and braking systems should be installed by a qualified professional.
- Gmc SIERRA 1500:
- 🧭 Diagnostic Flowchart
- 🎬 Helpful Videos
- 🛍️ Shop This Part
- What's Unique About the 2014-2020 Gmc SIERRA 1500
- Symptoms You May Notice
- Most Likely Causes
- Rare But Worth Checking
- Diagnosis Steps
- Parts You'll Likely Need
- Technical Service Bulletins (TSBs) & Recalls
- Platform-Specific Known Issues
- Mechanic-Grade Diagnostic Values
- Wiring & Ground Locations
- Real Owner Repair Stories
- Model Year Variations Within This Range
- 🎟️ Get 5% Off