
P0333 on 2014-2018 GMC Sierra 2500: Knock Sensor Circuit Causes and Fixes
On a 2014-2018 Sierra 2500, code P0333 often points to a wiring issue at the Engine Control Module (ECM) X2 connector, not a failed knock sensor. GM issued a Technical Service Bulletin (TSB #20-NA-207) about this specific problem, which can be triggered when shifting out of Park. Inspecting the ECM connector for loose terminals or corrosion should be the first step before buying parts.
- Always check for the known wiring issue at the ECM X2 connector first, as per GM TSB #20-NA-207, before replacing any parts.
- The code setting specifically when shifting out of Park is a strong indicator of the TSB-related wiring issue.
- P0333 indicates a circuit problem (high voltage), not necessarily an engine knock.
- Bank 2 is the passenger side of the engine on a GMC V8.
- If the sensor must be replaced, be prepared for a difficult job, as accessing the passenger side sensor may require removing the starter.
What's Unique About the 2014-2018 Gmc SIERRA 2500
What makes this code unique on the 2014-2018 Sierra platform is a well-documented electrical issue identified by General Motors. TSB #20-NA-207 states that voltage from the transmission's park/neutral signal circuit can bleed into the knock sensor circuit, causing a false P0333 code, especially when shifting out of Park. This often leads to misdiagnosis, where the knock sensor is replaced unnecessarily when the real problem is a poor connection at the ECM's X2 connector. Unlike pre-2014 models where sensors were under the intake manifold, these trucks have the sensors on the lower sides of the engine block, making them more exposed to elements but also changing the access procedure.
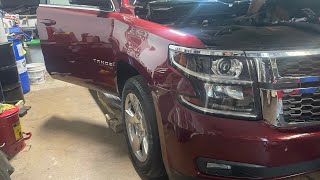
🎬 Watch: Step-by-step knock sensor replacement for this generation.Diagnostic Flowchart
Tap your situation to follow the diagnostic path that matches what you're seeing on this vehicle.
Symptoms You May Notice
- Check Engine Light is on
- Reduced engine power and acceleration
- Increased fuel consumption
- Audible engine pinging or knocking (less common for a circuit code, but possible)
- Hesitation during acceleration
- Code appears specifically when shifting out of Park
- Replacing the knock sensor without first inspecting the ECM X2 connector and harness as recommended by TSB #20-NA-207.
Most Likely Causes
- Wiring/Terminal Issue at ECM Connector (X2) 🔴 High Probability GM issued TSB #20-NA-207 specifically for this issue, where voltage from the transmission park/neutral signal circuit can bleed into the knock sensor signal wire at the ECM connector, or the terminal itself has a poor connection due to debris or moisture.
How to confirm: Inspect the K20 ECM X2 electrical connector for debris, moisture, corrosion, or backed-out/loose terminals. The knock sensor 2 signal is typically on Pin 52 (Dark Blue wire). A strong indicator of this issue is the Check Engine Light illuminating immediately after shifting from Park to Drive.
Typical fix: Clean the connector and terminals thoroughly with electrical contact cleaner, apply dielectric grease to prevent future moisture intrusion, and ensure all terminals are fully seated. Repair any damaged wires or terminals as needed.
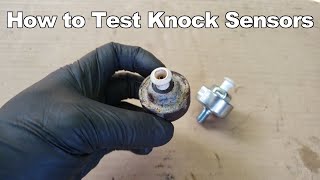
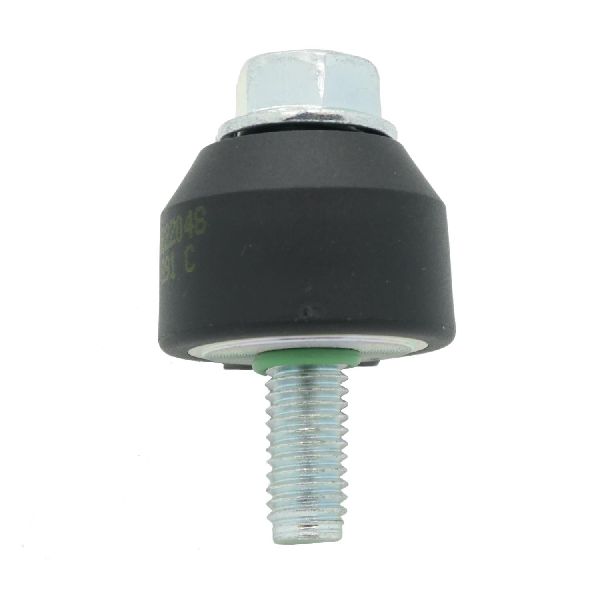
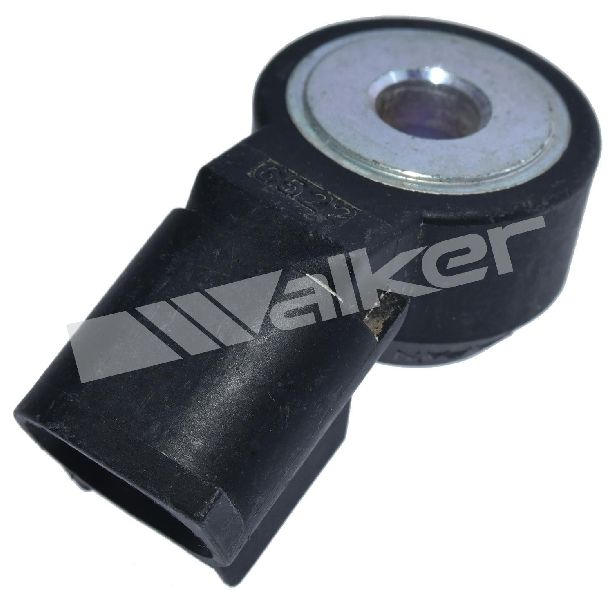
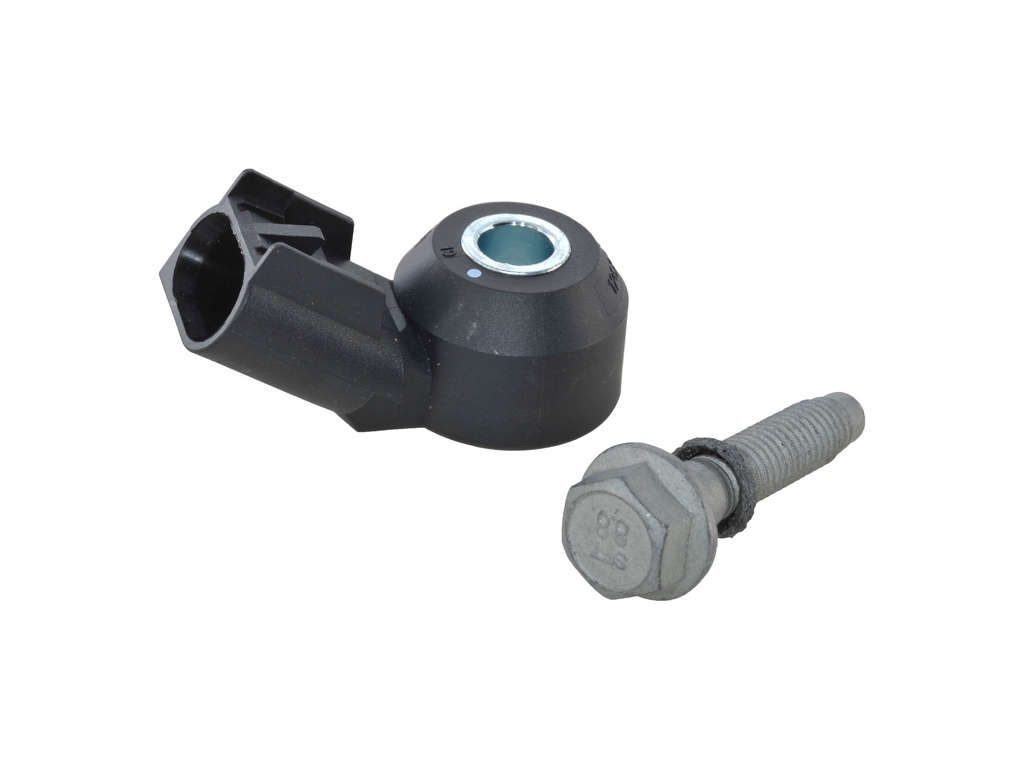
Est. part cost: $5-$20 - Failed Knock Sensor (Bank 2) 🟡 Medium Probability → Shop Ignition Knock (Detonation) Sensor Sensors are exposed to extreme heat and vibration on the engine block, which can cause them to fail over time. On the 2014+ models, they are located on the lower sides of the block, more exposed to road debris and moisture than the previous under-intake design.
How to confirm: After confirming the wiring is good, test the sensor. A good sensor should have a resistance of around 95-105 kOhms. It should also produce a small AC voltage when the engine block near it is tapped (with the engine off). With the key on, engine off, the signal wire should have a reference voltage of around 2-3 volts.
Typical fix: Replace the Bank 2 (passenger side) knock sensor. This may require removing the starter motor for access. It is critical to torque the new sensor to specification (typically 15-18 ft-lbs) as over or under-torquing can cause incorrect readings.
Est. part cost: $30-$80 - Damaged Wiring Harness ⚪ Low Probability The wiring harness can be damaged by heat from the exhaust manifold or chafing against other engine components, especially near the starter and front of the cylinder head.
How to confirm: Visually inspect the wiring loom running from the knock sensor to the ECM. Perform a continuity test on the signal and ground wires to check for opens or shorts to ground/voltage.
Typical fix: Repair the damaged section of the wire harness with new wire, solder, and heat shrink.
Est. part cost: $10-$30
Rare But Worth Checking
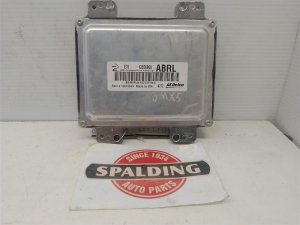
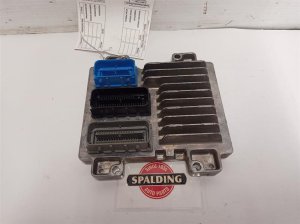
- Faulty Engine Control Module (ECM): → Shop Engine Control Module (ECM) This is very rare and should only be considered after all other possibilities, including wiring, connectors, and the sensor itself, have been thoroughly tested and ruled out.
Diagnosis Steps
- Read the code with an OBD-II scanner. Note if the code sets when shifting out of Park, as this strongly points to the TSB issue.
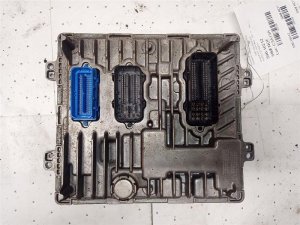
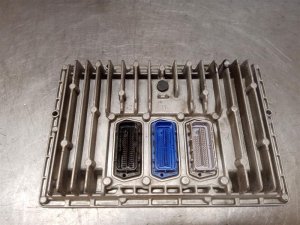
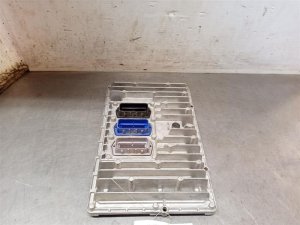
- Crucial First Step: Locate the Engine Control Module (ECM) in the engine bay. Disconnect the battery.
- Disconnect the ECM's X2 connector (it is often black) and inspect it meticulously for any signs of corrosion (green/white powder), moisture, or damaged/loose pins, paying close attention to Pin 52 (Knock Sensor 2 signal).
- If any issues are found, clean the connector with electrical contact cleaner, apply dielectric grease, and re-seat it firmly. Reconnect the battery, clear the code, and test drive, specifically shifting from Park to see if the code returns.
- If the connector is clean and the code returns, locate the Bank 2 (passenger side) knock sensor. On the 6.0L V8 and 6.6L Duramax, it is located on the lower side of the engine block, often obscured by the starter motor.
- Inspect the sensor's connector and the wiring harness leading to it for any visible damage, such as melting from exhaust heat or chafing.
- Test the sensor's circuit. Check for 95-105 kOhms resistance at the sensor. Check for 2-3 volts reference voltage on the signal wire at the connector with the key on, engine off.
- If the circuit is intact, test the sensor itself. If the sensor is faulty, replace it.
- After replacement, torque the new sensor to the manufacturer's specification (typically around 15-18 ft-lbs) to ensure it functions correctly. An improperly torqued sensor can set a code.
Parts You'll Likely Need
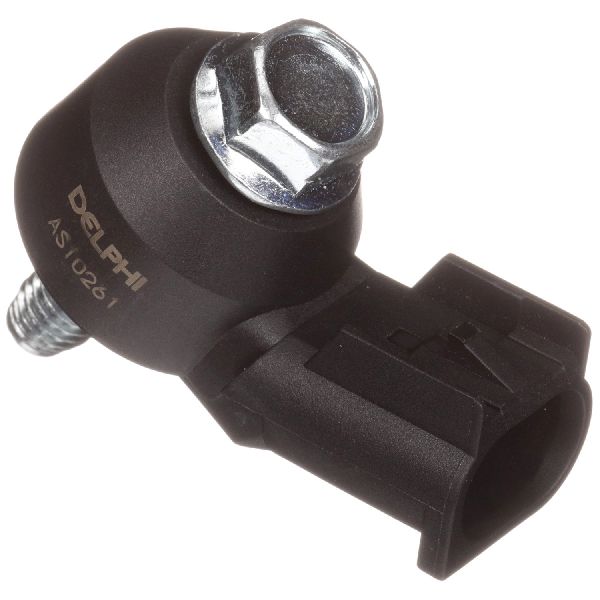
- Knock Sensor
(OEM #12623730)— This is the sensor that fails if the wiring and connectors are confirmed to be good. It is highly recommended to use OEM parts as aftermarket sensors are often cited as problematic.
Trusted brands: ACDelco, GM Genuine Parts, NTK
OEM price range: $50-$90
Aftermarket price range: $30-$60 - ECM Connector Terminal
(OEM #12084912 or 12084913)— If the issue is a loose or corroded terminal at the ECM as described in TSB #20-NA-207, the individual pin may need to be replaced. These are Delphi Micro-Pack 100W terminals.
Trusted brands: ACDelco, Delphi/Aptiv
OEM price range: $5-$15
Aftermarket price range: $2-$10 - ECM X2 Connector (Complete)
(OEM #19370825 (For L5P Duramax))— In cases of severe damage to the connector housing itself, the entire connector may need to be replaced. This part number is specifically for the L5P Duramax chassis harness connector.
Trusted brands: GM
OEM price range: $50-$100
Related Codes That Often Appear With This One
- P0328 - Knock Sensor 1 Circuit High (Bank 1): If both codes appear together, it could point to a systemic issue like a wiring harness problem common to both sensors or an ECM fault.
Technical Service Bulletins (TSBs) & Recalls
- Bulletin #20-NA-207: Information on Malfunction Indicator Lamp (MIL) Illuminated - DTC P0333 Set. Advises inspecting the K20 ECM X2 electrical connector for issues if standard diagnostics do not resolve the code, specifically noting voltage bleed from the transmission park/neutral circuit.
- Bulletin #PIP5576: The preliminary bulletin that first identified the P0333 issue related to the ECM connector. It has since been superseded by 20-NA-207.
Platform-Specific Known Issues
- TSB #20-NA-207 (which supersedes PIP5576) is the most significant issue for this code. It documents that voltage from the transmission park/neutral signal circuit can cross-contaminate the knock sensor circuit within the ECM X2 connector, causing a false P0333 code, often when shifting out of park.
Mechanic-Grade Diagnostic Values
- Knock Sensor Internal Resistance — expected: 93,000 to 110,000 Ohms (93-110 kOhms). Failure: An open circuit (infinite resistance) or a shorted circuit (near-zero resistance) indicates a failed sensor.
- Knock Sensor AC Voltage Output (Dynamic Tapping Test) — expected: A small, fluctuating AC voltage signal (e.g., 50mV to >200mV) should be produced when the engine block near the sensor is tapped with a wrench (engine off).. Failure: No AC voltage produced when tapping indicates the sensor's internal piezoelectric element is dead.
- Knock Sensor Mounting Bolt Torque — expected: 18 ft-lbs (25 Nm). Failure: An under-torqued or over-torqued sensor can fail to detect knock correctly or may become overly sensitive, potentially setting a code.
- Knock Sensor Signal Circuit Voltage (Key-On, Engine-Off) — expected: The circuit uses a 5V reference from the ECM. In a healthy circuit, the sensor's internal resistance pulls this down to ~2.5V.. Failure: A P0333 'Circuit High' is set when the voltage is stuck high (near 5V), indicating an open circuit, a disconnected sensor, or a short to another voltage source.
Scan Tool Commands That Help
- GDS2 (or similar professional scan tool): Live Data Monitoring: 'Knock Retard' and 'Knock Sensor Active Counter' PIDs. — This is not a command but a monitoring function. While tapping the engine block near the sensor, a technician can watch these data PIDs. A reaction on the scan tool (a change in value) helps verify the entire circuit, from the sensor to the ECM, is capable of transmitting a signal.
Wiring & Ground Locations
- K20 ECM Connector X2, Pin 52 — On the Engine Control Module (ECM) in the engine bay. Pin 52 is in the X2 connector (often black).. This is the specific pin for the Knock Sensor 2 Signal circuit, typically a Dark Blue wire. TSB #20-NA-207 identifies this connector as the location where voltage from the transmission park/neutral circuit can bleed into the knock sensor circuit, causing a false P0333.
- K20 ECM Connector X2, Pin 51 — On the Engine Control Module (ECM) in the engine bay, in the X2 connector.. This is the specific pin for the Low Reference (ground) for Knock Sensor 2, typically a Light Blue wire. A continuity test should be performed on this wire back to the sensor connector.
- G104 — Bolted to the rear of the passenger's side cylinder head.. This is a primary engine ground. A poor connection here can cause a variety of electrical issues and sensor faults due to an unstable ground reference for the entire engine block, including the knock sensors.
Real Owner Repair Stories
- gm-trucks.com forum user (2015 GMC Sierra 5.3L) — Intermittent Check Engine Light with P0333.
❌ Tried (didn't work) Replaced the Bank 2 knock sensor twice.
✅ What actually fixed it Found TSB #PIP5576 (superseded by #20-NA-207). The owner disconnected the ECM connectors, cleaned them thoroughly with electrical contact cleaner, and applied dielectric grease. The code did not return after this procedure, confirming the issue was at the connector and not the sensor.
OEM Part Supersession History
12570125→12623730— Standard part evolution and potential design improvement.12623730→12739206— Standard part evolution and potential design improvement.
Heads up: While 12739206 is listed as the replacement, 12623730 is still widely sold and referenced as the correct part for this application. Always verify fitment with a VIN.
Model Year Variations Within This Range
- 2017-2018: The 6.6L L5P Duramax diesel engine was introduced in 2017. For these specific engines, knock sensor circuit codes can be falsely triggered by other components in the emissions system, such as a soot-contaminated MAP sensor, which shares a wiring harness. This is a known issue specific to the L5P and not typically seen on the 6.0L gas engines.
Helpful Videos


Used OEM Parts in Stock
New Aftermarket Parts Available


The information in this article is provided for general reference and educational purposes only. Vehicle specifications, procedures, and part compatibility can vary by production date, trim level, and region. Always consult your vehicle's factory service manual and verify part numbers before purchasing or performing repairs. Safety-critical components such as airbags, seat belts, and braking systems should be installed by a qualified professional.
- Gmc SIERRA 2500:
- 🧭 Diagnostic Flowchart
- 🎬 Helpful Videos
- 🛍️ Shop This Part
- What's Unique About the 2014-2018 Gmc SIERRA 2500
- Symptoms You May Notice
- Most Likely Causes
- Rare But Worth Checking
- Diagnosis Steps
- Parts You'll Likely Need
- Related Codes That Often Appear With This One
- Technical Service Bulletins (TSBs) & Recalls
- Platform-Specific Known Issues
- Mechanic-Grade Diagnostic Values
- Scan Tool Commands That Help
- Wiring & Ground Locations
- Real Owner Repair Stories
- OEM Part Supersession History
- Model Year Variations Within This Range
- 🎟️ Get 5% Off